# Welcome to MigraCode Barcelona

In this GitBook, you can find all the useful information for our MigraCode Barcelona students, including the coding course content of our different courses, but also other details of our program.

![](https://4042228299-files.gitbook.io/~/files/v0/b/gitbook-legacy-files/o/assets%2F-MRebciU3NcuLgsX3ijf%2F-MSSSaGLbGT8X-NbxVtk%2F-MSSTvuD6aB4yVnwzQyk%2FMigracode%20Barcelona%20Logo%20\(Transparant\)%20\(1\).png?alt=media\&token=1d4e5e1a-b9e2-4de1-a69a-2968d18f449a)

**Jump to the information about your course including the content:**

{% content-ref url="/pages/-MX7kZGViUXZwNBzvFKc" %}
[IT Support & Security Course](/courses/untitled)
{% endcontent-ref %}

{% content-ref url="/pages/-MX7lRz6uumJY41PTSSA" %}
[Web Development Course](/courses/introduction-3)
{% endcontent-ref %}

{% hint style="info" %}
Nosotros te recomendamos usar el currículum en Inglés para mejorar tu nivel de Inglés. Sin embargo, si hay una parte que no entiendes nada, puedes usar Google Traductor. Como? Sencillo! Usa [Google Chrome](https://www.google.com/chrome/), haga clic derecho en esta página y haga clic en 'Traducir a espanol'.&#x20;

<img src="https://4042228299-files.gitbook.io/~/files/v0/b/gitbook-legacy-files/o/assets%2F-MRebciU3NcuLgsX3ijf%2F-MSl_L5hLyIadCFdJkhH%2F-MSlauTF6tlN5rgjs_i0%2Fimage.png?alt=media&amp;token=5a6cc59d-b98f-4b71-bcc2-b91b8c0d6035" alt="" data-size="original">
{% endhint %}

If you are familiar with MigraCode yet and you're interested in joining the program, please [refer to the main MigraCode Barcelona website](https://migracode.openculturalcenter.org/).

![](https://4042228299-files.gitbook.io/~/files/v0/b/gitbook-legacy-files/o/assets%2F-MRebciU3NcuLgsX3ijf%2F-MfYRHeUJIG8OOP8wnYq%2F-MfYRIsSBNKFeA8WbIBk%2Fimage.png?alt=media\&token=d5e46ab2-5b84-4ce2-a60d-a8cc05afaef9)

![](https://4042228299-files.gitbook.io/~/files/v0/b/gitbook-legacy-files/o/assets%2F-MRebciU3NcuLgsX3ijf%2F-MSX6EAIK-3x8CPRlFn1%2F-MSX6xKup0lBfpm0BGEj%2FDSC_0735migracode-bcn.jpg?alt=media\&token=bce69d22-1516-4059-9586-f3178a3ce678)


# Code of conduct

## **Safeguarding**

**Whilst working together we’re dedicated to providing a harassment-free community for everyone, regardless of gender or anything to do with it (‘including but not limited to gender identity, history, and expression, non-binary gender, etc), sexual orientation, disability, physical appearance, body size, race, religion, and programming background. We do not tolerate harassment of community participants in any form, and sexual language and imagery is not appropriate for any community activity.**

Our full safeguarding policies AND the methods to report any issues you may face or have observed, can be found in the handbook of the parent organisation of Open Cultural Center.

{% embed url="<https://handbook.openculturalcenter.org/safety-and-security/safeguarding>" %}

{% embed url="<https://handbook.openculturalcenter.org/safety-and-security/reporting>" %}

* **As you can see, there are various ways to report any issues. However, if you directly want to talk to someone from MigraCode, you can always reach out to Ali Ashraf or Hugo Martínez by Slack or email - <ali@migracode.org> , <hugo@migracode.org>.**
* **If you prefer to talk to a female contact person, you can reach out to Ly-Ly by Slack or email - @Ly-Ly Janusz (Slack) or <ly-ly@openculturalcenter.org>.**

## **Rules**

### **General rules**

* The student will be on time for each class;
* The student will do anything in her/his power to attend each class ([schedules can be found here](https://migracode.openculturalcenter.org/migracode-class-schedules/))
* The student will leave the work spaces clean and tidy after use;
* The student will do everything in her or his power to complete the ten months course;
* The student will do the weekly sprint work and ask for help if needed;
* The students will always communicate any difficulties that prevent her or him from following the course;
* The student will be cautious with any materials that Open Cultural Center provides to her or him;
* The student will always actively participates in classes;
* The student will not use her or his phone during classes, except if there is a specific emergency or personal situation;
* The student will use English as the main language of communication;
* The student will reply within 2 days to messages from MigraCode staff or volunteers;
* The student will have her or his camera on during online classes.

### **Your role as a student**

**We believe that everyone can be a developer. Becoming a successful developer is all about practice, dedication, and willingness to learn. We believe that you can graduate from Migracode with new skills to help you start your career in IT, but it will take hard work and dedication. We know you can do it!**

#### Practice

This means being a student is now your part-time job. You will need to attend classes and do homework for about 25-30 hours a week to achieve the learning goals of your Migracode course. This is about the same as a part-time job. Please think carefully about whether this is a realistic time commitment, and what your priorities are right now. Talk to one of the Migracode teams if you have any concerns.

#### Dedication

You show dedication to becoming a developer by attending every class. We invite you to bring your homework to discuss it with your peers. If you do not come prepared, you risk being unable to follow the class. It is important to try to attend all the classes, and complete the homework, so that you can discuss it with the other learners during class. If something happens that means you cannot do your homework or come to class, please let us know. Completing the course successfully will be difficult if you miss classes, but we want to work with you to help you succeed!

#### Willingness to Learn

MigraCode is not just an average school. Our passionate developers dedicate their free time to support your career. We would like you to see taking advantage of it and try together. You are encouraged to study hard, ask lots of questions, and always show up on time. Finally, respect is at the core of the MigraCode community. As a student, you show respect and willingness to learn from both your teachers and peers. We see our diversity as an asset and invite you to do the same. Migracode is a non-profit project, and your teachers are unpaid volunteers. We are really pleased that you want to join this learning community! Your teachers are passionate about your learning, and we want you to benefit as much as possible from their knowledge.

### Missing a class or being late

If for some reason you need to miss a class, please always inform Hugo, Ly Ly and Ali with a valid reason (if it is a personal reason, just say that, we do not need to know the details, except if you want to share it with us of course). Make sure to always arrange a one-two-one to replace the class you missed - this is obligated, and needed for you to stay up to date with the course.


# Experiences

Please find some previous experiences at MigraCode below, from students, volunteers and other involved people.

### **Rahaf Bayazi**

#### **MIGRACODE GRADUATE FROM SYRIA**

Thanks to Migracode I have made the professional change I have been looking for a long time ago, It is a great school and the people (Monitors, Managers and other staff) are really the soul of why that is. The people here care, they work hard, they work smart, they genuinely want the students to be successful even beyond the classes.

### **Alexander Ludwick**

#### **EMPLOYABILITY VOLUNTEER & RECRUITMENT SPECIALIST**

I was completely humbled to hear these guys talk about their experiences and their sheer determination to upskill and become valuable, contributing members of society and never have I felt so privileged and lazy! I’m genuinely not sure who learned more.

### **Cristal Bukler**

#### **EMPLOYABILITY VOLUNTEER & HOSPITALITY SPECIALIST**

Working at Migracode means that you not only have the opportunity to teach them how to stand out in the jobs market, but also how to stand out as people. Nothing more rewarding for me than knowing their life stories and providing them valuable resources to train their soft skills in order to conquer their own confidence.

### **Henriette Hettinga**

#### **MIGRACODE INSTRUCTOR & BOOTCAMP GRADUATE**

Many students of Migracode have escaped very difficult circumstances in their home country. They work tremendously hard to improve their knowledge and skills because they know their future depends on their studies. I am impressed with their dedication and hard work. Migracode is literally a life-changing experience for them.

### **Shaheen Akond**

#### **MIGRACODE GRADUATE FROM BANGLADESH**

When I stepped foot on Migracode, I did not imagine that the decision will shape my future. Today, I am proud to say, Migracode has played a leading role in my life and made my dream came true. Thank you for teaching me so much - both about the hard skills and soft skills. To me, our Migracode is a precious thing, a great gift to our community, a great opportunity for immigrant students who came to Spain with a great hope. It is a place of optimism, and transformation.

### **Thiago Luiz Pereira**

#### **MIGRACODE GRADUATE FROM BRAZIL**

After 8 months of course, training about development of skills, employability sessions and differents meet ups. I am feeling glad for I could use all those knowledges learned in Migracode at Webhelp, but it doesn't finish at all, was just one step for a long journey about self and professional development, always having focus to provide the best experience for the costumer and a good environment between my co-workers. Thanks Migracode and Webhelp to work together to make it real.

### **José Arriaga**

#### **MIGRACODE GRADUATE FROM MEXICO**

The start of my collaboration with migracode and the idea of learning code and sharing my thoughts and ideas with my colleagues was exciting, however, after the lockdown it was hard and challenging during the covid. But with the help of the mentors and working with people from different places and backgrounds helped us to strengthen our communication and teamwork. In addition, it was fruitful in many aspects. Rather than learning code, it was a preparation for new challenges in our new normal.

### **Anandamaya Arno**

#### **MIGRACODE GRADUATE FROM VENEZUELA**

Being a part of Migracode has been a life-changing experience in many ways. It's an amazing opportunity to start over and look for opportunities for a better future while it allows you to be a part of an incredible community, and as a migrant, I believe this is an incredible support. The amazing team is there to support you in absolutely anything you need, even if not related to the course itself. I totally thank them for that!

### **Ricardo Delgado**

#### **MIGRACODE GRADUATE FROM VENEZUELA**

My 8 months long learning experience at Migracode tells that it helped me gain my confidence on being a web developer with the knowledge of the latest stacks and tools, which was made possible by the presence of talented and helpful volunteers. The soft skills trainings and the consulting services regarding for any kind of problem is also something that Migracode is and will be special for, just like the way MigraCode is committed to help the students even after the bootcamp.

### **Oleksander Ortsev**

#### **MIGRACODE GRADUATE FROM UKRAINE**

With a fast changing world I decided to focus on the things that should help me in the future. That was one of the main reasons why I applied to the Migracode Programming school, when I came to Barcelona. Within the 8 months programming course, the the whole new tech-world opened for me. I realize that I am still at the very beginning of my journey in this area, but the future has become much more promising.

### **Lavinia Sirbulescu**

#### **MIGRACODE GRADUATE FROM ROMANIA**

There is philosophy in everything MirgraCode is doing for the under-represented community of refugees, migrants, women in tech. This gives them unthinkable power to build bridges and alter the circumstances of those of us in need. They might be young but wise enough to know that with power comes responsibility and they don’t fall short on it. They listen and connect with people. They don’t perform for them. They are genuine community builders. All of it is lived experience that brings meaning to my words.


# Copyright

**All the content of this Guide, including the various curriculums with course content, are created through an open-source community of developers from all over the world, and with mixed content from nonprofit coding schools around Europe, including Hack Your Future and Social Hackers Academy.**

In case you want to use, share or duplicate any of the content in this guide, you are able to without costs, as long you adhere to the **Creative Commons License** that is assigned to all work in this guide, which is:

[**Attribution-NonCommercial-ShareAlike 4.0 International**](http://creativecommons.org/licenses/by-nc-sa/4.0/)

In more detail, this license means that you:

* Can copy/use any of the content here as long as you reference us as co-creator (MigraCode Barcelona/Open Cultural Center) and with a link to <https://syllabus.migracode.org/>
* Can NOT use any of the content for any form of commercial use or profit in any other financial way from this content

If you have any doubts about this, please reach out to <info@openculturalcenter.org>.

![](https://4042228299-files.gitbook.io/~/files/v0/b/gitbook-x-prod.appspot.com/o/spaces%2F-MRebciU3NcuLgsX3ijf%2Fuploads%2FM6Ew8DNlPCNMP61wM9Kc%2Fimage.png?alt=media\&token=d31b2a71-9fc5-41d8-bcc7-8bf05a87df26)

[![Creative Commons License](https://i.creativecommons.org/l/by-nc-sa/4.0/88x31.png)](http://creativecommons.org/licenses/by-nc-sa/4.0/)\
This work is licensed under a [Creative Commons Attribution-NonCommercial-ShareAlike 4.0 International License](http://creativecommons.org/licenses/by-nc-sa/4.0/).


# Student Services

**We have various forms of additional support on top of the educational support to offer:**

{% content-ref url="/pages/-MSlXR9i5KXKEF9cNijb" %}
[Psychological Support](/student-support/additional-support/psychological-support)
{% endcontent-ref %}

Always feel free to contact our internal social worker - Vincent -, with whom you can talk to about any personal issues you may have or encounter during the duration of your MigraCode course. You can make an appointment through Slack. He can also get you in touch with our internal therapists. There may be a waiting list.

{% content-ref url="/pages/-MSlXY0q3CsCMWZoT1O1" %}
[Legal Support](/student-support/additional-support/legal-support)
{% endcontent-ref %}

If you are still in the process of arranging your visa, work permit, NIE or other documentation, contact Vincent to get you in touch with our external lawyers. There may be a waiting list.

{% content-ref url="/pages/-MSlW\_hiBSz0G2uym\_3e" %}
[CodeWomen](/student-support/additional-support/codewomen)
{% endcontent-ref %}

We have a specific program for our female students. You will be automatically added to the CodeWomen channel on Slack where we will share all the information you need. You can contact Henriette on Slack for more information.

{% content-ref url="/pages/-MSlWdKUokfs2B7OIok7" %}
[CodeBuddies](/student-support/additional-support/codebuddies)
{% endcontent-ref %}

If you struggle a lot with the materials, we can assign a specific ‘CodeBuddy’ to you - a volunteer that will help you on a regular and personal basis. If you need this, just send a message to Vincent or Henriette on Slack.

{% content-ref url="/pages/-MSlXL85WwomicCG4z3h" %}
[Language Support](/student-support/additional-support/english-classes)
{% endcontent-ref %}

You can access free online language lessons in English, Spanish, Arabic, and Catalan at the Language Lab. The Language Lab also organises regular language exchange events, and you can find a Language Buddy too! To join, just send a message to Charlotte Lloyd via Slack.&#x20;

{% content-ref url="/pages/6iCBCciwsIuYOndCM6Tc" %}
[Study space](/student-support/additional-support/study-space)
{% endcontent-ref %}

We have two options if you cannot study well at home. Both options are free and can be used based on availability. All you need to do is sign-up accordingly beforehand and be there.

![](https://4042228299-files.gitbook.io/~/files/v0/b/gitbook-legacy-files/o/assets%2F-MRebciU3NcuLgsX3ijf%2F-MSZMSoNrFMcV6HN1p4e%2F-MSZMkwVAhCGAScwqbFo%2FDSC_0659migracode-bcn.jpg?alt=media\&token=8c46cb34-e908-48aa-8152-8e398f5e2e5f)


# Volunteer Support

It is important to know that we have a huge volunteering-community ready to support you in becoming a software developer. Therefore, do not hesitate to request a one-two-one session if you feel lost with the materials, you are behind or you just need some extra explanations about the materials.  You can also ask someone to help you with the job search (later on the course).

* **Homework support**\
  If you are stuck with homework, do not hesitate to ask your questions in the #support-coding channel (for the Web Development Course) or #support-it (for the IT Support & Security Course) on Slack. There are many volunteers to help you and please note: there are no weird or stupid questions!&#x20;
* **CV/LinkedIn support/Job Preparation**\
  If you need help with creating or further developing your CV or LinkedIn or get help with preparing your job interview, please make use of the #support-employability channel on Slack to ask help from our volunteers to check your CV or LinkedIn or even make an appointment with them to improve it.

![](https://4042228299-files.gitbook.io/~/files/v0/b/gitbook-legacy-files/o/assets%2F-MRebciU3NcuLgsX3ijf%2F-MSldOAm3jECATKevKTK%2F-MSle2COFlPuQWGMq7Ya%2FMigraCode_3%20\(1\)migracode-bcn.jpg?alt=media\&token=e84699b3-198c-4d1a-a3b3-cf2b7002b418)


# CodeBuddies

Only applicable to Web Development students.

**The Migracode CodeBuddies project aims to support and encourage students during their Migracode bootcamp, to work towards their successful graduation as Junior Web Developer. We link students who are in need of extra support with developers who have volunteered for the CodeBuddies project. The personal relationship between the student and the instructor is key, and Migracode is in favour of as much flexibility as possible in how this relationship takes shape.**

## **How to start?**

How to request a CodeBuddy? Simple! Just fill [this form](https://airtable.com/shrytK91bWylnI6WZ). Once you have filled it, we will contact you as soon as we have found someone, which is usually between 1-2 weeks.

## **Guidelines**

1. The student will be paired with an instructor, who will provide personal technical support, encouragement and guidance to the student during (part of) their studies. The instructor will be the first contact person for tech questions.
2. On average, the instructor will make two hours per week available for the student. The student can discuss with the instructor what amount of support is needed.
3. In case the instructor is not available, the student can find help through the #support-technical channel of the Migracode Slack.
4. The instructor and student can decide together when and where they meet: in person or remote, at Open Cultural Center, in the open space of Elevador (elevador-bcn.es)  that is available to Migracode (to be coordinated with Henriette), or in a public space over a cup of coffee, for example. Covid regulations must be respected at all times.
5. If you as the CodeBuddy team feel much more support is needed than the Codebuddy can offer, you can discuss this with Henriette.
6. If a different kind of support is needed, we can contact the Mental Health Team of Migracode through Vincent. Depending on their availability, you could receive additional support through them.
7. We are very happy that volunteer instructors invest their time in supporting our students. From our students, we expect commitment and responsible behaviour: be on time, let the instructor know if you cannot be on time for a meeting, and be open and honest about your doubts and problems so that you can benefit the most from the CodeBuddy support.
8. This project is a new initiative and we welcome any feedback you can give us. It is important for Migracode to offer the best possible support, so please feel free to contact us about anything you feel would help to improve the project.
9. Henriette will organise an initial meeting to introduce the student and the instructor to each other, explain the project, and answer questions. For each buddy team, a private Slack channel will be created. You can contact your buddy through this channel. Vincent and Henriette will be added to the channel as well.
10. The Migracode team will support each CodeBuddy team in every way possible. Henriette is the Project Manager of CodeBuddies and your primary contact. You can contact her via Slack @Henriette, or email <henriette@migracode.org>. Vincent and Carlos can be contacted in case Henriette is not available.

![](https://4042228299-files.gitbook.io/~/files/v0/b/gitbook-legacy-files/o/assets%2F-MRebciU3NcuLgsX3ijf%2F-MSZMSoNrFMcV6HN1p4e%2F-MSZMpUFyRSubNM_sbDK%2FDSC_0323migracode-bcn.jpg?alt=media\&token=d3e505b9-1742-4973-9a9a-d9263ab097aa)


# CodeWomen

The CodeWomen project of MigraCode supports and encourages women students during their MigraCode bootcamp or IT Support & Security course, to work towards their successful graduation and landing a job. The project was started to address the often difficult position of women in the mostly male tech world. By building a community of women developers with a migration background, MigraCode works towards better career perspectives for women students and more diversity in the tech sector. Building a network with women in the tech sector in Barcelona will also benefit women students in many ways.

## Introduction

Much of what women hear about working in tech is about the problems and difficulties they will face, working in all-male teams, and this can easily lead to insecurities and a feeling that “tech is not really for me”. The CodeWomen initiative wants to offer the women students a very flexible context for personal (tech) support and encouragement. In addition, it offers the students a safe environment to share experiences, plans, ambitions, questions and problems with each other, and enjoy each other’s company.

![CodeWomen monthly coding session with coaches](https://4042228299-files.gitbook.io/~/files/v0/b/gitbook-x-prod.appspot.com/o/spaces%2F-MRebciU3NcuLgsX3ijf%2Fuploads%2FvgDCExk3eDpPeA0AvTUa%2FScreenshot%202022-02-19%20at%2009.50.44.png?alt=media\&token=58d1f2c1-cf08-4ce0-854b-859034638876)

About the CodeWomen project

The CodeWomen project consists of two meetings per month, plus a dedicated Slack channel and a WhatsApp group for organising, sharing materials, asking questions, etc. The format of the meets is flexible and the women who participate set the agenda. They can come with questions or topics they would like to hear more about, present something themselves, or work on a coding project together. CodeWomen is an initiative under the umbrella of MigraCode and is not an obligation or part of the bootcamp or IT Support course curriculum.

There are two CW meetings every month. The first is a programme event on Sunday afternoon, with a speaker, panel discussion or workshop on various topics: tech/coding topics but also career and job search (LinkedIn, CVs). The volunteers are invited to join these meets as well. These events offer the women a space to relax and hang out together, to talk, and to share how they experience their journey and the plans and doubts they have.&#x20;

The second meet is a coding session on Monday evening. This session offers an informal setting where students can practice their coding skills, working with coaches. They can work on their own project, on a specific coding problem, on their homework, get advice about their learning path and how to get into a tech career, etc. Volunteer women developers are available to help the students. With these practical coding sessions, the students can build on what they learn during their bootcamp.&#x20;

![Women helping other women learn coding](https://4042228299-files.gitbook.io/~/files/v0/b/gitbook-x-prod.appspot.com/o/spaces%2F-MRebciU3NcuLgsX3ijf%2Fuploads%2F7KdB0UyEy2NaxxoKjip1%2FScreenshot%202022-02-19%20at%2010.13.20.png?alt=media\&token=84a48bda-4b2f-4ff5-a7b9-48a79263333d)

By building a supporting community, we believe the CodeWomen project can make a real difference for women students and help them to succeed in their studies. The students can remain in the CodeWomen group after graduation, for support and encouragement in their career. We want to show the women that, in spite of the challenges they sometimes face with their studies or working environment, coding is great and a career in tech is possible for them:

> “... it is creative, it challenges you to solve problems, and the feeling of victory you get when you solve something after hours or days of frustration … that feeling is the best!”

![CodeWomen, an initiative for women, by women](https://4042228299-files.gitbook.io/~/files/v0/b/gitbook-legacy-files/o/assets%2F-MRebciU3NcuLgsX3ijf%2F-MSlfu064-gt-U0Vty15%2F-MSlgQo9PIZgQ3JIp5Fd%2FP9010157migracode-bcn.jpg?alt=media\&token=7b64b289-3bcc-4cc0-81be-87dacab1efa1)

## Practical Information

* All women students of MigraCode, both from the Web Development and from the IT Support & Security course, are members of the CodeWomen Slack channel. This channel also includes the organising team and Vincent, and the volunteers who are active in CodeWomen sessions. The CW WhatsApp group only includes the students.
* Women students and graduates from coding schools that collaborate with MigraCode can be invited to CW meetings as guests. The CodeWomen community is open to other tech women in Barcelona as well: self-learners as well as professional software developers.
* CodeWomen aims to be an inclusive community **for women, by women**, and all women+ are welcome.
* The CodeWomen organising team are Henriette Hettinga, Capucine Rosset, Kimberly Krieg (admin CW WhatsApp group), Marta Mateu, and Farhana Bipasha (admin CW WhatsApp group).
* The CodeWomen meetings rotate: once a month we organise a programme event with a talk or workshop, a panel discussion, a video tutorial, etc. An important part of this event is networking and socialising. The second monthly CW meet is a coding session with volunteers who are women developers and can coach and support students.
* The CodeWomen programme events are on Sundays from 12.00 to 15.30 hrs, and are hosted by CW partners such as coding academies CodeOp, AllWomen and Le Wagon. The CW coding sessions are on Mondays from 19.00 to 21.30 hrs, and are hosted by companies who support the CodeWomen initiative. For both meets the students have to register because places are limited.&#x20;
* If there are no objections, pictures are taken during the CodeWomen sessions, to be used for the MigraCode website and social media.&#x20;
* Any questions about the CodeWomen project, please contact **@Henriette on Slack or <henriette@migracode.org>.**

![](https://4042228299-files.gitbook.io/~/files/v0/b/gitbook-legacy-files/o/assets%2F-MRebciU3NcuLgsX3ijf%2F-MSlfu064-gt-U0Vty15%2F-MSlgTo7Ea5_mnGIys4Y%2FDSC_0282migracode-bcn.jpg?alt=media\&token=cd8986bd-3e27-40de-873e-987b12da1868)


# Language Support

**English is a global language and is a requirement for many tech jobs in Spain – even if the job is in Spanish. For this reason, students at MigraCode need a minimum level of English to get them through the course. Luckily, you can access free English lessons at the Language Lab and Oxford House!**&#x20;

**Spanish or Catalan are also often a requirement in tech jobs in Barcelona. The Language Lab also offers lessons for local languages, so you can get the support you need!**

## **Where and how?**

**Open Cultural Center**, our host organization, offers free language lessons at the [**Language Lab**](https://openculturalcenter.org/language-lab/). You can join **Spanish, English, Arabic and Catalan classes** taught by dedicated native-speaking volunteers, and be part of an amazingly diverse community. There are 2 levels for each language: beginner (A1 - A2) and intermediate (B1 - B2). The Language Lab also organises **language exchange events**, and runs **Language Buddies**, so you can practice in many different ways according to your preference!

Additionally, we have a collaboration with **Oxford House**, a language school in Barcelona that offers free **English classes** to MigraCode students via their [English Eco](https://oxfordhousebcn.com/en/english-courses/economic-english/) course. These courses are run by teachers in training from their [Cambridge CELTA](https://www.oxfordtefl.com/oxford-tefl-courses/cambridge-celta/cambridge-celta-100-online/) course. They last 3 months and are a great way to practise different skills while listening to different accents, and meeting people from all over the world.&#x20;

## How to join?

Have a look at the options below to see which one suits you best:

### Free English, Spanish, Catalan & Arabic classes at the Language Lab by Open Cultural Center

{% content-ref url="/pages/-MX7jTH6YHeb\_GMJk5EP" %}
[Language Lab](/student-support/additional-support/english-classes/open-cultural-center)
{% endcontent-ref %}

![](https://4042228299-files.gitbook.io/~/files/v0/b/gitbook-x-prod.appspot.com/o/spaces%2F-MRebciU3NcuLgsX3ijf%2Fuploads%2Fy7rCijeHfUeVisjY1eQW%2FCapture.PNG?alt=media\&token=cca2c57b-f065-4053-a551-fbdaea4eba08)

### Free English classes at Oxford House Barcelona

{% content-ref url="/pages/-MX7jPNEWfSO5iLRONqO" %}
[Oxford House](/student-support/additional-support/english-classes/oxford-house)
{% endcontent-ref %}

![](https://4042228299-files.gitbook.io/~/files/v0/b/gitbook-legacy-files/o/assets%2F-MRebciU3NcuLgsX3ijf%2F-MSle3onKaxUrZ4TKFnn%2F-MSleGw2PV2nBqoBgSrW%2Fimage.png?alt=media\&token=725cffb4-6a2a-4264-b9ff-6db0b43c00de)


# Language Lab

The Language Lab, Open Cultural Center's language school, offers free Spanish, Arabic, English and Catalan classes to all MigraCode students.

What they offer:

* Free of charge
* Arabic, Spanish, English and Catalan classes
* A1 to B2 (beginners and intermediate, no advanced)
* Fully online
* 2 classes of 1H every week
* Bi-monthly language exchange events
* Language Buddies

## How to apply?

### Step 1

Fill in [this form](https://airtable.com/shrS87pj0pUu7eI4I). The Language Lab team at Open Cultural Center will contact you.

### Step 2

You will be invited to the **Language Lab Slack** workspace, which is where all communication between students, teachers, and the Language Lab team takes place. Don't forget to upload a picture, make sure your name is spelt correctly, and join the first class where you will receive information about the course.&#x20;

## Language exchange events

Follow [Open Cultural Center on Meetup](https://www.meetup.com/open-cultural-center-barcelona/) to hear about the events organised by the Language Lab. In general, there are 2 language exchanges every month, and these events are open to everyone.&#x20;

For reminders and practical information about language exchanges, join the [Language Lab WhatsApp group](https://chat.whatsapp.com/CvwADRZ0mGEGWq4hqxh3ml).

If you are in the Language Lab Slack, you can also check the #exchange channel.

## Language Buddies

Through the Language Lab, you can also [register as a Language Buddy](https://airtable.com/shrFaH2cfPBJ22AKA)!

If you would like to practice a language with a native speake&#x72;**,** improve your language skills through one-on-one conversations, or help someone else with the language they are learning, this is a great option.

You will be matched with someone else from the Language Lab's multicultural language community, and you can start immediately.

![](https://4042228299-files.gitbook.io/~/files/v0/b/gitbook-legacy-files/o/assets%2F-MRebciU3NcuLgsX3ijf%2F-MXmXLR5Qy9lsCpG9Y3Z%2F-MXmYMoS45NoxsPmRvJd%2FOCC%20Block.png?alt=media\&token=b26cc351-8099-4f6f-9cd6-0314a7222264)


# Oxford House

Oxford House offers free English classes to MigraCode students via their Eco course. The course lasts 3 months.

## What they offer:

* Free of charge
* English classes
* A2 to B2 (no beginners, no advanced)
* Fully online (2021)
* 2 classes of 1H30mins OR 1 class of 3H every week

## How to apply?

### Step 1

Take the[ level test here](https://oxfordhousebcn.com/en/levels/level-tests/english/) and **convert it to the "Oxford House levels"** using this chart:

![](https://4042228299-files.gitbook.io/~/files/v0/b/gitbook-legacy-files/o/assets%2F-MRebciU3NcuLgsX3ijf%2F-MXmNSIpvECiVKdQaYpS%2F-MXmS9zmt9a8rz4ETQLW%2FCaptura%20de%20pantalla%202021-04-08%20a%20las%2019.07.53.png?alt=media\&token=b8ca6d3a-4251-450d-9e2d-51c879d6de7b)

### Step 2

Choose the time table that suits you best on this chart:

![](https://4042228299-files.gitbook.io/~/files/v0/b/gitbook-legacy-files/o/assets%2F-MRebciU3NcuLgsX3ijf%2F-MXmNSIpvECiVKdQaYpS%2F-MXmSGE1xuCqjqXYibcG%2FCaptura%20de%20pantalla%202021-03-31%20a%20las%2017.01.42.png?alt=media\&token=c72e1604-0cae-4a30-a7ee-15a667eaa0e6)

### Step 3

**Register** on [this link](https://oxfordhousebcn.com/en/registration/online-registration-english-eco-1-free-course/).&#x20;

Here is **all the information you need** in order to register:

* The "Oxford House level" that **corresponds to your level test result**
* The **timings** that suit you best **exactly** as you see on the chart in Step 2 (not others)
* The promotional code: **MIGRACODE**
* As the start of your course, choose **the closest ideal date for you**

### **Step 4**

Wait for your **confirmation letter**, you will receive it by email.&#x20;

### **Step 5**

Using the information that you have in the confirmation letter, fill in [this confirmation form](https://airtable.com/shr29aF9pVVIZlDgG). **You will NOT be considered as registered by MigraCode** until you complete this step, and we will not be able to support you with your language learning.

![](https://4042228299-files.gitbook.io/~/files/v0/b/gitbook-legacy-files/o/assets%2F-MRebciU3NcuLgsX3ijf%2F-MXmYl4OtzJOK4KMWQ0L%2F-MXmYq0QtuqgG1prh5TY%2FOliver.OH-Icono-para-video1920x1080-fondo-transparente.png?alt=media\&token=63172f7d-23c6-417c-8644-7f41d31625a6)


# Psychological Support

**Migrating to another country can have a big impact on your life. While it may bring you good things (like MigraCode), it can also give you stress and make you feel negative or sad. At the same time, you may have experienced things in your home country that still have an impact on how you feel now. MigraCode and their partner can help you dealing with these feelings.**

## Why psychological support?

It is extremely important to always share any personal issues you have - talking helps! This can be with friends or fellow students, but maybe you need someone to talk to who is specialised in helping people that deal with challenges in their lives.

This is why MigraCode works closely with Iguality, an NGO that offers free mental health support to (among others) migrant and refugee communities through dedicated voluntary professional therapists, ready to talk to you when you need it. The service is - like everything connected to MigraCode - cost-free, and you can always request to start with the service. A psychologist can help you when:

* You feel sad or negative
* You feel a lot of stress
* You have negative thoughts
* You miss family/friends&#x20;
* You feel lonely or without sufficient support
* You struggle with your identity
* You face any other personal issues

## How to start?

If you want to make use of this service, you can [fill in this form](https://airtable.com/shrv242Q7vLEzsTw6) directly. If you have some doubts, feel free to first send a message to @Vincent van Grondelle on Slack, who can assess your needs and see where you need help with, to find the best match! You can also find more information about the program through [this link](https://www.notion.so/iguality/Mental-Health-Program-Guide-3e3565eecd4f4114a5dc205c76180544).

{% hint style="info" %}
We get quite a lot of requests for this service. Please keep in mind there may be a waiting list which may take a few weeks.
{% endhint %}

## What to expect?

It is possible to just have a few sessions of approximate 1 hour, or to receive support for a longer period of time. This depends on what you need help with and if you feel comfortable! Depending on availability, you can receive in Spanish, English, Catalan and Portuguese.

**A MigraCode psychologist can:**

* listen to your story, how you feel and/or what you struggle with
* talk with you and - if you want - try to address the root cause of any personal issues
* give you advice on how to deal with negative or sad feelings
* support you through hard times and offer tools to handle difficult situations

**It also important to know that a MigraCode psychologist cannot:**

* become your close friend - rather see her or him as a personal guide
* solve every issue/problem/challenge you face - it depends a lot on your situation and the specific things you struggle with
* always be available for you - he or she will support you on a long- or short-term basis, but the support you receive will happen through the planned sessions *(for emergencies you can contact Vincent van Grondelle)*
* receive gifts or financial compensations - the psychologists offer their support on a voluntary basis and are not expecting anything in return :)


# Legal Support

**Being a migrant in Europe/Spain/Catalunya/Barcelona can be challenging, especially considering it may put you in a complicated situation regarding your legal status. You may need to apply for asylum, or for other potential procedures to receive a work permit and/or a residency status.**

## **What do we offer?**

In order to point you in the right direction, MigraCode has some volunteers who have basic to advanced legal knowledge, and they can give you useful information that you may not be able to find yourself on the internet or through public institutions. Some examples of what our volunteers can try to help you with:

* Obtaining Arraigo Social
* Support with the process of Pareja de Hecho
* Support with asylum request procedures
* Writing legal requests and/or appeals
* Other support related to legal processes

Please note that offering legal support is very difficult since the migration systems in Europe are very complicated. Our volunteers will try to point you in the right direction, but keep in mind no-one knows all the answers.&#x20;

{% hint style="info" %}
**Sometimes we can get in touch with pro-bono lawyers who are maybe able to help, but they cannot take you as a case - they can only give advice.**
{% endhint %}

## How to start?

To request help, simply [fill this form](https://airtable.com/shr4smDKLty5G7yqd). Depending on the waiting list, we will try to put you in touch with a volunteer through Slack, email or phone.&#x20;

{% hint style="info" %}
We get quite a lot of requests for this service. Please keep in mind there may be a waiting list which may take a few weeks, as for each request we are manually trying to link you up to a legal volunteer. If in the meantime your question is answered, please let us know by messaging Vincent on Slack!
{% endhint %}

## More advanced help

If you need more help after receiving advice from our volunteers, you probably need to get in touch with a private lawyer (if you didn't one assigned by the Spanish state). This can be hard and expensive, so we have collected some good options for you based on the experience of other students with these lawyers:

* **Laura Sainz Rodriguez -** <https://abogaciayperitaje.com/>
* **Eliselmo Altoe Weber** (**Lito)** - <https://maatbarcelona.es/>
* **Jordi Zorrilla** - <https://investalegal.es/jordi-zorrilla/>

![](https://4042228299-files.gitbook.io/~/files/v0/b/gitbook-legacy-files/o/assets%2F-MRebciU3NcuLgsX3ijf%2F-MT7SyZ5gZZ-a20KVih5%2F-MT7UI5wM_CuqT8jysZN%2Fsolicitar-arraigo-social-sin-contrato-de-trabajo-1024x683%20\(1\).jpg?alt=media\&token=9820164e-c3b4-4fc8-bb61-b3eb230a0d23)


# Study space

**We have two options if you cannot study well at home. Both options are free and can be used based on availability. All you need to do is sign-up accordingly beforehand and be there.**

## Study at the office of Porsche Digital

You can study for free at the fancy and nice office of PORSCHE DIGITAL in the center of Barcelona, between Monday and Friday from 10:00 to 18:00. Exact location [here](https://goo.gl/maps/Gah7BuanPTpiURRF6).&#x20;

Every week, you need to sign-up before Thursday evening through [this form](< https://airtable.com/shr0IFmWNe1EpF8Bk>) to reserve your spot(s) for the next week. You will receive your QR code on Friday which you will need to bring when you come to the allocated day/time.

{% hint style="info" %}
**IMPORTANT: If you reserve a spot, they expect you to come (as you may take someone else's spot, it's a small office), so make sure to inform me at least one day in advance in case you cannot make it after all.**
{% endhint %}

## **Study at our Open Cultural Center space**

You can also come to study at our own center in El Born, over [here](https://g.page/OpenCulturalCenter?share). We are open Tuesday to Friday, from 10:00 to 16:00. It may be a bit noisy from the street but we have a nice room where you can study with steady internet.

To sign up, just write Vincent + Diana on Slack to let us know when you want to come.&#x20;


# Finding a job

**MigraCode offers you many things (see the Student Services section), but obviously the main things are free education and supporting you with finding your first job in technology. While we will give you much help, there are also MANY things you can do on your own to find that first job, and you can start with this on DAY 1 of your MigraCode course.**

{% hint style="info" %}
**IMPORTANT:** Also with all the tips and do's on the following pages, **you are not alone!** Feel free to ask for help in the #support-employability channel in our Slack workspace to get help setting up profiles or learning more about the information shared here.
{% endhint %}

## Putting yourself out there: self-branding

To start: being visible online is a MUST, for recruiters to find you while at the same time being able to apply for jobs directly. If you're shy to promote yourself, *you need to let it go*, at least while you are searching for jobs and building a professional network online! We consider three types of profiles a must: LinkedIn, GitHub and a self-developed one (a webpage). Find more information below for each profile type.

{% content-ref url="/pages/3iu7aKzIMUc36Hvq3wiG" %}
[Self-branding](/student-support/finding-a-job/self-branding)
{% endcontent-ref %}

## Making use of online platforms: start networking!

Once you have created your online profiles and you have them fully setup as described in the previous sections, you can't just leave them there. You will need to be actively engaging with these networks, ideally on a daily or weekly basis. Don't worry: this is quite easy, as these networks are made exactly for that!

{% content-ref url="/pages/CpcNc6rVoFU2mp6XRkDm" %}
[Online networking](/student-support/finding-a-job/online-networking)
{% endcontent-ref %}

## Don't make them come for you: join events and job fairs

You can do all the things perfectly online and have your profiles ready and active - nothing works as good as just meeting people in-person and just talking directly to recruiters and other company representatives. You can always add them on LinkedIn and GitHub later!

{% content-ref url="/pages/6w1FY3xpLa9qFSVUVOoN" %}
[Events & job fairs](/student-support/finding-a-job/events-and-job-fairs)
{% endcontent-ref %}

![](https://4042228299-files.gitbook.io/~/files/v0/b/gitbook-legacy-files/o/assets%2F-MRebciU3NcuLgsX3ijf%2F-MSZMSoNrFMcV6HN1p4e%2F-MSZMkwVAhCGAScwqbFo%2FDSC_0659migracode-bcn.jpg?alt=media\&token=8c46cb34-e908-48aa-8152-8e398f5e2e5f)


# Self-branding

## **Introduction**

**To start: being visible online is a MUST, for recruiters to find you while at the same time being able to apply for jobs directly. If you're shy to promote yourself,&#x20;*****you need to let it go*****, at least while you are searching for jobs and building a professional network online! We consider three types of profiles a must: LinkedIn, GitHub and a self-developed one (a webpage). Find more information below for each profile type.**

![](https://4042228299-files.gitbook.io/~/files/v0/b/gitbook-x-prod.appspot.com/o/spaces%2F-MRebciU3NcuLgsX3ijf%2Fuploads%2Fld5UK3gtD7PBrOTwBUZZ%2FThe%20Internet%20is%20becoming%20the%20town%20square%20for%20the%20global%20village%20of%20tomorrow..png?alt=media\&token=edf0b8ec-b228-44b1-b1c1-5f0d5b390bb3)

## LinkedIn: Connect to the professional world

{% content-ref url="/pages/YzAZMhBE9XB6LtTMfOtz" %}
[LinkedIn profile](/student-support/finding-a-job/self-branding/linkedin-profile)
{% endcontent-ref %}

![](https://4042228299-files.gitbook.io/~/files/v0/b/gitbook-x-prod.appspot.com/o/spaces%2F-MRebciU3NcuLgsX3ijf%2Fuploads%2FPCHabH09ROdgsNETXCKz%2FLinkedIn_Logo.svg.png?alt=media\&token=41aad3d3-66e8-428e-93f7-f5a03b6fc05c)

## GitHub: Join the world's developer's community

{% content-ref url="/pages/s6HOJjMU2VOTfsnnUka7" %}
[GitHub profile](/student-support/finding-a-job/self-branding/github-profile)
{% endcontent-ref %}

![](https://4042228299-files.gitbook.io/~/files/v0/b/gitbook-x-prod.appspot.com/o/spaces%2F-MRebciU3NcuLgsX3ijf%2Fuploads%2FgfEQteCHWgZaHROcWJp9%2F955-9558163_transparent-github-logo.png?alt=media\&token=df500323-78cb-4b2a-beca-12a27f43b133)

## Self-developed profile: start being creative!

{% content-ref url="/pages/dSThcCBY6JPaNnxbt3Zx" %}
[Self-developed profile](/student-support/finding-a-job/self-branding/self-developed-profile)
{% endcontent-ref %}

![](https://4042228299-files.gitbook.io/~/files/v0/b/gitbook-x-prod.appspot.com/o/spaces%2F-MRebciU3NcuLgsX3ijf%2Fuploads%2FcGhYow6HXnRrGk81gfeb%2Ftwitter-profile-image.png?alt=media\&token=1d993397-57b5-48ec-bcfc-92627fec7dca)


# LinkedIn profile

## **Introduction**

**LinkedIn is an online platform that is primarily used for professional networking and career development, and allows job seekers to post their CVs and employers to post jobs. In other words, LinkedIn is THE place to be to connect to basically anyone that could help you, either directly or indirectly, to your first job.**&#x20;

![](https://4042228299-files.gitbook.io/~/files/v0/b/gitbook-x-prod.appspot.com/o/spaces%2F-MRebciU3NcuLgsX3ijf%2Fuploads%2FPCHabH09ROdgsNETXCKz%2FLinkedIn_Logo.svg.png?alt=media\&token=41aad3d3-66e8-428e-93f7-f5a03b6fc05c)

## Creating a LinkedIn profile

Starting with LinkedIn is easy: just go [over here](https://www.linkedin.com/signup) and follow the steps to create your personal profile. There are some important things to keep in mind:

* Use your full name, correctly written, and with proper capitalisation (like *John Lewis Scott*, and not *jon lewy scot* for instance)
* Be honest from the start: a lack of experience or education is not so bad as people think it is (more information about this later on)
* Add a good profile picture from the start, you can also ask someone to make it for you

{% hint style="info" %}
**Profile picture:** please use a proper profile picture; it's the first thing recruiters will see! So no holiday or bar pictures, but one taken in a professional setting. Moreover, make sure that:

* The picture shows mainly your face
* Is taken from the front with proper lighting
* That you either smile or look neutral (but definitely not angry)
* You were appropriate clothing (so no beach pictures)

It's always best to ask someone to just take a picture of you in front of a white wall, that also makes it easier later on to change the background, if needed. This person can also give you feedback on the picture.
{% endhint %}

![Your profile picture: Left: NO! Right: YES!](https://4042228299-files.gitbook.io/~/files/v0/b/gitbook-x-prod.appspot.com/o/spaces%2F-MRebciU3NcuLgsX3ijf%2Fuploads%2FqJzKUpKuaBIfU70yoPbi%2Fgood-bad-image-min.png?alt=media\&token=e687e27d-6942-4a41-a1f3-2667b0f4b917)

## Filling your profile

**Now that you have setup the base of your LinkedIn profile, you can start filling all the different sections that LinkedIn allows you to fill, such as your Education, Work Experience and more. From MigraCode, we recommend you to at least fill the following sections:**

### Current position

**This is super important!** Your current position, or the title that shows under your name, is the thing that many people will see when you popup in search results. Apart from a title, you can also add some of your main coding skills or from your previous experience. We recommend you something like:

* Web Development student @ MigraCode Barcelona | HTML/CSS/JS/React/NodeJS/Databases
* Junior Web Developer | Student @ MigraCode | Front-End focus
* Senior Student @ MigraCode Barcelona | Available to work in Software Development
* Marketing & Software Development | Agile/React/JavaScript | Student @ MigraCode
* Tech Support Specialist | Skilled, social & and ready to work

![](https://4042228299-files.gitbook.io/~/files/v0/b/gitbook-x-prod.appspot.com/o/spaces%2F-MRebciU3NcuLgsX3ijf%2Fuploads%2F3yRz7w5jK0bhX2EG1myX%2Fimage.png?alt=media\&token=2a52c6a0-10c6-477d-80df-ebe95b397da6)

### About section

This is the first thing people will see once they visit your profile, so make sure the English and/or Spanish is correct and that you have a good description of yourself here, shortly including:

* Your current work situation (student, working, etc.)
* What you are looking for (what kind of job etc.)
* What makes you great (awesome skills in JavaScript for example)
* Quick overview of previous experience (worked in Marketing before learning how to code for example)

**An example from one of our MigraCode graduates,** [**Joana Smerea**](https://www.linkedin.com/in/joannasmerea/)**:**

![](https://4042228299-files.gitbook.io/~/files/v0/b/gitbook-x-prod.appspot.com/o/spaces%2F-MRebciU3NcuLgsX3ijf%2Fuploads%2FGSY7Ln0Os1b089oSk0cX%2Fimage.png?alt=media\&token=b52a22b2-e0fc-437e-a756-62c7a74a3a04)

### 'Featured' section

The featured section is where you can highlight projects or other website where you or your teams have been mentioned, like interviews or accomplishments. We definitely recommend you to at least put the following links there:

* Your GitHub Profile
* Other relevant portfolio pages such as Codepen
* The MigraCode website
* Links to LinkedIn posts where you are mentioned
* Articles you wrote

![](https://4042228299-files.gitbook.io/~/files/v0/b/gitbook-x-prod.appspot.com/o/spaces%2F-MRebciU3NcuLgsX3ijf%2Fuploads%2FYo9L7ghqP0z3SMiPxvFl%2Fimage.png?alt=media\&token=04cf2243-b06e-46f0-9427-e0836f8c8991)

### Work experience

Obviously, previous and current work experiences are an important part as well of your LinkedIn profile. This is where you show where you have worked in the past, and what you have done there, including any responsibilities you had there. Some general tips:

* Keep it short, write either a short paragraph per position or put 2-3 bullet points
* Make sure to tag the company you worked for (if they are on LinkedIn), so their logo pops up as well&#x20;
* Feel free to add links here as well with either more information or any public accomplishments of what you did in this position
* Make sure the dates are correct: time periods that don't match are a huge problem for recruiters
* Avoid gaps in your CV: if you didn't have a job for a while, add volunteering or other experience that you kept yourself busy with (you can for instance put 'self-employed')

{% hint style="info" %}
**IMPORTANT:** Do **NOT** worry if you don't have a lot of work experience, either in tech or in general. For instance, if you weren't able to work for a long time because you were moving between countries, try to either explain this in the 'About' section or just put any activities you did in that time period. For instance, some of our students added 'Activity Manager' or 'Translation Advisor' for volunteering work they did when they were stuck in refugee camps.&#x20;

Also, keep in mind that non-tech work experience can STILL be relevant to the tech sector: if you worked in a restaurant for example, you learned how to multitask and work in teams, which is EXACTLY what you need working in tech! So mention these 'soft' skills for these specific jobs.
{% endhint %}

![](https://4042228299-files.gitbook.io/~/files/v0/b/gitbook-x-prod.appspot.com/o/spaces%2F-MRebciU3NcuLgsX3ijf%2Fuploads%2FaZLghi9VlGVCVX2INR4W%2Fimage.png?alt=media\&token=39056fa1-a8d4-4156-ae82-b20114cbba12)

### Education section

As the title says it already, in this section, you need to put any previous or current education you have. Like the work experience section, don't worry too much if you don't have a lot of education, or if you have not completed high school etc. You are learning Software Development, so let's start with putting that there! In other words, examples you can put here:

* A MUST: 'Web Development student', at [MigraCode Barcelona](https://www.linkedin.com/school/19126193/admin/)! Make sure to describe what you are learning, how many hours you spend with the course, the duration, that you are also learning soft skills such as project management, and that you will be a Junior Web Developer at graduation.
* Other university education (if any): if you completed previous university degrees, make sure to add them. Also, if you only have unfinished degrees, feel free to add them, with a note that you stopped earlier (with the reason if you feel comfortable to share it).&#x20;
* If you don't have university education, don't worry: add your high school education here with some details of the courses you followed - volunteers can help you to still make this educational experience relevant to your current technical education at MigraCode!
* Last but not least: if you don't have education apart from MigraCode, also don't worry. In this case, focus on MigraCode and ask your contacts at MigraCode to see if they can offer you more free courses!&#x20;

{% hint style="info" %}
**In this section, you can also add online courses** you have done or may still be doing, like from FreeCodeCamp or KhanAcademy. Especially if you lack other education, it's highly recommended to these courses so you can add them to your profile. Khanacademy for instance also offers mathematical courses and other kind of courses!

* [www.khanacademy.org](https://www.khanacademy.org/)
* [www.freecodecamp.org](https://freecodecamp.org/)
* [www.coursera.org](https://es.coursera.org/)
  {% endhint %}

![](https://4042228299-files.gitbook.io/~/files/v0/b/gitbook-x-prod.appspot.com/o/spaces%2F-MRebciU3NcuLgsX3ijf%2Fuploads%2FwzpsWNw9opwHrSwuIwPo%2Fimage.png?alt=media\&token=4f50b64e-deed-4f3a-b74f-761342ae724a)

![](https://4042228299-files.gitbook.io/~/files/v0/b/gitbook-x-prod.appspot.com/o/spaces%2F-MRebciU3NcuLgsX3ijf%2Fuploads%2FOOlvAIge0FNV9SJAVSxV%2Fimage.png?alt=media\&token=a2961335-f63a-4d97-9eab-a2e7d623f603)

### Skills section

Many people underestimate this section: why add specific skills if you have already described all your work experience and education? Well, it's simple: apart from the fact to let recruiters see an overview of your main hard and soft skills, this summary of skills is also used by recruiters in the LinkedIn Job Search platform to find you!

For example, a recruiter may search ONLY for profiles that have added JavaScript & React as skills to their profile - so even if you are the best JavaScript developer in the world, you won't show up in the search results! Below you can find some skills examples.

#### Tech/hard skills:

* HTML
* CSS
* JavaScript
* React
* NodeJS
* Spanish/English or any other language you speak
* Git
* Web Development
* Software Engineering
* Office
* Excel

#### Soft/personal skills:

* Teamwork
* Communication
* Leadership
* Public speaking
* People management

{% hint style="info" %}
**IMPORTANT:** You can fill up to 50 skills - make sure to reach 50 indeed! The more skills somehow relevant to you, the more chance recruiters will end up on your profile. If you think you don't have 50 skills, you are wrong :) Already after working as a ticket sales person on the streets of Barcelona, you will have already gained at least 30 skills, such as Sales, Communication, Teamwork, Convincing, Public speaking, etc.
{% endhint %}

### Languages

**A must as well:** add the languages that you speak, either just a little bit or fluently! LinkedIn will allow you to add your level, so if you just speak A2 Spanish, add it, and select '*Elementary proficiency*'.&#x20;

![](https://4042228299-files.gitbook.io/~/files/v0/b/gitbook-x-prod.appspot.com/o/spaces%2F-MRebciU3NcuLgsX3ijf%2Fuploads%2FZgsol1VCBtdmXTCNpLmr%2Fimage.png?alt=media\&token=9eb97ce9-40e6-4a2c-b091-280d856bb8fd)

### Recommendations

So what's this last important thing? In this section, you are able to let others confirm you are indeed the best person to hire! In other words, here you can ask people to recommend you by writing how happy they were with you in other job or educational experiences you have had in the past.&#x20;

So, for example, you can ask your old manager to write a few lines about how good you were at managing orders, or how amazing you were with handling conflict. **Don't be shy**: reach out to those old bosses and ask them to write something! If they suddenly write something negative, you can always just hide the recommendation from your profile.

{% hint style="info" %}
**TIP 1:** Ask your colleagues, fellow-students and the volunteers you work with at MigraCode to write something! You can for example ask your CodeBuddy to write about your coding skills, or your final project team to write about your teamworking skills.

**TIP 2:** Also make sure to write 1 or 2 recommendation to other people; this will show you are engaged with others and you also care about others. Recruiters like this!
{% endhint %}

Check out the awesome recommendations our previous student [Rahaf](https://www.linkedin.com/in/rahafbayazi/) has received from MigraCode volunteers (and the great one she has written about her fellow MigraCode student):

![](https://4042228299-files.gitbook.io/~/files/v0/b/gitbook-x-prod.appspot.com/o/spaces%2F-MRebciU3NcuLgsX3ijf%2Fuploads%2FKPzZutumWsoqBPYhySjA%2Fimage.png?alt=media\&token=40801fcb-a40d-44da-94d8-4d7555a37e33)

## What's next?

If you followed all the above steps, there's still much to improve! There are more sections available (like Volunteering or Certificates) that we recommend you to fill if they apply to you, to make your profile as complete as possible. More information can be found [over here](https://www.linkedin.com/help/linkedin/answer/15493/your-linkedin-profile-overview?lang=en).&#x20;

**After that, you can start building an online professional network!**

{% content-ref url="/pages/CpcNc6rVoFU2mp6XRkDm" %}
[Online networking](/student-support/finding-a-job/online-networking)
{% endcontent-ref %}


# GitHub profile

## **Introduction**

**GitHub is often seen as the LinkedIn for software developers. But it does more than just connecting the tech community; it also provides access control and several collaboration features such as bug tracking, feature requests, task management, continuous integration and wikis for every project. And just as important: (good) recruiters use it as well to see how well you can code and how active you are!**

![](https://4042228299-files.gitbook.io/~/files/v0/b/gitbook-x-prod.appspot.com/o/spaces%2F-MRebciU3NcuLgsX3ijf%2Fuploads%2FgfEQteCHWgZaHROcWJp9%2F955-9558163_transparent-github-logo.png?alt=media\&token=df500323-78cb-4b2a-beca-12a27f43b133)

## Creating a GitHub profile

Starting with LinkedIn is easy: just go [over here](https://github.com/signup?ref_cta=Sign+up\&ref_loc=header+logged+out\&ref_page=%2F\&source=header-home) and follow the steps to create your personal profile. There are some important things to keep in mind:

* Choose a username that can be tracked to your name so recruiters can easily find you (so not *codinglover1993*, but rather *VincentvanG1993*)
* Keep in mind that your profile will be public, so just like with LinkedIn, fill the data correctly with correct spelling and capitalisation
* A profile picture is a little less super important as with LinkedIn, as on GitHub, it's mainly about your coding skills and experience. You can also choose to make an avatar, through [this website](https://personas.draftbit.com/) for example

![](https://4042228299-files.gitbook.io/~/files/v0/b/gitbook-x-prod.appspot.com/o/spaces%2F-MRebciU3NcuLgsX3ijf%2Fuploads%2FkV5ia1wlUzRX9akWM3Uv%2Fimage.png?alt=media\&token=a8991215-573a-4831-9a9e-619fdd0192a2)

## Creating an (awesome) profile page

As GitHub is a tech platform, you need to use your tech skills to make your profile really complete. The best way to do so is to 'code' your own profile page, which you can do by adding a README file to your profile 'Repository'. **How to do so?**

### **Step 1: creating a README.md file for your profile**

1. Create a new repository with the same name as your GitHub username. For example, if your username is Gapur, the repository name must be Gapur.

   <img src="https://4042228299-files.gitbook.io/~/files/v0/b/gitbook-x-prod.appspot.com/o/spaces%2F-MRebciU3NcuLgsX3ijf%2Fuploads%2Fiq5zgX4jZslDlR5ujFYV%2Fimage.png?alt=media&amp;token=27beffb4-e96e-45ab-afd8-45a9fdec8b3c" alt="" data-size="original">
2. Within the repository, create a README.md file. This new file will be displayed on your GitHub profile page!

   ![](https://4042228299-files.gitbook.io/~/files/v0/b/gitbook-x-prod.appspot.com/o/spaces%2F-MRebciU3NcuLgsX3ijf%2Fuploads%2FJYSsT5aISQPDcsy0WAhT%2Fimage.png?alt=media\&token=b729cfcd-3eae-4f84-8c94-44755b948ab2)

### Step 2: code that README.md file!

Now it's time to be creative! You can use HTML markup to style the file, and just like with HTML, you can insert images and other content. In general, we recommend to create various sections, like LinkedIn does as well. For example, you can add the following sections with \<h1> (or h2) elements:

* Quick introduction (who you are, what you do, what you're good at in tech)
* Examples of your experience (web development student at MigraCode, completed various Khanacademy courses, for example)
* Projects portfolio (from small to big ones)
* Goals (learning Java, learning NodeJS, etc.)
* Skills (frameworks, coding languages, technologies, soft skills such as adaptability, creativity, self-criticism, etc.)
* Your programing music!
* How to reach out (LinkedIn profile, other networks)

![](https://4042228299-files.gitbook.io/~/files/v0/b/gitbook-x-prod.appspot.com/o/spaces%2F-MRebciU3NcuLgsX3ijf%2Fuploads%2FYjrRv6T5InKjJia1yGcY%2Fimage.png?alt=media\&token=0a63852a-63e8-41e2-accf-ca2c99bdc30d)

## Start contributing!

**Now that you have your GitHub page ready, and you may have added your first followers, it's time to become really active. It's SUPER important to have an active GitHub profile, as recruiters will definitely check if you are actively coding and upgrading your skills!**

### **Option 1: committing your own work and projects**

A great way to keep your GitHub profile active and to easily show-off your tech skills is by simply committing all the hard work you do for MigraCode and any other projects or courses. Make sure to commit each exercise, save each project you do and keep track of larger projects in your profile README.md. And keep them organized in the correct repositories, so it's easy for recruiters and others to separate your work.

![GitHub automatically shows how active you are on your main profile page](https://4042228299-files.gitbook.io/~/files/v0/b/gitbook-x-prod.appspot.com/o/spaces%2F-MRebciU3NcuLgsX3ijf%2Fuploads%2FyWyp2RP2xUONDsVEodQC%2Fimage.png?alt=media\&token=671e3c44-1785-427d-87b9-82cb6a43d66b)

### Option 2: contributing to open-source projects

There are many reasons why contributing to open-source projects is a great idea:

* It builds your resume by demonstrating that you can collaborate with others on code.
* It gives you practice with Git and GitHub, which is a valuable data science skill.
* It helps you to build relationships in the open source community.
* It feels good to give back to a project that you use!

And luckily, there are many guides out there that explain you in simple steps how to start contributing right away. We found [this one](https://www.dataschool.io/how-to-contribute-on-github/) on DataSchool, although [this one](https://akrabat.com/the-beginners-guide-to-contributing-to-a-github-project/) on Akrabat also looks good.

{% hint style="info" %}
**We recommend you to start contributing to other projects once you are a bit further in the course, for example after at least 1 JavaScript module.**
{% endhint %}

![](https://4042228299-files.gitbook.io/~/files/v0/b/gitbook-x-prod.appspot.com/o/spaces%2F-MRebciU3NcuLgsX3ijf%2Fuploads%2FIPNn2WforQ3438iQtFxa%2Fimage.png?alt=media\&token=6b711417-8cd5-48e1-b256-09c9c3e20b45)


# Self-developed profile

## Introduction

**While LinkedIn and GitHub are great to present yourself and promote your skills and experience, the most impressive thing to send to a recruiter is your own developed webpage with your portfolio and other relevant information. Not only will it show great motivation, but by making a great webpage, your profile itself is already showing your skills!**

![](https://4042228299-files.gitbook.io/~/files/v0/b/gitbook-x-prod.appspot.com/o/spaces%2F-MRebciU3NcuLgsX3ijf%2Fuploads%2FcGhYow6HXnRrGk81gfeb%2Ftwitter-profile-image.png?alt=media\&token=1d993397-57b5-48ec-bcfc-92627fec7dca)

## Some general advice

* IF you make your own profile page, make sure to have enough coding knowledge to make a really good one. If you just started coding, wait a little while. It's better to just have LinkedIn and GitHub than having a super basic HTML/CSS self-developed profile.&#x20;
* Once created, make sure to have other developers take a look at your page to receive proper feedback, so you can really finetune both the layout as well as the code itself.
* Any self-developer profile needs to have the following key-information:
  1. Who you are
  2. What you do
  3. Your location
  4. The work you have to share
  5. How to contact you&#x20;

## How to make your own profile?

There are many guides online how to make your own profile, and also with various options where to host it. You can either buy a domain like *[www.vincentvangrondelle.es](http://www.vincentvangrondelle.es)*, or you can host your page on [GitHub](https://github.com/) or [Heroku](https://www.heroku.com/) (so you will get like *vincentvang.heroku.com*). Below you can find some guides to start coding your own profile!

{% embed url="<https://elementor.com/blog/web-design-portfolio-examples?gclid=CjwKCAiA1uKMBhAGEiwAxzvX9-KO5idJ_f39SteNU0yIEpwe-2uIgss4btjqOVtYWPxn3XNJsd7cHBoCkN8QAvD_BwE>" %}

{% embed url="<https://brainstation.io/career-guides/how-to-build-a-web-developer-portfolio>" %}

{% embed url="<https://toggl.com/blog/web-developer-portfolio>" %}

{% embed url="<https://www.creative-tim.com/blog/education/web-developer-portfolio-website>" %}

{% hint style="info" %}
**Once you have fully published your own self-developed profile, make sure to add it to your other profiles to showcase it!**
{% endhint %}


# Online networking

## **Introduction**

**Once you have created your online profiles and you have them fully setup as described in the previous sections, you can't just leave them there. You will need to be actively engaging with these networks, ideally on a daily or weekly basis. Don't worry: this is quite easy, as these networks are made exactly for that!**

![](https://4042228299-files.gitbook.io/~/files/v0/b/gitbook-x-prod.appspot.com/o/spaces%2F-MRebciU3NcuLgsX3ijf%2Fuploads%2FwV3P1DhjAIBZPSzgviRd%2FThe%20Internet%20is%20becoming%20the%20town%20square%20for%20the%20global%20village%20of%20tomorrow.%20\(2\).png?alt=media\&token=a800371f-f9db-477a-8bfc-2a65d087838b)

## **Connecting to the right people**

### With MigraCode members

The easiest people to start connecting to on LinkedIn and GitHub are those you already know from MigraCode: your fellow students, the volunteers and the management of MigraCode! You can add them or give them a follow, and probably they will join your networks soon enough. If you don't know them that well, make sure to include a message when you add them on LinkedIn.

**Give it a try, starting adding:**

* [Yogesh Yadav](https://www.linkedin.com/in/soyyogi/), our Head of Education (GitHub [over here](https://github.com/soyyogi))
* [Diana Dashkovska](https://www.linkedin.com/in/dianadashkovska/), our Education Assistant (GitHub [over here](https://github.com/hheiress))
* [Vincent van Grondelle](https://www.linkedin.com/in/vincentvangrondelle/), our Program Manager (GitHub [over here](https://github.com/VincentvanG))
* [Eduard Bargues](https://www.linkedin.com/in/eduardbargues/), an awesome volunteer (GitHub [over here](https://github.com/EduardBargues))
* [Ricard More](https://www.linkedin.com/in/ricardmore/), an awesome volunteer (GitHub over here)
* [Anandamaya Arnó](https://www.linkedin.com/in/anandamaya-arno/), a MigraCode graduate (GitHub over here)
* [Henriette Hettinga](https://www.linkedin.com/in/henriette-hettinga/), CodeWomen Manager (GitHub [over here](https://github.com/Jethet))

![](https://4042228299-files.gitbook.io/~/files/v0/b/gitbook-x-prod.appspot.com/o/spaces%2F-MRebciU3NcuLgsX3ijf%2Fuploads%2FtP2TWbdfNvKPWOsvA71d%2Fimage.png?alt=media\&token=096a8f7b-b072-4e20-a1d5-3fa0ee0d88d0)

### With recruiters

Even if you're not a full stack web developer or advanced tech support agent yet, you can already start building a network of recruiters on LinkedIn that could potentially share interesting jobs with you, or contact you once they see you have completed MigraCode or other relevant courses! Just make sure to introduce yourself properly and provide some context when you send them an invite.

**Give it a try, start adding:**

* [Eduard Pinilla](https://www.linkedin.com/in/eduardpb/), Talent Acquisition Specialist at our partner Adaptive
* [Helena Torrents Aymerich](https://www.linkedin.com/in/htorrentsaymerich/?), Tech Recruiter at our partner Adevinta
* [Silvia Bellmunt](https://www.linkedin.com/in/silvia-bellmunt-36220aa3/), Tech Recruiter at our partner Glovo
* [Daniel Mortos](https://www.linkedin.com/in/danimartos/?), Recruitment Operations Lead at our partner Preply
* [Megan Walker](https://www.linkedin.com/in/meganwalker195/), Director of People at our partner Marfeel
* [Alvaro Rodriguez](https://www.linkedin.com/in/alvarorodriguezholaluz/?), Recruiter at our partner Holaluz

![](https://4042228299-files.gitbook.io/~/files/v0/b/gitbook-x-prod.appspot.com/o/spaces%2F-MRebciU3NcuLgsX3ijf%2Fuploads%2F0ReeJoiB5nfL6FUxbKpE%2Fimage.png?alt=media\&token=4ce5198b-b593-475e-a754-13d024cc0ec6)

### With other people

Don't limit yourself those recruiters out there: add your friends, old colleagues, sports buddies and basically everyone you know: job offers and possibilities can come from the most strange directions! Maybe you add an old friend on LinkedIn, who knows the HR Manager of a tech company, and you can be connected! So don't hesitate to go the '[My Network](https://www.linkedin.com/mynetwork/)' page of LinkedIn and start sending those invites. For GitHub, you can search by username/full name via [this page](https://docs.github.com/en/search-github/searching-on-github/searching-users).

![](https://4042228299-files.gitbook.io/~/files/v0/b/gitbook-x-prod.appspot.com/o/spaces%2F-MRebciU3NcuLgsX3ijf%2Fuploads%2FaRW0lYcpnZS9ftNu4d94%2Fimage.png?alt=media\&token=6c8c6ddf-7717-44b7-9e2d-1d150f5e2668)

{% hint style="info" %}
**It may seem a bit like how Facebook is used by 16-year old kids: adding as much people as you can.. But this is indeed a bit true as well! A big LinkedIn network creates a big reach when you share you are searching for a job (or anything else, see below), and can lead you to new, interesting connections that can get you that first job.**
{% endhint %}

## Sharing

**On any professional online network, it's important to stay active and share and interact with your network and potential new connections. You can do this by simply liking and commenting to posts of others or of posts of companies, but even better is sharing your own posts with content. Below you can find some examples of what you can share!**

### **Sharing accomplishments**

Whether you finally graduated from MigraCode, or maybe just finished the first HTML/CSS module, share it! Show your progress to your network, and keep potential future employees or interested recruiters up-to-date with the skills you are developing. Who knows, maybe after finally finishing the React module of MigraCode, a recruiter suddenly finds you more interesting!

![](https://4042228299-files.gitbook.io/~/files/v0/b/gitbook-x-prod.appspot.com/o/spaces%2F-MRebciU3NcuLgsX3ijf%2Fuploads%2FobenDNMCHEh3JdFwkksD%2Fimage.png?alt=media\&token=5d6c17e0-0611-4415-b2db-c9828feb58e1)

### **Sharing tech-related topics**

Whether you visited a tech event and have some cool pictures, or you read a great article about the future of coding (for example), it's always good to share this as well. LinkedIn is no Instagram, but as long as it's career-related, feel free to share a cool picture related to your job search or to coding/tech!

![](https://4042228299-files.gitbook.io/~/files/v0/b/gitbook-x-prod.appspot.com/o/spaces%2F-MRebciU3NcuLgsX3ijf%2Fuploads%2F4z7EiSOW3DOVbEfWQUQc%2Fimage.png?alt=media\&token=d4159e3d-aa7e-4b00-b2c8-20f7420b477f)

### **Sharing your projects**

Last but not least, don't be afraid to show off your hard work! Whether it's your first Codepen page made with HTML and CSS, or it's the draft of your Final Project, share it as an update on LinkedIn or put it as a public repository on GitHub. Explain people what you have done and how you have done it, and spark the interested of a recruiter or impress a CEO!

![](https://4042228299-files.gitbook.io/~/files/v0/b/gitbook-x-prod.appspot.com/o/spaces%2F-MRebciU3NcuLgsX3ijf%2Fuploads%2FfvrGWZVROHAcAFJZ3y8r%2Fimage.png?alt=media\&token=e285c221-76ee-46ec-ac69-6fb2dc19d63b)


# Events & job fairs

## Introduction

**You can do all the things perfectly online and have your profiles ready and active - nothing works as good as just meeting people in-person and just talking directly to recruiters and other company representatives. You can always add them on LinkedIn and GitHub later! It's easy to find events and to join them (for free) - below some tips how to find them and what to do there once you're there.**

![](https://4042228299-files.gitbook.io/~/files/v0/b/gitbook-x-prod.appspot.com/o/spaces%2F-MRebciU3NcuLgsX3ijf%2Fuploads%2FKmrnS12DQLXsr0hg2NgY%2FThe%20Internet%20is%20becoming%20the%20town%20square%20for%20the%20global%20village%20of%20tomorrow.%20\(3\).png?alt=media\&token=7958740a-7c51-44a2-b20c-f7140409f1d3)

## Types of events

### Meetups

Meetup became an organizing tool for a variety of interests including hobbies, drinking, sports, and gaming. Meetups provide a means of gathering like-minded people interested in a variety of social activities or interest. Especially in Barcelona, there are many Meetup events related to technology, and even so specific such as JavaScript or React events.

![](https://4042228299-files.gitbook.io/~/files/v0/b/gitbook-x-prod.appspot.com/o/spaces%2F-MRebciU3NcuLgsX3ijf%2Fuploads%2F2OihKAWWGJbZtNKRQWwg%2FUntitled%20design.jpg?alt=media\&token=7b6665b5-475a-4dae-947b-2324eecc864d)

### Job Fairs

A job fair, also referred commonly as a job expo or career fair or career expo, is an event in which employers, recruiters, and schools give information to potential employees. Job seekers attend these while trying to make a good impression to potential coworkers by speaking face-to-face with one another, filling out résumés, and asking questions in attempt to get a good feel on the work needed. It's THE best way to get in direct contact with recruiters and find that first job.

![](https://4042228299-files.gitbook.io/~/files/v0/b/gitbook-x-prod.appspot.com/o/spaces%2F-MRebciU3NcuLgsX3ijf%2Fuploads%2FoCorDDQZVlZvwmCvgBvu%2FUntitled%20design%20\(1\).png?alt=media\&token=14b9a90f-a7d4-4dbe-8e61-8438edb830b8)

### Hackathons

A hackathon (also known as a hack day, hackfest, datathon or codefest; a portmanteau of hacking marathon) is a design sprint-like event; often, in which computer programmers and others involved in software development, including graphic designers, interface designers, project managers, domain experts, and others collaborate intensively on software projects. It's an awesome way to build your portfolio and to meet other developers.

![](https://4042228299-files.gitbook.io/~/files/v0/b/gitbook-x-prod.appspot.com/o/spaces%2F-MRebciU3NcuLgsX3ijf%2Fuploads%2FgG7KeVkIM41kKB91AGvt%2FUntitled%20design%20\(2\).png?alt=media\&token=8dda448f-30f8-44d6-af76-d7f9bbc83e70)

## Finding useful events

### Meetup.com

{% embed url="<https://www.meetup.com/es-ES>" %}

### Eventbrite

{% embed url="<https://www.eventbrite.es>" %}

### LinkedIn Events

{% embed url="<https://www.linkedin.com>" %}

## You at an event

So, you are there, what now? Finally you are at a job fair or at a cool and fancy tech meetup, now you need to act! Below some best practices, depending what kind of event you have joined:

* **Dress to impress!** That doesn't always mean you need to suit/dress up! It rather means wearing according to the type of event: if it's a job fair, yes, maybe wear a tie or a nice dress, but if it's a regular networking event, it's not so common in tech to dress up fancy - just regular clothes will do.
* **Talk to people!** Almost all events are in the end networking events, meaning you need to connect to people and see if there are interesting people who can help you further in your career (or maybe you can help them). Of course, this isn't easy - don't worry if you haven't spoken to a lot of people at your first event: it takes practice!
* **Get information!** Take business cards, take flyers, or in other words: take all the information you can find. At home, you can organise all the information and potentially follow any interesting leads or information you received.
* **Connect digitally!** If you meet an interesting person or get to know a cool company, connect to them on LinkedIn or give the company a follow to stay up to date on any potential job opportunities. And as explained before: having more LinkedIn connections can never hurt.

![](https://4042228299-files.gitbook.io/~/files/v0/b/gitbook-x-prod.appspot.com/o/spaces%2F-MRebciU3NcuLgsX3ijf%2Fuploads%2FlGN4TsLd8BFe6zTkPISP%2FUntitled%20design%20\(3\).png?alt=media\&token=f721e5b6-61fb-4fbe-82e7-cc0c621b43a9)


# IT Support & Security Course

## A launchpad to an IT career through MigraCode and INCO Academy

**Through this scholarship program, which is powered by INCO Academy, you will gain the in-demand skills that will prepare you to be job-ready and have access to employability services to launch your career in IT.**

With this 5-course certificate scholarship program designed by Google and delivered on Coursera, you will have access to a variety of hands-on assessments which will help you to simulate real-world IT support scenarios that are critical for success in the workplace.

If you complete this course, you can apply for basic to advanced tech support roles, and we will offer you support with doing this.

![](https://4042228299-files.gitbook.io/~/files/v0/b/gitbook-legacy-files/o/assets%2F-MRebciU3NcuLgsX3ijf%2F-MX7l2PfcippM8MDTobG%2F-MX7lHJzs0diom9ISlqt%2Fimage.png?alt=media\&token=f39f3805-a3ae-4a62-b742-91cab84172b7)

## What are the outcomes

**By earning these IT Skills, you prepare yourself for roles that include — systems analyst, support specialist, database administrator, IT technician, computer specialist, and many more. More specifically, you will learn the following skills:**

* Learn skills required to succeed in an entry-level IT capacity
* Learn to perform day-to-day IT support tasks including computer assembly, wireless networking, installing programs, and customer service
* Learn how to provide end-to-end customer support, ranging from identifying problems to troubleshooting and debugging
* Learn to use systems including Linux, Domain Name Systems, Command-Line Interface, and Binary Code\\

**MigraCode's IT Support & Security course is made possible by INCO Academy.**

![](https://4042228299-files.gitbook.io/~/files/v0/b/gitbook-legacy-files/o/assets%2F-MRebciU3NcuLgsX3ijf%2F-MX7l2PfcippM8MDTobG%2F-MX7lK2DhV6O2Zt0IQiP%2Fimage.png?alt=media\&token=9aad0233-7f42-4f1f-9849-c28e18b0328e)

## &#x20;Background information about INCO Academy

{% embed url="<https://www.youtube.com/watch?v=ZSXFcHAU9gU&ab_channel=Google.org>" %}


# Structure

## Structure of the program

This program counts with 5 courses that will prepare you for a career in the high-growth field of IT. The content is highly interactive and exclusively developed by Google employees with decades of experience in IT. Each course is divided into modules dedicated to concrete subjects. Through a mix of videos, assessments, and hands-on labs, you’ll be introduced to foundational IT skills required for an entry-level job.

![](https://4042228299-files.gitbook.io/~/files/v0/b/gitbook-legacy-files/o/assets%2F-MRebciU3NcuLgsX3ijf%2F-MX7mZYhBQPfFVEvG8nv%2F-MX7mnDEI7UcJgAFLndW%2Fimage.png?alt=media\&token=98de1f3d-c641-4f74-b240-22f1202dfe87)

## 100% online

The course itself is 100% online which means you will need a computer. It can be a basic computer - it doesn’t have to be an expensive/strong one. We encourage you to work from home on your own computer, but if you are not (always) able to do so, you can discuss the possibility to either lend a laptop (if we have availability) or to work from the Open Cultural Center (OCC) office (C/Rec, 27 08003 Barcelona).

## Platforms & Tools

### Coursera

The courses are delivered by Coursera, an online learning platform that will provide you with all the content of the program.

{% embed url="<https://www.youtube.com/watch?v=Pf03RTjeISE&ab_channel=Coursera>" %}

### Slack

The channel-based messaging platform that we use as our main communication tool. Many tech companies also use Slack and it is a huge advantage to have Slack skills when you apply for jobs in tech.

{% embed url="<https://www.youtube.com/watch?v=EYqxQGmQkVw&ab_channel=Slack>" %}

## Self-learning approach

This program is based on autonomous learning. Autonomous learning revolves around students being responsible for themselves. As a student, you will be able to manage your study hours and customize your way of learning to adapt it to your own needs. But do not worry, you will not be alone in this. The mentor and a group of specialized tech volunteers will be by your side to provide support, advice, and knowledge when asked.&#x20;

***However, it is very important to be proactive: ask for help when you are stuck, inform your mentor when you have issues, and do not hesitate to use Slack to get help with the course.***

## **Main support**

#### Specialized volunteers

Migracode counts with a community of tech professional volunteers and students who will be willing to help you with any issue or any questions you have. You will be able to reach them at any time via Slack. Your mentor will explain Slack during the onboarding session,

#### Your personal mentor

The mentor - Simón -, will be the main contact person. He will help you to design your learning plan at the beginning, introduce you to the different platforms and guide you throughout the process. You will have a regular meeting with him - depending on your learning plan -, listen to your feedback and make sure everything is going as planned. The meetings will take place online or in-person at the office of OCC depending on your availability. You can contact him via email [simon@migracode.org](mailto:joana@migracode.org) or via Slack.&#x20;

<br>


# Course content

## Summary

* 116 hours in total
* 5 modules&#x20;
* 30 parts in total

[Link to Coursera course](https://www.coursera.org/professional-certificates/google-it-support)

*Please note that on Coursera, the 5 modules are called 'Courses', and the parts within the courses are called 'Modules'.*&#x20;

![](https://4042228299-files.gitbook.io/~/files/v0/b/gitbook-legacy-files/o/assets%2F-MRebciU3NcuLgsX3ijf%2F-MX7mZYhBQPfFVEvG8nv%2F-MX7mwOImheUGmObce1u%2Fimage.png?alt=media\&token=16964280-37a9-470b-baeb-3214d67f5065)

## Overview

### Module 1: Technical Support Fundamentals

*25 hours in total*

* Part 1: Introduction to IT\
  4 hours: 14 videos (Total 51 min), 6 readings, 3 quizzes
* Part 2: Hardware\
  5 hours: 17 videos (Total 80 min), 7 readings, 4 quizzes
* Part 3: Operating System\
  6 hours: 21 videos (Total 69 min), 6 readings, 5 quizzes
* Part 4: Networking\
  3 hours: 15 videos (Total 44 min), 1 reading, 2 quizzes
* Part 5: Software\
  4 hours: 10 videos (Total 25 min), 1 reading, 4 quizzes
* Part 6: Troubleshooting\
  3 hours: 22 videos (Total 69 min), 2 readings, 4 quizzes

### Module 2: The Bits and Bytes of Computer Networking

*34 hours in total*

* Part 1: Introduction to Networking\
  6 hours: 15 videos (Total 47 min), 8 readings, 6 quizzes
* Part 2: The Network Layer\
  5 hours: 18 videos (Total 68 min), 3 readings, 5 quizzes
* Part 3: The Transport and Application Layers\
  5 hours: 11 videos (Total 45 min), 1 reading, 4 quizzes
* Part 4: Networking Services\
  6 hours: 15 videos (Total 70 min), 2 readings, 7 quizzes
* Part 5: Connecting to Internet \
  6 hours; 15 videos (Total 49 min), 5 readings, 6 quizzes
* Part 6: Troubleshooting and the Future of Networking\
  6 hours: 18 videos (Total 59 min), 3 readings, 6 quizzes

### Module 3: Operating Systems and You: Becoming a Power User&#x20;

*35 hours in total*

* Part 1: Navigating System\
  7 hours: 32 videos (Total 94 min), 10 readings, 5 quizzes
* Part 2: Users and Permissions\
  4 hours: 16 videos (Total 67 min), 4 readings, 3 quizzes
* Part 3: Package and Software Management\
  7 hours: 16 videos (Total 58 min), 14 readings, 6 quizzes
* Part 4: Filesystems\
  5 hours: 16 videos (Total 52 min), 9 readings, 3 quizzes
* Part 5: Process Management

  6 hours: 14 videos (Total 43 min), 8 readings, 5 quizzes
* Part 6: Operating Systems in Practice

  6 hours: 17 videos (Total 52 min), 6 readings, 4 quizzes

### Module 4: System Administration and IT Infrastructure Services&#x20;

*31 hours in total*

* Part 1: What is System Administration?\
  5 hours: 16 videos (Total 44 min), 6 readings, 5 quizzes
* Part 2: Network and Infrastructure Services\
  7 hours: 23 videos (Total 74 min), 6 readings, 10 quizzes
* Part 3: Software and Platform Services\
  7 hours: 16 videos (Total 45 min), 10 readings, 8 quizzes
* Part 4: Directory Services\
  7 hours: 19 videos (Total 100 min), 11 readings, 6 quizzes
* Part 5: Data Recovery & Backups

  4 hours: 13 videos (Total 43 min), 3 readings, 4 quizzes&#x20;
* Part 6: Final Project

  14 min: 3 videos (Total 4 min)

### Module 5: IT Security: Defense against the digital dark arts&#x20;

*29 hours in total*

* Part 1: Understanding Security Threats\
  5 hours: 10 videos (Total 36 min), 7 readings, 4 quizzes
* Part 2: Pelcgbybtl (Cryptology)\
  7 hours: 14 videos (Total 83 min), 9 readings, 7 quizzes
* Part 3: AAA Security (Not Roadside Assistance)\
  3 hours: 14 videos (Total 55 min), 2 readings, 3 quizzes
* Part 4: Securing Your Networks\
  5 hours: 11 videos (Total 70 min), 7 readings, 5 quizzes
* Part 5: Defense in Depth\
  3 hours: 9 videos (Total 44 min), 3 readings, 3 quizzes
* Part 6: Creating a Company Culture for Security\
  6 hours: 16 videos (Total 59 min), 9 readings, 6 quizzes


# Planning & Schedule

**As mentioned before, the IT Support & Security Course is a flexible scholarship program that allows students to organize their study time according to their schedule and needs. To help students reach their goals and complete the 5 courses successfully in a concrete period of time, the mentor will help each student to develop a personalized learning plan.**

The average time to complete the course is 3,5 months. However, depending on your previous skills, time availability, life situation, etc. this time can be shorter or longer. As mentioned above, the study plan will be elaborated together with you and according to your needs at the beginning of the program so, you will be required to commit to it.

![](https://4042228299-files.gitbook.io/~/files/v0/b/gitbook-legacy-files/o/assets%2F-MRebciU3NcuLgsX3ijf%2F-MX7mZYhBQPfFVEvG8nv%2F-MX7n83GaMuMerZS7VVT%2Fimage.png?alt=media\&token=15c41b4e-c1a8-4a7c-931c-0fd4ebebe6ea)


# Application process

Applications for this scholarship will be open throughout 2023 and accepted students will be able to start the course right away. Make sure to read the details below before applying.

## **The Requirements**

![](https://4042228299-files.gitbook.io/~/files/v0/b/gitbook-x-prod.appspot.com/o/spaces%2F-MRebciU3NcuLgsX3ijf%2Fuploads%2FSbbwhDcAEFx8mcYYfDUo%2FCaptura%20de%20pantalla%202022-03-16%20a%20les%2012.58.30.png?alt=media\&token=4acc41f8-d738-4697-ba36-c0a8e2903a1a)

## **The Application process**

### **Step 1 - Apply online**

Apply through our [website.](https://migracode.openculturalcenter.org/it-support-security-course/) In the form, **you will be asked to fill in some personal data and to write a short motivation why you want to join this course.**

This part is already extremely important! **Motivation is the strongest aspect of our course**, as you will need to work a lot to complete our program. After sending the form, we will reply to you as soon as possible to inform you if you can continue with step 2.

### **Step 2 - Home assignment**&#x20;

Step 2 is the most difficult step and you will need to take your time for it. **It requires making a small home assignment.**

The assignment consists of the following:

* You will receive a simulated question from a customer about a technical issue.
* Your task is to answer the customer in the best way possible!
* After you wrote your answer to this customer, you send it to us by email.

You can find the assignment [here. ](/courses/untitled/application-process/home-assignment)

### **Step 3 - Interview**&#x20;

Once we have received your work, we will let you know **if you have passed the assignment** and if so, we will invite you to an **online interview.**&#x20;

After a few days, we will inform you about the result of the interview.&#x20;

### **Step 4 - Onboarding session**&#x20;

The final part of the application process is **to come to our office in Barcelona** to get to know us in person and to receive **a comprehensive introduction** to MigraCode Barcelona.

You will get help installing the required software on your laptop, we will explain to you the main tools that we use during the course and we explain **other practical information about MigraCode.**

Once this is done, **you are ready to start with the course right away!**


# Home assignment

This is the next step of the application process, a technical assignment. It is a simulation of a technical support case as if you are working in the Google technical support department.

### **Situation**

You have received a new technical case from a customer of Google Gmail. The customer is asking the following:

![](https://4042228299-files.gitbook.io/~/files/v0/b/gitbook-x-prod.appspot.com/o/spaces%2F-MRebciU3NcuLgsX3ijf%2Fuploads%2FRKIUWXjzwz0uDnx9gQDn%2Fjjj.jpg?alt=media\&token=fd4d07e9-6ef9-4dbe-93ca-e81c84e03c33)

### **Assignment**

Reply to this customer like you are writing a real email back as if you already were working in Google Technical Support. Include the explanation of how to set a signature in Google Gmail, and if you can, include a link to a webpage with more information. Make sure to use a good email structure and be polite and clear to the customer. Make use of Google Search to find the required information.

Once you have written this email, you can send it in a reply to **<simon@migracode.org>**

### **Resolution**

We will let you know as soon as possible if you have passed this step and if you will be accepted to our course.&#x20;

Thank you in advance and let us know if you have any questions.


# IT Automation with Python Course

## Learn to code confidently. Take your next career steps in IT through MigraCode, Google.org & INCO Academy

**Learn in-demand skills like Python, Git, and IT automation to advance your career.**

This 6-course certificate scholarship program designed by Google and delivered on Coursera, is designed to help individuals with a background in IT Support advance to technical paths like Systems Administrators. This stackable credential helps IT professionals build in-demand skills including Python, Git, and IT automation.

## What are the outcomes

**By earning these IT Skills, you prepare yourself for roles that include — IT Support II, Jr Systems Analyst, Jr Systems Administrator, Network Specialist, and many more. More specifically, you will learn the following skills:**

* Learn how to program with Python with no previous knowledge of coding required and you’ll use Python to automate common system administration tasks&#x20;
* Learn to use Git and GitHub, to troubleshoot and debug complex problems &#x20;
* Apply automation at scale by using configuration management and the Cloud&#x20;
* Practice your technical skills with hands-on projects including a capstone project where you’ll use your new knowledge to solve a real-world IT problem

**MigraCode's IT Automation with Python course is made possible by INCO Academy.**

![](https://4042228299-files.gitbook.io/~/files/v0/b/gitbook-legacy-files/o/assets%2F-MRebciU3NcuLgsX3ijf%2F-MX7l2PfcippM8MDTobG%2F-MX7lK2DhV6O2Zt0IQiP%2Fimage.png?alt=media\&token=9aad0233-7f42-4f1f-9849-c28e18b0328e)

## &#x20;Background information about INCO Academy

{% embed url="<https://www.youtube.com/watch?v=ZSXFcHAU9gU&ab_channel=Google.org>" %}


# Structure

## Structure of the program

This program counts with 6 courses that will improve your IT foundations to help you take your career to the next level. The content is highly interactive and exclusively developed by Google employees with decades of experience in IT. Each course is divided into modules dedicated to concrete subjects. Through a mix of videos, assessments, and hands-on labs, you’ll be introduced to foundational IT skills required for an entry-level job.

![](https://4042228299-files.gitbook.io/~/files/v0/b/gitbook-legacy-files/o/assets%2F-MRebciU3NcuLgsX3ijf%2F-MX7mZYhBQPfFVEvG8nv%2F-MX7mnDEI7UcJgAFLndW%2Fimage.png?alt=media\&token=98de1f3d-c641-4f74-b240-22f1202dfe87)

## 100% online

The course itself is 100% online which means you will need a computer. It can be a basic computer - it doesn’t have to be an expensive/strong one. We encourage you to work from home on your own computer, but if you are not (always) able to do so, you can discuss the possibility to either lend a laptop (if we have availability) or to work from the Open Cultural Center (OCC) office (C/Rec, 27 08003 Barcelona).

## Platforms & Tools

### Coursera

The courses are delivered by Coursera, an online learning platform that will provide you with all the content of the program.

{% embed url="<https://www.youtube.com/watch?v=Pf03RTjeISE&ab_channel=Coursera>" %}

### Slack

The channel-based messaging platform that we use as our main communication tool. Many tech companies also use Slack and it is a huge advantage to have Slack skills when you apply for jobs in tech.

{% embed url="<https://www.youtube.com/watch?v=EYqxQGmQkVw&ab_channel=Slack>" %}

## Self-learning approach

This program is based on autonomous learning. Autonomous learning revolves around students being responsible for themselves. As a student, you will be able to manage your study hours and customize your way of learning to adapt it to your own needs. But do not worry, you will not be alone in this. The mentor and a group of specialized tech volunteers will be by your side to provide support, advice, and knowledge when asked.&#x20;

***However, it is very important to be proactive: ask for help when you are stuck, inform your mentor when you have issues, and do not hesitate to use Slack to get help with the course.***

## **Main support**

#### Specialized volunteers

Migracode counts with a community of tech professional volunteers and students who will be willing to help you with any issue or any questions you have. You will be able to reach them at any time via Slack. Your mentor will explain Slack during the onboarding session,

#### Your personal mentor

The mentor - Simón -, will be the main contact person. He will help you to design your learning plan at the beginning, introduce you to the different platforms and guide you throughout the process. You will have a regular meeting with him - depending on your learning plan -, listen to your feedback and make sure everything is going as planned. The meetings will take place online or in-person at the office of OCC depending on your availability. You can contact him via email [simon@migracode.org](mailto:joana@migracode.org) or via Slack.&#x20;

<br>


# Course content

## Summary

* 117 hours in total
* 6 modules&#x20;
* 30 parts in total

[Link to Coursera course](https://www.coursera.org/professional-certificates/google-it-automation#enroll)

*Please note that on Coursera, the 6 modules are called 'Courses', and the parts within the courses are called 'Modules'.*&#x20;

![](https://4042228299-files.gitbook.io/~/files/v0/b/gitbook-legacy-files/o/assets%2F-MRebciU3NcuLgsX3ijf%2F-MX7mZYhBQPfFVEvG8nv%2F-MX7mwOImheUGmObce1u%2Fimage.png?alt=media\&token=16964280-37a9-470b-baeb-3214d67f5065)

## Overview

### Module 1: Crash Course on Python

*27 hours in total*

* Part 1: Hello Python!\
  4 hours: 14 videos (Total 44 min), 9 readings, 4 quizzes
* Part 2: Basic Python Syntax\
  5 hours: 14 videos (Total 45 min), 14 readings, 4 quizzes
* Part 3: Loops \
  4 hours: 13 videos (Total 47 min), 9 readings, 4 quizzes
* Part 4: Strings, Lists and Dictionaries\
  6 hours: 16 videos (Total 67 min), 17 readings, 4 quizzes
* Part 5: Object Oriented Programming (Optional)\
  6 hours: 13 videos (Total 50 min), 12 readings, 1 quiz
* Part 6: Final Project\
  2 hours: 9 videos (Total 27 min)

### Module 2: Using Python to Interact with the Operating System

*26 hours in total*

* Part 1: Getting Your Python On\
  3 hours: 15 videos (Total 76 min), 4 readings, 3 quizzes
* Part 2: Managing Files with Python\
  5 hours: 13 videos (Total 52 min), 4 readings, 3 quizzes
* Part 3: Regular Expressions\
  4 hours: 14 videos (Total 60 min), 2 readings, 4 quizzes
* Part 4: Managing Data and Processes\
  3 hours: 12 videos (Total 48 min), 2 readings, 4 quizzes
* Part 5: Testing in Python\
  6 hours; 14 videos (Total 50 min), 4 readings, 3 quizzes
* Part 6: Bash Scripting\
  4 hours: 13 videos (Total 62 min), 3 readings, 4 quizzes
* Part 7: Final Project\
  2 hours: 6 videos (Total 13 min)

### Module 3: Introduction to Git and GitHub&#x20;

*16 hours in total*

* Part 1: Introduction to Version Control\
  5 hours: 16 videos (Total 74 min), 6 readings, 4 quizzes
* Part 2: Using Git Locally\
  4 hours: 14 videos (Total 60 min), 3 readings, 4 quizzes
* Part 3: Working with Remotes\
  4 hours: 13 videos (Total 61 min), 3 readings, 4 quizzes
* Part 4: Collaboration\
  4 hours: 14 videos (Total 61 min), 3 readings, 4 quizzes

### Module 4: Troubleshooting and Debugging Techniques&#x20;

*16 hours in total*

* Part 1: Troubleshooting Concepts\
  4 hours: 14 videos (Total 71 min), 3 readings, 4 quizzes
* Part 2: Slowness\
  4 hours: 15 videos (Total 77 min), 3 readings, 4 quizzes
* Part 3: Crashing Programs\
  4 hours: 14 videos (Total 78 min), 2 readings, 4 quizzes
* Part 4: Managing Resources\
  4 hours: 16 videos (Total 74 min), 3 readings, 4 quizzes

### Module 5: Configuration Management and the Cloud&#x20;

*15 hours in total*

* Part 1: Automating with Configuration Management\
  4 hours: 11 videos (Total 45 min), 4 readings, 4 quizzes
* Part 2: Deploying Puppet\
  3 hours: 10 videos (Total 44 min), 3 readings, 4 quizzes
* Part 3: Automation in the Cloud\
  4 hours: 13 videos (Total 66 min), 2 readings, 4 quizzes
* Part 4: Managing Cloud Instances at Scale\
  4 hours: 14 videos (Total 67 min), 3 readings, 4 quizzes

### Module 6: Automating Real-World Tasks with Python&#x20;

*17 hours in total*

* Part 1: Manipulating Images\
  3 hours: 8 readings
* Part 2: Interacting with Web Services\
  3 hours: 10 readings
* Part 3: Automatic Output Generation\
  3 hours: 8 readings
* Part 4: Putting It All Together\
  3 hours: 1 video (Total 1 min), 3 readings, 1 quiz
* Part 5: Career Resources\
  5 hours: 27 readings


# Planning & Schedule

**As mentioned before, the IT Automation with Python Course is a flexible scholarship program that allows students to organize their study time according to their schedule and needs. To help students reach their goals and complete the 6 courses successfully in a concrete period of time, the mentor will help each student to develop a personalized learning plan.**

The average time to complete the course is 3,5 months. However, depending on your previous skills, time availability, life situation, etc. this time can be shorter or longer. As mentioned above, the study plan will be elaborated together with you and according to your needs at the beginning of the program so, you will be required to commit to it.

![](https://4042228299-files.gitbook.io/~/files/v0/b/gitbook-legacy-files/o/assets%2F-MRebciU3NcuLgsX3ijf%2F-MX7mZYhBQPfFVEvG8nv%2F-MX7n83GaMuMerZS7VVT%2Fimage.png?alt=media\&token=15c41b4e-c1a8-4a7c-931c-0fd4ebebe6ea)


# Application process

Applications for this scholarship will be open throughout 2023 and accepted students will be able to start the course right away. Make sure to read the details below before applying.

## **The Requirements**

![](https://4042228299-files.gitbook.io/~/files/v0/b/gitbook-x-prod.appspot.com/o/spaces%2F-MRebciU3NcuLgsX3ijf%2Fuploads%2FSbbwhDcAEFx8mcYYfDUo%2FCaptura%20de%20pantalla%202022-03-16%20a%20les%2012.58.30.png?alt=media\&token=4acc41f8-d738-4697-ba36-c0a8e2903a1a)

## **The Application process**

### **Step 1 - Apply online**

Apply through our [website.](https://migracode.openculturalcenter.org/it-support-security-course/) In the form, **you will be asked to fill in some personal data and to write a short motivation why you want to join this course.**

This part is already extremely important! **Motivation is the strongest aspect of our course**, as you will need to work a lot to complete our program. After sending the form, we will reply to you as soon as possible to inform you if you can continue with step 2.

### **Step 2 - Home assignment**&#x20;

Step 2 is the most difficult step and you will need to take your time for it. **It requires making a small home assignment.**

The assignment consists of the following:

* You will have to follow a short online material about functions in Python
* You will develop a simple function&#x20;
* After you wrote that function, you will send it to us by email

You can find the assignment [here](/courses/untitled-1/application-process/home-assignment).&#x20;

### **Step 3 - Interview**&#x20;

Once we have received your work, we will let you know **if you have passed the assignment** and if so, we will invite you to an **online interview.**&#x20;

After a few days, we will inform you about the result of the interview.&#x20;

### **Step 4 - Onboarding session**&#x20;

The final part of the application process is **to come to our office in Barcelona** to get to know us in person and to receive **a comprehensive introduction** to MigraCode Barcelona.

You will get help installing the required software on your laptop, we will explain to you the main tools that we use during the course and we explain **other practical information about MigraCode.**

Once this is done, **you are ready to start with the course right away!**


# Home assignment

This is the next step of the application process, a technical assignment. It is a simple function that would ask for a name, and print out a message.

### **Situation**

You will be asked to develop a python function that will return a message. As example you have the function below:

<figure><img src="https://4042228299-files.gitbook.io/~/files/v0/b/gitbook-x-prod.appspot.com/o/spaces%2F-MRebciU3NcuLgsX3ijf%2Fuploads%2FKStJHvL31VqLfc5KJSuV%2FCaptura%20de%20Pantalla%202023-02-14%20a%20las%2015.47.10.png?alt=media&amp;token=3d892afa-e1eb-4976-9d8e-d1ef4edb5f33" alt=""><figcaption><p>Image taken from <a href="https://www.w3schools.com/python/python_functions.asp">https://www.w3schools.com/python/python_functions.asp</a></p></figcaption></figure>

### **Assignment**

You will be advised to follow the material included in [W3Schools](https://www.w3schools.com/python/python_functions.asp) and [DataCamp](https://www.datacamp.com/tutorial/functions-python-tutorial); proceed to create an account in [Repl.it](https://replit.com/~); write the function, which should either prompt the user for a name or take it as parameter, then print out a personalised "Hello" response, like "Hello Jose". Otherwise, the function will print out "Hello World"

Once you have written and downloaded the python function file, you can send it in a reply to **<simon@migracode.org>.**

### **Resolution**

We will let you know as soon as possible if you have passed this step and if you will be accepted to our course.&#x20;

Thank you in advance and let us know if you have any questions.


# Web Development Course

This is the complete syllabus and course material for the web development course of [MigraCode Barcelona](https://migracode.openculturalcenter.org/). It is based on the syllabus from [CodeYourFuture](https://codeyourfuture.io/), [HackYourFuture](https://github.com/HackYourFuture/curriculum) and other resources. This syllabus does not only include the coding course, but also all other information for students.&#x20;

During the course you will learn a technology stack that helps you build anything from a simple website to a powerful database-driven web application or even a mobile app!

If you are familiar with MigraCode yet and you're interested in joining the program, please [refer to the main MigraCode Barcelona website](https://migracode.openculturalcenter.org/).

<div align="left"><img src="https://4042228299-files.gitbook.io/~/files/v0/b/gitbook-legacy-files/o/assets%2F-MRebciU3NcuLgsX3ijf%2F-MhrXRUnDwhInm8Rdh9g%2F-MhrXvn2Nq1bt8JWvSjL%2FCopy%20of%20Copy%20of%20MigraCode's%20Student%20Path%20(1).png?alt=media&amp;token=2f2d866a-0063-4767-9761-fd73bd6aa9e7" alt=""></div>

## Overall Course Content

* HTML/CSS
* Core JavaScript
* Backend development using [NodeJS](https://nodejs.org/)
* Modern front-end development with [React](https://facebook.github.io/react/)
* Databases

We’ll complement the training with workshops on modern software methodologies and job interview practices, etc. A simplified overview of our curriculum can be found [here](https://migracode.openculturalcenter.org/web-development-course/), including other details of our course.

## Our program in one video

{% embed url="<https://www.youtube.com/watch?v=EqEEx7ZbaFs&ab_channel=MigraCodeBarcelona>" %}

## Our learning objectives in detail

**Technical skills:**

* Lean to understand and use the following coding languages on a medium to advanced level: HTML/CSS, JavaScript, React, NodeJS and Databases
* Learn how to use Git and the Command Line, and also how to use the related GitHub platform
* Learn how to use project management tools such as Trello, Slack and Cloud Services
* Learn how to think in algorithms and how to search for solutions

**Job-seeking skills:**

* Learn how to use LinkedIn and how to benefit most from this platform
* Learn how to prepare and go through an interview process to get hired by a professional IT company
* Learn how to create and design a professional CV/Resume

**General soft skills:**

* Learn how to work in a team under supervision of a mentor
* Learn how to communicate effectively through professional communication training
* Learn how to work with people from different cultures and nationalities
* Learn how to cope with work-related stress and how to plan ahead
* Learn how to be proactive in asking things and approaching people

![](https://4042228299-files.gitbook.io/~/files/v0/b/gitbook-legacy-files/o/assets%2F-MRebciU3NcuLgsX3ijf%2F-MSX6EAIK-3x8CPRlFn1%2F-MSX6xKup0lBfpm0BGEj%2FDSC_0735migracode-bcn.jpg?alt=media\&token=bce69d22-1516-4059-9586-f3178a3ce678)


# Pre-Courses

Once you are accepted at MigraCode, we recommend you to have a look at the following courses to be fully prepared to start with MigraCode:

&#x20;**​Recommended:**

* &#x20;[Get an introduction to what web development is](https://www.w3schools.com/whatis/default.asp) (a complete overview)
* &#x20;[Find out about Git, GitHub and the Terminal](https://lab.github.com/githubtraining/introduction-to-github) (strongly recommended)
* &#x20;[Find another intro into HTML](https://www.w3schools.com/html/default.asp) (learning how to code is repeating)
* &#x20;[Do a specific course into CSS](https://www.w3schools.com/css/default.asp) (dive deeper into CSS)

&#x20;**Additional:**

* &#x20;[Take a first look at JavaScript](https://www.w3schools.com/js/default.asp) (just to have an idea)
* &#x20;[Discover people already working in tech](https://www.khanacademy.org/computing/computer-programming/meet-the-computing-professional-unit) (your potential future)
* &#x20;[Do a full programming introduction course](https://www.freecodecamp.org/learn/) (only if you really have time)

![](https://4042228299-files.gitbook.io/~/files/v0/b/gitbook-legacy-files/o/assets%2F-MRebciU3NcuLgsX3ijf%2F-MSZNg54Kmi1GgJ7r88t%2F-MSZNzngcKwaRDEnlWoo%2Fimage.png?alt=media\&token=bdc7be70-e4d8-4601-80ce-ea9ed873a16f)


# Main Tools & Software

## GitHub

[**https://www.github.com**](https://www.github.com)&#x20;

* Where our curriculum can be found
* To manage and save your homework

{% embed url="<https://www.youtube.com/watch?v=w3jLJU7DT5E&ab_channel=GitHub>" %}

## LinkedIn

[**https://www.linkedin.com**](https://www.linkedin.com)&#x20;

* To build your professional network
* To find your potential future job

{% embed url="<https://www.youtube.com/watch?v=ZVlUwwgOfKw&ab_channel=LinkedIn>" %}

## Slack

[**https://migracodebarcelona.slack.com/**](https://migracodebarcelona.slack.com/)&#x20;

* To communicate with all from MigraCode
* Request help or a one-two-one session

{% embed url="<https://www.youtube.com/watch?v=m2JuAa6-ors&ab_channel=Slack>" %}

## Meetup

[**https://www.meetup.com**](https://www.meetup.com/migracode-barcelona/)&#x20;

* To find interesting (job-finding) events
* To stay up-to-date with our events

{% embed url="<https://www.youtube.com/watch?v=d50cFJp27XQ&ab_channel=Meetup>" %}

## Trello

[**https://www.trello.com**](https://www.trello.com) **(to join** [**click here**](https://trello.com/invite/migracodebarcelona/fa78073e193607429c2dbacd77cc356f)**)**

* View useful info about MigraCode
* Learn to use a project management tool

{% embed url="<https://www.youtube.com/watch?v=tVooja0Ta5I&ab_channel=Trello>" %}

## Visual Studio Code

[**https://code.visualstudio.com/**](https://code.visualstudio.com/)

* To easily work with different coding languages
* To manage coding projects and collaborate with others

{% embed url="<https://www.youtube.com/watch?v=S320N3sxinE&ab_channel=VisualStudioCode>" %}


# Slack Information

**Slack is our main communication tool. Any help you need or any questions you have: communicate them via Slack! Many tech companies also use Slack and it’s a huge advantage to have Slack skills when you apply for jobs in tech.**&#x20;

## **An introduction video**

{% embed url="<https://www.youtube.com/watch?v=m2JuAa6-ors&ab_channel=Slack>" %}

## Main Channels in the MigraCode Slack

* **Class channel (i.e. #jan2021-1-en)**\
  The one we use to share information for your group and that we use during the classes
* **#all-students**\
  Useful news messages specifically for MigraCode students
* **#general**\
  General news messages for everyone that is part of MigraCode (students, volunteers, staff)
* **#support-coding**\
  To ask for technical help with your homework
* **#support-employability**\
  To ask for help with improving your CV/LinkedIn/Etc.
* **#random**\
  Jokes, memes and nice articles or videos!
* **#recreation-activities**\
  Not used now due to Covid, but soon to be used to organise nice activities together
* **#job-offers-junior**\
  Not to be used in the beginning of MigraCode but after a few months we'll use it to find job opportunities

## How to ask for help in #support-coding

#### **How to ask for help**

When you ask something here, always make sure that you:

* Describe what you are trying to do/achieve, and in which exercise/project
* Include details about what you have tried already
* Write your question in a clear and understandable way (preferably in English, but in Spanish is also allowed)
* Include the relevant parts of the code where you are getting the error/issue and **always include any error codes** you have received
* Use code snippets **(ctrl / cmd + shift + c)** to share your code to make it readable for humans
* Use **(shift + enter)** to pass to the next line

#### **Question templates**

In case you receive errors or things that go wrong during exercises, so short questions that can probably be solved in a chat, you can write your question as follows:

* *Hello + I need help with \[issue description] + screenshot/error message/etc. + what you have already tried to do + potential solutions you already found.*

If you feel lost, if you missed things or if you need some extra support in understand the materials, you can write your question as follows:

* *Hello + I need help with \[issue description] + proposal for time period you could have a call.*

#### **Useful links to search information before posting in this channel**

* <https://stackoverflow.com/>
* [https://www.freecodecamp.org](https://www.freecodecamp.org/)
* <https://developer.mozilla.org/en-US/docs/Web>

Please don’t hesitate to make use of asking questions here! You can also have a look at previous questions of other students to see what are good approaches to asking for help.

## Useful Slack tips

* Use THREADS (Hilos) to reply to messages, and find replies to your active threads on the top right (a nice video with more details [here](https://www.youtube.com/watch?v=JsX8V4hzENo\&ab_channel=Slack))
* Put a clear display name and a clear profile picture (info on how to edit your profile [here](https://slack.com/intl/es-es/help/articles/204092246-Editar-tu-perfil#:~:text=From%20your%20desktop%2C%20click%20your,profile%2C%20then%20click%20Save%20Changes.))
* Confirm messages by leaving an Emoji (how to do so check [here](https://slack.com/intl/es-es/help/articles/202931348-C%C3%B3mo-utilizar-emojis-y-emoticonos))
* I will save important messages by adding them to 'Pinned Items' (more info how to find them [here](https://slack.com/intl/es-es/help/articles/205239997-C%C3%B3mo-fijar-mensajes))
* Create a private/direct message with the round button on the top left of the screen (more info [here](https://slack.com/intl/es-es/help/articles/212281468-%C2%BFQu%C3%A9-es-un-mensaje-directo))
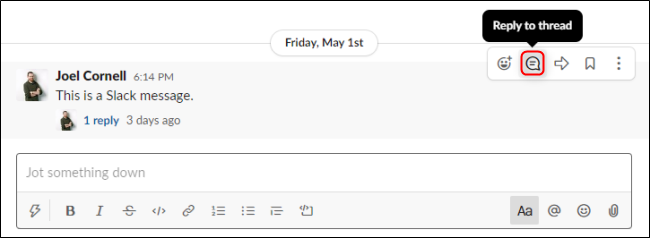
![](https://lh5.googleusercontent.com/zjYF7oTqjum8bo3vl9_RD60ZGZCD6inAy8dcKVjMOCWDpT-OzEm7HJX0NCTxnlmJplqpPQPks8_JT-7Z8kzR9JxRv7JyZRouft5VGoqDfRhUCDosMKM6Vl3dfkqzdMI0oqGcojLt)


# Grading System

## Introduction

At MigraCode, we believe in the power of learning by doing. Because of that, we don't give students tests - we rather let each student do small projects during the course and work on an extensive curriculum with many exercises to improve their knowledge and skills. And, most importantly: at the end of the course, students work together in groups on a larger final project.

## Tracking student progress

Still, of course, we need to also keep track of student's progress and see if they are gaining all the knowledge required to become junior web developers. Therefore, we have developed a grading system that is based on three aspects:

1. Class participation and being on time
2. Homework progress for the front-end modules
3. Homework progress for the back-end modules
4. Final Project efforts and output

Each aspect is graded on a 1-10 scale based on what students upload on GitHub and how to progress during and in-between classes. Each student will receive a Google Sheet in which they can see their own progress, like the one below:

![](https://4042228299-files.gitbook.io/~/files/v0/b/gitbook-legacy-files/o/assets%2F-MRebciU3NcuLgsX3ijf%2F-MSmSkyAeHWpavPSzq77%2F-MSmbGtHK7GGba1Gng_N%2Fimage.png?alt=media\&token=291e68d6-4f34-4991-b9a4-c31ed01f44ab)

## Minimum progress requirements

We constantly check your homework and give you feedback on it. However, during the 8-month course, there are 3 main checks where you MUST have finished all homework and required tasks. If you haven't it means you either need to quickly recover, or drop out and wait for the next course. Below the three main checks during the MigraCode course:

### Check 1: Between the front-end and back-end modules

After you finish the HTML/CSS, JavaScript and React module, we will do the first full check on your progress. If you are not fully up-to-date, you get a chance to recover before the back-end modules starts. However, if you are not able to, you will not be able to continue the course and you will have the opportunity to join a next course.

### Check 2: Between the back-end modules and the final projects

After finishing all modules, we will do the second check on your progress. If you are not fully up-to-date, you'll also get a chance to recover the missing parts. However, if you can't, you will not be able to enter the final projects. You will then be offered to join the final projects of a next course.

### Check 3: At the end of the course, after the final projects

Before graduation, we will check how you have performed in the final projects and if you have done all the tasks assigned to you on Trello. If you have not completed them, you will get a chance to recover.  However, if you haven't performed sufficiently, you will need to re-do the final projects with another group in another course.

![](https://4042228299-files.gitbook.io/~/files/v0/b/gitbook-legacy-files/o/assets%2F-MRebciU3NcuLgsX3ijf%2F-MSmSkyAeHWpavPSzq77%2F-MSmalZGZbP7ErH8kXqx%2Fimage.png?alt=media\&token=802acac5-494b-4268-b66b-5ccf92490dd3)


# Homework

You are requested to check your homework on the [Trello Board](https://trello.com/b/wl6LgDXD/homework-overview) after every class. There you will find a column with your **class group** name and at top of that list you will find the **latest homework** with a **due date** as shown in the image below.

![](https://4042228299-files.gitbook.io/~/files/v0/b/gitbook-legacy-files/o/assets%2F-MRebciU3NcuLgsX3ijf%2F-MaNlR9-ysVj8ZFDai9O%2F-MaNoCV5gCkvzBPZ2iOS%2Fimage.png?alt=media\&token=db02a885-0900-4800-ba35-6dc334361641)


# Course content

**The MigraCode Barcelona curriculum - a direct output of the European collaboration between various NGOs spread over the European Union - contains all the information and knowledge a MigraCode student needs to become a junior web developer.**

Find the full curriculum of MigraCode Barcelona through the links below:

{% content-ref url="/pages/-MSXEC0pesR1SoB8bZeo" %}
[Introduction](/courses/introduction-3/course-content/introduction-2)
{% endcontent-ref %}

{% content-ref url="/pages/-MSXEE63JMwaJeip3hPh" %}
[HTML/CSS](/courses/introduction-3/course-content/html-css)
{% endcontent-ref %}

{% content-ref url="/pages/-MSXEGAZddbU2uQ9jwNE" %}
[JavaScript I](/courses/introduction-3/course-content/javascript-i)
{% endcontent-ref %}

{% content-ref url="/pages/-MSXEJ63BOPXkuy9E4RK" %}
[JavaScript II](/courses/introduction-3/course-content/javascript-ii)
{% endcontent-ref %}

{% content-ref url="/pages/-MSXELBw6idsUc8q8vPM" %}
[JavaScript III](/courses/introduction-3/course-content/javascript-iii)
{% endcontent-ref %}

{% content-ref url="/pages/-MSXEN8BD9OtsiaIjtmW" %}
[React](/courses/introduction-3/course-content/react)
{% endcontent-ref %}

{% content-ref url="/pages/-MSXEPaBPsy4MmrWcMol" %}
[Node.js](/courses/introduction-3/course-content/nodejs)
{% endcontent-ref %}

{% content-ref url="/pages/-MVqQRCbyh21DEHnEEZX" %}
[Databases](/courses/introduction-3/course-content/databases)
{% endcontent-ref %}

{% content-ref url="/pages/-MSX1cSNPSDOCCzGu1Or" %}
[Final Projects](/courses/introduction-3/course-content/introduction-1)
{% endcontent-ref %}

![](https://4042228299-files.gitbook.io/~/files/v0/b/gitbook-legacy-files/o/assets%2F-MRebciU3NcuLgsX3ijf%2F-MYfU7m3IQlfDZdB3LSJ%2F-MYfUAtjKzooL1GWwU0W%2Fimage.png?alt=media\&token=87a24d9a-9adc-48cc-aaa9-c2fdc2841bb6)


# Introduction

**In the first week, you will get an introduction to the world of coding, including explanations how to use the terminal, what GitHub is and why you will use it and how to ‘push’ the website you made during the application process.**

Below an overview of the week-by-week topics - click on the title to find more details.

{% content-ref url="/pages/-MS-2\_mIrPtKoKM34QSL" %}
[1 - Dev Tools and command line](/courses/introduction-3/course-content/introduction-2/dev_tools)
{% endcontent-ref %}

{% content-ref url="/pages/-MS-3ZUkjhgpclYdGKB3" %}
[2 - Git and Github](/courses/introduction-3/course-content/introduction-2/2-git-and-github)
{% endcontent-ref %}

![](https://4042228299-files.gitbook.io/~/files/v0/b/gitbook-legacy-files/o/assets%2F-MRebciU3NcuLgsX3ijf%2F-MSXGtKUhAK1wnjgonVJ%2F-MSXGxD06MxEjlWkcl3m%2FMigraCode_3%20\(1\)migracode-bcn.jpg?alt=media\&token=710c808a-262a-4ee1-8881-379963418a2a)


# 1 - Dev Tools and command line

## Table of Content

1. [Operating systems](/courses/introduction-3/course-content/introduction-2/dev_tools#operating-systems)
2. [The Command Line](/courses/introduction-3/course-content/introduction-2/dev_tools#the-command-line)
3. [Beginner Level Terminal](/courses/introduction-3/course-content/introduction-2/dev_tools#beginner-level)&#x20;
   1. [Navigating in Terminal](/courses/introduction-3/course-content/introduction-2/dev_tools#navigating-in-terminal)
   2. [Working with Files and Folders](/courses/introduction-3/course-content/introduction-2/dev_tools#working-with-files-and-folders)
   3. [Listing Files and Flags](/courses/introduction-3/course-content/introduction-2/dev_tools#listing-files-and-flags)
4. [Terminal Basics Exercises](/courses/introduction-3/course-content/introduction-2/dev_tools#terminal-basics-exercises)
5. [Intermediate Level Terminal](/courses/introduction-3/course-content/introduction-2/dev_tools#intermediate-level)
   1. [Permissions and Links](/courses/introduction-3/course-content/introduction-2/dev_tools#permissions-and-links)
   2. [Redirection](/courses/introduction-3/course-content/introduction-2/dev_tools#redirection)
   3. [Piping](/courses/introduction-3/course-content/introduction-2/dev_tools#piping)
6. [Permissions, Redirection, and Piping Exercises](/courses/introduction-3/course-content/introduction-2/dev_tools#permissions-redirection-and-piping-exercise)
7. [Development Tools](/courses/introduction-3/course-content/introduction-2/dev_tools#development-tools)
8. [Visual Studio Code Extensions](/courses/introduction-3/course-content/introduction-2/dev_tools#optional-visual-studio-code-extensions-for-web-development)
9. [More Resources](/courses/introduction-3/course-content/introduction-2/dev_tools#more-resources)
10. [Advanced Level - 1](/courses/introduction-3/course-content/introduction-2/dev_tools#advanced-level-1-optional) **{ OPTIONAL }**
11. [Advanced Level - 2](/courses/introduction-3/course-content/introduction-2/dev_tools#advanced-level-2-optional) **{ OPTIONAL }**

## Operating Systems

An Operating System (OS) is a powerful, and usually large, program that controls and manages the hardware and software on a computer. All computers and computer-like devices require operating systems, including laptops, tablets, desktops, and smartphones. The OS performs all the basic tasks like file management, memory management, process management, handling input and output, and controlling peripheral devices such as disk drives and printers.

The most common operating systems for desktop and laptop computers are:

* Microsoft Windows (Windows 95, Windows 7, Windows 10,...)
* Linux (Debian, Red Hat, Ubuntu,..)
* MacOS
* Chrome OS
* Android and iOS are operating systems for mobile devices.

#### Unix

Unix is ​​a family of operating systems. The first version was developed starting in 1969. Unix is ​​characterized by being portable and multitasking.

Unix operating systems are widely used in a multitude of devices that range from the most capable supercomputers to the mobile phones and computers that we use daily. The philosophy of Unix systems is characterized by:

* a hierarchical file system,
* a large collection of small programs that can work in series,
* the use of text files to store the data,
* treating devices as files.

Linux and MacOS are examples of Unix systems.

#### Linux

Linux is a family of Unix-like operating systems that use the Linux kernel. The name comes from the original programmer, a student named Linus Torvals, who in 1991, working with the GNU project of the Free Software Foundation, created the first version of this operating system.

Linux development is one of the clearest examples of free, open source software development by a diverse community of programmers all over the world. Anyone can use the operating system, study it and modify it. The open source nature of Linux is protected by the GPL (GNU General Public License).

#### Ubuntu

Ubuntu is a Linux distribution. It is an open-source operating system aimed at desktop users, and its strengths are that it is easy to use and install. Although the desktop is somewhat different from Windows or Mac OS, a user who is accustomed to any of these operating systems will not have many problems becoming familiar with Ubuntu. Ubuntu is a Linux distribution based on Debian and composed mostly of free and open-source software. Ubuntu is officially released in three editions: Desktop, Server, and Core for Internet of things devices and robots.

If you are using [Ubuntu](https://ubuntu.com/), you will see this sreen:

![](https://4042228299-files.gitbook.io/~/files/v0/b/gitbook-legacy-files/o/assets%2F-MRebciU3NcuLgsX3ijf%2F-M_ukmoKJqF2MCh7TjlF%2F-M_um1qA98FUDMSXjvt1%2Fimage.png?alt=media\&token=0eef12e7-318a-4f2e-ae3c-6d99dfd62cc2)

Demo of Ubuntu:

* The friendly Desktop
* The filesystem: navigate through folders and files using File Manager
* Ubuntu software: a tool to install software easily

## The Command Line

The **Command Line**, also knows as **Bash**, **Terminal** or **Shell** (**Línea de Comandos** ó **Símbolo de sistema** in Spanish) is a way of controlling a computer, based on a text interface.

![](https://4042228299-files.gitbook.io/~/files/v0/b/gitbook-legacy-files/o/assets%2F-MRebciU3NcuLgsX3ijf%2F-M_ukmoKJqF2MCh7TjlF%2F-M_uma95CMcv1wwJt-17%2Fimage.png?alt=media\&token=15dc8e36-8422-43c1-895f-cdcbc07cce38)

Why should I use the command line/terminal?

* Once you know the basics, it helps you to interact with you computer faster
* Some software for developers must always be used from a terminal
* You have more control over the software
* It allows you to create scripts (lists of commands) and automate manual tasks
* It is what hackers use in movies.

#### How do I use the terminal on my computer?

Here are the instructions for the three operating system:

* **MacOS:** You can find the Terminal.app in your Applications, in the folder Utilities. An alternative way to open the Terminal is to search with Spotlight and type in “terminal”. Select the application called terminal and press the return key. This should open up an app with a black background. When you see your username followed by a dollar sign, you’re ready to start using the command line.
* **Linux:** You can open the Terminal by directly pressing \[ctrl+alt+T] or you can search for it by clicking the dash (#) icon, typing in “terminal” in the search box, and opening the Terminal application. This should open up an app with a black background. When you see your username followed by a dollar sign, you’re ready to start using the command line.
* **Windows:** Windows has its own **Command Prompt**. It is very similar to the Unix command line, but some commands are not exactly the same. For the main differences go to this [link](https://enexdi.sciencesconf.org/data/pages/windows_vs_mac_commands_1.pdf). Because of these differences, and because we want to learn UNIX commands, we use the **Git Bash**. Go to the Windows "Start" button and search the program **Git Bash**. When you open it you will see a screen like this one:

![](https://4042228299-files.gitbook.io/~/files/v0/b/gitbook-legacy-files/o/assets%2F-MRebciU3NcuLgsX3ijf%2F-M_ukmoKJqF2MCh7TjlF%2F-M_un7q7kUArvFBFvl-N%2Fimage.png?alt=media\&token=715ce79a-a547-4ee2-bb68-79d360a2a821)

After you have followed the instructions, open a terminal and write `ls`, then press the `Enter` key. What do you see?

#### Commonly used commands

These are the most used commands that you will quickly become comfortable with during the course. These commands allow you to effectively move around the filesystem and write software on your laptop. There are more commands in the tables with more commands and descriptions below.

* `cd` - change directory. To move up one folder level and into the parent directory use: `cd ..`
* `ls` - list the contents of a directory. Can also be used as `ls [directory_name]` to list the contents of a specific directory without actually moving (with `cd`) to it
* `pwd` - print working directory: print the full location of the folder you are working in
* `mkdir [name]` - make directory: create a new directory, with the given `name` after a space
* `touch [file_name]` - create a new file, with the given name (don't forget to add the extension, like `.css` or `.html`)
* `rm [file_name]` - remove a file
* `rm -r [directory_name]` - remove a directory (**and all files inside that directory**)

**Getting Help**

When you're stuck and need help with a command, help is usually only a few keystrokes away. Help on most commands is built right into the commands themselves, available through online help programs (such as <https://linux.die.net/man>), and of course online.

**Using a command's built-in help**\
Many (but not all) commands have simple help screens that can be called with special command flags. These flags usually look like `-h` or `--help`. Example: `grep --help`.

**Online manuals: the man pages**\
The best source of information for most commands are the manual pages, also known as the man pages. To read a command's man page, type `man` plus a space and the command.

| Example   | Info                                   |
| --------- | -------------------------------------- |
| `man ls`  | Get help on the ls command             |
| `man man` | Get the manual for info on the manual! |

## Beginner Level

### { Navigating in Terminal. }

#### Objectives:

By the end of this chapter, you should be able to:

* Define what Terminal is and how it is structured
* Navigate through and list files on your machine
* Define the following terms: shell, terminal, directory, absolute path, relative path

| Linux/Mac          | Windows         | Description                                                                |
| ------------------ | --------------- | -------------------------------------------------------------------------- |
| `pwd`              | `cd`            | print working directory: shows current location                            |
| `cd`               | `cd`, `chdir`   | change directory; returns to the home directory                            |
| `cd directory`     | `cd directory`  | change into the specified directory                                        |
| `cd ~`             |                 | \~ means home directory; shortcut to the home directory                    |
| `cd ..`            | `cd ..`         | move up one directory                                                      |
| `cd -`             |                 | returns to the directory of your previous location                         |
| `ls`               | `dir /w`        | list all files in current directory                                        |
| `ls directory`     | `dir directory` | list all files in the specified directory                                  |
| `ls -l`            | `dir`           | list all files in long format: one file per line, with info about the file |
| `ls -a`            | `dir /a`        | list all files, including hidden files (= filenames that start with .)     |
| `ls -ld directory` |                 | show detailed information about the directory                              |
| `ls /usr/bin/d*`   | `dir d*.*`      | list all files starting with d in the `/usr/bin` directory                 |

#### What is Terminal?

Terminal is an application that gives us a command line interface (or CLI) to interact with the computer. Everything you can do in Finder/Windows Explorer you can do in Terminal. Developers use Terminal because it is usually much faster to use Terminal than a graphical user interface (GUI) such as Finder/Windows Explorer. Although the Terminal interface can seem daunting at first, with a bit of practice, you'll be up to speed in no time!

#### What is a shell? Bash/ZSH

You will also hear the term "shell" when learning about Terminal so it is important to distinguish between these terms. From [Stack Overflow](https://superuser.com/questions/144666/what-is-the-difference-between-shell-console-and-terminal):

> The **shell** is the program which actually processes commands and returns output. Most shells also manage foreground and background processes, command history and command line editing. These features (and many more) are standard in bash, the most common shell in modern linux systems. (We are using `zsh`).
>
> A **terminal** refers to a wrapper program which runs a shell. Decades ago, this was a physical device consisting of little more than a monitor and keyboard. As unix/linux systems added better multiprocessing and windowing systems, this terminal concept was abstracted into software.

If you are using Windows, there is a great tool called [Babun](https://babun.github.io/), which is a shell that you can install and use the same commands as if you were on Mac or Linux. This is not essential, but using it will enable you to more easily follow along with the material.

#### How Terminal is Structured

In Terminal, all files and folders begin at the root directory. The root directory is noted by a `/`. Inside the root directory are essential files/folders that your machine needs, but we do not modify the files and folders in the root directory often. Inside of the root directory, we have a folder called `Users` which contains all of the user accounts on your computer. If you move into the directory for your user account, you will be in the `home` directory, which is denoted by `~`. For example, if your user name on the computer is `eschoppik`, then your home directory would be `/Users/eschoppik`. A synonym for the `/Users/eschoppik` path is `~` when you are logged in as `eschoppik`.

#### Moving Around

The first thing you want to start to understand when using Terminal is how to navigate from folder to folder. One of the most common commands you will be using in Terminal is `cd` which is short for "change directory." In order to change a directory, type `cd` followed by the directory or a path to the directory. If we want to move up a directory we use `cd ..` and if we want to move into a directory we specify the name of the directory we are moving into. For example, if you are in your home directory and type `cd Desktop`, you should move into your Desktop directory.

We just mentioned that you can type `cd` followed by a directory or path. But what is a path? Let's learn some more vocabulary:

#### Absolute Paths vs Relative Paths

A path is simply the way to reach a file or folder; it's like an address for the file or folder you're trying to reach. When we specify a path starting from the root directory `/`, we call that an absolute path. For example, if I am currently in the `~` home directory and I would like to change directories into my Desktop folder, I can do that in two of the following ways:

1. `cd Desktop` - relative to where I am currently
2. `cd /Users/eschoppik/Desktop` - absolute, starting from the root (first `/`, then `Users`, then `eschoppik`, then `Desktop`)

**Questions to Answer**

* What is the difference between `/` and `~`? What do we call each of these directories?
* What command do we use to change directories?
* What is the difference between an absolute and relative path?

### { Working with Files and Folders. }

#### Objectives

By the end of this chapter, you should be able to:

* Create files and folders in Terminal using `mkdir` and `touch`
* Move files and folders in Terminal using `mv`
* Copy files and folders in Terminal using `cp`
* Remove files and folders in Terminal using `rm` and `rmdir`
* Explain what a flag is in Terminal
* Explain what the following commands do: `whoami`, `pwd`, `cat`, `echo`, `less`, `open`

| Linux/Mac | Windows                 | Description                                       |
| --------- | ----------------------- | ------------------------------------------------- |
| `cp`      | `copy`                  | copy a file from one location to another          |
| `mv`      | `rename`, `ren`, `move` | moves a file to a new location, or renames a file |
| `rm`      | `del`                   | remove (= delete) a file                          |
| `mkdir`   | `md`                    | create a new directory                            |
| `rmdir`   | `rd`, `rmdir`           | remove a directory                                |

#### Creating Files And Folders

Now that we have a good understanding of how to change directories and navigate in Terminal, let's see how we can create our own folders and files. To create a folder we use the `mkdir` command (short for "make directory"), followed by the name (or space-separated names) of the folder(s) that we would like to create. So let's head over to our `Desktop` and create a new folder called `first_folder`.

```
cd /Users/$USER/Desktop
mkdir first_folder
```

Whoa...you should be asking yourself, what is that `$USER` thing? It is an environment variable in your shell that keeps track of the current user of the shell. You can also see who `$USER` by typing `echo $USER` or by using the command `whoami`. Try out both methods of checking who the current user is.

As another side note, this tutorial will use absolute paths to navigate, just to make it easier for you to follow along. However, don't feel like you MUST use absolute paths over relative ones.

Now that we made the `first_folder`, how do we change directories into it? If you are thinking of the `cd` command, you're right! So let's `cd /Users/$USER/Desktop/first_folder`. Or, if you are already in your Desktop, you can just `cd first_folder`.

We just mentioned "if you are already in your Desktop." How do you know which directory you are in if you forget? Thankfully, there is a handy command called `pwd` which will display the absolute path and let you know what current directory you are working in. So if you are ever unsure, just type in `pwd` (which is short for *present working directory*).

Now that we are inside our new folder, `first_folder`, let's create a new file. A simple way to create a file is with the `touch` command. The `touch` command simply creates an empty file. Let's create a file called `first_file`: `touch /Users/$USER/Desktop/first_folder/first_file`. Alternatively, if you are currently in the `first_folder` directory, you can simple type `touch first_file`. Now use the `ls` command to verify that your file was created. `ls`, which is short for "list," will list all of the files and folders in your current directory.

#### Displaying Contents Of A File

A very common command to display the contents of a file is the `cat` command. If you type `cat NAME_OF_FILE` you can see the contents of the file easily, right there in Terminal. Try it out on the file you just created, `first_file`. You should see no output after pressing enter. There is no output because `first_file` is empty.

Let's add some text to the file so that we can use `cat`. Type:

`echo "Hello World" > first_file`

The `echo` command simply writes text to the terminal. The `>` is called a redirect. The `>` redirects the output from the command on the left side into the file on the right hand side. We will see more redirects in the next chapter.

Now try using `cat` on the file again. Do you see `Hello World`?

There are other ways of seeing the contents of a file in the terminal. Try using the command `less`: `less first_file`. `less` is a program that displays the contents of a file and allows the user to navigate up and down through the file or search for text in the file. To exit `less`, just press `q`.

#### Opening up a file

If you would like to open up a file, you can use the `open` command. So if we want to see the contents of `first_file` we can do `open first_file`. The `open` command is also very useful if you want to open all the files and folders in a directory (using your operating system's user interface). Try typing in `open .` and see what happens! If you are on Windows, the command to do this is `start NAME_OF_FILE`

#### Moving Files And Folders

Now that you understand how to create files and folders, let's move onto another essential operation: moving and copying folders. To move files and folders we use the `mv` command. Let's try this out!

Head back to the Desktop by typing in `cd ~/Desktop` and let's make a new file called `test.txt` (remember that command? If not - stop reading and go through the previous section again). Now on your Desktop you should have a folder called `first_folder` and a file called `test.txt`. Our goal is to move `test.txt` inside of `first_folder` - let's do that using the `mv` command. First make sure you are in the Desktop (type `pwd` to be sure), type `mv test.txt first_folder/test.txt`, and press enter.

Did it work? You shouldn't see any kind of success message or confirmation from Terminal, but you also should not see an error. This is very common when working with Terminal: you will see error messages if a command is incorrect, but very rarely see a success message. In other words, no news is good news. In this case, to make sure we did the correct thing, let's `cd` into `first_folder` and type in `ls`. We should see `test.txt` inside of `first_folder`.

#### Copying Files and Folders

Sometimes you may want to make a copy of a file or a folder. To copy a file, we use the `cp` command (short for copy). The general syntax looks like this:

```
cp PATH_TO_ORIGINAL_FILE PATH_TO_COPIED_FILE
```

For example, if we wanted to create a copy of `test.txt` and call it `test_copy.txt`, we could enter the following command (assuming we're inside of `first_folder`:

```
cp test.txt test_copy.txt
```

If you list all of the files in `first_folder`, you should now see three text files.

What if you want to copy an entire directory of files? Try moving up a directory from `first_folder`, and then type `cp first_folder first_folder_copy`. Uh oh! You should see an error: `cp: questions_copy is a directory (not copied).`

In order to copy a directory, you need to modify the `cp` command as follows:

```
cp -r first_folder first_folder_copy
```

The `-r` is called a *flag*; you can think of a flag for a command as an option that can be passed to that command. To learn more about the flags that you can pass to `cp`, you can type `man cp` (`man` is short for manual, on Windows this command is `--help`) and use the arrow keys to move up and down. When you're finished, press `q` to quit.

#### Deleting Files And Folders

Alright, enough with all of these files and folders, let's get rid of them. Make sure you are inside the `first_folder` and type `rm test.txt`. Once again, you shouldn't see much of a response from the terminal, so run a quick `ls` to make sure that the file is removed. Now that it is gone... where did it go? The Trash? The answer is it is completely removed from your computer. There is no confirmation or undo so be **VERY** careful when using the `rm` command. After you have removed this file, go ahead and remove the copied file as well. Finally, remove `first_file`. Now that the `first_folder` is empty, let's move up a directory and remove the `first_folder` directory itself.

Here you may run into a problem. If you try to use `rm` on a directory, you will see this message: `rm: first_folder: is a directory`. It turns out that `rm` is for a file, while the command `rmdir` is used to remove (empty) directories. So, let's use the `rmdir` command to remove `first_folder`. Make sure that there is nothing else inside that folder, or else you will see a message that looks like this: `rmdir: first_folder: Directory not empty`.

If there is anything inside the folder, you will have to use `rm -rf first_folder`. Like we saw with `cp`, the `r` and `f` in `-rf` are examples of flags. How can you learn more about the flags for `rm`? Go ahead and remove the `first_folder_copy` directory using `rm -rf`.

**Exercises**

1. Create a file called `name.txt`.
2. Try renaming the file to `rename.txt` using the `mv` command. What does this tell you about the command?
3. Using the `cp` command, make a copy of `rename.txt` and call it `copy.txt`.
4. Remove the file `copy.txt`.
5. Create a folder called `questions`.
6. Change directories to the `questions` folder.
7. Create a file called `first.txt`.
8. Create a file called `second.txt`.
9. Go back a directory and make a copy of the questions folder and call it `questions_copy`.
10. When using `cp -r` what is the `-r` called? What does it do?
11. Delete the original `questions` folder and the copy.

### { Listing Files and Flags. }

#### Objectives

By the end of this chapter, you should be able to:

* Understand what the `ls` command does
* Define flags and describe how the syntax works
* List files using flags

#### Listing Files

As you saw in the previous chapter, one of the most important commands you are going to be using is `ls`, which lists the contents of a directory. If you type `ls` in a directory you will see all sorts of content. For example, typing `ls` in your home directory will show you all of the files and folders inside of that directory. Typically your home directory contains folders such as `Desktop`, `Documents`, `Downloads`, `Music`, `Pictures`, etc.

Sometimes the default `ls` command does not give us all the information we want. In such cases, we'll need to add some flags to get more details.

#### Flags

In the previous chapter, we saw how flags could be used to modify the behavior of `cp` and `rm`. Flags can change and even enhance commands and are added using a `-` after the command. Flags are usually represented by single uppercase and lowercase letters. With the `ls` command, we can pass in the `-a` flag to list "all" files (including hidden files and folders). If we want the `ls` command to give us more information about each file, we can pass in the `-l` flag. To combine flags we can just use one `-` and pass in each flag. So the command to use `ls` and show all files and more detailed information about each one would be `ls -la`.

Using flags for `ls` will be essential when working with permissions as well as when you start working with `git`. We will also see many other terminal commands which accept flags later in this course.

## { Terminal Basics Exercises. }

Write the following terminal commands to perform the following tasks:

#### Part I

1. make a directory called `first`
2. change directory to the `first` folder
3. create a file called `person.txt`
4. change the name of `person.txt` to `another.txt`
5. make a copy of the `another.txt` file and call it `copy.txt`
6. remove the `copy.txt` file
7. make a copy of the `first` folder and call it `second`
8. delete the `second` folder

#### Part II

1. What does the `man` command do? Type in `man rm`. How do you scroll and get out?
2. Look at the `man` page for `ls`. What does the `-l` flag do? What does the `-a` flag do?
3. Type the following command to download and save the contents of google.com: `curl https://www.google.com > google.html`
4. Use `less` to look at the contents of `google.html`.
5. Look at the `man` page for less. Read the section on `/pattern`. Search for the text **hplogo** in the `google.html` file.
6. How do you jump between words in the terminal?
7. How do you get to the end of a line in terminal?
8. How do you move your cursor to the beginning in terminal?
9. How do you delete a word (without pressing backspace multiple times) in terminal?
10. What is the difference between a terminal and shell?
11. What is an absolute path?
12. What is an relative path?
13. What is a flag? Give three examples of flags you have used.
14. What do the `r` and `f` flags do with the `rm` command?

## Intermediate Level

### { Permissions and Links. }

#### Objectives

By the end of this chapter, you should be able to:

* Determine the permissions set for a file or a directory
* Manage and change permissions using `chmod`
* Manage and change users and groups using `chown` and `chgrp`
* Explain what `root` is, and the relationship between `root` and `sudo`
* Create links in the file system using the `ln` command
* Explain the difference between a hard and a symbolic link

#### Introduction

When you're working in Terminal, you may sometimes find that you're not allowed to do things you want to do. Maybe you're trying to install something, or move a file from one directory to another, and you get an error telling you something along the lines of "permission denied." These sorts of permissions errors are extremely common, so understanding how to deal with them is important. That's what we'll learn how to in this chapter.

#### Users and Groups

Before you learn about permissions, you first need to understand users and groups. Let's take a look at an example. Head to your home directory and list everything using the `ls -lah` command. (Not sure what the `h` flag does? Check the manual!)

The output you get might look something like this:

![](https://4042228299-files.gitbook.io/~/files/v0/b/gitbook-legacy-files/o/assets%2F-MRebciU3NcuLgsX3ijf%2F-MhiGQo2jtdtmBvzkcP0%2F-MhiGp-G9K8gMvTq0NMd%2Fimage.png?alt=media\&token=156c9f74-bc4b-494d-8247-9242438b4f84)

The details of these files aren't important. What you should see is a bunch of rows of output, one row for each file or directory. Let's figure out what all of this actually means. For instance, here is the line for the `.bashrc` file from the above screen shot:

`-rwxr-xr-x 1 eschoppik staff 67B Aug 29 2014 .bashrc`

The third column specifies the username of the user that owns the file. In this case, `eschoppik` is the owner of the file. The fourth column specifies the name of the group associated with the file. In this case the group `staff` is associated with the file.

In most Mac systems, users are also members of the `staff` group. To see which groups you are a member of, type the `groups` command in Terminal. The `staff` group will likely be one of the many groups you are in. As we will see next, permissions can be set for the owner of the file, a user that is in a group associated with the file, or a user that is neither the owner nor a member of the associated group.

#### Permissions

Let's take a look at that `.bashrc` line again:

`-rwxr-xr-x 1 eschoppik staff 67B Aug 29 2014 .bashrc`

We've already talked about the third and fourth columns in this output. Now let's talk about the first column. The `-rwxr-xr-x` refers to *permissions* of the `.bashrc` file. Each character of the permissions string, `-rwxr-xr-x` describes something about the file's permisisons. But what are permissions? A file's permissions is a set of rules that describes which operations a user can or cannot perform on a file or folder. There are 3 types of operations that can be allowed or not allowed:

* `r` - reading the file
* `w` - writing to the file
* `x` - executing the file (we will go into this in more detail soon)

You may be asking at this point, why is the permissions string so long if there are only 3 operations that can be specified? Well, a permissions string describes different types of users that can or cannot perform read, write and execute operations. You may be one of 3 different types of users:

1. The owner of the file.
2. Not the owner, but a member of a group associated with the file.
3. Other. Not an owner and not in a group that is associated with the file

So a permissions string specifies the permissions for all 3 types of users plus an extra character to specify the type (file, folder, etc).

Here is how the above permissions string breaks down:

![](https://4042228299-files.gitbook.io/~/files/v0/b/gitbook-legacy-files/o/assets%2F-MRebciU3NcuLgsX3ijf%2F-MhiGQo2jtdtmBvzkcP0%2F-MhiGbznUgtE0cVYZNO2%2Fimage.png?alt=media\&token=fe78c5fa-4c99-4efe-9413-6debd102a71e)

In other words, this string says that `.bashrc` is a file, that the owner of the file can read, write, and execute, users in the group can only read and execute, and other users can only read and execute as well.

#### Changing Permissions

To change the permissions of a file we use the `chmod` command. For each set of permissions (owner, group, everyone) we can assign a number from 0 to 7. This is called **octal** (base-8) notation. Here's a table that illustrates what each number means.

| Number | Permission              | `rwx` (display in terminal) |
| ------ | ----------------------- | --------------------------- |
| 0      | none                    | `---`                       |
| 1      | execute                 | `--x`                       |
| 2      | write only              | `-w-`                       |
| 3      | write and execute       | `-wx`                       |
| 4      | read only               | `r--`                       |
| 5      | read and execute        | `r-x`                       |
| 6      | read and write          | `rw-`                       |
| 7      | read, write and execute | `rwx`                       |

So if we want to change a file so that only the owner and group can read, write, and execute, we would type `chmod 770 somefile.txt`.

If you'd like to be a bit more specific, you can also set permissions using what's called **symbolic** notation. Here's an example of what that looks like:

```
chmod ug+rwx,o-rwx hi.txt
```

This is saying "add read, write, and execute permissions to the **u**ser and the **g**roup, and remove read, write, and execute permissions from **o**ther." While a bit more verbose, it's also a little more descriptive. To see more examples of symbolic notation, check out [this](https://askubuntu.com/questions/518259/understanding-chmod-symbolic-notation-and-use-of-octal) article.

If we want to change permissions for a folder, we need to add the `-R` flag: `chmod -R 755 some_folder`.

You can read more about `chmod` [here](https://en.wikipedia.org/wiki/Chmod).

#### Executable Files and Folders

Now let's talk a little bit more about what the `x` (executable) means for a file or a folder's permissions. If you have executable permissions on a folder, it means that you can cd into it. See what happens with the following commands:

```
mkdir test_folder
cd test_folder
cd ..
chmod 666 test_folder
cd test_folder
```

You should see an error saying permission denied. Add the execute permission back to the folder, and then remove the folder.

Now onto executable files. When a file is executable, it can be run from your shell as if it were a program. Let's first create our file. Type the following in your terminal:

```
echo ls > test.sh
echo pwd >> test.sh
echo pushd . >> test.sh
echo "cd ~" >> test.sh
echo "pwd" >> test.sh
echo popd >> test.sh
cat test.sh
```

The `test.sh` file should look like the following now:

```
ls
pwd
pushd .
cd ~
pwd
popd
```

(Did you notice that our first `echo` command used a single arrow (`>`), while the other commands used two? We'll explore the difference between these two operators in the next chapter!)

Now let's make the file executable and run it. Use chmod to make it executable: `chmod 755 test.sh`. Next, execute the file by providing a path to the file. In our case, the file is in the current directory, so to execute it, we do the following: `./test.sh`. We just made our first executable shell script!

#### chown and chgrp

Now that we have a clearer understanding of users, groups and permissions, let's take a look at the line from `ls -lah` again:

`-rwxr-xr-x 1 eschoppik staff 67B Aug 29 2014 .bashrc`

* The `1` refers to the number of files (this will always be 1 for files)
* `eschoppik` is the "owner"
* `staff` is the group
* `67B` is the size of the file
* `Aug 29 2014` is the last day the file was modified
* `.bashrc` is the name of the file

So what if we don't want `eschoppik` as the owner of the file any longer? Or what if we want a different group to own that file? We can use one of the following commands:

`chown anotheruser:anothergroup .bashrc`

Or if we just want to change the group:

`chgrp anothergroup .zshrc`.

Now let's take a look at this line from the `ls -lah` command:

`drwxr-xr-x 6 root admin 204B Oct 20 2015 ..`

The other file said `eschoppik` for user and `staff` for group, but this one says `root` and `admin`. We can also see that this is a directory because it starts with a `d` before listing the permissions. So what is the `root` user?

#### root user and sudo

The `root` user is a special user on your computer that has the power to do anything it wants. It can change permissions on any file, delete anything it wants, etc. When you see `root` as the owner, and you want to make a change to that file, you have to use a command called `sudo`. The `sudo` command gives you the powers of the `root` user for just one command and will ask you for your password in order to preform the command. Try out commands with sudo. Create a file called `somefile.txt`. Then make the owner the root user:

`sudo chown root somefile.txt`

Now try to delete the file without using sudo. You are not allowed. Look at the permissions. Why is this not allowed?

#### Links

Since we have files and folders located all over our file system, it becomes difficult to identify where many of these are located. Fortunately, we can create a link (also known as an alias) to a file or folder using the `ln` command. The structure looks like this:

`ln path_to_link name_of_link`

There are two kinds of links we can make, hard and symbolic links - let's see how they work!

#### Hard Links

Let's create a file called `learn.txt` in our `Desktop` folder (type in `cd /Users/$USER/Desktop` if you need to get there). We can open up our `learn.txt` file using `open learn.txt` and let's add the text "Learning about links!".

Now let's create a link to this file! We can call our link `first_link`. To do this we use the `ln` command and type `ln learn.txt first_link`. Now if we `cat first_link` we should see the output "Learning about links!".

If we decide to move our `learn.txt` file anywhere we still have a link to it through `first_link`! Pretty awesome!

If we decided to delete our `learn.txt` file, what happens to our hard link? Let's `rm learn.txt` and then `cat first_link`. We still see that we have a link! This might seem strange; shouldn't a link be broken if a file is removed? Not with hard links! You can think of a hard link like a direct copy of a file. If the file is removed, the link still exists.

#### Symbolic Links

We saw that when we remove the original file, any hard links still remain and contain the entire source file. This is usually not what we want, since we usually want a reference to some file and not a direct copy. To create a reference instead of a copy, let's make a symbolic link.

To create a symbolic link, we use the `-s` flag when creating a link. Let's create a new file called `learn_again.txt` and then create a symbolic link using `ln -s learn_again.txt first_sym_link`. If we `cat first_sym_link` we do not get any errors! But if we delete or move `learn_again.txt`, our `first_sym_link` will be broken!

We can also use symbolic links for folders as well, which makes it very useful if we need to access a folder but do not remember the path. However, if your original file/folder path changes or is removed , the symbolic link **will** break!

### { Redirection. }

#### Objectives

By the end of this chapter, you should be able to:

* Explain what redirection is
* Explain the difference between `>`, `>>`, and `<`
* Use redirection to work more effectively in Terminal

#### Redirection

Sometimes instead of simply displaying the output from a command to the terminal, it's useful to take the result output of a command and send it somewhere else. We call this "redirection" and it is denoted by `>>` or `>`. Let's start with a simple example using the `echo` command.

The `echo` command is useful for displaying text to the terminal, but many times it is more useful to take that text and redirect it to a file. In Terminal, type the command `echo Hello World > hello.txt`. Then, using the `cat` command, let's see what we just did by typing `cat hello.txt`. All we did here is take the text "Hello World" and instead of displaying it to the terminal, we sent it to a file called `hello.txt`!

Run the same command again but with slightly different text: `echo Hello Universe > hello.txt`. Now cat the file again. Notice that your new text completely overwrote the old text: you should see that "Hello World" has been replaced by "Hello Universe." In other words, when you use `>`, whatever text you're echoing into the file will completely overwrite any text that might already be in the file.

Maybe this is what you want, but maybe not. What if you're trying to append some text to the end of the file, rather than overwriting the text? In this case, use `>>` instead. Try it out: `echo Hello World >> hello.txt`. Now cat the file. You should see the following:

```
Hello Universe
Hello World
```

One very common use case for redirection is to put small pieces of text in a file. Instead of opening a text editor, typing in some text, saving it and closing the file we can do this all in one step.

#### Redirection with Input

So far we have seen redirection using `>` and `>>`. These arrows indicate redirection with standard output (take something and output it to something else). However, we can also use redirection with input as well using the `<` arrow. Let's use a command called `sort`, which sorts a file alphabetically. Imagine we have a file called `names.txt` with the following names:

```
Bob
Tom
Jim
Amy
```

If we want to sort this file, we can type `sort names.txt` and it will output

```
Amy
Bob
Jim
Tom
```

Now what if we want to take the contents of `names.txt`, redirect that to the `sort` command, and then send *that* output to a file called `sorted.txt`? The redirection will look like this: `sort < names.txt > sorted.txt`. This will now create a new file called `sorted.txt` with the names sorted alphabetically!

This might seem a bit strange, but try typing these commands and see what information you can output and redirect. As we see right now, we are only using the `sort` command, but what would happen if we wanted to use other commands along with sort? We would somehow need to connect each of these commands together. We connect these commands together through something called "pipes."

### { Piping. }

#### Objectives

By the end of this chapter, you should be able to:

* Explain what the `head`, `tail`, `sort`, `uniq`, `wc` and `grep` commands do
* Define what piping is
* Understand use cases for piping
* Use piping to better work in Terminal

#### Piping

At the end of the last chapter, we saw how we could use redirection to combine a couple of commands into one. In that case, in a single line we were able to both sort a text file and output the contents to a new file.

But what if we want to chain even more commands together? This is where piping comes into play. Before we learn about piping, though, let's learn/review a couple other terminal commands.

`head` - display the first lines of a file (using the `-n` flag we can specify the number of lines)

`tail` - display the last lines of a file (using the `-n` flag we can specify the number of lines)

`sort` - sort lines of a text file

`uniq` - removes duplicated lines (your data **must** be sorted for this to work)

`wc` - word, line, character and byte count

Now let's create two files - `first.txt` which contains the text

```
First
Second
Third
```

And `second.txt` which contains:

```
Fourth
Fifth
Sixth
```

If we want to concatenate (join) these two files together, we use the `cat` command:

`cat first.txt second.txt` (make sure the files and commands are separated by a space).

But what happens if we want to concatenate these two files and then find the word count? What if we want to concatenate and then sort it? This is where we need piping! You can think of a pipe as a connection between the output of one command into the input of another command. So once we concatenate two files we then want to send (or pipe) the result of that to another command. We can even combine this with redirection!

To pipe a command we use the `|` character. So if we want to pipe `cat` into `sort` it would look like this:

`cat first.txt second.txt | sort` or `cat first.txt second.txt | sort | head -n 2`

Take a look at this command and try to figure out what it's doing. You'll find a step-by-step answer below.

`cat first.txt second.txt | sort | tail -n 3 | head -n 1`

1. Concatenate the two files first.txt and second.txt
2. Sort the results
3. Find the last 3 lines
4. Find the first line of those last 3 lines

This is how we can find the third from last line in a file (without knowing how many lines the file has).

#### `grep`

Let's examine another useful command called `grep` which is extremely powerful for finding text. On its own it is helpful, but it is quite useful when piped with `cat`. Let's try a simple example with `cat first.txt | grep First` - what do you see?

You should see the word `First` output to the terminal. This is because `grep` searched the file for the text `First` and found a match!

Notice that if `grep` doesn't find a match, it won't output anything. If it finds multiple matches, it will print them all. Try out these commands and see what `grep` returns to you!

```
cat first.txt second.txt | grep Nope
cat first.txt second.txt | grep th
```

Let's look at another example. Imagine you have a file called `petnames.txt`, and inside you have the following list of names:

```
Lassie
Moxie
Whiskey
Fido
Lassie
Moxie
```

We see here there are quite a few duplicates, so let's try to use the `uniq` command to remove these duplicate names. The problem is, when we run `uniq petnames.txt` we get the following

```
Lassie
Moxie
Whiskey
Fido
Lassie
Moxie
```

If we look back at our definition of how the `uniq` command works, we see that our data must be sorted! So how can we first use `sort` on `petnames.txt` then attach the `uniq` command? Piping to the rescue!

`sort petnames.txt | uniq` gives us

```
Fido
Lassie
Moxie
Whiskey
```

This looks great! But this text is just being output to the terminal, what if we want to output this text to a new file called `petnames_sorted.txt`? We can combine piping with redirection and use `sort petnames.txt | uniq > petnames_sorted.txt`. Now if we `cat petnames_sorted.txt` we should see our four unique sorted names!

## { Permissions, Redirection, and Piping Exercise. }

#### Part I (Permissions and links)

Write terminal commands to do the following:

1. Create a file called `restricted.txt`.
2. Change the permissions on the `restricted.txt` file to allow the owner to read and write to the `restricted.txt` file. Do this using the **Octal** Notation.
3. Change the permissions on the `restricted.txt` file to only allow the owner, group and everyone to read and write and execute the `restricted.txt` file. Do this using the **Symbolic** notation.
4. Create a folder called `secret_files`. Inside the `secret_files` folder create a file called `first_secret.txt` and another folder called `classified`. Inside of the `classified` folder create a file called `super_secret.txt`.
5. Change the permissions on the secret\_files to only allow the owner and group to read, write and execute in all the files and folders inside of secret\_files. Do this using the Octal Notation.
6. Create a hard link for the `restricted.txt` called `hard_link`.
7. Create a symbolic link for the `classified` folder called `classified_link`.

#### Part II (Piping and Redirection)

For the following exercises, create a text file called `vegetables.txt` with the following text:

```
Lettuce
Amaranth
Beet
Celery
Kale
Dill
Cabbage
Broccoli
Lettuce
Amaranth
Beet
Spinach
Chard
Broccoli
Cabbage
Dill
```

Write the following terminal commands to do the following

1. Sort `vegetables.txt`.
2. Count the number of lines in `vegetables.txt`.
3. Create a file called vegetables\_sorted.txt which contains all the unique vegetables sorted in ascending order in vegetables.txt (do this without the touch command).
4. Create a file called `last_three.txt` which contains the last three vegetables in the `vegetables.txt` file (do this without the `touch` command).
5. Count the number of lines the word "Broccoli" appears on (using `wc` and `grep`).

## Development Tools

#### Visual Studio Code

Visual Studio Code or VS Code is an IDE. IDE stands for Integrated Development Environment. It is the software that you will be using to write most of your code. It is designed to help you develop your apps quickly, focusing on the problems that you need to solve instead of having to search online for minor details.

**Auto-complete**

One of the most important features of an IDE is that it provides *auto-completion*. This means that it will give you suggestions of what you can write next, while you are typing something.

For example, when writing a CSS property, VSC will tell you what values you can assign to this property.

![](https://4042228299-files.gitbook.io/~/files/v0/b/gitbook-legacy-files/o/assets%2F-MRebciU3NcuLgsX3ijf%2F-M_unkBsxd4ADPB-LSx4%2F-M_uofxeoWOMelnaE8gU%2Fimage.png?alt=media\&token=e15dd9ab-9247-4d20-a317-6959f5bc53a0)

**File tree view**

The reason why we call an IDE *integrated* is that you almost don't need to leave the window when you are write your code. For example, creating, renaming and moving files can be done directly from the IDE. This functionality can be achieved from something called a **tree view**. You can find this view on the left side of your IDE.

![](https://4042228299-files.gitbook.io/~/files/v0/b/gitbook-legacy-files/o/assets%2F-MRebciU3NcuLgsX3ijf%2F-M_unkBsxd4ADPB-LSx4%2F-M_up5lFGm8bbdRMKk_i%2Fimage.png?alt=media\&token=bbb14c39-641e-454e-a57a-056457f56d97)

**Finding files**

When working with big projects, you will often need to find a file quickly, without having to go through the tree view manually.

![](https://4042228299-files.gitbook.io/~/files/v0/b/gitbook-legacy-files/o/assets%2F-MRebciU3NcuLgsX3ijf%2F-M_uxJ8JTCaxpe_n868R%2F-M_uyaa3kMjiJeXzHT8t%2Fimage.png?alt=media\&token=8f3ae472-c2e5-4c6b-8af9-91b66b79a3dd)

**Enable formatting on save**

To automatically give your code the right format:

* In Visual Studio open the settings file (see <https://code.visualstudio.com/docs/getstarted/settings#_creating-user-and-workspace-settings>)
* Search for `editor format`
* Set `editor.formatOnSave` and `editor.formatOnPaste` to `true`

### { OPTIONAL } Visual Studio Code Extensions For Web Development

Visual studio code offers a wide range of extensions. Here is how to install the extension.

Press **SHIFT+COMMAND (or Windows)+X** or just click on the extension icon of visual studio code. Search for the extension and press install

![](https://4042228299-files.gitbook.io/~/files/v0/b/gitbook-legacy-files/o/assets%2F-MRebciU3NcuLgsX3ijf%2F-MaOCj2s4Gza3IM8vfJG%2F-MaOF5aMj2A2P6d8xPF2%2Fimage.png?alt=media\&token=d21c0aff-cdf6-48ff-8ebb-e0410bbab510)

Here are some visual studio code extensions for web development. The choices of the extension are ones personal opinion.

#### 1: Javascript (ES6) Code Snippets

No need to mention that JavaScript is the core of web development. There are lots of code snippets that we used on a daily basis and this extension helps you by not writing that repetitive code again and again.

It provides JavaScript, TypeScript, Vue, React, and HTML code snippets. This is a must-have extension for web development.

Link: <https://marketplace.visualstudio.com/items?itemName=xabikos.JavaScriptSnippets>

You can install it by searching the name on the extension section of the visual studio code.

#### 2: CSS Peek

As its name suggests, this extension lets you jump to the CSS code using classes and IDs.

Link: <https://marketplace.visualstudio.com/items?itemName=pranaygp.vscode-css-peek>

You can install it by searching the name on the extension section of the visual studio code.

#### 3: Auto Close Tag

This extension automatically adds the closing tag of HTML and XML.

Link:[ https://marketplace.visualstudio.com/items?itemName=formulahendry.auto-close-tag](https://marketplace.visualstudio.com/items?itemName=formulahendry.auto-close-tag)

You can install it by searching the name on the extension section of the visual studio code.

#### 4: ESLint

ESLint is the linting utility for JavaScript. It checks your code for common errors and lets you know in the editor itself. It’s like a virtual peer who is validating your code while you are writing it.

Link:[ https://marketplace.visualstudio.com/items?itemName=dbaeumer.vscode-eslint](https://marketplace.visualstudio.com/items?itemName=dbaeumer.vscode-eslint)

You can install it by searching the name on the extension section of the visual studio code.

Before installing ESLint in visual studio, install it as a global package first. `npm install -g eslint`

#### 5: Prettier – Code formatter

This extension performs the formatting of the JavaScript, CSS, and HTML code.

Link: <https://marketplace.visualstudio.com/items?itemName=esbenp.prettier-vscode>

You can install it by searching the name on the extension section of the visual studio code.

#### 6: Path Intellisense

Importing code from other files is what everyone does on a daily basis. This extension makes the development time faster by autocompleting file names.

You type the name of the file in statements and it will search and give you suggestions.

Link: <https://marketplace.visualstudio.com/items?itemName=christian-kohler.path-intellisense>

You can install it by searching the name on the extension section of the visual studio code.

#### 7: GitLens

We use Git almost every day of our life. GitLens is the visual studio code plugin to supercharge git capabilities.

With GitLens, it’s so easy to view code authorship, check commit number, view changes between the last commit and existing changes, and so on

Link: <https://marketplace.visualstudio.com/items?itemName=eamodio.gitlens>\
You can install it by searching the name on the extension section of the visual studio code.

#### 8: Project Manager

Do you work on multiple projects and switch back and forth? I know I do and the project manager has been a savior to manage multiple projects in visual studio code

Link: <https://marketplace.visualstudio.com/items?itemName=alefragnani.project-manager>

You can install it by searching the name on the extension section of the visual studio code.

#### 9: Live Server

Live Server extension provides the live preview of your web application right within the editor.

This is very handy and useful for the front end developers.

Link:[ https://marketplace.visualstudio.com/items?itemName=ritwickdey.LiveServer](https://marketplace.visualstudio.com/items?itemName=ritwickdey.LiveServer)\
You can install it by searching the name on the extension section of the visual studio code.

#### 10: Debugger for Chrome

This extension brought the powerful chrome debugger right into the visual studio code.

It is very useful for front-end developers to perform the testing and debugging.

Link: <https://marketplace.visualstudio.com/items?itemName=msjsdiag.debugger-for-chrome>\
You can install it by searching the name on the extension section of the visual studio code.

#### 11: Better Comments

This extension helps you to create more human-friendly and easy-to-read comments

Link: <https://marketplace.visualstudio.com/items?itemName=aaron-bond.better-comments>\
You can install it by searching the name on the extension section of the visual studio code.

#### 12: Code time

This extension tracks your development time and provides you with useful stats such as how many hours you have code today etc.

It’s pretty useful to keep track and see the progress. This is not strictly for web development only, anyone can use this extension.

Link: <https://marketplace.visualstudio.com/items?itemName=softwaredotcom.swdc-vscode>\
You can install it by searching the name on the extension section of the visual studio code.

#### 13: Settings Sync

I use a different machine for my work and personal use. I use visual studio code in both machines, however, I don’t want to repeat the same steps to configure the editor every time.

Enters Setting Sync extension. It creates and stores your configuration in Github gist and synchronizes wherever you want. Simple and awesome!

Link: <https://marketplace.visualstudio.com/items?itemName=Shan.code-settings-sync>\
You can install it by searching the name on the extension section of the visual studio code.

## **More Resources**

* [Tutorial: Terminal for Beginners!](https://medium.com/@grace.m.nolan/terminal-for-beginners-e492ba10902a)
* [Basic commands tutorial 10 mins](https://youtu.be/vhZLTp6N4XA)
* [Intro to Ubuntu and useful command tutorial 45 mins](https://youtu.be/KSh9-6FIu1w)

It's alright if you get stuck or if something doesn't look right! When that happens, please ask your teachers or classmates for help in Slack, or use the **#support-coding** channel.

{% hint style="info" %}
**Everything below is optional and not a requirement of our course. Students who like to challenge themselves can continue with the Advanced Level.**
{% endhint %}

## Advanced Level - 1  { OPTIONAL }

### { Terminal Environment. }

#### Objectives:

By the end of this chapter, you should be able to:

* Describe what a terminal environment is
* Create and modify terminal environment variables, including the `PATH`
* Save environment variables to a configuration file

#### What is your terminal's environment?

A terminal's environment is a list of settings that can be referenced by programs. To see what your terminal's environment looks like right now, try typing `env` in your terminal. You should see output similar to the following:

```
rvm_bin_path=/Users/tim/.rvm/bin
TERM_PROGRAM=Apple_Terminal
GEM_HOME=/Users/tim/.rvm/gems/ruby-2.3.1
TERM=xterm-256color
SHELL=/bin/bash
CLICOLOR=1
IRBRC=/Users/tim/.rvm/rubies/ruby-2.3.1/.irbrc
TMPDIR=/var/folders/5s/zstwqxy52pl_lq_lr3b5v7nc0000gn/T/
Apple_PubSub_Socket_Render=/private/tmp/com.apple.launchd.Q7TcyOvK4P/Render
TERM_PROGRAM_VERSION=361.1
OLDPWD=/Users/tim
TERM_SESSION_ID=281162A1-5C58-4285-9A35-AC9306923C34
USER=tim
__CF_USER_TEXT_ENCODING=0x1F5:0x0:0x0
LSCOLORS=GxFxCxDxBxegedabagaced
PATH=/usr/local/bin:/usr/local/bin:/usr/bin:/bin:/usr/sbin:/sbin:/Users/tim/.rvm/bin
PWD=/Users/tim/Projects/Rithm/prework
.
.
.

```

Each word on the left side of the equal sign is called an **environment variable**. The value on the right side is the value of the variable.

#### Using environment variables

In the terminal, you can see what value an environment variable has by using `echo`. When referencing an environment variable, you must use the `$` as a prefix. In other words, to print the value for the environment variable `PWD`, the command would be:

```
echo $PWD
```

Try that in your terminal. You should get the same output as the output for the command `pwd`.

#### Creating environment variables

Now let's make our own environment variable. Go to your home directory and create a folder called `Projects`. Now let's make an environment variable called `PROJDIR` (environment variables are usually all caps) that keeps track of the path to your projects directory. To create an environment variable, you can use the `export` command. On a Mac or Linux machine, the command would be:

```
export PROJDIR=/Users/tim/Projects
```

Notice that the `$` isn't being used in this case. When you define an environment variable, you do not use the `$`. Only use the `$` when you want to reference the value of the variable.

Now that you've created the environment variable, let's use it:

```
cd ~
cd $PROJDIR
```

You should now be in your project directory.

So now we have a great way of saving a useful variable in our terminal's environment, but we have a problem. Every time you close your terminal window, the environmet variables get reset, so the `PROJDIR` environment variable will be lost! How do we fix that?

#### Saving environment variables

Now that we know how to create environment variables, we need to learn how to save them so that every time we open a new terminal window, we have those environment variables set. To save environment variables, you need to modify the shell configuration file in your home directory. This file is different depending on what your default shell is. If you are using oh-my-zsh, then your configuration file will be called `.zshrc`; if you are using bash, then your configuration file will be called `.bash_profile`.

Open the configuration file for your shell, either `.zshrc` or `.bash_profile`. Next, add the following line to your file:

```
export PROJDIR=/Users/$USER/Projects
```

Save the file, quit out of all terminal windows, and then open terminal again. Try executing `echo $PROJDIR`. You should see the path to your projects directory.

We did one other interesting thing here. Rather than using a hard coded path to the projects directory, we used another environment variable to figure out the correct user name. Try typing `echo $USER` in your terminal. You should see your user name. The important takeaway here is that an environment variable can be defined using other environment variables. For example, if we had a `python` folder inside of the `Projects` directory, we may want a variable for that as well. We could definite it like the following way:

```
export PYTHON_PROJ=/Users/$USER/Projects/python
```

Or we could use the `PROJDIR` environment variable that we already have set:

```
export PYTHON_DIR=$PROJDIR/python
```

The only catch is that the line for exporting `PROJDIR` must come before the line using `PROJDIR`. Otherwise, `PROJDIR` will not yet be defined when we use it in the `PYTHON_DIR` definition.

#### The `PATH` environment variable

An important environment variable to know and understand is the `PATH`. Your terminal uses the `PATH` environment variable to find programs to execute. Try the following in a new terminal window:

```
export PATH=
```

Now try using `ls` in the terminal. It doesn't work! Try a few other commands like `man` or `chgrp`. None of them work. That's because commands like `ls` are just programs stored in a file somewhere in your filesystem. The reason we don't normally need to give the full path to the `ls` command when we use it is because `ls` is a file found in one of the folders that are specified on the path.

Open a fresh terminal window. The `ls` command should be working again. Now use the `which` command to see where on the path `ls` is coming from:

```
which ls
```

Typically, the `ls` command is located in the `/bin` directory (though if you're using oh-my-zsh, the command may be aliased to `ls -G`). Let's change our `PATH` environment variable again, but this time, let's assign it to `/bin`:

```
export PATH=/bin
```

Now try to use the ls command. It should still work! That's because `ls` can now be found in one of the folders of the `PATH`, specifically in `/bin`. Other commands still don't work however. The `man` command still isn't working because it is not found on the `PATH`. Let's add a few more directories to the `PATH` in the same terminal window. We want to add `/usr/bin`, `/usr/sbin`, and `/sbin`, but we don't want to rewrite the `PATH` variable completely. Instead, let's add to the `PATH` that already exists. In order to do that, we reference the `PATH` environment variable using the `$` and separate multiple paths using a colon:

```
export PATH=$PATH:/usr/bin:/usr/sbin:/sbin
```

Now if you do `echo $PATH`, you should see the following output:

```
/bin:/usr/bin:/usr/sbin:/sbin
```

And commands like `man` should work. Now that you understand the `PATH`, close the terminal window and open a fresh window, so that your `PATH` will be set up correctly.

### { Processes. }

#### Objectives

By the end of this chapter, you should be able to:

* Define what a process is
* Examine processes that are running on your machine
* Kill a process using the `kill` command

#### What is a process?

A process is a program on your computer that is being run. For example, when you have Google's chrome browser open, that is a process running on your machine. An email application, a terminal window, and even the `ls` command are also processes when they are being executed on your machine.

The nice thing about processes is that the operating system ensures that all of the memory for one process cannot be accessed by another process. In other words, if one process crashes, it should not have any effect on the rest of the system.

But how can you tell which processes are running at any given time? And how can you stop a process from the terminal?

#### `ps`

The `ps` command is a useful tool for seeing which processes are running on your machine. You can execute the command `ps` on its own, but more commonly you'll see the command `ps aux` being used. The `a` indicates that you're interested in all processes, not just process for your current user; `u` ensures that the process owner will be displayed; finally, specifying `x` makes sure that you'll see a list of all active processes, not just those attached to a terminal.

(Note: you may be wondering why the command is `ps aux`, and not `ps -aux`. For some history on the command, check out [this](https://stackoverflow.com/questions/15102576/ps-aux-works-but-ps-aux-doesnt) Stack Overflow question.)

Try typing `ps aux` in your terminal and see what you get. You should see something similar to this:

```
USER   PID  %CPU %MEM      VSZ    RSS   TT  STAT STARTED      TIME COMMAND
tim  74874   8.3  1.7  3408348 139912   ??  S     3:34PM   6:39.74 /Applications/Google Chrome.app/Contents/Versions/53.0.2785.116/Google Chrome Helper.app/Contents
tim  74858   6.2  2.8  3224740 233060   ??  S     3:34PM   8:34.62 /Applications/Google Chrome.app/Contents/MacOS/Google Chrome
tim  61431   2.5  0.6  2698840  53728   ??  R     9:46AM   0:59.49 /Applications/Utilities/Terminal.app/Contents/MacOS/Terminal
```

Some important columns are `USER`, `PID`, and `COMMAND`. The USER column is the username of the user who executed the process. The PID column is a number that uniquely identifies the process. This PID will be useful very soon when we learn how to stop a process.

#### `kill`

At times you may have a process that for whatever reason is not responsive. In other words, the process continues to execute when you do not want it to. We can stop the process from running by using the `kill` command.

Let's try it out. First, open any file in terminal using the `less` command. The process will continue to run as long as you have not pressed `q` to quit. In a separate terminal window, type the following:

```
ps aux
```

Now scroll through the list until you find a process that is running that has been started by your username and whose command's path ends with less. Once you've identified the process, take note of the PID.

Next, to kill the process, type `kill` and then the PID and hit enter. For example, if your process looks like the following:

```
tim             10011   0.0  0.0  2434948    900 s000  S+    5:32PM   0:00.00 less readme.md
```

Then your PID is `10011`. So to kill less, your command would be the following:

```
kill 10011
```

After killing the process, you should see your terminal window that was running less go back to a normal terminal prompt.

#### `kill` vs. `kill -9`

Sometimes when you're reading tutorials and a process needs to be killed, you'll see that the command `kill -9` is executed, not `kill`. So what's the difference between these two?

Whenever you try to kill a process, a signal is sent to that process telling it to terminate. By default that signal is the `TERM` signal. However, if a program has crashed or is frozen for some reason, it's possible that it won't pick up on that signal and the process may not terminate. The -9 flag sends a different signal to the process: according to the manual for `kill`, -9 represents the `KILL` signal, which is a "non-catchable, non-ignorable kill." If killing a process doesn't work, try killing with -9 and see if that gets the job done.

For more on `kill` and the different signals you can send, check out [this](https://superuser.com/questions/107543/bash-man-page-kill-pid-vs-kill-9-pid) superuser question.

### { Finding Files and Folders. }

#### Objectives

By the end of this chapter, you should be able to:

* compare and contrast `find` and `grep`
* use `find` to search for files and folders
* use `grep` to search for patterns in a string or text
* define what a *regular expression* is

#### `find`

One of the most useful terminal commands is the `find` command. When you know how to use it well, you can easily find files on your computer without using Spotlight, Alfred or any other GUI. Let's get started by learning how the syntax works.

To find a specific file in your current directory, you can simply type `find` and the name of the file. (If you try to find a folder you will find all of the contents inside as well.) For example, if try typing the following command from your home directory:

```
find Downloads
```

You should see a list of all your Downloads in the terminal.

To find something with a bit more complexity, use the following pattern

1. `find`
2. a filepath
3. an expression (this is where you have the most flexibility)

Let's `cd` into a folder called `views` and try this pattern to find anything with the name `first.txt` inside of the `views` folder:

`find . -name "first.txt"`

Now this is nice if we know exactly the name of the file we are looking for, but many times we need to use wildcard characters including `*`, `?` and `[]`. The difference between these characters is as follows:

`*` - any number of characters\
`?` - one character\
`[]` - any of the characters inside the brackets

Here are some more examples:

* find inside of the `views` folder (assume we are inside the views folder) anything that ends with `.html` => `find . -name "*.html"`
* find inside of the `views` folder (assume we are inside the views folder) anything that ends with a three letter file extension like `.txt` or `.css` => `find . -name "*.???"`
* find inside of the `views` folder (assume we are inside the views folder) anything that starts with the letter `f` `t` or `s` => `find . -name "[fts]*"`
* find inside of the `views` folder anything that has the text `main` somewhere in the filename (this could be the beginning as well) `find . -name "*main*"`

#### `grep`

Another extremely useful tool for finding information that we've seen before is `grep`. While `find` is for files and folders, `grep` is excellent for searching for specific values in a string or in a text file. If you type `grep` on its own, it's not that valuable because you need to make sure you pass a filename and text to it. You can also use `grep` with piping and `cat`.

We have already seen examples using `grep` with `cat` to find words like `cat people.txt | grep Elie` to find if the word Elie exists in the `people.txt` file. Let's use the file below which we will call `names.txt` as an example:

```
Lisa
Mark
Elie
Beth
Tim
Elizabeth
Tom
Matt
Liza
Janey
Jane
Shana
```

Let's add a little more onto our knowledge of `grep` and introduce some flags.

* `-i` for case insensitive search

`grep -i "elie" names.txt` => `Elie`

* `-w` for full word search

`grep -i "beth" names.txt`

```
Beth
Elizabeth
```

`grep -iw "beth" names.txt` => `Beth`

* `-A` display a certain number of lines after

`grep -A 3 "Beth" names.txt`

```
Beth
Tim
Elizabeth
Tom
```

* `-B` display a certain number of lines lines before

`grep -B 3 "Beth" names.txt`

```
Lisa
Mark
Elie
Beth
```

* `-C` display a certain number of lines lines around

`grep -C 3 "Beth" names.txt`

```
Lisa
Mark
Elie
Beth
Tim
Elizabeth
Tom
```

* `-v` invert pattern (you can think of this as anything NOT what you are searching for)

`grep -v "Jane" names.txt`

```
Lisa
Mark
Elie
Beth
Tim
Elizabeth
Tom
Matt
Liza
Shana
```

* `-c` count matches

`grep -c "Jane" names.txt` => `2`

* `-n` show line number

`grep -ni "Jane" names.txt`

```
10:Janey
11:Jane
```

There are **many** more flags with `grep`; you can google around for more or look at `man grep`.

#### Wildcards with `grep`

We previously saw wildcards with `find`, so how can we use them with `grep`? The key is to use *regular expressions*. Regular expressions are used to define patterns in a string of characters, which are then used to search a text for potential matches. Regular expressions are common and quite powerful: you can use them to check whether a user has submitted a properly formatted email address or phone number, for instance.

We will not go in depth with regular expressions here. There are a number of great [interactive references](https://regexr.com/) online. For now, but let's just take a look at a couple examples of the syntax:

`.` - matches any character

**Example:** How many names have a full name that is four characters long?

`grep -wc "...." names.txt` => `7`

`*` - match zero or more of the preceding character or expression.

**Example:** How many names start with a capital T?

`grep -wc "T.*" names.txt` => `2`

`[]` - any specific characters

**Example:** How many names start with a capital L, M, or E?

`grep -wc "[LME].*" names.txt` => `6`

`[^]` - do not match

**Example** How many names **do not** start with a capital T?

`grep -wc "[^T].*" names.txt` => `10`

## { Advanced Terminal - 1 Exercises. }

#### Part I

Answer the following questions:

1. Create an environment variable called `FIRST_NAME` and set it equal to your first name (this does not need to be permanent)
2. Print the `FIRST_NAME` variable
3. Print out the `$PATH` variable
4. What is the `$PATH` variable?
5. Why would you want to create an environment variable?
6. How do you permanently save environment variables?
7. What is a process?
8. How do you list all processes running on your machine?
9. What is a PID?
10. How do you terminate a process?
11. What is the difference between `kill` and `kill -9`?
12. What `grep` flag allows for case insensitive search?
13. What `grep` flag allows for a certain number of lines before the match?
14. What `grep` flag allows for a certain number of lines around the match?
15. What `grep` flag allows for a certain number of lines after the match?
16. What `grep` flag allows for full word search?
17. What `grep` flag shows you the line number of a match?

#### Part II

Write the following terminal commands to do the following (assume that `instructors.txt` is an imaginary file):

1. Find all files inside the `Desktop` folder that have a name of "learn."
2. Find all files inside the `Desktop` folder that start with a "P."
3. Find all files inside the `Desktop` folder that end with `.txt`.
4. Find all files inside the `Desktop/views` folder that have the name `data` somewhere in their filename.
5. Inside of the `instructors.txt` file, output the number of times the word "Elie" appears.
6. Inside of the `instructors.txt` file, list all matches for any full word that starts with a capital "P."
7. Inside of the `instructors.txt` file, list all the line numbers for any full word that starts with a "z" (it should match regardless of upper or lower case).

## Advanced Level - 2  { OPTIONAL }

### { SSH. }

#### Objectives

By the end of this chapter, you should be able to:

* set up an EC2 instance on Amazon
* use the `ssh` command to connect securely to a remote server
* use the `scp` command to copy files to a remote server

#### SSH

SSH, or **S**ecure **Sh**ell, provides a secure channel to access other computers. We commonly use SSH to remotely log in and connect securely to other servers. To practice with SSH we will be setting up our own remote servers using Amazon EC2. This setup can be a bit intimidating, but it's a very valuable skill to know with any kind of development. Let's get started!

#### Setting up an EC2 Instance

As evidenced by the list below, there are a fair number of steps involved in setting up your instance. The links provided also provide a fair amount of context, and help explain the purpose of each of the following steps.

1. Make sure that you have an Amazon Web Services (AWS) account. You can log in / sign up [here](https://docs.aws.amazon.com/) and click on the top right.
2. Create an IAM user [here](https://docs.aws.amazon.com/AWSEC2/latest/UserGuide/get-set-up-for-amazon-ec2.html#create-an-iam-user).
3. Create a key pair [here](https://docs.aws.amazon.com/AWSEC2/latest/UserGuide/get-set-up-for-amazon-ec2.html#create-a-key-pair)
4. Create a VPC [here](https://docs.aws.amazon.com/AWSEC2/latest/UserGuide/get-set-up-for-amazon-ec2.html#create-a-vpc)
5. Create a Security Group [here](https://docs.aws.amazon.com/AWSEC2/latest/UserGuide/get-set-up-for-amazon-ec2.html#create-a-base-security-group)
6. Launch your instance [here](https://docs.aws.amazon.com/AWSEC2/latest/UserGuide/EC2_GetStarted.html#ec2-launch-instance_linux)
7. Connect to your instance [here](https://docs.aws.amazon.com/AWSEC2/latest/UserGuide/EC2_GetStarted.html#ec2-connect-to-instance-linux).

To connect to your instance using SSH you can start [here](https://docs.aws.amazon.com/AWSEC2/latest/UserGuide/AccessingInstancesLinux.html).

Before you try to SSH make sure that your instance is running and that the checks have passed. This should involve typing something along the lines of `ssh -i ./me-key-pair-uswest2.pem ec2-user@YOUR_PUBLIC_DNS`

Once you've connected via SSH, you can exit out of the shell by typing `exit`.

#### Securely copying files to the EC2 Instance with scp

To move files to your EC2 instance, we use the `scp` command to securely copy information. We will need our `pem` file that we used before so make sure you know where that is located. The pattern for `scp` looks like this:

`scp -i PATH_TO_YOUR_PEM_FILE FILE_TO_MOVE USERNAME@PUBLIC_DNS`

This command would move the file `move.txt` from my current directory to the `home` directory on my EC2 instance.

`scp -i ./me-key-pair-uswest2.pem move.txt ec2-user@ec2-54-213-7-226.us-west-2.compute.amazonaws.com:/`

#### Terminate your instance

When you are done working on this tutorial - you **MUST** terminate your instance so that it is not still running. This ensures that you will not be charged for anything as well. You can read more about it [here](https://docs.aws.amazon.com/AWSEC2/latest/UserGuide/EC2_GetStarted.html#ec2-clean-up-your-instance)

### { Cut, Sed, Awk, and Xargs. }

#### Objectives

By the end of this chapter, you should be able to:

* Understand what the `cut` command does and list some use cases for it
* Understand what the `sed` command does and list some use cases for it
* Understand what the `awk` command does and list some use cases for it
* Understand what the `xargs` command does and list some use cases for it

#### cut

The `cut` command is very useful for separating or delimiting strings and characters. If you need to split apart text files or find certain characters, `cut` is the way to go. Let's see how it works with a few examples in a file called `languages.txt`:

`languages.txt`

```
Java,James
Ruby,Matz
Lisp,John
Bash,Brian
Self,David
```

Here's an example using `cut` to grab the first 4 characters of each line (the `-c` flag indicates that the numerical range coming after the flag is referencing characters, not bytes):

`cut -c 1-4 languages.txt`

```
Java
Ruby
Lisp
Bash
Self
```

Now let's grab the last names, but not by the number of characters. Instead, let's do this by delimiting (splitting) on the comma

`cut -d, -f2 languages.txt`

```
James
Matz
John
Brian
David
```

So what is the `-f2`? `-f` refers to each portion that has been split by the delimeter (`-d`) flag. So if we just want the names we can do

`cut -d, -f1 languages.txt`

```
Java
Ruby
Lisp
Bash
Self
```

This is much better because if we had languages of different character lengths, `cut -c 1-4 languages.txt` would not work!

Next, try to use `cut` to print out just the authors. Then sort them and then return the first two authors!

Here's one solution:

`cut -d, -f2 languages.txt | sort | head -n 2`

#### sed

Sed, or Stream EDitor, is one of the *much* more complex terminal commands, so we will only be going over some simple uses cases. There are many, many things you can do with `sed` so try to follow these examples and push yourself to keep learning!

Sed is commonly used for finding and replacing text, editing text in a file, and printing certain parts of a file (though it can to much more). Let's start by finding and replacing each comma in the `languages.txt` file with a colon.

Here's the command:

`sed 's/,/:/g' languages.txt`

Let's break this down:

`sed` - the command\
`s` - substitute\
`,` - our old value, a comma\
`:` - our new value\
`g` - globally, do this everywhere not just the first match\
`languages.txt` - the file we are working with

Here's what the command should output:

```
Java:James
Ruby:Matz
Lisp:John
Bash:Brian
Self:David
```

Notice that if you `cat languages.txt` after running the above `sed` command, the original file is unchanged. In order to edit the file, we need to use the `i` flag to edit in place. But if you try running the command with the `-i` flag you'll get an error about extra characters. Since we are also specifying additional arguments, we need to use the `-e` flag as well.

`sed -ie 's/,/:/g' languages.txt`

If you run this command, and then `cat languages.txt`, you should see that everything has been replaced!

We are just scratching the surface with `sed`. If you want to learn more about it you can read [this](https://www.tutorialspoint.com/sed/sed_basic_syntax.htm) and [this](http://www.panix.com/~elflord/unix/sed.html)

#### awk

Similar to `sed`, `awk` is an incredibly powerful text processing tool. In fact, AWK itself is actually a language that can pretty much do any kind of text manipulation you can think of. We will briefly cover `awk` and go over a few useful commands you can use with it.

Let's start with the simple command `awk '{print}' languages.txt`. This will simply print out the `languages.txt` file. But what happens if we want to just print out a certain part of the file? We can also use `awk` as a delimiter using the `-F` flag. Let's set `:` to be our delimiter and just print out the first portion delimited using `$1`

`awk -F ':' '{print $1}' languages.txt`

Let's look at another example, using the `history` command. If you type this into the terminal, you should see a list of your recent commands. Let's use `awk` to get a history of just the names of the commands we've used, with no further details. When using `awk`, if the delimiter is an empty space we do not need the `-F` flag. So if we want to find the commands we recently used we can type `history | awk '{print $2}'`.

We can also use `awk` to print out rows and columns. For example, if you type `df -h` into the terminal you'll see a table withs some information on your hard drive (`df` is short for display free desk space). Let's pass the result of this command into `awk`:

```
df -h | awk 'FNR == 2 {print $4}'
```

FNR refers to the record number which is usually a line number. Essentially we're telling `awk` to grab the item in the 2nd row and 4th column of the table, which in this case should be your available disk space.

If you want to read more about `awk`, check out [this](https://www.tutorialspoint.com/awk/) tutorial.

#### xargs

Sometimes you may want to execute the same command for multiple inputs. For instance, maybe you want to search multiple text files for a certain piece of text. This is a case where the `xargs` command can be quite handy. Here are some example use cases for `xargs`; each one runs command for a group of files instead of a single one.

`find . -name *.html | xargs grep "elie"` - look for the text "elie" inside of every single `html` file in the current folder

`ls | xargs wc -l` - counts the total amount of lines for each file in a folder

`find . -name "*" | xargs open` - opens all of the files in the current folder.

`find . -name "*.css" | xargs open` - opens all `css` files in the current folder

`find . -name "*.html | xargs rm` - removes all files that end with `.html`

`ls | xargs -t -I {} mv {} {}.md` - adds a markdown file extension to all files (the `-I` flag replaces occurrences; the `-t` flag causes the command that gets run for each input to be logged to the terminal before it is executed, which can be helpful for debugging).

You can read more about `xargs` [here](http://www.cyberciti.biz/faq/linux-unix-bsd-xargs-construct-argument-lists-utility/)

### { Shell Scripting and Vim. }

#### Objectives

By the end of this chapter, you should be able to:

* write simple shell scripts with arguments
* use `vi` to open and edit files

#### Shell Scripting

So far we have learned how to use terminal commands, but our commands are not dynamic. We know exactly what the filenames are or what we might be searching for. Our commands are also not reusable easily; if the filename changes, we have to write the whole command again. To reduce duplication and perform far more sophisticated commands in the terminal, we can write shell scripts using a language called bash. To get started, let's create a file called `first.sh` and inside place the following

```
echo "Hello World"
```

Now if we try to run `./first.sh` it will tell us `permission denied: ./first.sh`. So we need to make this program executable! Let's change permissions to `755` so that anyone can run this file: `chmod 755 first.sh`. Now we can run `./first.sh`!

Let's make a second script called `second.sh`. Inside of this file, type the following:

```
echo Hello $1
```

What do you think that `$1` represents? Let's first `chmod 755 second.sh` and then run `./second.sh` - we should just see "Hello". Now let's try `./second.sh World` and we should see "Hello World"! What we just did was pass an argument to our script. Using arguments which start with `$1` and continue upward are how we can make more dynamic scripts.

#### Your turn

Write a script called `sum.sh` which accepts two arguments and echoes the sum of the two numbers. You might need to do some research [here](https://stackoverflow.com/questions/6348902/how-can-i-add-numbers-in-a-bash-script).

Here's a solution:

```
echo $(($1+$2))
```

#### More complex scripts

There is much more we can do with shell scripting, including conditional logic, if statements, and much more. But for now, let's try to write some handy scripts to help us with daily tasks. Very commonly we are searching for a process using `ps aux | grep "Something"`. Instead of typing that whole thing, we could make a script that does that for us and passes in an argument. Let's try that out with a script called `process.sh`. It might look something like this.

```
ps aux | grep $1
```

Now this is useful if we want to search for a process! If you would like to use the script frequently, you will want to make sure it is somewhere in your $PATH. You can also remove the `.sh` extension if you are doing this.

#### Vim

Vim is a terminal based text editor. It can be quite intimidating at first, but if you spend the time to learn how to use it, you can become an extremely efficient developer. To open up something in `vi`, simply type `vi NAME_OF_FILE`. Once you are in vim you can exit **without** saving by pressing `escape + : + q`. If that is not working press `escape` + `:` + `q!`. If you want to quit and save a file you can either press `shift + Z + Z` or `escape + : + w + q!`.

When you first get into vim you will be in what is called `visual` mode. This means that your keyboard will be set for navigating and not for inserting characters; if you type letters and do not see anything being output, do not worry! To make insertions, press `i` to enter `insert` mode. Here you can make changes to files and type as you normally would. Just remember, if you want to quit out of a file you have to be in `visual` mode!

You can get more practice by using `vimtutor` - just type `vimtutor` into your terminal and you can get started. Alternatively, if you want a more visual tutorial you can check out [Vim Adventures](https://vim-adventures.com/).

## { Advanced Terminal - 2 Exercises. }

Use the following text file to answer the questions

```
Elie-Schoppik-sushi
Tim-Garcia-gummybears
Janey-Keig-bagels
Colt-Steele-tacos
Matt-Lane-pizza
```

1. Replace all of the `-` with `:` using `sed`
2. Return a file with just the first name and last name separated by a space (you can do this with `cut` and `sed` or just `sed`)

```
1>>>>2
2>>>>3
3>>>>4
4>>>>5
```

1. Using `cut` print out just the numbers 2, 3, 4, 5. Use `xargs` to print them all on 1 line
2. Using `xargs` in the `./Desktop` directory, find all of the files that include the text `Welcome`
3. Write a shell script called `access_file.sh` which accepts one parameter and changes the permissions to `755`
4. Write a shell script called `unaccessible_sh.sh` which accepts one parameter and changes the permissions to `300`
5. Using `sed` write the command to replace all instances of the name "foo" with the string "bar" in a file called `baz.txt`
6. Write the command to only print out all of the `pid`s using `awk`
7. Type in the `df -h` command - it will show you much space you have on your hard drive. Using the `awk` command, print out **only** the first percentage capacity.


# 2 - Git and Github

## Learning Objectives

By the end of this class, you should be able to:

* Explain what Git is, and why it is a useful tool.
* Get a copy of your homework questions onto your computer.
  * (To *clone* a repository).
* Save your answers, and send them to our volunteers.
  * (To *commit*, *fork* a repository, and *push* changes).
* See and respond to feedback on your homework.
  * (To use GitHub's *pull request* workflows, and *push* further changes).
* Explore how a file has changed over time.
  * (To use Git's *history log*).

### Get started

We will use Git as our Version Control System (also known as Source Control). Simply put, a version control system takes snapshots of your files and saves them.

> **What is "version control"?** Version control is a system that records changes to a file or set of files over time so that you can recall specific versions later.\
> It allows you to revert files back to a previous state, revert the entire project back to a previous state, compare changes over time, see who last modified something that might be causing a problem, who introduced an issue and when, and more. Using a VCS also generally means that if you screw things up or lose files, you can easily recover. In addition, you get all this for very little overhead.

(Extract from [Git Pro book](https://git-scm.com/book/en/v2/Getting-Started-About-Version-Control) )

So what is **Git**? Git is one of many Version Control Systems available, and by far [the most popular](http://stackoverflow.com/insights/survey/2015#tech-sourcecontrol).

Do not confuse Git with **GitHub**! GitHub is a very popular website where you can publish and share your code. You upload your code as Git repositories (a type of folder or directory), so that you can share it. This makes it possible to collaborate with other people: everyone is writing code that tracked by Git and is added to the same repository.

![](https://4042228299-files.gitbook.io/~/files/v0/b/gitbook-legacy-files/o/assets%2F-MRebciU3NcuLgsX3ijf%2F-M_uxJ8JTCaxpe_n868R%2F-M_uz4PvezISPuD7-dF5%2Fimage.png?alt=media\&token=89e4c16a-3879-45b8-b6a4-c9108a5f5d4d)

During our course, we will be using [GitHub](https://github.com/) to store our code. GitHub is the most popular Git service around, and is used by many large companies, like Facebook, Airbnb and The Guardian.

Most software engineers use a tool called Git to organise their code, and collaborate with other people.

Git is a version control tool that is used to keep the history of changes. I - this sets up the remote URL (GitHub)t makes collaboration easier. We'll see many of its uses throughout the course.

Each week, you're going to use Git to get a copy of your homework exercises, to submit your solutions, and to get feedback on your solutions. Today, you're going to learn how to do these things.

[MigraCode's GitHub page >](https://github.com/migracode-barcelona)

If Git is not installed, follow this tutorial from GitHub to [setup Git](https://docs.github.com/en/github/getting-started-with-github/set-up-git#setting-up-git)

Once Git is installed, set your username and email address: `git config --global user.name <name>` and `git config --global user.email <email>`. Example:

```
git config --global user.name "Mona Lisa"
git config --global user.email email@example.com
```

**Git in the Terminal: most used commands**

* `git init` to be used only ***if it is a new project***, i.e. a project not **cloned** from a repo or a fork
* `git add .` to add local files to the **index**
* `git commit -m "Good explanation of your file changes"` to commit files to the local repo
* `git remote add origin GitRepoRemoteUrl` to be used only ***if it is a new project***
* `git remote -v` to verify that the remote URL is set correctly
* `git push -u origin master` to push your commits to the remote URL (GitHub in our case)

The commands `git add .` and `git commit -m "Good explanation of your file changes"` are used to index and save the files in our computer repository, and we will use `git push` to send the changes to GitHub. This is confusing when you read it the first time, so let's draw the flow:

![](https://4042228299-files.gitbook.io/~/files/v0/b/gitbook-legacy-files/o/assets%2F-MRebciU3NcuLgsX3ijf%2F-M_uzKfiNpowaW3MzwHN%2F-M_v-9igp1OI_9Eoe8nV%2Fimage.png?alt=media\&token=ccc7d87f-557c-49d1-8740-a0ddc5bde9b2)

![](https://4042228299-files.gitbook.io/~/files/v0/b/gitbook-legacy-files/o/assets%2F-MRebciU3NcuLgsX3ijf%2F-M_uzKfiNpowaW3MzwHN%2F-M_v-FlwPjQ1UEQMBFAU%2Fimage.png?alt=media\&token=cde152c4-eb5c-4cff-b7ea-b68700a9d9f8)

### What problem does Git solve?

Git is a version control tool, used to keep the history of changes, and make collaboration easier. It's used to solve many problems, but today we're going to focus on how it:

* Helps us to share information.
* Enables people to make their own changes to that information, and share it back.
* Allows us to make checkpoints so that we can save our work as we go along.
* Allows us to track how information has changed between each checkpoint, and go back to older versions of our work if we want to see what we tried before, or to undo changes.
* Enables us to try more things, because if they didn't work out, we can always go back to what we had working before, by going back to a checkpoint.

#### Versioning <a href="#versioning" id="versioning"></a>

We use Git to track different versions of files.

Perhaps you've had this experience before...

![](https://4042228299-files.gitbook.io/~/files/v0/b/gitbook-legacy-files/o/assets%2F-MRebciU3NcuLgsX3ijf%2F-MhiH3r4vEcbco5hXlxh%2F-MhiHEtZzqCXDEUWay4a%2Fimage.png?alt=media\&token=2247006f-9e91-488d-a4d3-6cb456e3999c)

You've probably in the past saved a document in a file with "draft" in its name, and then another with "version 1" in its name, and eventually one called "final", and then "really final", and then "final after feedback". It can be hard to know what the latest one is, and to track what order the files came in. But we keep these files around, because they were useful, and we may want to check something from them.

Git helps us to avoid this problem. Before we see how Git helps, let's try an exercise:

#### Exercise 1 (10 minutes) <a href="#exercise-1-10-minutes" id="exercise-1-10-minutes"></a>

Open these three links - they are different stages of a draft blog post about CodeYourFuture:

* [final](https://codeyourfuture.github.io/git-draft-blog-post-example/final)
* [revised](https://codeyourfuture.github.io/git-draft-blog-post-example/revised)
* [v1](https://codeyourfuture.github.io/git-draft-blog-post-example/v1)

Try to find all of the differences between these three documents. Can you work out which one is the finished one which was meant to go on the website?

You probably found it hard to see all of the differences (some were really small, like adding or removing a comma!), and non-obvious which is the most complete version!

### How does Git help? <a href="#how-does-git-help" id="how-does-git-help"></a>

Imagine your teacher wanted everyone in the class to answer three questions and to send back the answers. What capabilities would we need in order to be able to do that?

**First**, the teacher needs to be able to write the questions, and **store** them somewhere.

When we're using Git, we write things down in files in a folder (these could be text files, Word documents, images, or really any kind of file). When we save these files, we say we're *committing* them, and we call the folder where we're saving them a *repository* (or *repo* for short).

![](https://4042228299-files.gitbook.io/~/files/v0/b/gitbook-legacy-files/o/assets%2F-MRebciU3NcuLgsX3ijf%2F-MhiH3r4vEcbco5hXlxh%2F-MhiHIMjHsKcqRDjxRcs%2Fimage.png?alt=media\&token=af85d64f-7abe-413a-a4e8-a5906829fe3c)

**Next**, the teacher needs to put the repository somewhere where the learners can get it. We call this *pushing* the repository. The teacher won't send a copy to each learner, but will put one copy somewhere on the Internet, and tell the learners where it is. The place the teachers on this course will be pushing to is a website called [GitHub](https://github.com/), but there are other websites they could push to if they wanted to. This is the difference between Git and GitHub - Git is a way of storing and sharing files, and GitHub is one website where you can use Git.

![](https://4042228299-files.gitbook.io/~/files/v0/b/gitbook-legacy-files/o/assets%2F-MRebciU3NcuLgsX3ijf%2F-MhiH3r4vEcbco5hXlxh%2F-MhiHKiseFNV8jN0bI_H%2Fimage.png?alt=media\&token=1b8f9bf6-cc8c-4ecc-8913-cdb03cdf442d)

**Then**, now that the teacher has pushed the questions, each learner needs to be able to **get the questions onto their computer**.

When we're using Git, we call this *cloning* the teacher's repository (because we're making our own copy). After we've cloned the repository, we will have the same folder on our computer as the teacher created, committed, and pushed.

![](https://4042228299-files.gitbook.io/~/files/v0/b/gitbook-legacy-files/o/assets%2F-MRebciU3NcuLgsX3ijf%2F-MhiH3r4vEcbco5hXlxh%2F-MhiHNJIysdBDQ44AjDI%2Fimage.png?alt=media\&token=7ace1872-0610-4118-8216-1495f1b00cef)

### The Git Cheatsheet <a href="#the-git-cheatsheet" id="the-git-cheatsheet"></a>

We tend to do the same four or five things in Git over and over again, but it can be easy to forget them. There's a handy reference at [Git Guide](https://syllabus.migracode.org/git) and [Git CheatSheet](https://education.github.com/git-cheat-sheet-education.pdf) to help you remember.

Let's walk through one of the sections together: "I want to get code from a repo onto my computer (Cloning)". It has a video, to show us what we should be doing, and explains each step in the text.

We'll use it in our next exercise:

#### Exercise 2 (15 minutes) <a href="#exercise-2-15-minutes" id="exercise-2-15-minutes"></a>

Volunteers from Code Your Future have already pushed an example repository, so you're going to try to clone it from GitHub onto your computer.

Try following the instructions labelled "I want to get code from a repo onto my computer (Cloning)" from the [Git Cheatsheet](https://education.github.com/git-cheat-sheet-education.pdf). The repository we want to clone is `https://github.com/CodeYourFuture/cyf-demo-repo`.

When you've finished the exercise, you should have `file.txt` open in VS Code.

### What did we just do? <a href="#what-did-we-just-do" id="what-did-we-just-do"></a>

![](https://4042228299-files.gitbook.io/~/files/v0/b/gitbook-legacy-files/o/assets%2F-MRebciU3NcuLgsX3ijf%2F-MhiH3r4vEcbco5hXlxh%2F-MhiHZRU5Af2qAHewYTq%2Fimage.png?alt=media\&token=131cddfc-645b-4fee-8f6e-38e08412a096)

Each of you just cloned a repository which CodeYourFuture created onto your computer, and opened up your copy of one of the files. This is the process you're going to follow to get your homework every week.

### Let's do some homework (teacher-led demo) <a href="#lets-do-some-homework-teacher-led-demo" id="lets-do-some-homework-teacher-led-demo"></a>

The file you opened, `file.txt`, has a question in it. We're going to answer the question, and submit it as if it was our homework.

Let's clone our repository to our computer:

```
https://github.com/CodeYourFuture/cyf-demo-repo
```

We can edit the file in VS Code to answer the question, and save it like normal.

After we've saved the file, if we open up GitHub Desktop, something interesting has changed. On the left, it now says "1 changed file", and on the right, it shows us what the change was. Things we've removed get a red background, and things we've added get a green background.

(If you've changed a line, the old version will appear with a red background, and the new version with a green background).

![](https://4042228299-files.gitbook.io/~/files/v0/b/gitbook-legacy-files/o/assets%2F-MRebciU3NcuLgsX3ijf%2F-MhiH3r4vEcbco5hXlxh%2F-MhiHdMILypKms_t7vMu%2Fimage.png?alt=media\&token=c02b2d13-8b25-4292-ab4b-2e17a2087e91)

This is a really useful way for us to check over our homework before submitting it. If we've accidentally deleted things, or changed things we didn't mean to, we can notice now, and undo them by editing the file again.

When we're happy with our change, we can press the "Commit to main" button. That tells Git "This change is an interesting change, I want to keep it". You don't need to wait until you've got your answers perfect before committing, in fact it's better to make lots of commits as you work - we'll come back to this in a bit!

This doesn't copy our change to any other computer - it won't go on GitHub - committing is something we just do on our computer.

#### Exercise 3 (10 minutes) <a href="#exercise-3-10-minutes" id="exercise-3-10-minutes"></a>

Try doing what your teacher just did:

1. Answer the question in `file.txt` in VS Code and save your changes.
2. Look at the diff in GitHub desktop - does it look as you expect?
3. Make a commit in your local repository.

#### Teacher-led demo continues... <a href="#teacher-led-demo-continues" id="teacher-led-demo-continues"></a>

Now, because we committed a change, our copy of the repository is different from CodeYourFuture's copy. GitHub Desktop now gives us a new button: "Push origin" ("origin" is what Git calls "where I cloned this repository from"). If we press it, it will try to send our change to the CodeYourFuture version.

We didn't have this button before, because even though we had changed the files, we hadn't committed any changes. There's an important distinction here: When we save files in VS Code, we store them in the file on our computer, but Git doesn't automatically commit them. It notices the changes (it showed them to us!), and asks us if we want to commit them. Only after we've committed them does it let us push them. We'll talk about when you want to commit later on today.

So, we're happy with our homework, we've committed it, let's try pushing it!

### Forking <a href="#forking" id="forking"></a>

GitHub Desktop just gave us a really useful warning, but it uses some words we haven't seen yet!

We just tried to push our changes to CodeYourFuture's copy of this repository. But we're not allowed to do that! Imagine if anyone could just push anything they wanted to our repository! Someone could accidentally delete all of the questions, or add the answers to all of the questions, or turn the HTML homework into a bunch of questions about vegetables!

To avoid this, we use something called a *fork* and something called a *pull request*.

Remember when we cloned the repo, we pasted `https://github.com/CodeYourFuture/cyf-demo-repo` in as the place to clone from? Let's look at that:

![](https://4042228299-files.gitbook.io/~/files/v0/b/gitbook-legacy-files/o/assets%2F-MRebciU3NcuLgsX3ijf%2F-MhiH3r4vEcbco5hXlxh%2F-MhiHnRCGxKhYQdgth0H%2Fimage.png?alt=media\&token=80374048-8b1c-4492-b752-e920ef898256)

This is saying "On GitHub, the user `CodeYourFuture` has a repository called `cyf-demo-repo`, I want that".

GitHub lets you host your own copy of the repository on GitHub too! If your username is `EagerLearner`, can you guess what URL your repository would be at?

That's right, <https://github.com/EagerLearner/cyf-demo-repo>!

![](https://4042228299-files.gitbook.io/~/files/v0/b/gitbook-legacy-files/o/assets%2F-MRebciU3NcuLgsX3ijf%2F-MhiH3r4vEcbco5hXlxh%2F-MhiHsrxun13gYpe7zS3%2Fimage.png?alt=media\&token=689dd106-912d-4a01-97f7-a7ff49ef0125)

This is called a *fork*. It's a copy of the repository, where you're allowed to make changes. So when GitHub Desktop just asked us "Do you want to fork this repository?", what it's really saying is "You're not allowed to make changes to CodeYourFuture's repository, would you like to make your own copy on GitHub where you *are* allowed to make changes, and put your changes there?"

That sounds like exactly what we want to do, so we'll click the "Fork This Repository" button.

Then GitHub asks us whether we want to fork "To contribute to the parent project" (i.e. because we want to work with CodeYourFuture) or "For my own purposes" (i.e. because we want to do our own thing apart from CodeYourFuture). We want to work with CodeYourFuture, so we'll select "To contribute to the parent project" and press Continue.

Now if we press "Push origin", it will copy our changes to our fork on GitHub.

![](https://4042228299-files.gitbook.io/~/files/v0/b/gitbook-legacy-files/o/assets%2F-MRebciU3NcuLgsX3ijf%2F-MhiH3r4vEcbco5hXlxh%2F-MhiHwrwH8nZHahXrE0D%2Fimage.png?alt=media\&token=d8c0b2f6-d5bb-412d-8698-46cc3a9d3738)

If you forget this, it's in the [cheatsheet](https://education.github.com/git-cheat-sheet-education.pdf)! Check out the "I want to send my code to volunteers (Pushing)" section.

### Making a Pull Request <a href="#making-a-pull-request" id="making-a-pull-request"></a>

Now that we've pushed our homework to our fork, we need to tell CodeYourFuture about it, so that the volunteers know to look at it!

We do this with something called a *pull request*. This is a slightly weird name, in the context of homework.

Normally, when people push changes to a fork on GitHub, they're doing so because they want the person who owns the repository to look at the changes, and pull the changes into their repository. For example, this webpage we're reading the syllabus on right now is hosted on GitHub, and if someone spots a typo, they can fix it, push it to their fork, and request for CodeYourFuture to pull their change into CodeYourFuture's version (hence the name a pull request - "requesting to pull in changes").

We call pulling someone's change into a repository "merging" the change, because we're merging what we're pulling into our repo with what we had before.

For submitting homework, every week you're going to create a pull request, and a volunteer will look at it and give you feedback, but we won't be pulling your homework into CodeYourFuture's copy (then the next student would have the answers when they tried to read the questions!). You'll be creating pull requests, but we won't actually merge your changes into the repository.

In GitHub Desktop, if you open the Branch menu, and click "Create Pull Request", it will open your web browser at GitHub, and show you the changes you're about to make a pull request for. This is another great time to check that you're happy with your homework (if you're not, go back to VS Code, make your changes, commit them, push them to origin again, and refresh this page).

If you're happy, press the "Create pull request" button. Fill in the details in the form, so that the volunteers know what they're meant to be reviewing, and press "Create pull request".

Now there's a pull request that volunteers can look at! They can see who made the pull request, and see all the changes you've made.

#### Exercise 4 (15 minutes) <a href="#exercise-4-15-minutes" id="exercise-4-15-minutes"></a>

Make yourself a pull request with your change!

1. Try to push your changes, make a fork, and then actually push your changes.
2. Make your first pull request!

If you get stuck, check out the [cheatsheet](https://education.github.com/git-cheat-sheet-education.pdf) :)

#### Exercise 5 (5 minutes) <a href="#exercise-5-5-minutes" id="exercise-5-5-minutes"></a>

There's another file in the repository you've cloned, `other-file.txt`.

1. Open it
2. Answer the question in the file
3. Commit
4. and Push

Notice a couple of things are different this time!

It didn't ask you to fork the repository - that's because you already have a fork you're allowed to push to.

You may also notice that if you click the "Create Pull Request" menu item, it brings you to a different page. It doesn't have a "Create Pull Request" button, it has a "View Pull Request" button. This is because if you already have a pull request open, when you push more changes, it will update your existing pull request.

This is useful for responding to feedback you get on your homework. There are ways to open more than one pull request at a time (using something called branches), which we'll learn about in the future, but for now, one should do!

### Getting feedback <a href="#getting-feedback" id="getting-feedback"></a>

When you've made your pull request, our volunteers will be notified. They will look at your changes. When they are done, you will get an email. Here are some of the things they may do:

* Make comments with suggestions, either about a particular bit of code, or about the whole pull request.
* Add labels to the pull request (e.g. marking it as complete, or unfinished).

If they give you suggestions, you should try to implement the suggestions, and push a new commit. If you're confused, struggling, or find them unclear, you can respond to the comment with a comment of your own, or ask on Slack.

### History <a href="#history" id="history"></a>

One useful features of Git is how it stores your commits. In GitHub Desktop, if you open the History tab, you can see a list of each commit that's been made in the repository, with the oldest at the bottom and the newest at the top.

If you click on one of the commits, you'll see the changes that happened in it. This can be really useful to understand how the repository evolved to how it looks today. It can also help us to find out when bugs were introduced!

You can always see an old version of a file by looking in the Git history, and if you want to get it back, you can just copy and paste it from the history view into your text editor.

#### When to commit, push, and make a pull request <a href="#when-to-commit-push-and-make-a-pull-request" id="when-to-commit-push-and-make-a-pull-request"></a>

You should commit often! Every time you think you've done something you may want to look at again, you should make a commit.

Let's say you've made a website, and it generally looks about right, but you were thinking of adding some colour, or an animation. Before you do that, make a commit, because then if you break some of the CSS by trying to add an animation, you can always undo it.

Or if you want to try out a few different colours, make a commit for each colour, and then you can easily see what colours you tried out, and compare them.

**Teacher-led demo: Changing the colours**

A volunteer made a small website, which we can find in <https://github.com/CodeYourFuture/SampleGitWebsite>

They had a few different colour combinations they were trying to choose between. Because they made commits for each choice, we can look at their choices, and try them each out.

If they hadn't made all of those commits, they probably would've forgotten at least one of the colours, and we wouldn't be able to see them now. Maybe they would've lost the perfect colour! Thankfully, we can look in the git history and see each step along the way.

Similarly, you don't need to have finished everything before you push - in fact, it can be better to push lots! If your computer crashes, or you accidentally delete your files, or you want to work on homework on someone else's computer, you can always get back anything that you've pushed to GitHub. So commit often, and push often!

You also don't need to have finished all of your homework in order to make a pull request! If you've been struggling with one question, you can make a pull request and ask for help (you can even link to it on Slack! It will help the volunteers to help you, because they will be able to see exactly the code you're struggling with). Or if you've done most of the homework, but are struggling with a few questions, a volunteer can look at what you've done and help you out - but only if they can see your code!

Commit often, push often, and make pull requests early!

You may notice that your commits all have messages like "Update file.txt", whereas the ones before you started editing have different messages.

Commit messages can be really useful to understand what a change did without having to read the whole thing. Let's try out an exercise to help us understand this:

#### Exercise 6 (10 minutes) <a href="#exercise-6-10-minutes" id="exercise-6-10-minutes"></a>

1. Clone <https://github.com/CodeYourFuture/git-log-example> (if you forgot how, check the [cheatsheet](https://education.github.com/git-cheat-sheet-education.pdf)
2. Have a read of the file called `README.md`. See if you can find a problem in the file.
3. Look through the history in GitHub Desktop. See if you can work out when and why the problem was introduced.
4. Make a pull request fixing the problem.

#### Exercise 7 (5 minutes) <a href="#exercise-7-5-minutes" id="exercise-7-5-minutes"></a>

Remember earlier we looked at three blog posts? They're actually in a repository on GitHub! <https://github.com/CodeYourFuture/git-draft-blog-post-example>

Clone the repository and take a look. Can you find all of the differences between them now? Can you tell which was the finished version? How much easier/harder is this than it was without Git?

### Commit messages <a href="#commit-messages" id="commit-messages"></a>

If you looked through the history of the Git repository, you may have been able to see where the problem came in just from the commit message, without having to look at the changes that were actually made. If the commit messages were all just "Update file.txt", that would've been much harder!

When we make commits in Git, we try to give clear, helpful messages, describing what changed, and why. (The why is really important! You can always work out *what* changed by reading the change itself, but it's much harder to work out *why* if no one wrote it down!)

There is a convention when using Git to use the following format for commit messages:

```
One sentence summary

Longer explanation of how, the reasons, exceptions, or anything that may be surprising.
This may be many sentences, and keep going for a long time.
```

Try to use this format when making your own commits. GitHub Desktop tries to encourage this by having two boxes above the "Commit to main" button - one which is just one line, and one where you can put lots of lines.

![](https://4042228299-files.gitbook.io/~/files/v0/b/gitbook-legacy-files/o/assets%2F-MRebciU3NcuLgsX3ijf%2F-MhiH3r4vEcbco5hXlxh%2F-MhiI5KoTmeknSHmjLa4%2Fimage.png?alt=media\&token=d590791b-8ff8-4b31-804c-68544da4afca)

Explaining *why* we're making the change can help people in the future to understand why things look the way they do, and what's important not to change.

### Glossary <a href="#glossary" id="glossary"></a>

We introduced a few new things in this class, and it can be a bit confusing to know which is which:

* **Git** is a system for storing changes to files in commits, and sharing them between different computers. There are also other systems which do this, but Git is the most popular one.
* **GitHub** is a website which will store a copy of your Git repository, and allow you to clone it, and push changes to it. There are also other websites which can do this, but GitHub is the most popular one.
* **GitHub Desktop** is a program made by GitHub to allow you to use Git easily from your computer. Later in the course, we will use other programs to use Git, too.

### **More Resources**

* [Git Cheat Sheet](https://education.github.com/git-cheat-sheet-education.pdf)
* [How does GitHub work? (30min)](https://www.youtube.com/watch?v=E8TXME3bzNs)
* Follow this tutorial to learn the basic Git commands <https://www.codeschool.com/courses/try-git>
* Another good resource: Git - the simple guide <http://rogerdudler.github.io/git-guide/>
* A more detailed tutorial that goes into advanced topics of Git - <https://www.atlassian.com/git/tutorials/what-is-version-control>
* You can also check this visual explanation of different commands and what they do: <http://ndpsoftware.com/git-cheatsheet.html#loc=workspace>
* This Glossary has definitions of the terms normally used with Git: <https://help.github.com/articles/github-glossary/>

###


# Git and GitHub Practice Session

## Assignment

In this project, we’ll walk through the basic Git workflow that you will use in all your projects.

**Create the Repository**

1. Create a new repository by clicking the button shown in the screenshot below.

![](https://4042228299-files.gitbook.io/~/files/v0/b/gitbook-legacy-files/o/assets%2F-MRebciU3NcuLgsX3ijf%2F-MaOkhFrEJ22zVjuJRH-%2F-MaOmGvD2c5pZEGKXHfj%2Fimage.png?alt=media\&token=b7b4b3c0-373f-41d4-9f49-689da3a55071)

&#x20;**2.** Give your repository the name “git\_test” in the repository name input field, and create the repository by clicking the green “Create repository” button at the bottom of the page.

**3.** This will redirect you to your new repository on GitHub. To copy this repository onto your local machine, select the HTTPS option and copy the line next to it.

![](https://4042228299-files.gitbook.io/~/files/v0/b/gitbook-legacy-files/o/assets%2F-MRebciU3NcuLgsX3ijf%2F-MaOkhFrEJ22zVjuJRH-%2F-MaOmf1yI-7tReRBRJwz%2Fimage.png?alt=media\&token=5da94e24-6c76-44d2-a634-9f4bcfc8d047)

**4.** In the command line on your local machine, navigate to where you want to store this project, and then clone your repository on GitHub onto your computer with `git clone` followed by the URL you copied in the last step. The full command should look similar to `git clone https://github.com/USER-NAME/REPOSITORY-NAME.git`.

**Note:** In the image below SSH link is used instead of HTTPS which is not important for us at this point. You can continue with HTTPS link.

![](https://4042228299-files.gitbook.io/~/files/v0/b/gitbook-legacy-files/o/assets%2F-MRebciU3NcuLgsX3ijf%2F-MaOkhFrEJ22zVjuJRH-%2F-MaOmlw8VU5Z1bQpd6k1%2Fimage.png?alt=media\&token=e6b4b7ec-dace-43ef-9e20-6d258ea32e5c)

**5.** That’s it! You have successfully connected the repository you created on GitHub to your local machine. To test this, you can `cd` into the new **git\_test** folder that was downloaded and then enter `git remote -v` in your command line. This will display the URL of the repository you created in GitHub, which is the remote for your local copy. You may have also noticed the word **origin** at the start of the `git remote -v` output, which is the name of your remote connection. The name “origin” is both the default and the convention for the remote repository, but it could have just as easily been named “party-parrot” or “dancing-banana”. (Don’t worry about the details of origin for now; it will come up again near the end of this tutorial.)&#x20;

![](https://4042228299-files.gitbook.io/~/files/v0/b/gitbook-legacy-files/o/assets%2F-MRebciU3NcuLgsX3ijf%2F-MaOkhFrEJ22zVjuJRH-%2F-MaOmx3m9vzpR7guVBnV%2Fimage.png?alt=media\&token=91388d9b-7403-45ae-9723-86aa2a91b794)

**Use the Git Workflow**

Create a new file in the `git_test` folder called “README.md” with the command `touch README.md`.

![](https://4042228299-files.gitbook.io/~/files/v0/b/gitbook-legacy-files/o/assets%2F-MRebciU3NcuLgsX3ijf%2F-MaOkhFrEJ22zVjuJRH-%2F-MaOnDiXtaKFCRJiUf5f%2Fimage.png?alt=media\&token=d21e69c9-b4d7-4e48-a6dd-908fcc43ed2e)

Type `git status` in your terminal. In the output, notice that your README.md file is shown in red, which means that this file is not staged.

![](https://4042228299-files.gitbook.io/~/files/v0/b/gitbook-legacy-files/o/assets%2F-MRebciU3NcuLgsX3ijf%2F-MaOkhFrEJ22zVjuJRH-%2F-MaOnG3US7JD8IV25MNS%2Fimage.png?alt=media\&token=67c8ecbd-9bdc-4e4f-9688-09cb04237ed5)

Type `git add README.md`. This command adds your README.md file to the staging area in Git. Now, type `git status` again. In the output, notice that your file is now shown in green, which means that this file is now in the staging area.

![](https://4042228299-files.gitbook.io/~/files/v0/b/gitbook-legacy-files/o/assets%2F-MRebciU3NcuLgsX3ijf%2F-MaOkhFrEJ22zVjuJRH-%2F-MaOnImzz6zPnhiicPrJ%2Fimage.png?alt=media\&token=0a24f98e-2a1f-4e3e-bfad-e699d3321c3a)

Type `git commit -m "Add README.md"` and then type `git status` once more. The output should now say, “*nothing to commit, working tree clean*”, indicating that your changes have been committed. Don’t worry about the `upstream is gone` message you may see, this is totally normal and only showing because your cloned repository currently has no branches. It will be resolved once you have followed the rest of the steps in this project.

![](https://4042228299-files.gitbook.io/~/files/v0/b/gitbook-legacy-files/o/assets%2F-MRebciU3NcuLgsX3ijf%2F-MaOkhFrEJ22zVjuJRH-%2F-MaOnLSnzvcc91utQ6hc%2Fimage.png?alt=media\&token=6c72b350-22fb-4c85-a622-64c93d818d16)

Type `git log` and look at the output. You should see an entry for your “Add README.md” commit. You will also see details on the author who made the commit and the date and time for when the commit was made.

**Add Another File**

Create a new file in the `git_test` folder called `hello_world.txt`. In the terminal, type `git status`, and notice `hello_world.txt` is not staged.

![](https://4042228299-files.gitbook.io/~/files/v0/b/gitbook-legacy-files/o/assets%2F-MRebciU3NcuLgsX3ijf%2F-MaOkhFrEJ22zVjuJRH-%2F-MaOnQNrMH-FhJ2hfuuS%2Fimage.png?alt=media\&token=eec3c52b-61c3-4826-b048-fca7e109c9ee)

Open README.md in your text editor of choice and add the text “This is (YourUsername)’s first git project!” and then save the file.

![](https://4042228299-files.gitbook.io/~/files/v0/b/gitbook-legacy-files/o/assets%2F-MRebciU3NcuLgsX3ijf%2F-MaOkhFrEJ22zVjuJRH-%2F-MaOncrBmOriApvjHsfu%2Fimage.png?alt=media\&token=dd643ab4-40c2-4351-9aeb-6fdf61b033e4)

Back in your terminal, type `git status`, and notice that README.md is now shown as modified, and not staged or committed. This is because you made a change to it, and it is already a tracked file.

![](https://4042228299-files.gitbook.io/~/files/v0/b/gitbook-legacy-files/o/assets%2F-MRebciU3NcuLgsX3ijf%2F-MaOkhFrEJ22zVjuJRH-%2F-MaOnh-6MHFbnVbR8dZA%2Fimage.png?alt=media\&token=d1cbb6a9-06a9-4714-ab60-e08c02388272)

Add README.md to the staging area with `git add README.md`.

Can you guess what `git status` will output now? README.md will be displayed in green text, while hello\_world.txt will still be in red. This means that only README.md has been added to the staging area.

![](https://4042228299-files.gitbook.io/~/files/v0/b/gitbook-legacy-files/o/assets%2F-MRebciU3NcuLgsX3ijf%2F-MaOkhFrEJ22zVjuJRH-%2F-MaOnku0V-PmRhvUf63V%2Fimage.png?alt=media\&token=58d80ddb-d0b7-4730-a795-ef2afc61ea6b)

Now, add hello\_world.txt to the staging area with a slightly different command: `git add .`, where the full stop means to add all files **in the current directory** that are not staged. Then, type `git status` once more, and everything should now be in the staging area. *(Note: You can use `git add -A` to add ALL unstaged files to the staging area within the repository)*

![](https://4042228299-files.gitbook.io/~/files/v0/b/gitbook-legacy-files/o/assets%2F-MRebciU3NcuLgsX3ijf%2F-MaOkhFrEJ22zVjuJRH-%2F-MaOnp9OkL8rnKnKkUJR%2Fimage.png?alt=media\&token=4e508f6a-73ca-40c7-8d75-32976f6c3772)

Finally, let’s commit all of the files that are in the staging area and add a descriptive commit message `git commit -m "Add hello_world.txt and edit README.md"`. Then, type `git status` once again, which will output “*nothing to commit*”.

![](https://4042228299-files.gitbook.io/~/files/v0/b/gitbook-legacy-files/o/assets%2F-MRebciU3NcuLgsX3ijf%2F-MaOkhFrEJ22zVjuJRH-%2F-MaOnsRDpOStl7xtcICo%2Fimage.png?alt=media\&token=56fab2aa-da55-44d5-b501-e703713f8963)

Take one last look at your commit history by typing `git log`. You should now see two entries.

**Push Your Work to GitHub**

Finally, let’s upload your work to the GitHub repository you created at the start of this tutorial.

Type `git push origin main`.

![](https://4042228299-files.gitbook.io/~/files/v0/b/gitbook-legacy-files/o/assets%2F-MRebciU3NcuLgsX3ijf%2F-MaOkhFrEJ22zVjuJRH-%2F-MaOo-TfyC9My8SyOslA%2Fimage.png?alt=media\&token=e0c848cd-a610-48fe-808d-dcb18e5004c3)

Type `git status` one final time. It should output “*nothing to commit, working tree clean*”.

![](https://4042228299-files.gitbook.io/~/files/v0/b/gitbook-legacy-files/o/assets%2F-MRebciU3NcuLgsX3ijf%2F-MaOkhFrEJ22zVjuJRH-%2F-MaOo3t6mgGoKdXEcTSz%2Fimage.png?alt=media\&token=9427ed74-2816-4f8e-b89c-be8163c66161)

When you reload the repository on GitHub, you should see the README.md and hello\_world.txt files that you just pushed there from your local machine.

![](https://4042228299-files.gitbook.io/~/files/v0/b/gitbook-legacy-files/o/assets%2F-MRebciU3NcuLgsX3ijf%2F-MaOkhFrEJ22zVjuJRH-%2F-MaOo8IRKN9ZXCIsG9O7%2Fimage.png?alt=media\&token=f1c9ed6c-b079-4969-916c-fba9d66097bc)

### Conclusion

The main take away from the past lessons is how to use Git and GitHub for your projects. You now have this very powerful skill that will help you immensely when we get into the coding projects. You will be able to share your work with others for code reviews and to get help with your code if you’re stuck.

### Extra Practice

Follow the instructions on this [link](https://github.com/Migracode-Barcelona/learn-git) for more practice.


# HTML/CSS

**HTML and CSS are the building blocks of any website and in this module we teach you how to use them well. You will learn how to make responsive, modern websites and it will prepare you for the following modules.**

Below an overview of the week-by-week topics - click on the title to find more details.

{% content-ref url="/pages/-MRec6e6x6aZ3xxMxQh3" %}
[1 - Semantic HTML and CSS](/courses/introduction-3/course-content/html-css/week-1)
{% endcontent-ref %}

{% content-ref url="/pages/-MRecnqgzbvMvorhLEK0" %}
[2 - Responsive Web and Layout](/courses/introduction-3/course-content/html-css/week-2)
{% endcontent-ref %}

{% content-ref url="/pages/-MRed5QUCSaJXXwC47aq" %}
[3 - Bootstrap](/courses/introduction-3/course-content/html-css/week-3)
{% endcontent-ref %}

![](https://4042228299-files.gitbook.io/~/files/v0/b/gitbook-legacy-files/o/assets%2F-MRebciU3NcuLgsX3ijf%2F-MSXGtKUhAK1wnjgonVJ%2F-MSXH-cobh06BKvpvtDC%2FIMG_8661%20\(2\)migracode-bcn.jpg?alt=media\&token=acbac257-6603-4a0a-9281-4c39ec679f92)


# 1 - Semantic HTML and CSS

What you will learn this week:

1. A refresh of HTML syntax and semantics
2. How to use Chrome Developer Tools
3. How is HTML and CSS consumed by the browser
4. A deeper dive into CSS
5. HTML forms

## Part 1 - HTML refresh

### 1.1 HTML Syntax <a href="#html-syntax" id="html-syntax"></a>

You're already familiar with HTML code from your application process. If you want to refresh your memory, read this [quick guide to the HTML syntax](http://marksheet.io/html-syntax.html).

#### Exercise (1 minute) <a href="#exercise-1-minute" id="exercise-1-minute"></a>

All together, let's review the basic syntax in the following example:

```
<article>
  <h1>Learning HTML</h1>
  <p>Get to know the HTML basics.</p>
  <a href="http://html5rocks.com">Read Article</a>
</article>
```

Which parts are the **Tags** and which parts are the **Attributes**.

### 1.2 HTML Tags <a href="#html-tags" id="html-tags"></a>

HTML tags are arranged in a hierarchy. This is sometimes called "nesting" tags or creating an HTML "tree". Between the opening `<article>` tag and the closing `</article>` tag there are three other tags. We call these "child" tags, because they have a parent-child relationship.

![](https://4042228299-files.gitbook.io/~/files/v0/b/gitbook-legacy-files/o/assets%2F-MRebciU3NcuLgsX3ijf%2F-MhiCm_F6gtcBhdPNFAG%2F-MhiEdJMoYL0ian8NOGr%2Fimage.png?alt=media\&token=e4b0223f-9e7b-443e-9eaa-71b136eccbe0)

#### Exercise (5 minutes) <a href="#exercise-5-minutes" id="exercise-5-minutes"></a>

As a group, let's try to name all of the parent and child tags in the following example.

```
<article>
  <h1>Learning HTML</h1>
  <p>
    <span class="author">Author:</span>
    <a href="http://codeyourfuture.io">Code Your Future</a>
  </p>
  <p>Get to know the HTML basics.</p>
  <a href="http://html5rocks.com">Read Article</a>
</article>
```

### &#x20;<a href="#example-htmlcss-project" id="example-htmlcss-project"></a>

### Example HTML/CSS Project <a href="#example-htmlcss-project" id="example-htmlcss-project"></a>

In today's class, we will begin adapting styles on this example website. We'll review some of the HTML/CSS basics you already encountered during your application process and learn some new techniques. By the end of the third lesson, we will have worked together to improve the example site on the left so that it looks like the screenshot on the right.

Next image shows how it is right now:

![](https://4042228299-files.gitbook.io/~/files/v0/b/gitbook-legacy-files/o/assets%2F-MRebciU3NcuLgsX3ijf%2F-MhiCm_F6gtcBhdPNFAG%2F-MhiEmPD03r2DH6GRzFw%2Fimage.png?alt=media\&token=fd5fbc0a-e798-4583-85a1-4bef41f17f49)

And this image shows how should be after you complete it:

![](https://4042228299-files.gitbook.io/~/files/v0/b/gitbook-legacy-files/o/assets%2F-MRebciU3NcuLgsX3ijf%2F-MhiCm_F6gtcBhdPNFAG%2F-MhiEqd51YWyjkDff71y%2Fimage.png?alt=media\&token=d28ab3db-0c0b-4466-89d4-ef31921d8118)

The example website you'll begin working with is available on this Code Your Future GitHub repository - [Bikes for Refugees](https://github.com/CodeYourFuture/bikes-for-refugees). Fork the repository to your personal account and then clone the repository

#### Exercise (5 minutes) <a href="#exercise-5-minutes" id="exercise-5-minutes"></a>

Spend a few minutes exploring the `.html` and `.css` files for this page. Why don't we put everything in one file?

### &#x20;<a href="#semantic-html" id="semantic-html"></a>

### 1.3 Semantic HTML <a href="#semantic-html" id="semantic-html"></a>

When writing HTML code, you can use different tags to describe the content. Is it a navigation menu, a paragraph of text, or an article? By using the correct tag, you help search engines like Google or screen readers for the visually impaired.

> Semantic HTML is the use of HTML markup to reinforce the semantics, or **meaning**, of the information in webpages and web applications rather than merely to define its presentation or look. [Wikipedia](https://en.wikipedia.org/wiki/Semantic_HTML)

We'll cover the following semantic tags:

* `<header>`
* `<footer>`
* The `role="main"` attribute
* `<nav>`
* `<article>`
* `<aside role="complementary">`

#### Exercise (10 minutes) <a href="#exercise-10-minutes" id="exercise-10-minutes"></a>

Determine where to place these new Tags and Attributes in the index.html file. Who benefits when we write "semantic" HTML?

### &#x20;<a href="#css-selectors" id="css-selectors"></a>

## Part 2: Chrome developer tools

### 2.1 What are Chrome Developer Tools?

Here’s what you’ll see when you open Developer Tools:

![](https://4042228299-files.gitbook.io/~/files/v0/b/gitbook-legacy-files/o/assets%2F-MRebciU3NcuLgsX3ijf%2F-MawsIFBsw33Abs_N4IR%2F-MawvkMANlumzL35E9DV%2Fimage.png?alt=media\&token=86495a2d-6fed-460e-ae36-f6e0fcdb64bd)

A standard web page, but with a new set of tools open in a panel on the right of the page.

There are three tabs at the top of the Developer Tools window, and a further six that you can see by clicking the **>>** symbol next to them.

The tabs are:

* Elements
* Console
* Source
* Network
* Application
* Security
* Memory
* Performance
* Audits

They don’t always stay in this order—Chrome moves them around based on which you opened last.

By default, Developer Tools opens with the Elements tab open.

**Elements** shows you the HTML used to build the page you’re looking at, together with any inline CSS.

![](https://4042228299-files.gitbook.io/~/files/v0/b/gitbook-legacy-files/o/assets%2F-MRebciU3NcuLgsX3ijf%2F-MawsIFBsw33Abs_N4IR%2F-Maww5OmVfFrhG2rZ9J5%2Fimage.png?alt=media\&token=10a8a55e-f2cd-44ad-a589-382a5dba6ccd)

**Console** deals with JavaScript. It gives you information about interactive elements on a page. In Console, you can write JavaScript to interact with the web page you’re viewing, and it also lets you write messages to yourself in the JavaScript of websites you’re building, which then show up in Console to show that the JS was executed.

![](https://4042228299-files.gitbook.io/~/files/v0/b/gitbook-legacy-files/o/assets%2F-MRebciU3NcuLgsX3ijf%2F-MawsIFBsw33Abs_N4IR%2F-MawwCygZ0lVQuMQJDsv%2Fimage.png?alt=media\&token=7cdfa6af-5e05-4fa2-9a80-c76b4617d68d)

The **Sources** tab shows you where all the files that were used to make the website are stored and lets you inspect them.

![](https://4042228299-files.gitbook.io/~/files/v0/b/gitbook-legacy-files/o/assets%2F-MRebciU3NcuLgsX3ijf%2F-MawsIFBsw33Abs_N4IR%2F-MawwJb5ikwgWF5pvIrR%2Fimage.png?alt=media\&token=dd076e17-7836-487d-b32f-33d0c609724c)

The **Network** tab shows you all the files that are loading in the URL you’re looking at.

![](https://4042228299-files.gitbook.io/~/files/v0/b/gitbook-legacy-files/o/assets%2F-MRebciU3NcuLgsX3ijf%2F-MawsIFBsw33Abs_N4IR%2F-MawwgcQH8zpV5FOvTFt%2Fimage.png?alt=media\&token=a0534afa-47dc-420c-b04d-5fd2c6c0efa3)

You get a waterfall and deep data on all the items loaded, including initiator and time to load that element.

**Application** shows you what’s in your browser storage: in-browser databases like Web SQL, local storage, and more. It also gives you granular control over your cookies.

![](https://4042228299-files.gitbook.io/~/files/v0/b/gitbook-legacy-files/o/assets%2F-MRebciU3NcuLgsX3ijf%2F-MawsIFBsw33Abs_N4IR%2F-Mawx0CeDEesYy7Dv-TZ%2Fimage.png?alt=media\&token=d383e5b7-9dfd-4456-a9e6-8cb4b49ed380)

### 2.2 How to open Chrome Developer Tools

You can open Developer Tools with keyboard shortcuts or through the Chrome menu.

The keyboard shortcuts are:

* Mac OS: **CMD+Shift+J** or **CMD+Shift+C**
* Linux, Chromebook and Windows: **Ctrl+Shift+J**

From the Chrome menu:

Open the Chrome menu and go to “More Tools” > “Developer Tools.”\\

![](https://4042228299-files.gitbook.io/~/files/v0/b/gitbook-legacy-files/o/assets%2F-MRebciU3NcuLgsX3ijf%2F-MawsIFBsw33Abs_N4IR%2F-MawxDlO2g2eXbJqnP9d%2Fimage.png?alt=media\&token=5b73bd02-41bc-46c5-8cbc-bfb0f6c1da87)

Finally, you can right-click (Windows) or Ctrl-click (Mac) anything on a web page and select “Inspect Element” to open Developer Tools.

The Developer Tools panel will open in whatever web page you’re on. You need to open them again for each new Chrome window, but you can navigate between web pages with them open.

### 2.3 5 common uses of Chrome Developer Tools for beginners

Just because you’re not a developer doesn’t mean Developer Tools aren’t for you. Here are five ways you can make your life easier with Developer Tools.

Most of these will use the Elements tab. Here’s a quick guide to that:

![](https://4042228299-files.gitbook.io/~/files/v0/b/gitbook-legacy-files/o/assets%2F-MRebciU3NcuLgsX3ijf%2F-MhiCm_F6gtcBhdPNFAG%2F-MhiD5w4NuSLpzKzF3PS%2Fimage.png?alt=media\&token=a2fb4194-aade-4ff4-b92b-074790acdb85)

The top section shows the HTML for the site.

The bottom left section shows the CSS styles applied to that page.

The bottom right shows the CSS layout visually so you know what you’re looking at.

#### 1. Inspect page tags

One of the most important elements of on page SEO is simple h1 and h2 tags. Snoop under the hood and you’ll find a lot of folks (including those who should know better) aren’t getting this stuff right.

Once you’ve seen pages where the h1 was an unoptimized image, or pages with four h1 tags, you begin to appreciate the urgency of the situation. And tools like Screaming Frog are great but they’re not always 100% accurate. It’s best to check by hand. It’s also very easy.

Open a page, then open Developer Tools. In the Elements tab, press **CMD+F** or **Ctrl-F** to search and search “h1” to see your page’s tag(s):

![](https://4042228299-files.gitbook.io/~/files/v0/b/gitbook-legacy-files/o/assets%2F-MRebciU3NcuLgsX3ijf%2F-MhiCm_F6gtcBhdPNFAG%2F-MhiDBtSviyJ27Ph5kV-%2Fimage.png?alt=media\&token=1262a6eb-3828-429b-b811-3b6e0c2a3d29)

#### 2. Edit CSS

Developer Tools lets you change the CSS of a page directly in your browser. You can trial color combinations, fonts—anything that’s governed by CSS. You don’t have to mess around with the stylesheet and you often don’t have to write a single character of code.

Suppose I want to see what the FYI homepage would look like with red text.

I open the page, then open Developer Tools. Ctrl-click or right-click the element you want to change on the web page. In the Elements tab I find the color for the element in the bottom left panel:

![](https://4042228299-files.gitbook.io/~/files/v0/b/gitbook-legacy-files/o/assets%2F-MRebciU3NcuLgsX3ijf%2F-MhiCm_F6gtcBhdPNFAG%2F-MhiDGPld7GQ5gq-5AEh%2Fimage.png?alt=media\&token=b1fb426e-3693-4833-a4ba-4f37ccffaec2)

Click on the color box and I can simply click on another color in Chrome Color Picker (more on this later). The text changes immediately.

![](https://4042228299-files.gitbook.io/~/files/v0/b/gitbook-legacy-files/o/assets%2F-MRebciU3NcuLgsX3ijf%2F-MhiCm_F6gtcBhdPNFAG%2F-MhiDLFcFr_0yJV2iyvI%2Fimage.png?alt=media\&token=2b0e7feb-d2f2-456e-863d-588a03c64e36)

Probably going to leave that black.

#### 3. See what they built the website with

When you visit a website, it’s not always easy to see what CMS was used to build it. But you can find out easily with Developer Tools.

Open the site and Developer Tools, then look at the top right of the Styles panel in the Elements tab:

![](https://4042228299-files.gitbook.io/~/files/v0/b/gitbook-legacy-files/o/assets%2F-MRebciU3NcuLgsX3ijf%2F-MhiCm_F6gtcBhdPNFAG%2F-MhiDQ69xcEaTzZIwEy7%2Fimage.png?alt=media\&token=b50060d5-2c57-48a6-ac57-ad702e0008e8)

Right-click or Ctrl-click on the link that starts “style.css” and select “Copy link address.” Paste the link into a new tab and it will tell you the CDN and theme used to build the site—in this case, it’s built using Divi on WordPress.

#### 4. Write into the website

If you’re working up copy for a new web page, you can go to one that already exists and write directly into it with Developer Tools. So if layout or sizing is an issue, you can check your copy still looks good in the environment it’s going to be displayed.

Here’s how.

Open Developer Tools on a web page—you can do this with any web page.

With the Elements tab open, right-click a piece of text on the page. You’ll see the relevant HTML highlighted:

![](https://4042228299-files.gitbook.io/~/files/v0/b/gitbook-legacy-files/o/assets%2F-MRebciU3NcuLgsX3ijf%2F-MhiCm_F6gtcBhdPNFAG%2F-MhiETldLkiujzQSVWa-%2Fimage.png?alt=media\&token=bf57661c-4a9f-45ad-938b-e9014c773a9c)

Find the three vertical dots on the left side of the HTML for that element, click them, and select “Edit as HTML.”

Even if you don’t know HTML from the DMV, you can still do this: all you’re looking for is the text you clicked on, inside all the code. The HTML is all color-coded, while the text is black. Click on it, and you can type in whatever you like:

![](https://4042228299-files.gitbook.io/~/files/v0/b/gitbook-legacy-files/o/assets%2F-MRebciU3NcuLgsX3ijf%2F-MhiCm_F6gtcBhdPNFAG%2F-MhiEPvU-I5hbycRSGCd%2Fimage.png?alt=media\&token=8fdbbe23-09e3-4633-b922-ad428d7f3c92)

Click on the background to exit the HTML and your changes appear in the page itself:

![](https://4042228299-files.gitbook.io/~/files/v0/b/gitbook-legacy-files/o/assets%2F-MRebciU3NcuLgsX3ijf%2F-MhiCm_F6gtcBhdPNFAG%2F-MhiEMbU3FmwR2TOpcjH%2Fimage.png?alt=media\&token=f577e644-a8e7-4a75-9187-39d311ce65e8)

Yes, it looked better before. But this way you can find out for sure, and tailor your copy precisely to the layout and design it will be used with.

#### 5. See it on mobile

…and on any other viewport you want. Developer Tools lets you manage viewport appearance using both preselected sizes and free scaling.

Open Developer Tools and look at the top menu bar, where Elements, Console, and Source are displayed. You’ll see two icons on the far left of that bar; the one that looks like a stack of mobile devices is what we’re after.

![](https://4042228299-files.gitbook.io/~/files/v0/b/gitbook-legacy-files/o/assets%2F-MRebciU3NcuLgsX3ijf%2F-MhiCm_F6gtcBhdPNFAG%2F-MhiEIp1aHeZjJvPNtyy%2Fimage.png?alt=media\&token=c7169fb2-0f1a-45c5-ae0a-71ba2fd581cd)

Click that and you’ll see the site you’re on displayed as if you were a mobile visitor:

![](https://4042228299-files.gitbook.io/~/files/v0/b/gitbook-legacy-files/o/assets%2F-MRebciU3NcuLgsX3ijf%2F-MhiCm_F6gtcBhdPNFAG%2F-MhiE92lXP2Owzqck4wF%2Fimage.png?alt=media\&token=89e1cfe5-d40a-4781-b1a6-6bb815cf55c3)

That’s cool, but there’s more you can do with these controls. The icon lets you toggle between mobile and desktop versions of the site. And the controls at the top of the screen let you adjust viewport size. Here’s how it looks on a mobile with a big screen:

![](https://4042228299-files.gitbook.io/~/files/v0/b/gitbook-legacy-files/o/assets%2F-MRebciU3NcuLgsX3ijf%2F-MhiCm_F6gtcBhdPNFAG%2F-MhiE4x1pHZYa7wDPt5Y%2Fimage.png?alt=media\&token=b9dcf074-aa66-48d5-a97e-85f84ac6c6a6)

Here’s how it looks on a tablet:

![](https://4042228299-files.gitbook.io/~/files/v0/b/gitbook-legacy-files/o/assets%2F-MRebciU3NcuLgsX3ijf%2F-MhiCm_F6gtcBhdPNFAG%2F-MhiE0s6zqGa_ZpoDSFA%2Fimage.png?alt=media\&token=b796f8e3-92e0-4526-b89b-2d38cf16d5bc)

Use these controls to choose the viewport size you want:

![](https://4042228299-files.gitbook.io/~/files/v0/b/gitbook-legacy-files/o/assets%2F-MRebciU3NcuLgsX3ijf%2F-MhiCm_F6gtcBhdPNFAG%2F-MhiDw4dvx7Pvm6TFbqF%2Fimage.png?alt=media\&token=78e2f90c-87d6-47a6-9367-048c8c6bd573)

Use this dropdown to see what the site looks like on different devices:

![](https://4042228299-files.gitbook.io/~/files/v0/b/gitbook-legacy-files/o/assets%2F-MRebciU3NcuLgsX3ijf%2F-MhiCm_F6gtcBhdPNFAG%2F-MhiDre5idomNTKvKD0Q%2Fimage.png?alt=media\&token=0e123fca-34b9-4583-ba48-55accf5ceb3d)

Set viewport size yourself:

![](https://4042228299-files.gitbook.io/~/files/v0/b/gitbook-legacy-files/o/assets%2F-MRebciU3NcuLgsX3ijf%2F-MhiCm_F6gtcBhdPNFAG%2F-MhiDokUZDF_-XISlNmt%2Fimage.png?alt=media\&token=0d7e9480-3f39-453f-92ad-319ff29f3666)

And even mimic different connection qualities as you navigate the site:

![](https://4042228299-files.gitbook.io/~/files/v0/b/gitbook-legacy-files/o/assets%2F-MRebciU3NcuLgsX3ijf%2F-MhiCm_F6gtcBhdPNFAG%2F-MhiDjRUSbgpldnDCAFm%2Fimage.png?alt=media\&token=fb8303a9-aa62-4cab-a810-0ebe1835098c)

You can do all that and more from the menu bar at the top.

## Part 3 - How does the browser consume HTML and CSS?

### 3.1 The process

Have you ever wondered, what happens when you visit a web page in the browser? How does the browser consume the HTML and CSS files? How does it know what to display and how to display it?

Well the actual process is quite complex, but we can simplify it to the following steps:

1. The browser loads the HTML.
2. It converts the HTML into a DOM (Document Object Model). The DOM represents the document in the computer's memory.
3. The browser then fetches most of the resources that are linked to by the HTML document, such as embedded images, videos, and CSS. (To keep things simple, we won't discuss how JavaScript is handled here.)
4. The browser parses the CSS, and sorts the different rules by their selector types. It then works out which rules should be applied to which nodes in the DOM, and attaches style to them as required. This step is called the render tree.
5. Now the render tree is created, which is a set of objects that will be painted on the screen. The render tree contains rectangles with visual attributes like color and dimensions. The rectangles are in the right order to be displayed on the screen.
6. The visual display of the page is shown on the screen (this stage is called painting).

You can learn more about this process in this page [MDN - How CSS works](https://developer.mozilla.org/en-US/docs/Learn/CSS/First_steps/How_CSS_works).

### 3.2 How does the browser workout which CSS rule to apply?

Now you know how the browser consume HTML and CSS, but how does it know which CSS rule to apply to which HTML element?

To understand this, we need to understand the concept of **cascade**,**specificity** and **inheritance**.

Soon in your journey writing CSS, you will probably encouter situations where the rules you create are not applied to the element on the screen. This is likely related to the three fundemantal concepts we just mentioned above.

#### Cascade

This rule suggests that the order of the CSS rules matter. This applies to the rules in the same stylesheets, as well as the order of stylesheets themselves.

For example, if you have two rules that are targeting the same element, the rule that comes last will be applied.

```
p{
  color: red;
}
p{
  color: blue;
}
```

In the above example, the color of the paragraph will be blue, because the second rule is applied last.

#### Specificity

This is an algorithm that the browser uses to determine which rule to apply to an element. For instance, a class selector has more specificity than an element selector.

We will learn more about this later in this lesson.

#### Inheritance

This is a concept that allows some properties to be inherited by their children. For example, if you set the `font-family` of the body element to be Arial, then all the elements inside the body will inherit this property.

However, not all properties support inheritance. For instance, all `background`,`border` properties do not support inheritance.

You can find a list of inherited and non-inherited properties in this page [CodeCademy - Inheritance](https://www.codecademy.com/resources/docs/css/inheritance).

## Part 4: A deeper dive into CSS

### 4.1 What is CSS - Cascading Style Sheet <a href="#css-selectors" id="css-selectors"></a>

Cascading style sheets (CSS) are an extension to HTML that allow you to specify formatting for an HTML document. Cascading style sheets are called *cascading* because several different style sheets can be active for a single document at the same time.

For example, one style sheet may be associated with the document itself, another style sheet may be linked to the first one, and yet another may be associated with the web browser on which the document is being displayed. When multiple style sheets are in effect, they are applied to the document in a pre-determined sequence set by the browser: their formatting instructions can be thought of as cascading from one style sheet to the next.

It is important in which order you write your styles since new additions to your stylesheet might override previously written styles. However there is another concept we need to understand before moving forward.

#### 4.2 Calculating CSS Specificity Value <a href="#h-calculating-css-specificity-value" id="h-calculating-css-specificity-value"></a>

If there are two or more conflicting CSS rules that point to the same element, the browser follows some rules to determine which one is most specific and therefore wins out.

Think of specificity as a score/rank that determines which style declarations are ultimately applied to an element.

CSS applies vastly different specificity weights to classes and IDs. In fact, an ID has *infinitely* more specificity value! That is, no amount of classes alone can outweigh an ID.

Let’s take a look at how the numbers are actually calculated:

![](https://4042228299-files.gitbook.io/~/files/v0/b/gitbook-legacy-files/o/assets%2F-MRebciU3NcuLgsX3ijf%2F-Mawlfj-cSXgzzgXHaRG%2F-MawqMprCnMCPVkox_iG%2Fimage.png?alt=media\&token=afd8b01f-9181-461b-a2bd-47590a689b7a)

In other words:

* If the element has inline styling, that automatically wins (1,0,0,0 points)
* For each ID value, apply 0,1,0,0 points
* For each class value (or pseudo-class or attribute selector), apply 0,0,1,0 points
* For each element reference, apply 0,0,0,1 point

You can generally read the values as if they were just a number, like 1,0,0,0 is “1000”, and so clearly wins over a specificity of 0,1,0,0 or “100”. The commas are there to remind us that this isn’t really a “base 10” system, in that you could technically have a specificity value of like 0,1,13,4 – and that “13” doesn’t spill over like a base 10 system would.

```
/* Basic specificity cheatsheet  */

h1 {
  /* Native elements have a weight of 0001. */
}

::after {
  /* Pseudo-elements have a weight of 0001. */
}

.class {
  /* Class selectors have a weight of 0010. */
}

[type="text"] {
  /* Attributes selectors have a weight of 0010. */
}

a:hover {
  /* Pseudo-classes have a weight of 0010. */
}

#id {
  /* Id's have a weight of 0100. */
}

/* Inline styles have a weight of 1000. */
<div style="color: red;">Text</div>

h1 {
  /* !imporant has a weight of 10000. */
  color: red !imporant; 
}
```

### &#x20;<a href="#css-selectors" id="css-selectors"></a>

### 4.3 CSS Selectors <a href="#css-selectors" id="css-selectors"></a>

During your application process, you became familiar with CSS selectors. We'll review the basic selectors and then practice combining these to modify our button styles.

> If you want to review the selectors, read the [Common Selectors section](http://learn.shayhowe.com/advanced-html-css/complex-selectors/) of this page.

#### Exercise (10 minutes) <a href="#exercise-10-minutes" id="exercise-10-minutes"></a>

Make the blue buttons on the page red (`#ce5f31`). The white button, which says "Volunteer", should remain white but the text should change to red.

### 4.4 Pseudo Classes <a href="#pseudo-classes" id="pseudo-classes"></a>

You can assign CSS rules to a class like this:

```
.btn {
  background: #ce5f31;
}
```

There are also things called "pseudo" classes. In this section, we'll introduce you to the common pseudo classes for assigning styles to interactions, such as moving your mouse over a link.

> "pseudo" is a fancy word for "fake". We call them "pseudo" classes because they're not really there in the HTML, but the browser knows what to do with them.

Here's an example of a pseudo class which changes the color of a link when the mouse moves over it.

```
.btn:hover {
  background: #ef7f52;
}
```

Not everyone uses a mouse. Some users will prefer a keyboard, where they can hit `tab` to move between links on a page. So that they can see where they are, you should add effects to the `:focus` pseudo class too.

```
.btn:hover,
.btn:focus {
  background: #ef7f52;
}
```

#### Exercise (10 minutes) <a href="#exercise-10-minutes" id="exercise-10-minutes"></a>

Work in pairs and use the pseudo classes to make the background color of the red buttons change when in a "hover" or "focus" state. See if you can make the white "Volunteer" button change to a different background without effecting the red buttons.

### 4.5 Box Model <a href="#box-model" id="box-model"></a>

The CSS Box Model is used to create a definition for the way the HTML elements are organized on the screen. This approach accounts for options such as margins, padding, borders, and all the properties that manipulate them.

Each element can be thought of as having its own box. As all the elements on a page have to work together with each other, it is quite important to know just how each of those boxes works. This brief tutorial will help explain the box model for beginners.

The CSS Box Model is a term used for the container that wraps the following element properties within it.

* **Margin**
* **Border**
* **Padding**
* **Content**
* **Height and Width**

However, understanding the term “Box Model” makes more sense once it is visually displayed. See the example image below for a more straight breakdown of where these bullet points relate to your HTML content.

![](https://4042228299-files.gitbook.io/~/files/v0/b/gitbook-legacy-files/o/assets%2F-MRebciU3NcuLgsX3ijf%2F-Maw_E3h5paCg_-mLPdZ%2F-MawhWV8UPWj8bM9aqDR%2Fimage.png?alt=media\&token=f4a3765f-8c43-4911-9605-78446e3f0e10)

As you can see from the image above, the content sits inside the box model. In this case, you have an example “p,” (or paragraph) element on display with the simple text “Introduction to CSS Box Model” shown. In the next few sections, each of these areas will be explained.

#### **The Margin**

On the CSS Box Model, the margin is the section in the exterior. This edge extends around the box model taking the empty space between the margin and border properties. You can consider this a buffer area that separates the interior of the CSS box model from other HTML elements on a page.

Note that the margin is defined by **both** the width and height of the box, as well as set margin properties. This can also be affected by the “box-sizing” property.

#### **The Border**

Next, you have the Border property of the CSS Box Model. Keeping in the theme of separation, this area exists as a boundary between the margin and padding properties of the box. This area can be manipulated using the CSS Border property for styling and sizing needs.

#### **The Padding**

The padding section of the CSS Box Model sits in the space between the HTML content and the border. As with much of the other items in the box model, the padding can be altered through its related properties. For example, the padding can be changed through the directions of the top, right, bottom, and left sections.

For example, we can take this sample CSS code below;

```
div {
  border-style: solid;
  border-color: blue;
  }
```

This div does not have padding defined, as such, you have the output shown in the image below.

![](https://4042228299-files.gitbook.io/~/files/v0/b/gitbook-legacy-files/o/assets%2F-MRebciU3NcuLgsX3ijf%2F-MhiCm_F6gtcBhdPNFAG%2F-MhiF5UKMsEMMdducPgq%2Fimage.png?alt=media\&token=b93e5990-557a-42f2-b656-a3f4874f3ac1)

Now, the same code is used but a padding value of 40 pixels has been added.

```
div {
padding: 40px;
border-style: solid;
border-color: blue;
  }
```

This will now alter the padding to give you the following image.

![](https://4042228299-files.gitbook.io/~/files/v0/b/gitbook-legacy-files/o/assets%2F-MRebciU3NcuLgsX3ijf%2F-MhiCm_F6gtcBhdPNFAG%2F-MhiF8rqWr06QxBtw9S2%2Fimage.png?alt=media\&token=97e44844-3de1-4602-befe-124256d31d9d)

It’s easy to see that the added padding between the div content and the border has changed considerably.

#### **The Content**

The Content is the center of the “tootsie pop,” so to say. This is the main HTML content you are working to display on the site. This can range from an image, a paragraph, or even a web button. While this is quite direct in definition, it should be noted that “content” can be empty space as well. Using an empty div for example can be a neat way to add extra creative components to a site design.

#### **The Height and Width**

The properties for height and width on the box model are set through the calculations of the applied contents. However, these can also be specified directly as needed to fit the page design.

One common issue that beginners may encounter is forgetting to note the **height and width also takes into account the added padding or border values**. Quite simply, when you add padding or border changes, this will directly affect the visual width/height display for an element on the page.

Generally, the understood calculations are as follows:

**Box Width:**

padding **+** width **+** border **=** final width for the box model.

**Box Height:**

padding **+** height **+** border **=** final height for the box model

### **Changing the Box**

Sometimes, it just helps to see changes in action when it comes to this kind of information. For the next few examples, you can see just how much of an impact even a few slight changes to the box model within CSS can make.

#### **Margin Changes**

With this example, you can see how content can be displayed with multiple box models in use. Here, multiple divs have been used to display three separate contents sets. Each one is using the box model with various changes made to the borders to better identify each.

Using this example code, three separate boxes will be created.

```
#div1 {
 padding: 40px;
 border-style: solid;
 border-color: blue;
  }

  #div2 {
 padding: 40px;
 border-style: dashed;
 border-color: red;
  }

  #div3 {
 padding: 40px;
 border-style: dotted;
 border-color: black;
  }
```

This provides this simple output shown in the image below.

![](https://4042228299-files.gitbook.io/~/files/v0/b/gitbook-legacy-files/o/assets%2F-MRebciU3NcuLgsX3ijf%2F-MhiCm_F6gtcBhdPNFAG%2F-MhiFE7_JR_DexVsf_dT%2Fimage.png?alt=media\&token=678b4138-60f3-4906-b042-d67ea39f0b62)

Now, with some modifications made to the code, we alter how the content is presented in the box model structure. Going back to the use of margins mentioned above, the code below will add **margin** properties to the divs. Notice how each increases in each div.

```
#div1 {
 padding: 25px;
 border-style: solid;
 border-color: blue;
 margin: 10px;
  }

  #div2 {
 padding: 50px;
 border-style: dashed;
 border-color: red;
 margin: 30px;
  }

  #div3 {
 padding: 100px;
 border-style: dotted;
 border-color: black;
 margin: 50px;
  }
```

This margin increase can be seen in the spacing provided within the image below.

![](https://4042228299-files.gitbook.io/~/files/v0/b/gitbook-legacy-files/o/assets%2F-MRebciU3NcuLgsX3ijf%2F-MhiCm_F6gtcBhdPNFAG%2F-MhiFJ6LK3rcgYsjA6c4%2Fimage.png?alt=media\&token=f9399377-4d0b-477e-9a32-76815bd00340)

With just a few margin adjustments, there is a great effect in both readability and design change for each box.

#### **Width and Height Changes: Using the Box-Sizing Property**

Changing the width and height of an element can lead to some odd outcomes when the calculations for the additional constraints of the box model are not planned for. While setting those details and dimensions manually can be a valid need, sometimes it can also be worthwhile to use something more “automatic” in a sense.

This is where you can look at the use of the “**box-sizing**” property. The box-sizing property can take the values of “content-box” or “border-box”. These are explained below.

**Content-Box:**

With the property value set to “content-box”, the applied CSS values are used without regard to the margin, padding, or border settings. This takes the provided width and height for the content to be the only factors for the calculation.

**Border-Box:**

The value of “border-box” creates a calculation where the values of the padding and border are inserted for height and width. The margin, however, is not included with this calculation which leads to it being rendered within the constraints of the box itself. This is important to note as the HTML content will be provided less area as some of it is taken over by the margin.

**Using Box-Sizing Example**

Take the example CSS code below for reference on using both of these options. For the first div, the “content-box” value was set for the “box-sizing” property. In the second example, the “border-box” property was used instead.

**Note that both divs have the same padding, margin, width, and height values applied.**

```
#div1 {
 padding: 15px;
 border-style: solid;
 border-color: blue;
 margin: 20px;
 width: 100px;
 height: 100px;
 box-sizing: content-box;
  }

  #div2 {
 padding: 15px;
 border-style: solid;
 border-color: red;
 margin: 20px;
 width: 100px;
 height: 100px;
 box-sizing: border-box;
  }
```

This example CSS code will provide the following box model examples as shown in the image below.

![](https://4042228299-files.gitbook.io/~/files/v0/b/gitbook-legacy-files/o/assets%2F-MRebciU3NcuLgsX3ijf%2F-MhiCm_F6gtcBhdPNFAG%2F-MhiFMsWjWgqf4A1z-5f%2Fimage.png?alt=media\&token=d6a7ae8f-7998-4181-8a12-ea2eacece872)

As you can see, the method you choose can make drastic changes to the HTML content and how it is rendered to the page. A bit of trial and error can be expected and should be experienced to get a solid footing on your design concepts.

#### &#x20;<a href="#exercise-10-minutes" id="exercise-10-minutes"></a>

#### Exercise (10 minutes) <a href="#exercise-10-minutes" id="exercise-10-minutes"></a>

Work in pairs and use the `margin` and `padding` rules to spread your navigation links out a bit wider. There should be a small gap between them and enough padding so that the border is not too tight on the text.

#### Exercise (10 minutes) <a href="#exercise-10-minutes" id="exercise-10-minutes"></a>

Use a transparent border so that the width of each navigation menu item stays the same even when it is hovered or focused.

**Note -** You may have noticed that the border you added to the navigation links causes the links to jump around when you move your mouse over them. That's because the border is adding to the width of the box model, pushing the others to the side.

You can also set a transparent border, so that it takes up the space without showing a visible border.

```
.navlink {
  border: 1px solid transparent;
}
```

#### &#x20;<a href="#exercise-10-minutes" id="exercise-10-minutes"></a>

### CSS Project (60 minutes+) <a href="#css-project-60-minutes" id="css-project-60-minutes"></a>

1. In this repository you will find a CSS Project for you to complete using what you've learnt so far today. Fork it [Zoo project repository](https://github.com/CodeYourFuture/HTML-CSS-Challenges) to your GitHub account.
2. Clone it to your computer and complete all the mistakes in the project and fix them by following these instructions [Zoo Project Readme](https://github.com/CodeYourFuture/HTML-CSS-Challenges/tree/main/zoo-css-challenge)

## Part 5: HTML forms

### Resources

1. [HTML5 - MDN](https://developer.mozilla.org/en-US/docs/Learn/HTML/Introduction_to_HTML/Getting_started)
2. [CSS Selectors - MDN](https://developer.mozilla.org/en-US/docs/Web/CSS/CSS_Selectors)
3. [The Cascade - MDN](https://developer.mozilla.org/en-US/docs/Web/CSS/Cascade)
4. [Box Model - MDN](https://developer.mozilla.org/en-US/docs/Learn/CSS/Introduction_to_CSS/Box_model)
5. [CSS specificity - MDN](https://developer.mozilla.org/en/docs/Web/CSS/Specificity)
6. [Pseudo classes - MDN](https://developer.mozilla.org/en-US/docs/Web/CSS/Pseudo-classes)


# 2 - Responsive Web and Layout

## Responsive Web Design

When we build for the web, we're making websites that can be viewed in a phone, a laptop, a tablet and more. To ensure we're presenting a website that's easy to use on any device, we use Responsive Web Design techniques to modify how content is displayed depending on the viewport.

> **Exercise:** As a group, let's brainstorm as many devices as we can think of which might access the websites we build.

See how much variety there is in [viewport sizes](https://decadecity.net/blog/2014/08/19/a-device-agnostic-approach-to-inlining-css).

## Media Queries

As you learned in your homework assignment, media queries help us change the display of our content depending on the size of the viewport. Let's review what you learned and break down a media query:

```
@media screen and (min-width: 900px) {
  body {
    background: red;
  }
}
```

In this media query, we're assigning a red background color to the `<body>` element whenever the viewport is larger than `900px`, and we're viewing on a screen.

* `@media` starts the media query
* `screen` tells it to apply these styles to screen displays. Other displays might be `print`, for when a webpage is being printed.
* `(min-width: 900px)` tells it to apply these styles when the viewport is larger than `900px`

Finally, we wrap all of our styles for this media query in brackets (`{` and `}`), just like a CSS rule.

> **Exercise:** Working in pairs, reduce the size of the "Bikes for Refugees" text so that it fits on a small screen (`320px`). But make sure it increases in size on larger screens.
>
> **Exercise:** The two buttons in the jumbotron don't fit on the same line on small screens around `320px` wide. Can you adjust their size so that they fit on the same line?

## Flexbox

Flexbox is a name for a set of CSS layout rules which are supported in newer browsers. They allow you to apply rules to elements to place them side-by-side and re-arrange them. You just specify how you want your elements arranged and the browser will scale this arrangement depending on the screen size and device used for viewing.

Most flexbox rules are applied to the container, to tell it how to arrange its children. However, there are some rules that can be applied to children as well.

You can see all the rules that can be applied to both the container and the children here: <https://css-tricks.com/snippets/css/a-guide-to-flexbox/>

> **Exercise:** Continue editing the "Bike for refugees" website by adding 3 boxes below Jumbotron, and using Flexbox, make sure they are arranged like in the sketch below: ![](https://migracode-barcelona.github.io/syllabus/html-css/assets/flexbox_practice.png)

You can start with something like the below, by just adding a container, and the 3 text pieces within it. Try to use flexbox to position the text elements within the container to match the picture:

```
<div>
  <!-- CONTAINER START -->
  <div>Check availability</div>
  <div>Donate bikes</div>
  <div>Volunteer with us</div>
</div>
<!-- CONTAINER END -->
```

Once that's done you can move on to creating boxes for each individual text piece, and again, using flexbox to position the text piece in the middle of its box.

Let's take a break from flexbox for a minute. Do you remember the `:first-child` psuedo class? There's a `:last-child` psuedo class as well.

> **Exercise:** See if you can use these psuedo classes to give the left box a grey background (`#ddd`) and the right box a grey border (`1px solid #ddd`). Use [this screenshot](https://migracode-barcelona.github.io/syllabus/html-css/assets/screenshot-complete.png) to guide you.

## Workshop

&#x20;Make a website inspired by [Airbnb](https://www.airbnb.com/).

**Note -** It must be mobile responsive and you can not use any third party library.


# 3 - Bootstrap

## HTML/CSS Frameworks

A design framework is a collection of re-usable code snippets which you can use to build a website. It is sometimes called a "design system", "style guide", or "pattern library", and will usually consist of three things:

1. **Brand guidelines** define the appropriate typography, colors and logos to use.
2. **Components** define re-usable code snippets for common requirements, like navigation menus.
3. **Helpers** define additional code tools to construct the site, like layout grids.

The main goals of a design framework are to ensure design consistency and avoid writing the same code twice.

## Bootstrap 4

[Bootstrap](https://getbootstrap.com/) is CSS and JavaScript code that we [load in our HTML pages](https://getbootstrap.com/docs/4.0/getting-started/introduction/). Bootstrap's documentation describes how to write HTML code that fits the Bootstrap components, including a [grid layout](https://getbootstrap.com/docs/4.0/layout/grid/) as well as several [components](https://getbootstrap.com/docs/4.0/components/alerts/).

#### Exercise (15 minutes)

Fork [this repository](https://github.com/NateWr/groupstrap) and follow the instructions in the [readme](https://github.com/NateWr/groupstrap) to create a new page and add a card component to it.

## Assignment

Note: Ignore any ads, icons, and interactive elements (which use Javascript). If you really want to grab icons, try taking a screenshot of them and making an image file out of that.

1. Go to [newsweek.com](http://www.newsweek.com/) and have a look around.
2. Set up a GitHub repository for this project.
3. Create a new HTML document.
4. Think about all the elements on the page and how they are grouped together.
5. Add Bootstrap to your project by following the instructions at [GetBootstrap.com](http://getbootstrap.com/getting-started/). Use the examples on that page as templates for how to organize your page.
6. Lay out the basic structure of the page using empty semantic HTML elements that are appropriately sized and which are positioned by using the appropriate Bootstrap classes.
7. Set up the top title and navigation bar.
8. Work your way down the page by filling in and positioning the additional sections.
9. Try resizing the browser to see if it mimics the behavior of the real Newsweek homepage.
10. Push your solution to GitHub.

## Personal Website Project

Over the last two weeks, you've been building personal websites as part of your homework. Now we want you to take those websites and apply the knowledge you've learned to make them as good as you can. Some ideas:

* Add [Bootstrap 4](https://getbootstrap.com/docs/4.0/getting-started/introduction/) to your site and use some of the components.
* Use re-usable class names to reduce your CSS code.
* [Validate your HTML code](https://validator.w3.org/#validate_by_input) to find and fix problems.
* Add a second page and link to it from your first page.
* Try to style the first article differently so that it stands out from the rest.

By the end, you should have created a repository for your site on GitHub with all the commits you've made.

### Resources

* [HTML Forms](http://marksheet.io/html-forms.html) at Marksheet.io
* [Building Forms](http://learn.shayhowe.com/html-css/building-forms/) at ShayHowe.com
* [Bootstrap 4 Documentation](https://getbootstrap.com/)


# JavaScript I

**Over nine weeks, we take you from writing your first javascript program all the way to the most modern tools and techniques. You’ll learn how to make website’s interactive and to write excellent, clean code.**

Below an overview of the week-by-week topics - click on the title to find more details.

{% content-ref url="/pages/-MRuHN93bhsV5JSVHqMP" %}
[1 - Hello Javascript](/courses/introduction-3/course-content/javascript-i/week-1)
{% endcontent-ref %}

{% content-ref url="/pages/-MS-Eb4w8HGemO4STqOC" %}
[2 - Expressions and loops](/courses/introduction-3/course-content/javascript-i/week-2)
{% endcontent-ref %}

{% content-ref url="/pages/-MS-FHB1BNisfxVV-FSW" %}
[3 - Arrays and callbacks](/courses/introduction-3/course-content/javascript-i/week-3)
{% endcontent-ref %}

![](https://4042228299-files.gitbook.io/~/files/v0/b/gitbook-legacy-files/o/assets%2F-MRebciU3NcuLgsX3ijf%2F-MSXGtKUhAK1wnjgonVJ%2F-MSXH28x1rTu4rzFCQqY%2FP9010140migracode-bcn.jpg?alt=media\&token=9811ed3e-5588-45a6-9b66-18841dd515f4)


# 1 - Hello Javascript

## Before the class

#### Fork the exercises module repo <a href="#fork-the-exercises-module-repo" id="fork-the-exercises-module-repo"></a>

Fork the [Javascript Module 1 repository](https://github.com/Migracode-Barcelona/javascript-module-1) to your personal account and clone it. Find help in the [Migracode GIT Guide](https://syllabus.migracode.org/git#fork-and-clone-an-existing-project-from-github). This is the repo we will use during the first Javascript module, and for homework.

### Learning Objectives <a href="#learning-objectives" id="learning-objectives"></a>

By the end of this class, you should be able to:

* Use `console.log()` to print information to the console
* List and describe the different primitive data types in JS
* Use `typeof` to find the type of a variable
* Assign data to variables using `let` and `const`
* Write, call and evaluate functions in JavaScript
* Manipulate strings with concatenation and interpolation techniques
* Manipulate numbers with mathematical operators using the `Math` library
* Define the difference between `console.log()` and `return`
* Call functions within functions
* Search and read documentation to help when you are stuck

## Hello World

It is programming tradition that the first thing you do in any language is make it output 'Hello world!'.

We'll do this in JavaScript, using a command called `console.log()`. The `console.log()` method writes a message to the console.

The console is a tool which is mainly used to log information - it's useful for testing purposes.

#### Exercise A (10 minutes) <a href="#exercise-a-10-minutes" id="exercise-a-10-minutes"></a>

(This exercise will help you understand how to run a basic JS script and explore the different ways you can run JS code)

1. Update your first `exercise-A.js` script in the folder `week-1/InClass` in the [Javascript Module 1 repository](https://github.com/Migracode-Barcelona/javascript-module-1) you forked before
2. Type `console.log("Hello World!")`
3. Run this script by going with the terminal to your directory and write `node exercise-A.js`, you will see the result of the console.log in the terminal

#### Exercise B (5 minutes) <a href="#exercise-b-5-minutes" id="exercise-b-5-minutes"></a>

(This exercise will help you expand your understanding of console.log)

1. Update the file `exercise-B.js` script in the folder `week-1/InClass`
2. Write 10 statements like these, but in different languages.

For example:

```
Halo, dunia! // Indonesian
Ciao, mondo! // Italian
Hola, mundo! // Spanish
```

## Variables

When you write code, you'll want to create shortcuts to data values so you don't have to write out the same value every time.

We can use a *variable* to create a reference to a value. Variables can be thought of as named containers. You can place data into these containers and then refer to the data simply by naming the container.

Before you use a variable in a JavaScript program, you must declare it. Variables are declared with *let* and *const* keywords as follows.

```
let greeting = "Hello world";

console.log(greeting);
```

```
const name = "Irina";

console.log(name);
```

The program above will print "Hello world" to the console. Notice how it uses the value assigned to the variable `greeting`.

#### Exercise C (5 minutes) <a href="#exercise-c-5-minutes" id="exercise-c-5-minutes"></a>

1. Update the file `exercise-C.js` script in the folder `week-1/InClass`
2. Add a variable `greeting` to js1-week1.js and assign a greeting of your choice to the variable
3. Print your `greeting` to the console 3 times. You should see your greeting 3 times on the console, one on each line.

### Strings <a href="#strings" id="strings"></a>

In programming there are different *types of* data. You've used one data type already: **string**.

Computers recognise strings as a sequence of characters but to humans, strings are simply lines of text.

```
const message = "This is a string";
```

Notice that strings are always wrapped **inside of quote marks**. We do this so that the computer knows when the string starts and ends.

You can check that the data is a string by using the `typeof` operator:

```
const message = "This is a string";
const messageType = typeof message;

console.log(messageType); // logs 'string'
```

#### Exercise D (5 minutes) <a href="#exercise-d-5-minutes" id="exercise-d-5-minutes"></a>

1. Update the file `exercise-D.js` script in the folder `week-1/InClass`
2. Write a program that:
   * creates a variable called `colors`
   * assigns colors "blue" and "yellow" as a comma separate string to `colors`
   * logs the type `colors` using `typeof`.
3. What is the `typeof` a number?

### String concatenation <a href="#string-concatenation" id="string-concatenation"></a>

You can add two strings together using the plus operator (`+`) or *string interpolation*.

String interpolation is a useful JavaScript feature that allows you to put variables directly into a string:

```
// Here is an example using the plus operator to concat strings
const greetingStart = "Hello, my name is ";
const name = "Daniel";

const greeting = greetingStart + name;

console.log(greeting); // Logs "Hello, my name is Daniel"
```

```
// Here is example using the String interpolation to concat strings
const greetingStart = "Hello";
const name = "Daniel";

const greeting = `${greetingStart}, my name is ${name}`;

console.log(greeting); // Logs "Hello, my name is Daniel"
```

#### Exercise E (5 mins) <a href="#exercise-e-5-mins" id="exercise-e-5-mins"></a>

1. Update the file `exercise-E.js` script in the folder `week-1/InClass`
2. Write a program that logs a message with a greeting and your name using the two concatenation methods we used

### Numbers as integers <a href="#numbers-as-integers" id="numbers-as-integers"></a>

The next data type we will learn is **number**.

Unlike strings, numbers do not need to be wrapped in quotes.

```
const age = 30;
```

You can use mathematical operators to calculate numbers:

```
const sum = 10 + 2; // 12
const product = 10 * 2; // 20
const quotient = 10 / 2; // 5
const difference = 10 - 2; // 8
```

#### Exercise F (10 mins) <a href="#exercise-f-10-mins" id="exercise-f-10-mins"></a>

1. Update the file `exercise-F.js` script in the folder `week-1/InClass`
2. Create two variables `numberOfStudents` and `numberOfMentors`
3. Log a message that displays the total number of students and mentors

**Expected result**

```
Number of students: 15
Number of mentors: 8
Total number of students and mentors: 23
```

### Numbers as decimals <a href="#numbers-as-decimals" id="numbers-as-decimals"></a>

Numbers can be integers (whole numbers) or floats (numbers with a decimal).

```
const preciseAge = 30.612437;
```

Numbers with decimals can be rounded to the nearest whole number using the `Math.round` function:

```
const preciseAge = 30.612437;
const roughAge = Math.round(preciseAge); // 31
```

#### Exercise G (15 mins) <a href="#exercise-g-15-mins" id="exercise-g-15-mins"></a>

1. Update the file `exercise-G.js` script in the folder `week-1/InClass`
2. Using the variables provided in the exercise calculate the percentage of mentors and students in the group (percentages must be a rounded to the nearest integer)
3. Using online documentation, what other things can you do with the `Math` library? Pick one thing on your table that you can do other than `Math.round` and prepare an explanation for the rest of the class

**Expected result**

```
Percentage students: 65%
Percentage mentors: 35%
```

## Functions

Functions are blocks of code that can do a task as many times as you ask them to. They take an input and return an output.

Here's a function that doubles a number:

```
function double(number) {
  return number * 2;
}
```

To use the function we need to: a) *call* it with an input and b) do something with the returned value, for example assigning it to a variable

```
const result = double(2);

console.log(result); // 4
```

The input given to a function is called a **parameter**.

A function can take more than one parameter:

```
function add(a, b) {
  return a + b;
}
```

When you write a function (sometimes called *declaring a function*) you assign names to the parameters inside of the parentheses (`()`). Parameters can be called anything.

This function is exactly the same as the on above:

```
function add(num1, num2) {
  return num1 + num2;
}
```

#### Exercise H (20 minutes) <a href="#exercise-h-20-minutes" id="exercise-h-20-minutes"></a>

1. Update the file `exercise-H.js` script in the folder `week-1/InClass`
2. Design and create a function that:
   1. takes in more than one input
   2. uses string concatenation
   3. this means adding two strings together
   4. performs some form of operation on a number
   5. uses `return` to return a **string**
3. Add a comment above your function to explain what it does
4. Call your function and run your script
5. What's the difference between a `return` and `console.log`?
6. When would you choose to use functions over the way we have been scripting so far?

### Calling functions inside functions <a href="#calling-functions-inside-functions" id="calling-functions-inside-functions"></a>

Functions are very powerful.

* You can write more than one line of code inside of functions.
* You can use variables inside of functions.
* You can call other functions inside of functions!

```
function getAgeInDays(age) {
  return age * 365;
}

function createGreeting(name, age) {
  const ageInDays = getAgeInDays(age);
  const message =
    "My Name is " + name + " and I was born over " + ageInDays + " days ago!";
  return message;
}
```

#### Exercise I (20 mins) <a href="#exercise-i-20-mins" id="exercise-i-20-mins"></a>

1. Update the file `exercise-I.js` script in the folder `week-1/InClass`
2. Write a function that returns the year someone is born given their age as input
3. Using the answer from step 1, write a function that takes someone's name and age as input and returns a string that states the person's name and year they were born in a sentence

### Glossary <a href="#glossary" id="glossary"></a>

* Console: a place on your computer to run scripts or commands from
* Command: something that you type on your computer which performs an operation that your computer does
* Directory: another word for "folder" on your computer
* Parameter: a placeholder for values you can pass into functions
* Primitive type: a built-in type in JavaScript (e.g. strings and numbers are primitive types in JavaScript)
* Script: a file that contains a program
* Terminal: another word for "console"

## &#x20;<a href="#homework" id="homework"></a>


# 2 - Expressions and loops

## Learning Objectives

By the end of this class, you should be able to:

* What are expressions and statements (and what's the difference)?
* Define what expressions and statements are and describe the difference
* Define what was a conditional is
* Define what `for` and `while` loops are and define the difference
* Write an if statement using a conditional
* Define comparator operators and list the different types
* Use comparator operators in an `if` statement
* Define what a logical operator is and give examples
* Describe what an array is and write code that interacts with them

## Expressions

In JavaScript, there are **expressions** and **statements**. We will use these words frequently to describe code.

#### Expression <a href="#expression" id="expression"></a>

An expression returns a value. Sometimes we will say that an expression *evaluates to* a value.

The following are all examples of expressions:

```
1 + 1; // returns 2
("hello"); // returns "hello"
2 * 4; // returns 8
"Hello" + "World"; // returns "HelloWorld"
```

We can take the value produced by an expression and assign it to a variable. That line of code would be called a statement.

Expressions can also contain variables.

```
function greetingPlanet() {
  const planet = "Earth";
  return `Hello ${planet}`; // returns Hello Earth
}
```

You can also use expressions inside a string interpolation or as a `return` value.

```
console.log(`2 + 4 is ${2 + 4}`); // 2 + 4 is 6

function double(num) {
  return num * 2; // expression being returned
}
```

#### Statement <a href="#statement" id="statement"></a>

A statement is some code that performs an action. Here are some examples:

```
const sum = 1 + 1; // action: assigns result of `1 + 1` to variable `sum`
const greeting = "hello"; // action: assigns result of the expression "hello" to variable `greeting`
console.log(2 * 4); // action: logs the result of `2 * 4` to the console
sayGreeting(greeting); // action: calls the function `sayGreeting` with the parameter `greeting`
```

There are some other different types of statements that we will learn in the coming weeks.

You can run `node` by itself, which will open a *node console*, also called a [Read–Eval–Print Loop (REPL)](https://www.tutorialspoint.com/nodejs/nodejs_repl_terminal.htm).

This console allows you to run expressions in the console line by line and is a great way of testing bits of code before writing it in a script.

#### Exercise A (5 mins) <a href="#exercise-a-5-mins" id="exercise-a-5-mins"></a>

In your VS Code terminal, run the command `node` and run the following expressions. What are their outputs? Is there anything you didn't expect? (To exit the node REPL, you have to click Ctrl+d or Cmd+D on Mac)

* `1 + 2`
* `"hello"`
* `let favouriteColour = "purple"`
* `favouriteColour`
* `console.log(favouriteColour)`

### Booleans <a href="#booleans" id="booleans"></a>

There is another *primitive type* in JavaScript known as a **boolean** value. A boolean is either `true` or `false`, and it should be written without quotes.

```
let codeYourFutureIsGreat = true;
let thisIsATerribleClass = false;
```

#### Exercise B (10 mins) <a href="#exercise-b-10-mins" id="exercise-b-10-mins"></a>

1. In a node REPL, what is the `typeof` a `true` or `false`?
2. Pair up and correct the following function so that the output returns `"You've given me a bool, thanks!"`

```
function boolChecker(bool) {
  if (typeof bool === ) {
    return "You've given me a bool, thanks!";
  }

  return "No bool, not cool.";
}

boolChecker(true);
```

1. As a class, can you step through the function and explain what each line does?

### Comparison Operators <a href="#comparison-operators" id="comparison-operators"></a>

In the previous exercise, you used an **expression** that returns a `boolean` value. This was possible because of the **comparison operator** `===`. Using a comparison operator will always return a `boolean` value.

Comparison operators are used in logical statements to determine equality or difference between variables or values.

Given that `x = 5`, the table below explains the comparison operators:

| Operator | Description                       | Comparing | Returns |
| -------- | --------------------------------- | --------- | ------- |
| ==       | equal to                          | x == 8    | false   |
|          |                                   | x == 5    | true    |
|          |                                   | x == "5"  | true    |
| ===      | equal value and equal type        | x === 5   | true    |
|          |                                   | x === "5" | false   |
| !=       | not equal                         | x != 8    | true    |
| !==      | not equal value or not equal type | x !== 5   | false   |
|          |                                   | x !== "5" | true    |
|          |                                   | x !== 8   | true    |
| >        | greater than                      | x > 8     | false   |
| <        | less than                         | x < 8     | true    |
| >=       | greater than or equal to          | x >= 8    | false   |
| <=       | less than or equal to             | x <= 8    | true    |

### Conditionals <a href="#conditionals" id="conditionals"></a>

Like humans, computer programs make decisions based on the information given to them. **Conditionals** are a way of representing these decisions in code (remember, you saw this in a previous exercise!)

For example:

* In a game, if the player has 0 lives, then the game is over
* In a weather app, if rain is forecast, a picture of rain clouds is shown

The most common type of conditional is the **if statement**.

An if statement runs some code if a condition is met. If the condition is not met, then the code will be skipped.

```
let isHappy = true;

if (isHappy) {
  console.log("I am happy");
}
```

The code in parentheses - e.g. `(isHappy)` - is the condition. The condition can be *any* expression. The following are all valid conditions:

```
// boolean value
if (true) {
  // do something
}

// variable assigned to boolean value
let isHappy = true;
if (isHappy) {
  // do something
}

// equality operator returns a boolean value
if (1 + 1 === 2) {
  // do something
}

// comparison operator returns a boolean value
if (10 > 5) {
  // do something
}

// function call returns boolean value
if (greaterThan10(5)) {
  // do something
}
```

An `if` statement runs code when a condition is met. What if the condition is not met? Sometimes you want to run an alternative bit of code.

An **if...else statement** also runs code when the condition is *not* met.

```
let isHappy = true;

if (isHappy) {
  console.log("I am happy 😄");
} else {
  console.log("I am not happy 😢");
}
```

You can use **else if** to handle multiple conditions.

```
const age = 24;
if (age >= 65) {
    console.log("John is an old guy.")
} else if (age < 18) {
    console.log("John is a young boy."); 
} else {
    console.log("John is an adult."); 
}
```

#### Exercise C (5 mins) <a href="#exercise-c-5-mins" id="exercise-c-5-mins"></a>

Can you explain what this function does line by line? What happens when you pass in a string?

```
function numberChecker(num) {
  if (num > 20) {
    return `${num} is greater than 20`;
  } else if (num === 20) {
    return `${num} is equal to 20`;
  } else if (num < 20) {
    return `${num} is less than 20`;
  } else {
    return `${num} isn't even a number :(`;
  }
}
```

#### Exercise D (10 mins) <a href="#exercise-d-10-mins" id="exercise-d-10-mins"></a>

Create a function that gives you a message depending on your mood! It should:

* take one input
* return "Good job, you're doing great!" if you pass in "happy"
* return "Every cloud has a silver lining" if you pass in "sad"
* return "Beep beep boop" if you pass in a number
* return "I'm sorry, I'm still learning about feelings!" if you pass in anything else

### Logical Operators <a href="#logical-operators" id="logical-operators"></a>

Logical operators are used to determine the logic between variables or values.

There are three logical operators in JavaScript: `||` (OR), `&&` (AND), `!` (NOT).

They let you write expressions that evaluate to a boolean value.

Given that `x = 6` and `y = 3`, the table below explains the logical operators:

| Operator | Description | Example                       |
| -------- | ----------- | ----------------------------- |
| &&       | and         | (x < 10 && y > 1) is true     |
| \|\|     | or          | (x == 5 \|\| y == 5) is false |
| !        | not         | !(x == y) is true             |

Suppose you want to test if a number is bigger than 3 and smaller than 10. We can write this, using different logical operators.

```
let num = 10;

function satisfiesRequirements(num) {
  if (num > 3 && num < 10) {
    return true;
  }

  return false;
}
```

We can test expressions with logical operators in a node console too.

#### Exercise E (5 mins) <a href="#exercise-e-5-mins" id="exercise-e-5-mins"></a>

Type the following expressions into your node REPL and note the output. Anything you didn't expect?

* `let num = 10`
* `num > 5 && num < 15`
* `num < 10 || num === 10`
* `false || true`
* `!true`
* `let greaterThan5 = num > 5`
* `!greaterThan5`
* `!(num === 10)`

#### Exercise F (15 mins) <a href="#exercise-f-15-mins" id="exercise-f-15-mins"></a>

In pairs, write a function that checks a username is of an acceptable format for a user type. The function must:

* take two parameters: one for the username and one for the user type
* if the username starts with a capital letter *and* has length between 5 and 10 characters long, it must return `"Username valid"`; otherwise, it must return `"Username invalid"`
* if the user type is an `admin` *or* a `manager`, all usernames must return `"Username valid"`

## Loops

When we're writing programs, we often find that we want to repeat a bit of code over and over, or repeat it but change something about it each time. To save ourselves from writing all that code, we can use a **loop**. JavaScript has two kinds of loops, a `while` loop and a `for` loop.

#### while loop <a href="#while-loop" id="while-loop"></a>

Programs are very efficient when executing recurring tasks, but now imagine you are asked to log numbers from 1 to 100:

```
console.log("The count is 1");
console.log("The count is 2");
console.log("The count is 3");
console.log("The count is 4");
console.log("The count is 5");
// ...
console.log("The count is 100");
```

Although this would work you would need to write 100 lines of code to achieve the desired output. A better solution for this problem would require that we could execute a block of code multiple times. This form of control is what we call a loop.

There are many ways to create a loop in a program, the first we will study is the `while` loop:

#### `while ( ) { //... }` <a href="#while" id="while"></a>

```
let count = 1;
while (count <= 100) {
  console.log("The count is: " + count);
  count += 1;
}
```

The `while` statement creates a loop. The syntax is somehow similar to the `if` statement, it evaluates a condition inside the parentheses `(true|false)` and then it executes the code inside the `{ }` block only if that condition evaluates to `true`.

#### Exercise G (10 mins) <a href="#exercise-g-10-mins" id="exercise-g-10-mins"></a>

Log the Apollo 11 countdown, use the message provided as the last output. It starts from 8 till 0!

```
const apolloCountdownMessage = "all engine running... LIFT-OFF!";
let countdown = 8;

console.log(apolloCountdownMessage);
```

Expected output

```
8
7
6
5
4
3
2
1
0
all engine running... LIFT-OFF!
```

#### for loop <a href="#for-loop" id="for-loop"></a>

The `for` loop is similar to a while loop, but with a more specialized syntax. Programmers invented the for loop when they realized they were always doing the same three things: creating loop counter variables (like `i` above), incrementing them by some amount, and checking that they're less than a value.

The `for` loop syntax has special places for each of those three things. Here's the same loop as the first while loop above, as a for loop:

#### `for (initialization; condition; final-expression) { //... }` <a href="#for-initialization-condition-final-expression" id="for-initialization-condition-final-expression"></a>

![For loop](https://user-images.githubusercontent.com/31692/75388870-9213a880-58dd-11ea-90e6-4e67eabf390b.png)

```
for (let i = 0; i < 100; i++) {
  console.log("The count is: " + counter);
}
```

The initialization is `let i = 0`, the condition is `i < 100` and the final-expression is `i++`. Those blocks can be seen inside the parentheses after the `for` keyword and separated by semicolons `;`, in the following order `(initialization; condition; final-expression)`.

Notice the line **i++** - this is the same as saying **i = i + 1** It does exactly the same thing but it is just more convenient to write.

#### Exercise H (10 mins) <a href="#exercise-h-10-mins" id="exercise-h-10-mins"></a>

Calculate the exponential of the even numbers from 5 to 20 Using a for loop and the helper functions provided.

```
function exponential(number) {
  return number * number;
}

function isEven(number) {
  return number % 2 === 0;
}
```

Expected output

```
The exponential of 6 is 36
The exponential of 8 is 64
The exponential of 10 is 100
The exponential of 12 is 144
The exponential of 14 is 196
The exponential of 16 is 256
The exponential of 18 is 324
```

## Arrays

If you ever find yourself writing code like this...

```
const mentor1 = "Daniel";
const mentor2 = "Irina";
const mentor3 = "Rares";
```

...then it's probably time to use an **array**!

Arrays are data structures that hold a list of values. We call these values the **elements** of the array.

```
const mentors = ["Daniel", "Irina", "Rares"];
```

Arrays can hold any type of value (although almost always you only have one data type per array).

```
const testScores = [16, 49, 85];
const grades = ["F", "D", "A"];
const greetings = ["Hello, how are you?", "Hi! Nice to meet you!"];
```

You can access elements in an array using the **index** of an element with **bracket notation**

**🔔 Remember:** All arrays start at position 0! To access the first element in an array, you need to access index `0`, the second element at `1`, the fifth at `4` and so forth. This is called zero-based indexed arrays. There are some [very intense reasons for this](http://www.cs.utexas.edu/users/EWD/transcriptions/EWD08xx/EWD831.html), but most people just accept it and move on.

```
const students = ["Ahmed", "Maria", "Atanas", "Nahidul", "Jack"];

students[0]; // "Ahmed"
students[3]; // "Nahidul"
```

You can also *assign* new values to parts of an array:

```
const students = ["Ahmed", "Maria", "Atanas", "Nahidul", "Jack"];

students[2] = "Bianca";

console.log(students); // ["Ahmed", "Maria", "Bianca", "Nahidul", "Jack"]
```

#### Exercise I (5 mins) <a href="#exercise-i-5-mins" id="exercise-i-5-mins"></a>

In the node REPL, enter the following array:

```
> const fruits = ['banana', 'apple', 'strawberry', 'kiwi', 'fig', 'orange'];
```

Now, using the correct indexes, get the following values from the array:

* strawberry
* kiwi
* orange
* banana

Then, replace 'apple' with 'raspberry', and replace 'fig' with 'pineapple'.

#### Exercise J (5 mins) <a href="#exercise-j-5-mins" id="exercise-j-5-mins"></a>

Complete this function so that, if the second index in the array contains the name "Amy", it returns `"Second index matched!"`

```
function secondMatchesAmy(array) {
  if ( ) {
    return "Second index matched!";
  }
  return "Second index not matched";
}
```

#### Using for loops with arrays <a href="#using-for-loops-with-arrays" id="using-for-loops-with-arrays"></a>

We can use the power of loops to run some code for each element in our array.

When we do this say we **iterate** over an array.

```
const daysOfWeek = [
  "Monday",
  "Tuesday",
  "Wednesday",
  "Thursday",
  "Friday",
  "Saturday",
  "Sunday",
];

for (let i = 0; i < daysOfWeek.length; i++) {
  const dayMessage = "day is: " + daysOfWeek[i];
  const indexMessage = "index is: " + i;
  console.log(indexMessage, dayMessage);
}
```

#### Exercise K (10 mins) <a href="#exercise-k-10-mins" id="exercise-k-10-mins"></a>

Write a function which takes your **students** array as an input. In the function, use a for loop to **iterate** over the array and print the name of each student to the console.

### Glossary <a href="#glossary" id="glossary"></a>

* Duplicate: exact copies of something (e.g. two or more files, numbers, directory can be exactly the same)
* Index: numbers that let you know an item's position inside an array
* Element: another name for an item in an array
* Iterate: to repeat some code multiple times, as we do when we use a loop
* REPL: (Read-Eval-Print-Loop) an interactive way to execute code you write inside the console
* Zero-based Index: an `array` starting at `0` and not at `1`

For words like **Terminal**, **Primitive Types** please see [Glossary: JavaScript Core I - 2](https://migracode-barcelona.github.io/syllabus/js-core/week-1/lesson.md#Glossary)

## References <a href="#references" id="references"></a>

* [Comparisons in JS (javascript.info)](https://javascript.info/comparison)
* [Logical operators in JS (javascript.info)](https://javascript.info/logical-operators)
* [More on operators (javascript.info)](https://javascript.info/operators)
* [`while` loops (developer.mozilla.org)](https://developer.mozilla.org/en-US/docs/Web/JavaScript/Reference/Statements/while)
* [`for` loops (developer.mozilla.org)](https://developer.mozilla.org/en-US/docs/Web/JavaScript/Reference/Statements/for)
* [Loops in JS (javascript.info)](https://javascript.info/while-for)
* [Switch statements (javascript.info)](https://javascript.info/switch)
* [Arrays (developer.mozilla.org)](https://developer.mozilla.org/en-US/docs/Web/JavaScript/Reference/Global_Objects/Array)
* [What are algorithms](https://www.khanacademy.org/computing/computer-science/algorithms/intro-to-algorithms/v/what-are-algorithms)
* [Bubble sort](https://humanwhocodes.com/blog/2009/05/26/computer-science-in-javascript-bubble-sort/)


# 3 - Arrays and callbacks

## Learning Objectives

By the end of this class, you should be able to answer these questions:

* Describe what an array method is and use them to manipulate an array
* Write code that chains array methods together
* Define what a callback is
* Write code that uses a callback to run code
* Define what an anonymous function is
* Write code that uses an anonymous function as a callback

## Array properties

Arrays, like strings, have a `length` property.

You can check this by starting a node console in your terminal.

```
$ node
> let arr = [1, 2, 3];
undefined
> arr
[1, 2, 3]
> arr.length
3
```

### Manipulating arrays <a href="#manipulating-arrays" id="manipulating-arrays"></a>

You can **get** a single value out of an array using **bracket notation**.

```
$ node
> let ingredients = ["Flour", "Water", "Salt"];
undefined
> ingredients[0]
Flour
> ingredients[1]
Water
> ingredients.length
3
```

Did you notice how we use `[0]` to get the first value? In programming we count starting at zero.

> The number inside of the brackets is called an **index**. Index just means the position of the item within the array.

You can also **set** a value using bracket notation and an assignment operator (`=`).

```
const scores = [80, 41, 47];

scores[2] = 29; // Change the last score
scores[3] = 51; // Add a new score
```

#### Exercise A (5 minutes) <a href="#exercise-a-5-minutes" id="exercise-a-5-minutes"></a>

* Create an array with the names of the people on your table
* `console.log` out the names and how many people are at the table
* Put someone from another table at the beginning of the array
* Add someone else to the end of the list

### Working with arrays <a href="#working-with-arrays" id="working-with-arrays"></a>

When working with lists it is often useful to manipulate, enhance, or search the information in that list.

Some examples of things you might want to do with a list of data:

* Only use the first 10 items in a list
* Get people from a list whose name starts with a `M`
* Find the first person in a list to be over 100 years old
* Arrange people in a list alphabetically
* Get the last 10 items in an array
* Add all the numbers up in a list
* Get all the cats in an array of animals
* From a list of numbers, add a `£` sign prefix
* Combine a list of romance films and thrillers

## Array methods

Do you remember how strings have special functions called methods? Don't worry if not! Here's an example to jog your memory:

```
$ node
> let name = "Daniel";
undefined
> name.toLowerCase()
daniel
```

Arrays also have several methods that you can use.

#### `.sort()` <a href="#sort" id="sort"></a>

*An array method that sorts the values in an array into ascending alphabetical or numerical order.*

```
const unorderedLetters = ["z", "v", "b", "f", "g"];
const orderedLetters = unorderedLetters.sort();

const unorderedNumbers = [8, 5, 1, 4, 2];
const orderedNumbers = unorderedNumbers.sort();

console.log(orderedLetters); // logs [ 'b', 'f', 'g', 'v', 'z' ]
console.log(unorderedLetters); // logs [ 'b', 'f', 'g', 'v', 'z' ]

console.log(orderedNumbers); // logs [ 1, 2, 4, 5, 8 ]
console.log(unorderedNumbers); // logs [ 1, 2, 4, 5, 8 ]
```

> When you call this array method it uses the array on the left side of the dot as an input, and it sorts that array also returning it. Note how both ordered and unordered arrays are sorted now!

#### `.concat()` <a href="#concat" id="concat"></a>

*Adds (or concatenates) another value or array to the array.*

```
$ node
> let arr = [1, 2, 3];
undefined
> arr.concat(4)
[1, 2, 3, 4]
> arr
[1, 2, 3]
```

Did you notice how calling the concat method did not change `arr`? This is because `concat`, like most array methods, returns a *new* array, it does not alter the one you called the method on.

If you want to use the array returned by calling `.concat()` you should store it in a new variable.

```
const arr = [1, 2, 3];
const newArr = arr.concat(4);

console.log(newArr); // logs [1, 2, 3, 4]
```

#### `.slice()` <a href="#slice" id="slice"></a>

*Returns a slice of the array.*

You can tell `.slice()` where you want the slice to begin and end by passing it two parameters.

```
$ node
> let arr = [0, 1, 2, 3, 4]
undefined
> arr.slice(0, 2)
[0, 1]
> ["a", "b", "c", "d"].slice(1, 2)
['b']
```

#### `.includes()` <a href="#includes" id="includes"></a>

*Returns true if a value is in the array.*

```
const mentors = ["Daniel", "Irini", "Ashleigh", "Rob", "Etzali"];

function isAMentor(name) {
  return mentors.includes(name);
}

console.log("Is Rukmuni a mentor?");
console.log(isAMentor("Rukmini")); // logs false
```

#### `.join()` <a href="#join" id="join"></a>

*Returns all the array values joined together in a string. By default, this method takes no parameters and then the elements are divided with a comma `,`. If you provide it with a string parameter though, then it becomes the divider of the elements, like the example below:*

```
$ node
> ["H", "e", "l", "l", "o"].join();
'H,e,l,l,o'
> ["H", "e", "l", "l", "o"].join("--");
'H--e--l--l--o'
```

There is a string method `.split()`. In an interactive console try using the string `.split()` method and the array `.join()`. How could they work together?

#### Exercise B (10 minutes) <a href="#exercise-b-10-minutes" id="exercise-b-10-minutes"></a>

* Use the array of the people from your class
* Combine it with another array filled with the names from another class
* `console.log` the names in alphabetical order
* Create a function that takes a `name` and an array of names and returns a string. If the name is not in an array, it should return `<name> is not at the class with <people in the array>`. If the name is in the array, it should return `<name> is at the class with <people in the array>`.

### Array map <a href="#array-map" id="array-map"></a>

Imagine you have an array of names...

```
const mentors = ["Daniel ", "irina ", " Gordon", "ashleigh "];
```

You notice that the names are not formatted consistently. To fix the array you decide you need to trim whitespace and convert to lowercase. How do you do that for every value in the array?

We can write a function that changes one name:

```
function tidy(name) {
  return name.trim().toLowerCase();
}
```

All you need to run every name in the array through this function and update the array values. Thankfully there is an array method that does just this!

#### `.map()` <a href="#map" id="map"></a>

*Runs every item in the array through a function and returns a new array with the values returned by the function*.

Have a look at this other example:

```
function double(number) {
  return number * 2;
}

const numbers = [1, 2, 3];
const numbersDoubled = numbers.map(double);
```

The `map()` method runs the function we provided (`double`) on each item in the array and uses the return values to create a new array. In the example `numbersDoubled` is a new array containing `[2, 4, 6]`.

#### Callback functions <a href="#callback-functions" id="callback-functions"></a>

A **callback function** is a function that is passed *as an argument* to another function, to be “called back” at a later time. . The term highlights that although we *provide* the `double` function, the `.map()` method *calls* it. (Notice how we never write `double()` to call the function).

We'll see callback functions used a lot more in the coming weeks.

Often, when a function is only needed for a map operation, developers will declare the callback function inside of the method call. Let's try copying and pasting the function declaration inside of the `.map()` method call.

```
const numbers = [1, 2, 3];
const numbersDoubled = numbers.map(function double(number) {
  return number * 2;
});
```

We can make this shorter by removing the function name to declare an *anonymous function*. We can do this because we are not using the function anywhere else in the code, so we do not need the function name to reference it.

```
const numbers = [1, 2, 3];
const numbersDoubled = numbers.map(function (number) {
  return number * 2;
});
```

We can make this code even shorter still. In the latest versions of JavaScript a way of declaring functions was introduced called *arrow functions*.

```
const numbers = [1, 2, 3];
const numbersDoubled = numbers.map((number) => {
  return number * 2;
});
```

The arrow function syntax lets you declare a function without the `function` keyword. (There are some other subtle differences between arrow functions and regular functions that you will learn about at a much later stage).

There is one last thing you can do to make your code shorter. If you remove the braces (`{}`) from an arrow function, the body of the function will be returned without needing to write the `return` keyword.

```
const numbers = [1, 2, 3];
const numbersDoubled = numbers.map((number) => number * 2);
```

In the example above, the expression `number * 2` is automatically returned because it comes directly after the `=>` arrow (instead of coming after curly braces). This is called an `implicit return`.

#### Exercise C (10 minutes) <a href="#exercise-c-10-minutes" id="exercise-c-10-minutes"></a>

I have a function defined below as:

```
function magician(yourFunc) {
  console.log(
    "I am magician! Watch as I mutate an array of strings to your heart's content!"
  );
  const namesArray = [
    "James",
    "Elamin",
    "Ismael",
    "Sanyia",
    "Chris",
    "Antigoni",
  ];

  const magicOutput = yourFunc(namesArray);

  return magicOutput;
}
```

This function does not need to be modified. Can you pass in a *callback function* which will mutate `namesArray` such that it:

* Upper cases all letters in the array

#### Exercise D <a href="#exercise-d" id="exercise-d"></a>

Modify your callback function from the previous exercise so that it also:

* sorts  `namesArray` in alphabetical order

### Array forEach <a href="#array-foreach" id="array-foreach"></a>

The `.forEach()` method is similar to `.map()` except it does not return a new array.&#x20;

#### `.forEach()` <a href="#foreach" id="foreach"></a>

Say we want to log to the console a list of names.

```
const names = ["Daniel", "mozafar", "irina"];
```

We can use `.forEach()` to go through the array, item by item, and call a function we provide.

```
names.forEach(function (name, index) {
  console.log(index + ": " + name);
});
```

#### &#x20;<a href="#exercise-e-10-minutes" id="exercise-e-10-minutes"></a>

#### Exercise E (10 minutes) <a href="#exercise-e-10-minutes" id="exercise-e-10-minutes"></a>

* Create a function that takes a `birthYear`, and returns the age of someone
* You are given an array with year that 7 people were born, `[1964, 2008, 1999, 2005, 1978, 1985, 1919]`. Take this array and create another array containing their ages.
* `console.log` the birth years array

#### Exercise F (5 minutes) <a href="#exercise-f-5-minutes" id="exercise-f-5-minutes"></a>

You can drive in the UK at the age of 17.

* Write another function that takes a birth year and returns a string `Born in {year} can drive` or `Born in {year} can drive in {x} years`
* Use the array of birth years, `[ 1964, 2008, 1999, 2005, 1978, 1985, 1919 ]`, to get an array of strings saying if these people can drive
* `console.log` the answers

### Array filter <a href="#array-filter" id="array-filter"></a>

Imagine you have an array of students' test scores:

```
const testScores = [90, 50, 100, 66, 25, 80, 81];
```

You want to show only the test scores that are higher than 80. How do you do that for every value in the array?

We can write a function that checks if one score is greater than 80:

```
function isHighScore(score) {
  return score > 80;
}
```

To find out which scores were greater than 80, you'd have to run this function against every score in the array, and push the 80+ scores into a new array. Thankfully there is an array method that does just this!

#### `.filter()` <a href="#filter" id="filter"></a>

*Runs every item in the array through a condition that we set, and returns a new array with the values that match the condition*.

```
const highTestScores = testScores.filter(isHighScore);

console.log(highTestScores); // logs [90, 100, 81]
```

#### Exercise G (10 mins) <a href="#exercise-g-10-mins" id="exercise-g-10-mins"></a>

Create a function which:

* Takes an array of `birthYears`
* Uses `console.log` to print the message `These are the birth years of people who can drive: <filtered birth years>`
* Returns an array of people who can drive (remember, you can drive if you are 17 years or older)

### Array find <a href="#array-find" id="array-find"></a>

Imagine you have an array of names:

```
const names = ["Daniel", "James", "Irina", "Mozafar", "Ashleigh"];
```

How would you find the first name that's longer than 6 characters?

You can write a predicate function that checks if a string is longer than 6 characters:

```
function isLongName(name) {
  return name.length > 6;
}
```

To find the first item that satisfies the predicate you would have to go through each array item, and pass it into `isLongName`. Once it returns true, we can stop going through the array and grab the item that passed the predicate's test. Sounds complicated! Thankfully there is an array method that does just this!

#### `.find()` <a href="#find" id="find"></a>

*Searches through the array and returns the value of the first item that satisfies a predicate function.*

```
const longName = names.find(isLongName);

console.log(longName); // logs Mozafar
```

#### Exercise H (10 mins) <a href="#exercise-h-10-mins" id="exercise-h-10-mins"></a>

Create a function which:

* Takes an array of names
* Looks to see if your name is in the array
* If it is, return `Found me!`; if not, return `Haven't found me :(`

#### Chaining <a href="#chaining" id="chaining"></a>

Notice how we were able to write one method after another e.g. `names.map(formatName).forEach(log)`? This is called *method chaining*.

You can call `.forEach()` after `.map()` because `.map()` returns a new array.

Consider this code:

```
function formatName(name) {
  return name.split("")[0].toUpperCase() + name.slice(1);
}

function log(name, index) {
  console.log(index + ": " + name);
}

const namesFormatted = names.map(formatName);
namesFormatted.forEach(log);
```

It can be written more simply (without assigning the array returned from `.map()` to a variable):

```
names.map(formatName).forEach(log);
```

Be careful though! You can not call `.map()` after `.forEach`.

```
names.forEach(log).map(formatName); // ERROR
```

This code does not work because `forEach()` does not return a new array (it returns `undefined`). The code is therefore attempting to call `.map()` on `undefined`, and `undefined` does not have a `.map()` method.

#### Exercise I (15 minutes) <a href="#exercise-i-15-minutes" id="exercise-i-15-minutes"></a>

Create a function which accepts an array of "messy" strings. Example:

```
[
  100,
  "iSMael",
  55,
  45,
  "sANyiA",
  66,
  "JaMEs",
  "eLAmIn",
  23,
  "IsMael",
  67,
  19,
  "ElaMIN",
];
```

This function should:

* Remove all non-string entries
* Change the strings to upper case, and add an exclamation mark to the end

If you're using the above example, you should expect to return an array with 2x `ELAMIN!`, 1x `SANYIA!`, 2x `ISMAEL!` and 1x `JAMES!`.


# JavaScript II

**Over nine weeks, we take you from writing your first JavaScript program all the way to the most modern tools and techniques. You’ll learn how to make website’s interactive and to write excellent, clean code.**

### Before the class <a href="#before-the-class" id="before-the-class"></a>

Fork the [JavaScript Module 2 Workshop repository](https://github.com/Migracode-Barcelona/javascript-module-2-todo-workshop) to your personal account and clone it. Find help in the [MigraCode GIT Guide](https://syllabus.migracode.org/git#fork-and-clone-an-existing-project-from-github).&#x20;

This is the repo we will be using during the JavaScript module II workshop. Follow README.md file provided in the above mentioned repository.

Below an overview of the week-by-week topics - click on the title to find more details.

### Table of contents

* [**Part-1 JavaScript in the browser**](https://github.com/Migracode-Barcelona/javascript-module-2-todo-workshop#part-1-javascript-in-the-browser)
  * [Node.js versus browser](https://github.com/Migracode-Barcelona/javascript-module-2-todo-workshop#nodejs-vs-browser)
  * [The Document Object Model](https://github.com/Migracode-Barcelona/javascript-module-2-todo-workshop#the-dom)
  * [Attach events to DOM elements](https://github.com/Migracode-Barcelona/javascript-module-2-todo-workshop#attach-events-to-dom-elements)
  * [Create and manipulate DOM elements](https://github.com/Migracode-Barcelona/javascript-module-2-todo-workshop#create-and-manipulate-dom-elements)
* [**Part-2 Objects in JavaScript**](https://github.com/Migracode-Barcelona/javascript-module-2-todo-workshop#part-2-objects-in-javascript)
  * [Object basics](https://github.com/Migracode-Barcelona/javascript-module-2-todo-workshop#object-basics)
  * [Dot notation](https://github.com/Migracode-Barcelona/javascript-module-2-todo-workshop#dot-notation)
  * [Bracket notation](https://github.com/Migracode-Barcelona/javascript-module-2-todo-workshop#bracket-notation)
  * [Setting object members](https://github.com/Migracode-Barcelona/javascript-module-2-todo-workshop#setting-object-members)
  * [What is "this"?](https://github.com/Migracode-Barcelona/javascript-module-2-todo-workshop#what-is-this)
  * [Object built-in methods](https://github.com/Migracode-Barcelona/javascript-module-2-todo-workshop#object-built-in-methods)
  * [Loop through an object](https://github.com/Migracode-Barcelona/javascript-module-2-todo-workshop#loop-through-an-object)
* [**Part-3 Introduction to APIs**](https://github.com/Migracode-Barcelona/javascript-module-2-todo-workshop#part-3-introduction-to-apis)
  * [A frame of reference](https://github.com/Migracode-Barcelona/javascript-module-2-todo-workshop#a-frame-of-reference)
  * [What is an API and why is it valuable](https://github.com/Migracode-Barcelona/javascript-module-2-todo-workshop#what-an-api-is-and-why-its-valuable)
  * [How to use an API](https://github.com/Migracode-Barcelona/javascript-module-2-todo-workshop#how-an-api-is-used)
  * [Representing data](https://github.com/Migracode-Barcelona/javascript-module-2-todo-workshop#representing-data)
  * [JSON](https://github.com/Migracode-Barcelona/javascript-module-2-todo-workshop#json)
  * [JavaScript JSON built-in library](https://github.com/Migracode-Barcelona/javascript-module-2-todo-workshop#javascript-json-built-in-library)
  * [Web Storage API](https://github.com/Migracode-Barcelona/javascript-module-2-todo-workshop#web-storage-api)
  * [Local Storage](https://github.com/Migracode-Barcelona/javascript-module-2-todo-workshop#local-storage)
  * [Session Storage](https://github.com/Migracode-Barcelona/javascript-module-2-todo-workshop#session-storage)
  * [Todo App Local Storage Implementation](https://github.com/Migracode-Barcelona/javascript-module-2-todo-workshop#todo-app-local-storage-implementation)

![](https://4042228299-files.gitbook.io/~/files/v0/b/gitbook-legacy-files/o/assets%2F-MRebciU3NcuLgsX3ijf%2F-MSXGtKUhAK1wnjgonVJ%2F-MSXH5-qc8LZdJ2eO1So%2FP9010157migracode-bcn.jpg?alt=media\&token=8e289b5f-1fc6-4239-8750-941cd72f816c)


# JavaScript III

**Over nine weeks, we take you from writing your first javascript program all the way to the most modern tools and techniques. You’ll learn how to make website’s interactive and to write excellent, clean code.**

### Before the class <a href="#before-the-class" id="before-the-class"></a>

Fork the [JavaScript Module 3 Workshop repository](https://github.com/Migracode-Barcelona/javascript-module-3-pokedex-workshop) to your personal account and clone it. Find help in the [MigraCode GIT Guide](https://syllabus.migracode.org/git#fork-and-clone-an-existing-project-from-github).&#x20;

This is the repo we will be using during the JavaScript module III workshop. Follow README.md file provided in the above mentioned repository.

![](https://4042228299-files.gitbook.io/~/files/v0/b/gitbook-legacy-files/o/assets%2F-MRebciU3NcuLgsX3ijf%2F-MSXGtKUhAK1wnjgonVJ%2F-MSXH84t7JT6D-EZh5hW%2FMigraCode_7migracode-bcn.jpg?alt=media\&token=28f3a5e1-4cbe-439f-bc54-8ff521b5849e)


# 1 - Good practices and debugging

{% hint style="warning" %}
**This Page is outdated and will be removed shortly. Follow this repository**  [**JavaScript Module 3 Workshop repository**](https://github.com/Migracode-Barcelona/javascript-module-3-pokedex-workshop) **for updated syllabus content.**
{% endhint %}

### Intro to ES6

ECMAScript 2015 (or ES6) is a significant update to JavaScript that introduces new syntax for writing complex applications.

### const and let <a href="#const-and-let" id="const-and-let"></a>

You have already come across the `var` keyword as a way to create new variables. The `let` and `const` keywords are also used for variable creation, but the variables created using these keywords have different scope. Var has "function scope", whereas let and const have "block scope".

> This **badly designed** function will throw the error `message is not defined`. What is the problem, and how could we fix it?

```
function compareNumbers(m, n) {
  if (m < n) {
    let message = m + " is smaller than " + n;
  } else {
    let message = m + " is bigger than or equal to " + n;
  }

  return message;
}
```

The `const` keyword is similar to `let`, the only difference is that a variable declared using `const` can't be changed after it is assigned.

> What advantages might a block scope variable have over a function scope variable? In what situation might you want to use `const` instead of a variable that can be re-assigned?
>
> How can we update this code to use `let` and `const` instead of `var`?

```
function getCircleArea(radius) {
  var pi = Math.PI;
  var rSquared = Math.pow(radius, 2);

  return pi * rSquared;
}

function getCircleAreas(radiusArr) {
  var areasArr = [];

  for (var i = 0; i < radiusArr.length; i++) {
    var circleArea = getCircleArea(radiusArr[i]);
    areasArr.push(circleArea);
  }

  return areasArr;
}
```

### Template literals <a href="#template-literals" id="template-literals"></a>

We do a lot of string concatenation in JavaScript - ES6 introduces a more elegant way of accomplishing the same.

```
function greeting(name) {
  return "Hello " + name + ", welcome to JS core 3!";
}
```

Rewriting this function in ES6, we have

```
function greeting(name) {
  return `Hello ${name}, welcome to JS core 3!`;
}
```

### Arrow functions <a href="#arrow-functions" id="arrow-functions"></a>

ES6 also has a new way of declaring functions. Let's see how it works.

```
// before 
function sum(a, b, c) {
  return a + b + c;
}

// ES6
const sum = (a, b, c) => {
  return a + b + c;
}
```

If the function only contains one expression, the curly braces and the `return` are optional and we can write the whole function in one line.

```
const sum = (a, b, c) => a + b + c;
```

### Default parameters <a href="#default-parameters" id="default-parameters"></a>

ES6 allows us to declare defaults for function arguments. The default value is used when the argument/parameter is either missing or `undefined`.

This function returns the sum of three numbers. Let's assume we want to use the same function with only two arguments:

```
// without default parameter
const sum = (a, b, c) => {
  c = c || 0;
  return a + b + c;
}

console.log(sum(1, 3, 4)) // 8
console.log(sum(2, 5)) // NaN

// with default parameter 
const sum = (a, b, c = 0) => {
  return a + b + c;
}
console.log(sum(2, 5)) // 7
```

### Destructuring <a href="#destructuring" id="destructuring"></a>

In ES6 we can extract data from objects or arrays using destructuring.

```
// before 
var chicken = {
  name: 'Maggie', 
  age: 2
}

var name = chicken.name;
var age = chicken.age;

var numbers = [1, 2];

var firstNumber = numbers[0];
var secondNumber = numbers[1];


// in ES6
const chicken = {
  name: 'Maggie', 
  age: 2
}

const { name, age } = chicken;

const numbers = [1, 2];

const [firstNumber, secondNumber] = numbers;
```

Resources:

* [Let and const](http://wesbos.com/let-vs-const/)
* [ES6 features](http://es6-features.org/)

**Exercise**

From [exercises-js3-week1 repo](https://github.com/Migracode-Barcelona/exercises-js3-week1) in folder **InClass/A-ES6** do exercise1.js

### Classes <a href="#classes" id="classes"></a>

Objects in programming languages provide us with an easy way to model data. Let’s say we have an object called polygon. The polygon object has properties: values that contain data about the polygon, and methods: functions that define actions that the polygon can perform. This focus on “objects” and “actions” is the basis of Object Oriented Programming.

Analyze the following code, what is a constructor?

```
class Polygon {
  constructor(height, width) {
    this.name = "Polygon";
    this.height = height;
    this.width = width;
  }
  sayName() {
    console.log('Hi, I am a ' + this.name);
  }
}

let p = new Polygon(300, 400);
p.sayName();
```

The extends keyword is used in class declarations or class expressions to create a class as a child of another class. Why do you think are two lines commented?

```
class Rectangle extends Polygon {
  constructor(height, width) {
    super(height, width);
    this.name = "Rectangle";
    this.sides = 4;
    //this.area = this.height * this.width;
  }
  get area() {return this.width * this.height;}
  sayName() {
    console.log('Hi I am a polygon and my name is ' + this.name + '.');
  }
}

let r = new Rectangle(50, 60);
r.sayName();
//r.area = 3;
console.log('The area of this polygon is ' + r.area);
```

Resources:

* [Classes differences in ES5 and ES6](https://medium.com/@luke_smaki/javascript-es6-classes-8a34b0a6720a)
* [Explanation of Classes](https://developer.mozilla.org/en-US/docs/Web/JavaScript/Reference/Classes)

**Exercise**

From [exercises-js3-week1 repo](https://github.com/Migracode-Barcelona/exercises-js3-week1) in folder **InClass/A-ES6** do exercise2.js

### Tracing Code <a href="#tracing-code" id="tracing-code"></a>

What is Code? Computer code is a **set of rules or instructions**. It is made up of words and numbers and when you put them in the **right order** it will tell your computer what you want it to do.

Let's trace these code samples together:

* [Exercise 1](https://github.com/Migracode-Barcelona/exercises-js3-week1/blob/master/InClass/B-Tracing%20code/exercise1/)
* [Exercise 2](https://github.com/Migracode-Barcelona/exercises-js3-week1/blob/master/InClass/B-Tracing%20code/exercise2/)

## Debugging <a href="#debugging" id="debugging"></a>

Debugging is the process of finding and resolving defects or problems within a computer program that prevent correct operation of computer software or a system.

### Syntax bugs <a href="#syntax-bugs" id="syntax-bugs"></a>

A syntax bug is an error caused by something the programmer has typed – it could be a spelling mistake or a command that the computer doesn’t understand.

### Logical bugs <a href="#logical-bugs" id="logical-bugs"></a>

A logical bug is an error which means that even though the computer is able to carry out its instructions, it doesn’t act as the programmer intended or the user expects.

### Debugging with Chrome <a href="#debugging-with-chrome" id="debugging-with-chrome"></a>

Follow this tutorial about [Debugging with Chrome](https://developers.google.com/web/tools/chrome-devtools/javascript/) And try to solve the problem in the link 'Open Demo'

## Good Design <a href="#good-design" id="good-design"></a>

Design is important if we want our code to be understandable (both to other humans, but also to us in the future), to be easy to use and easy to expand.

There are three main principles you need to know now: clarity, reusability and extensibility. There are also others, but they are deeply related to these three.

* Ease of Maintenance / Clarity
  * Naming
  * Commenting
  * Clear logic
  * Concise
  * Formatting
  * Avoiding Redundancy
* Reusability
  * DRY
  * Single Reponsibility
    * Avoiding global state (scope)
    * Predictability and Ease of testing
* Extensibility
  * Avoiding being unnecessarily specific (e.g. magic numbers)

Now let's take a look at a bigger example of a badly written function

```
function myFunction(salary, taxCode, incomeTax1, incomeTax2, ownsCar) {
  var totalIncomeTax = incomeTax1 + incomeTax2;
  var studentLoan = (salary - 17775) * 0.09;
  var originalSalary = salary;
  var nationalInsurance = null;

  if (taxCode === "1150L") {
    nationalInsurance = salary * 0.1;
  } else if (taxCode === "ST") {
    nationalInsurance = salary * 0.05;
  } else {
    nationalInsurance = salary * 0.08;
  }

  var deductions = [nationalInsurance, totalIncomeTax, studentLoan];

  salary = salary - deductions[0];
  salary = salary - deductions[1];
  salary = salary - deductions[2];

  return (
    "Your gross income is £" +
    originalSalary.toString() +
    " and your net income is £" +
    salary.toString() +
    "."
  );
}

console.log(myFunction(28000, "1150L", 1000, 580, false));
```

Comment together what is wrong with this function?

**Exercise**

From [exercises-js3-week1 repo](https://github.com/Migracode-Barcelona/exercises-js3-week1) in folder **InClass/C-Good Design** do exercise1.js

#### Refactoring <a href="#refactoring" id="refactoring"></a>

There are times when we want to make our code better without changing any functionality, for example because we just learnt about a better way to solve a certain problem (like, finding needles in haystacks). This is called *refactoring*.

When previously **GREEN** code - working code! - suddenly does not work anymore, we call this a *regression*. Our existing tests can make sure that when we refactor, the functionality of our code actually stays the same, and does not regress.

### Modules <a href="#modules" id="modules"></a>

So far, all our programs have been in their own single files. But Node programs can become really large, and having all our code in only one file will not be maintainable.

We can therefore split our code into so-called *modules*. A module is basically a JavaScript file that makes its functionality available to other modules and programs.

#### Creating modules, exporting code <a href="#creating-modules-exporting-code" id="creating-modules-exporting-code"></a>

It is really simple to take existing JavaScript code and turn it into a module by exporting its functionality:

```
function printName(name) {
  console.log("My name is " + name);
}

module.exports = printName;
```

The key here is the line containing `module.exports`. As you see, this is an assignment, and whatever is assigned to `module.exports` will be made available to other modules and program when this file is imported.

#### Using modules, importing code <a href="#using-modules-importing-code" id="using-modules-importing-code"></a>

But how do we make use of another module in our program? We need to *import* it, and this is done using a function called `require()`.

> There are different module formats for JavaScript. The one we are using here, which is natively supported by Node, is called **CommonJS**.

```
var printName = require("./printName.js");
```

> The string passed to the `require()` function is a *path* to the file you are importing. `./` signifies the current directory, so the above command will import a file called "printName.js" that is in the same directory as our program.

Assuming our program is in the same folder as `printName.js`, we can use the above code to import the functionality provided by that module and store it in the `printName` variable.

We can then continue to use the `printName` function as if it we defined it in our own program!

```
var printName = require('./printName.js');

printName();
```

> Modules can not only export functions, but all variable types you already learned about. Most commonly, they export a function or an object containing multiple functions.
>
> *Together:* Edit the file `modules/main.js` and follow the instructions.

## Resources <a href="#resources" id="resources"></a>

1. [JavaScript: The Good Parts by Douglas Crockford, chapter 4 - Functions](http://bdcampbell.net/javascript/book/javascript_the_good_parts.pdf)
2. [MDN Objects basics](https://developer.mozilla.org/en-US/docs/Learn/JavaScript/Objects/Basics)
3. [MDN OOP in JS](https://developer.mozilla.org/en-US/docs/Learn/JavaScript/Objects/Object-oriented_JS)
4. [Modules](https://nodejs.org/api/modules.html)
5. [Setup VS Code for Debugging](https://medium.com/software-developer/debugging-facebooks-jest-for-react-in-visual-studio-code-9059223e1e71)

### Tracing code resources <a href="#tracing-code-resources" id="tracing-code-resources"></a>

Check out these videos. They contain code that is not JavaScript being traced on paper.

[Hand Tracing - Intro to Java Programming](https://www.youtube.com/watch?v=TZss5ukwN8s)

[Tracing code by hand](https://www.youtube.com/watch?v=tJGrie7k97c)

[Tracing a flowchart](https://www.youtube.com/watch?v=SEtNBShckCg)

[Java Tracing Arrays Worksheet 1](https://www.youtube.com/watch?v=niwBxBUzDu4)

[Nested loops](https://www.youtube.com/watch?v=5mxT9x5rgCg)


# 2 - APIs and fetch

{% hint style="warning" %}
**This Page is outdated and will be removed shortly. Follow this repository**  [**JavaScript Module 3 Workshop repository**](https://github.com/Migracode-Barcelona/javascript-module-3-pokedex-workshop) **for updated syllabus content.**
{% endhint %}

### Learning Objectives <a href="#learning-objectives" id="learning-objectives"></a>

* The learner should understand what the acronym API means
* The learner can define what an API's purpose is and why it is useful
* The learner should be able to edit the structure of a API URL and to change the data retrieved from the server
* The learner should be able to define what a `Promise` is
* The learner should understand what `fetch` is and what it is used for
* The learner should be able to use `fetch` to retrieve `JSON` from an API
* The learner should be able to parse the `JSON` and extract data from it
* The learner should be able to use `DOM` manipulation to add content to the `DOM`
* The learner should understand `window.onload` and `document.onload` and should be able to assign functions to run at specific life cycle events

### 1. How the web works - quick recap <a href="#id-1-how-the-web-works---quick-recap" id="id-1-how-the-web-works---quick-recap"></a>

In this session we will look at how computer talk to each other using the web.

At the core of the web is the URL, which stands for Uniform Resource Locator. We use the term resource to mean anything that a server might return such as webpage, CSS, JavaScript, image, data etc. A good way to think of a URL is as an address. It allows us to refer to webpages, images, data etc that is stored on servers elsewhere.

#### Methods <a href="#methods" id="methods"></a>

The main methods used to send requests on the web are `GET` and `POST`. However, later in the course when we look at building APIs using Node we will also look at other methods such as `PUT` and `DELETE`.

A `GET` method is a way of asking a server for a webpage, resource or a piece of data. For example, when we type a URL into a browser and submit it. The browser will send a `GET` request.

A `POST` method is used to send data to a server.

The main difference between `GET` and `POST` is that a `POST` method has a body, that is it can contain some data that we are sending. Whereas a `GET` does not have a body since we use it to request data.

#### Headers <a href="#headers" id="headers"></a>

Each request and response sent has meta data, information about the data, at the beginning called a `header`. The `header` contains information such as a

* status code indicating whether a request was successful
* content type which indicates what the request or response contains

as well as lots of other things we won't cover here

#### Status codes <a href="#status-codes" id="status-codes"></a>

Each response returned needs to contain a `status` code which tells the client whether the request was successful. If the request succeeded the response code will be `200`. If the resource you tried to access was not found the response code used is `404`.

Some status codes you may have come across before are:

* `200` ok. Request was successful
* `301` moved permanently. Used to redirect request when moved permanently
* `401` Unauthorised. User credentials were not supplied
* `404` Not found
* `500` Internal server error

The response codes can be grouped into categories

* 1xx: Informational
* 2xx: Success
* 3xx: Redirection
* 4xx: Client Error
* 5xx: Server Error

If you want a fun look at HTTP codes, take a look at <https://httpstatusdogs.com/> or <https://http.cat/> if you are cat person. For a technical perspective take a look at <https://en.wikipedia.org/wiki/List_of_HTTP_status_codes>.

#### Content type <a href="#content-type" id="content-type"></a>

When sending data across the web, we need to specify in the header what the request or response contains. To do that, the `content-type` header is used. That way the receiver knows what to do with the data received.

Common content types include

* `text/html` - HTML web page
* `text/css` - CSS
* `image/jpeg` - JPEG image
* `application/javascript` - JavaScript code
* `application/json` - JSON data

#### Exercise <a href="#exercise" id="exercise"></a>

```
In Slack post answers to the following

- What can HTTP headers contain?
- What is the purpose of status codes?
- What can an HTTP message contain?
```

### 2. What are APIs and how to interact with them <a href="#id-2-what-are-apis-and-how-to-interact-with-them" id="id-2-what-are-apis-and-how-to-interact-with-them"></a>

#### Explanation <a href="#explanation" id="explanation"></a>

* API stands for `Application Programming Interface`
* APIs are created by providers and used by consumers
* It is a specific part of a larger system that can be contacted by other systems, for example from the internet.
* When we connect to an `API` we say that we are connecting to an `Endpoint`
* Some well-known APIs are [Facebook APIs](https://developers.facebook.com/), [Twitter APIs](https://developer.twitter.com/en/docs), [Maps APIs](https://developers.google.com/maps/documentation) and many many more
* In particular, an API doesn't care what language or technology is used in the consumer or the provider

An API is a set of rules that allow programs to talk to each other. The developer creates the API on the server and allows the client to talk to it. An example of a server is the application on a computer hosting a website and an example of a client is the browser on the phone trying to access the website.

**Why do we need APIs?**

Imagine that I am a big social network and I want to give developers all over the world access to the data on the people on my website.

What are some problems that I would have with sharing my data with everyone?

1. Some of the information that I have is public (for example, peoples names) whilst other information I have is private (for example, email addresses). I want to make sure that I only ever give developers access to peoples names but never to their email addresses - otherwise they could send them spam email.
2. I want to make sure that when developers ask for my data I can control who has access to it. I like that my users data is being used to make their lives better but I don't like it when companies try to sell them new stuff they don't need.
3. Some developers might want to change some of the users details on my social network and this would get very messy quickly if people where allowed to change whatever they wanted

An API is a special type of program what acts as a **gatekeeper** to all of this information. Having an API means that I can control which information is shared about my users and who it is shared with. Perfect!

**Types of APIs:**

* Private: for employees only under a company network for internal use.
* Semi-private: for clients who paid for the API.
* Public: for everyone on the web (but may or may not need an account to use).

**Examples**

Here is the API endpoint for Transport For London

[https://api.tfl.gov.uk](https://api.tfl.gov.uk/)

The data from this endpoint will be used by many apps that you use every day - Google Maps and Citymapper to name two.

This endpoint will get location of all of the Bikepoints in London.

<https://api.tfl.gov.uk/BikePoint>

That's a lot of Bikes! It would be better if we could search for a location. Luckily this API let's us search for places.

<https://api.tfl.gov.uk/BikePoint/Search?query=Clerkenwell>

This API also has lots of other endpoints that we can use to get other data. For example, lets find the Air Quality of London.

<https://api.tfl.gov.uk/AirQuality>

As you can see the URL changes the data that we get from the API. This can be broken down like this

![](https://migracode-barcelona.github.io/syllabus/js-core-3/assets/api-breakdown.png)

#### Exercise <a href="#exercise" id="exercise"></a>

**Task (5 mins):**

```
Let's use the TFL API to get data about the London Underground

https://api.tfl.gov.uk

1.  Which endpoint would you use to find out if there is a disruption on the 'central' line? 2. Does the 'central' line have a disruption right now? Name another line that has a disruption on it.

Hint: Use your browser to access the endpoints
```

**Recap**

**Question:**

```
Which of the following statements below about APIs is false?

A) Public APIs can be accessed by anyone on the Internet.
B) You must use Javascript to access an API.
C) APIs can control access to data or features of an application.
D) You can change data via an API.
```

**Question:**

```
Give an example of a company that uses an API to allow access to their data.
```

### 3. How to use `fetch` to do network requests <a href="#id-3-how-to-use-fetch-to-do-network-requests" id="id-3-how-to-use-fetch-to-do-network-requests"></a>

#### Explanation <a href="#explanation" id="explanation"></a>

* Fetch is a function to request from other places on the web
* Fetch is defined in the browser which means it can be used without using an external library (`window.fetch`)
* Fetch is available in nearly all browser but it's good to check which ones it won't work in
  * We can use this website to help us - [caniuse.com](https://caniuse.com/#feat=fetch))
* Fetch API documentations by Mozilla [link](https://developer.mozilla.org/en-US/docs/Web/API/Fetch_API/Using_Fetch)

#### How does fetch work? <a href="#how-does-fetch-work" id="how-does-fetch-work"></a>

Fetch uses a JavaScript pattern called "Promises" which has a very specific structure.

You can think of a Promise as you would think of a promise you make to another person - you make a promise that something will happen in the future. For example - I promise to call you later, I promise to go to the shops and buy milk later.

Using Promises allows us to schedule functions to be called after some asynchronous code finishes running. We can specify different functions depending on whether the asynchronous code was successful or ran into an error.

Promises can make it easier to split our code into small functions and make code easier to read. They also make it easier to handle errors.

In this example we

1. Get the `Promise` that we will get the milk from the shops (this could take a long time so it's good that it's a `Promise`!)
2. When the milk has arrived from the shop `then` I should drink it and `return` the bottle so I can do something else with it
3. When I've drank the milk `then` I should recycle the bottle
4. If anything goes wrong with those steps I should `catch` the error and `warn` everyone what happened

#### Example <a href="#example" id="example"></a>

```
getMilkFromShops
  .then((milk) => {
    console.log(`I've got the milk`);
    milk.drink();
    return milk.bottle;
  })
  .then((bottle) => {
    console.log(`I'm going to recycle the bottle`);
    bottle.recycle();
  })
  .catch((error) => console.warn("Oh no, I dropped the milk"));
```

**Example 1**

*Live Coding Exercise*

Let's step through how the Fetch function is used and what it is comprised of

```
//Retrieve the JSON
fetch("https://cat-fact.herokuapp.com/facts")
  // Get the response and extract the JSON
  .then(function (response) {
    return response.json();
  })
  // Do something with the JSON
  .then((headlines) => {
    console.log(headlines);
  })
  // If something goes wrong
  .catch((error) => console.log(error));
```

**Example 2**

*Live Coding Exercise*

Wouldn't it be cool to make a new friend with just the click of a button?

Write a function that makes an API call using `fetch` to `https://www.randomuser.me/api`

* The function should make an API call to the given endpoint: `https://www.randomuser.me/api`
* Log the received data to the console
* Incorporate error handling
* Show how you can build a profile page for the user using the DOM
  * Add a name
  * Add a profile picture
  * Add some styling using CSS

#### Error handling <a href="#error-handling" id="error-handling"></a>

We saw earlier that each HTTP response contains an status code which indicates if our request was successful or not. If the our request failed we usually want to handle it appropriately.

We can handle these errors gracefully in your code by checking the `status` and `statusText` value of the response:

```
fetch("https://httpstat.us/500")
  .then((response) => {
    if (response.status >= 200 && response.status <= 299) {
      return response.json();
    } else {
      throw new Error(
        `Encountered something unexpected: ${response.status} ${response.statusText}`
      );
    }
  })
  .then((jsonResponse) => {
    // do whatever you want with the JSON response
  })
  .catch((error) => {
    // Handle the error
    console.log(error);
  });
```

**Recap**

**Task (5 mins):**

```
Complete the rest of this code to connect to the following API: `https://dog.ceo/api/breeds/image/random`

    fetch(_____)
    .then(_____)
    .then(body => console.log(body))
    .catch(error => console.log(error));
```


# 3 - Project

{% hint style="warning" %}
**This Page is outdated and will be removed shortly. Follow this repository**  [**JavaScript Module 3 Workshop repository**](https://github.com/Migracode-Barcelona/javascript-module-3-pokedex-workshop) **for updated syllabus content.**
{% endhint %}

Follow the steps and complete all the steps you can from the [Weather Project](https://docs.google.com/presentation/d/1vdQT9M8jMmdWwhEOWUTBkNP5E0ddEdpV5pQtjf9acaM/edit#slide=id.g879a9f0369_0_124)


# React

**React is a modern framework that makes creating complex website’s in a reusable way very easy. In this module we teach how React works and why it is a great way to make websites.**

Below an overview of the week-by-week topics - click on the title to find more details.

{% content-ref url="/pages/-MS-H6eFEAKTxBonl6He" %}
[1 - React 101](/courses/introduction-3/course-content/react/week-1)
{% endcontent-ref %}

{% content-ref url="/pages/-MS-HQTUYIvlVvaztEte" %}
[2 - Reacting to changes](/courses/introduction-3/course-content/react/week-2)
{% endcontent-ref %}

{% content-ref url="/pages/-MS-Hbh-8BzFpe6lh97D" %}
[3 - Fetching Data](/courses/introduction-3/course-content/react/week-3)
{% endcontent-ref %}

{% content-ref url="/pages/-MS-IR79QcZV-nGnG4Zl" %}
[Extra Materials](/courses/introduction-3/course-content/react/extra-materials)
{% endcontent-ref %}

![](https://4042228299-files.gitbook.io/~/files/v0/b/gitbook-legacy-files/o/assets%2F-MRebciU3NcuLgsX3ijf%2F-MSXGtKUhAK1wnjgonVJ%2F-MSXHAnveBx3ObToq4pe%2FDSC_0282migracode-bcn.jpg?alt=media\&token=a7bf1016-6b05-4c08-ac2c-f9eb85303883)


# 1 - React 101

### What is NPM?

When you installed Node, you also installed a package managing application called [`npm`](https://www.npmjs.com/). `npm` will install JavaScript packages in your project and also keep track of details about the project.

The [Node.js Package Manager (npm)](https://www.npmjs.com/) is the default and most popular package manager in the Node.js ecosystem, and is primarily used to install and manage external modules in a Node.js project. It is also commonly used to install a wide range of CLI tools and run project scripts. npm tracks the modules installed in a project with the `package.json` file, which resides in a project’s directory and contains:

* All the modules needed for a project and their installed versions
* All the metadata for a project, such as the author, the license, etc.
* Scripts that can be run to automate tasks within the project

As you create more complex Node.js projects, managing your metadata and dependencies with the `package.json` file will provide you with more predictable builds, since all external dependencies are kept the same. The file will keep track of this information automatically; while you may change the file directly to update your project’s metadata, you will seldom need to interact with it directly to manage modules.

### What is create-react-app?

Starting a new React project used to be a complicated multi-step process that involved setting up a build system, a code transpiler to convert modern syntax to code that is readable by all browsers, and a base directory structure. But now, [Create React App](https://github.com/facebook/create-react-app) includes all the JavaScript packages you need to run a React project, including code transpiling, basic linting, testing, and build systems. It also includes a server with *hot reloading* that will refresh your page as you make code changes. Finally, it will create a structure for your directories and components so you can jump in and start coding in just a few minutes.

`npm` also includes a tool called [`npx`](https://www.npmjs.com/package/npx), which will run executable packages. What that means is you will run the Create React App code without first downloading the project.

The executable package will run the installation of `create-react-app` into the directory that you specify. It will start by making a new project in a directory, which in this tutorial will be called `pokedex`. Again, this directory does not need to exist beforehand; the executable package will create it for you. The script will also run `npm install` inside the project directory, which will download any additional dependencies.

To install the base project, run the following command:

```
npx create-react-app pokedex
```

This command will kick off a build process that will download the base code along with a number of dependencies.

Now your project is set up in a new directory. Change into the new directory:

```
cd pokedex
```

Now that you are inside the project directory, take a look around. You can either open the whole directory in your text editor, or if you are on the terminal you can list the files out with the following command:

```
ls -a
```

The `-a` flag ensures that the output also includes hidden files.

Either way, you will see a structure like this:

```
Output
node_modules/
public/
src/
.gitignore
README.md
package-lock.json
package.json
```

Let’s explain these one by one:

* `node_modules/` contains all of the external JavaScript libraries used by the application. You will rarely need to open it.
* The `public/` directory contains some base HTML, JSON, and image files. These are the roots of your project.
* The `src/` directory contains the React JavaScript code for your project. Most of the work you do will be in that directory. You can delete all the files inside this directory and create the files as you need them.
* The `.gitignore` file contains some default directories and files that git—your source control—will ignore, such as the `node_modules` directory. The ignored items tend to be larger directories or log files that you would not need in source control. It also will include some directories that you’ll create with some of the React scripts.
* `README.md` is a markdown file that contains a lot of useful information about Create React App, such as a summary of commands and links to advanced configuration. For now, it’s best to leave the `README.md` file as you see it. As your project progresses, you will replace the default information with more detailed information about your project.

The last two files are used by your package manager. When you ran the initial `npx` command, you created the base project, but you also installed the additional dependencies. When you installed the dependencies, you created a `package-lock.json` file. This file is used by `npm` to ensure that the packages match exact versions. This way if someone else installs your project, you can ensure they have identical dependencies. Since this file is created automatically, you will rarely edit this file directly.

The last file is a `package.json`. This contains metadata about your project, such as the title, version number, and dependencies. It also contains scripts that you can use to run your project.

Start the project by typing the following command in the root of your project. For this tutorial, the root of your project is the `pokedex` directory. Be sure to open this in a separate terminal or tab, because this script will continue running as long as you allow it:

```
npm start
```

You’ll see some placeholder text for a brief moment before the server starts up, giving this output:

```
Compiled successfully!

You can now view digital-ocean-tutorial in the browser.

  http://localhost:3000

Note that the development build is not optimized.
To create a production build, use npm run build.
```

If you are running the script locally, it will open the project in your browser window and shift the focus from the terminal to the browser.

If that doesn’t happen, you can visit [`http://localhost:3000/`](http://localhost:3000/) to see the site in action. If you already happen to have another server running on port `3000`, that’s fine. Create React App will detect the next available port and run the server with that. In other words, if you already have one project running on port `3000`, this new project will start on port `3001`.

### What is React?

React is a JavaScript library created by Facebook. It is used for making complex, interactive user interfaces. It has become very popular in the last 5 years.

Why has it become so popular?

* It is fast and efficient
* It is easy to understand & less verbose than the "vanilla" JS API
* It helps separate functionality into small, understandable pieces

### What is a component? <a href="#what-is-a-component" id="what-is-a-component"></a>

React heavily relies on a concept called "components". Components are like small Lego blocks for designing and developing user interfaces (UI). They can be stuck together in different ways to create new UI.

Let's have a look at an example: the GitHub header. What are the logical "pieces" of UI? What could be a component?

![](https://4042228299-files.gitbook.io/~/files/v0/b/gitbook-legacy-files/o/assets%2F-MRebciU3NcuLgsX3ijf%2F-MhhysDcPrrY79Q90OoS%2F-MhhyzIb3OeIl0BrODSB%2Fimage.png?alt=media\&token=fb20a3cc-d9b4-4b64-9942-3cdd8cb782a4)

Here we've highlighted some elements that could be components:

![](https://4042228299-files.gitbook.io/~/files/v0/b/gitbook-legacy-files/o/assets%2F-MRebciU3NcuLgsX3ijf%2F-MhhysDcPrrY79Q90OoS%2F-Mhhz6ARsWuCjfKiyXol%2Fimage.png?alt=media\&token=e2c5a726-0c08-4b7e-b6d7-b8d63de1ded2)

#### Component tips <a href="#component-tips" id="component-tips"></a>

There are no hard & fast rules for making components. UIs can be split up into components in many different ways, requiring judgement based on your context.

* Components should follow the Single Responsibility Principle
  * Each component should only have 1 "responsibility"
  * Should only do 1 thing
* Components should have good, explicit names
  * This helps you to remember what the component's job is

| Exercise A (estimate: 10 min)                                                                                                                               |
| ----------------------------------------------------------------------------------------------------------------------------------------------------------- |
| 1. Look at the example online shopping user interface in the [Thinking in React article](https://react.dev/learn/thinking-in-react) (the image at the top). |
| 2. Draw boxes around the components and give them names. Compare with the example components shown in the second image.                                     |

### Rendering with React <a href="#rendering-with-react" id="rendering-with-react"></a>

Remember how annoying it was to manage the DOM yourself in [our previous lesson](https://github.com/Migracode-Barcelona/javascript-module-2-todo-workshop#create-and-manipulate-dom-elements)? The "vanilla" JavaScript APIs for updating the DOM are quite long and difficult to remember. React makes this easier by manipulating each DOM element itself, instead of you doing it manually. You give React a "description" of the DOM that you want and it will update the DOM for you. React *abstracts* away the management of the DOM.

Let's take a look at an example. We are going to walk through how to render a `<div>` with the text "Hello World" within it.

First, lets recap how we could do this using "vanilla" JS ([interactive version](https://jsbin.com/zexiyulavu/edit?html,output)):

```jsx
let divNode = document.createElement("div");
divNode.innerText = "Hello World";

const rootElement = document.getElementById("root");
rootElement.appendChild(divNode);
```

Now let's convert to using React ([interactive version](https://jsbin.com/delojecaka/edit?html,js,output)):

```jsx
const element = React.createElement("div", {
  children: "Hello World",
});

const rootElement = document.getElementById("root");
ReactDOM.createRoot(rootElement).render(element);
```

### JSX <a href="#jsx" id="jsx"></a>

As you can see, React is already helping us a bit by cleaning up some of the verbose vanilla JS APIs. However in a typical React application you would still use a *lot* of the `React.createElement` function. To improve the developer experience the React team developed **JSX**.

JSX is a simple syntax *sugar* that looks like HTML, but is actually converted to the `React.createElement` function when you run it.

Using JSX ([interactive version](https://jsbin.com/xitupewiwe/edit?html,output)):

```jsx
const element = <div>Hello World</div>;

const rootElement = document.getElementById("root");
ReactDOM.createRoot(rootElement).render(element);
```

As you can see, this is much easier to read than both the straight `React.createElement` API and the vanilla JS API. Most people using React use JSX to write their components.

| Exercise B (estimate: 5 min)                                                                                                                            |
| ------------------------------------------------------------------------------------------------------------------------------------------------------- |
| Change the [JSX example from above](https://jsbin.com/xitupewiwe/edit?html,output) to instead render a `h1` tag with the text "Hello Code Your Future". |

### Let's create a React app <a href="#lets-create-a-react-app" id="lets-create-a-react-app"></a>

| Exercise C (estimate: 10 min)                                                                    |
| ------------------------------------------------------------------------------------------------ |
| 1. If you haven't already, follow the instructions above to create a React app called `pokedex`. |

#### What got created? <a href="#what-got-created" id="what-got-created"></a>

Diagram of folder layout created by create-react-app. Click [here](https://excalidraw.com/#json=5666421027635200,SRigco8_OhrCb94QSj4Wow) for live diagram.

![](https://4042228299-files.gitbook.io/~/files/v0/b/gitbook-legacy-files/o/assets%2F-MRebciU3NcuLgsX3ijf%2F-MhhysDcPrrY79Q90OoS%2F-Mhi-2m1jvi2UUuJPA3r%2Fimage.png?alt=media\&token=f09b855a-ed76-4b72-8001-6f2d3a345f41)

### React Components <a href="#react-components" id="react-components"></a>

We looked at the beginning of the lesson at the concept of components. Now let's look at how components are made in React.

```jsx
import React from "react";
import ReactDOM from "react-dom/client";

function HelloWorld() {
  return <div>Hello World</div>;
}

ReactDOM.createRoot(document.getElementById("root")).render(<HelloWorld />);
```

There are 3 important parts in this code:

1. First we import `React`. This is important because
   1. The code we write in a React app is written in JSX. JSX is an extension of the JavaScript language based on ES6, which allows us to write HTML elements in JavaScript and place them in the DOM without any `createElement()` and/or `appendChild()` methods.
   2. Behind the scene JSX is translated to JavaScript and it is when we need `React.createElement` and If we don't import "react" then `React` variable will be undefined and our React app will fail to run.
2. We create a React component called `HelloWorld`.
3. We *render* the `HelloWorld` component into the element with the id of `root`. This element with id of `root` is inside `index.html` file inside *public* directory.

**Note :- The process of \_rendering**\_\*\* is converting the JSX elements returned by the component function into DOM elements on the screen. This is done by React for you.\*\*

| Exercise D (estimate: 10 min)                                                                                                                                                                                                             |
| ----------------------------------------------------------------------------------------------------------------------------------------------------------------------------------------------------------------------------------------- |
| 1. In the `pokedex` React app that you just created, open the `src/App.js` file.                                                                                                                                                          |
| 2. Delete everything in the file except the line containing `export default App`. You should see an error in your terminal and in your web browser - don't panic! We're going to remake the `App` component ourselves.                    |
| 3. Import the React variable from the React package.                                                                                                                                                                                      |
| 4. Create a function named `App`, which will be our component.                                                                                                                                                                            |
| 5. Within the `App` function, return a `<h1>` element with the text "Welcome to the Pokedex". What do you see in your web browser?                                                                                                        |
| 6. Create a `<div>` element that *wraps around* the `<h1>` you just created.                                                                                                                                                              |
| 7. Below the `<h1>` element (but within the `<div>`), create an `<img>` element. Then make its `src` attribute equal to `https://assets.pokemon.com/assets/cms2/img/pokedex/full/016.png`. What do you expect to see in your web browser? |
| 8. Now create a `<header>` element to wrap both the `<h1>` element **and** the `<img>` element.                                                                                                                                           |

**Component Composition**

A component can be combined with another component so that both are rendered. This is called *composition*:

```jsx
function Greeting() {
  return <span>Hello</span>;
}

function Mentor() {
  return <span>Ali</span>;
}

function HelloWorld() {
  return (
    <div>
      <Greeting />
      <Mentor />
    </div>
  );
}
```

In the `HelloWorld` component we are using a reference to the `Greeting` and `Mentor` components. React reads these references when rendering `HelloWorld` and so it renders the `Greeting` and `Mentor` *child* components.

We are also using some shorter syntax within the `HelloWorld` component. `<Greeting />` is just a shorter way of writing `<Greeting></Greeting>`, which is useful if we don't need to put anything inside the `Greeting` component.

Notice how the components that we write (`HelloWorld`, `Greeting`, `Mentor`) are written using a `camel case` convention and always start with an uppercase letter? And "regular DOM" components (`div`, `span`) are always lowercase? This is a convention to let you know whether you are using a "regular DOM component" or a component that you have written. When you're making your own components, you should always start them with an uppercase letter.

| Exercise E (estimate: 5 min)                                                                                                                                                     |
| -------------------------------------------------------------------------------------------------------------------------------------------------------------------------------- |
| 1. In your `pokedex` React app, open the `src/App.js` file.                                                                                                                      |
| 2. Create a new function named `Logo`.                                                                                                                                           |
| 3. Copy the `<header>` element and its contents and paste it into the `Logo` component.                                                                                          |
| 4. Replace the `<header>` element in the `App` component with the new `Logo` component.                                                                                          |
| 5. Create a new component function named `BestPokemon` and return a `<p>` element with some text saying which is your favorite Pokémon (e.g. "My favorite Pokémon is Squirtle"). |
| 6. *Render* your new `BestPokemon` component below the `Logo` component within the `App` component.                                                                              |

**Arrow Functions for shorter syntax**

Because a React component is just a function, we can also use the arrow function syntax:

```jsx
const HelloWorld = () => {
  return (
    <div>
      <h1>Hello World</h1>
    </div>
  );
};
```

This can be even shorter again if we use parentheses and implicit return:

```jsx
const HelloWorld = () => (
  <div>
    <h1>Hello World</h1>
  </div>
);
```

Although this is shorter, it is less flexible as we cannot insert code that is **not** JSX. Like for example, a `console.log`:

```jsx
// THIS DOES NOT WORK!
const HelloWorld = () => (
  console.log('Hello!');
  <div>
    <h1>Hello World</h1>
  </div>
);
```

If we want to do this, we can still use arrow functions but we can't use the implicit return.

| Exercise F (estimate: 5 min)                                                           |
| -------------------------------------------------------------------------------------- |
| 1. Using the `pokedex` React app that you created earlier, open the `src/App.js` file. |
| 2. Convert the `Logo` and `BestPokemon` functions into arrow functions.                |

### Embedding JavaScript into JSX <a href="#embedding-javascript-into-jsx" id="embedding-javascript-into-jsx"></a>

So far all of the components we have looked at haven't been able to change - they are *hard-coded*. But this doesn't make very interesting websites, we want to be able to use variables with different data. We can insert variables (and some other things) into our React components.

Anything in the JSX that is inside curly braces `{}` is interpreted as a regular JavaScript *expression*. That means you can use every object or function from JavaScript that we have learned so far. Let's look at an example ([interactive example](https://codesandbox.io/s/interpolation-in-jsx-l910pqnjql)):

```jsx
function Greeting() {
  const greetingWord = "Hello";

  return <span>{greetingWord}</span>;
}
```

Now instead of hard-coding the greeting in the `Greeting` component, we are using a variable. Remember that everything between the curly braces is just regular JavaScript. So we can use more than just variables ([interactive example](https://codesandbox.io/s/interpolation-with-methods-in-jsx-nw29kzx744?file=/src/HelloWorld.js)):

```jsx
function Mentor() {
  const mentors = ["Ali", "Kash", "Davide", "German", "Gerald"];
  return <span>{mentors.join(", ")}</span>;
}
```

Now we have modified the `Mentor` component to use the `Array.join` method so that it lists several mentor's names. This also works with other JS types:

```jsx
function Addition() {
  return <span>{1 + 2 + 3}</span>;
}
```

```jsx
function Weather() {
  const weatherData = {
    temperature: 5,
    location: "London",
  };

  return (
    <p>
      The temperature in {weatherData.location} is {weatherData.temperature}
    </p>
  );
}
```

```jsx
function formatName(user) {
  return user.firstName + " " + user.lastName;
}

function Name() {
  const user = {
    firstName: "Bob",
    lastName: "Marley",
  };
  return <span>{formatName(user)}</span>;
}
```

A common pattern in React is to use `Array.map` to loop through a list of items and render a component for each one ([interactive example](https://codesandbox.io/s/interpolation-with-map-in-jsx-7mw0mw3qx0?file=/src/MentorsList.js)):

```jsx
const mentors = ["Ali", "Kash", "Davide", "German", "Gerald"];

function MentorsList() {
  return (
    <ul>
      {mentors.map((name) => (
        <li>{name}</li>
      ))}
    </ul>
  );
}
```

Here we are using `Array.map` to turn an array of strings into an array of components.

| Exercise G (estimate: 10 min)                                                                                                                                                                                           |
| ----------------------------------------------------------------------------------------------------------------------------------------------------------------------------------------------------------------------- |
| 1. Using the `pokedex` React app that you created earlier, open the `src/App.js` file.                                                                                                                                  |
| 2. Inside the `Logo` component create a new variable called `appName` and assign it to `"Pokedex"`.                                                                                                                     |
| 3. Now replace the hard-coded app name with `{appName}`. What do you see in your web browser? What would you do if you wanted to change the app name?                                                                   |
| 4. Create a new component named `CaughtPokemon`. Within this component return a `<p>` tag with the text "Caught 0 Pokémon on" (we're going to fill in today's date in the next step).                                   |
| 5. Create a variable named `date` within the `CaughtPokemon` component, and assign it today's date (hint: `new Date().toLocaleDateString()`). Finally, render the `date` variable after the text "Caught 0 Pokémon on". |
| 6. Render the `CaughtPokemon` component within the `App` component (below `BestPokemon`).                                                                                                                               |
| 7. Within the `BestPokemon` component, create a variable named `abilities` and assign it to an array with some Pokémon abilities (e.g. `['Anticipation', 'Adaptability', 'Run-Away']`).                                 |
| 8. Change the `BestPokemon` component to return a `<div>` element with the existing `<p>` element inside it. Then add a `<ul>` element underneath the `<p>` element.                                                    |
| 9. Now use the `.map()` method on the `abilities` variable to loop over each name and return a `<li>` element for each (hint: look at the mentors list example above) within the `<ul>` element.                        |

### Keys <a href="#keys" id="keys"></a>

You may have noticed that we are now seeing a red error message in the Dev Tools: `Warning: Each child in a list should have a unique "key" prop.`. This error happens when you use `Array.map` to return a list of elements ([interactive example](https://codesandbox.io/s/key-prop-for-lists-in-react-pwp8ox4kn0?file=/src/MentorsList.js)):

```jsx
const mentors = ["Ali", "Sub", "Loic", "Anthony", "Lucy", "Mozart"];

function MentorsList() {
  return (
    <ul>
      {mentors.map((name, index) => (
        <li key={index}>{name}</li>
      ))}
    </ul>
  );
}
```

Here we have added a `key` prop to the `li` element. A documentation page explaining in more depth is in the further reading section but basically the `key` prop has a special meaning in React because it is used internally to keep track of which element in the list is which.

### Importing/Exporting Components <a href="#importingexporting-components" id="importingexporting-components"></a>

To help organize your code, components can be imported and exported just like any other JavaScript code ([interactive example](https://codesandbox.io/s/1z6xozl81l)):

```jsx
import Greeting from "./Greeting";
import Mentor from "./Mentor";

function HelloMentor() {
  return (
    <div>
      <Greeting />
      <Mentor />
    </div>
  );
}
```

We also need to export our components if we want to use them in other files:

```jsx
function Greeting() {
  return <span>Hello</span>;
}

export default Greeting;
```

The convention is to name component files exactly the same as the component (including the capital letter).

| Exercise H (estimate: 5 min)                                                                                                |
| --------------------------------------------------------------------------------------------------------------------------- |
| 1. Open the `pokedex` React app that you created earlier.                                                                   |
| 2. Create a new file within the `src` directory named `Logo.js`.                                                            |
| 3. Copy and paste the `Logo` component from `App.js` into `Logo.js`.                                                        |
| 4. Remember to add `import React from 'react'` at the top of `Logo.js`.                                                     |
| 5. Export the `Logo` component from `Logo.js` (hint: look at the `Greeting` example above).                                 |
| 6. Delete the old `Logo` component from `App.js`.                                                                           |
| 7. Import the `Logo` component into `App.js` (hint: look at the `HelloMentor` example above).                               |
| 8. Repeat this process with the `BestPokemon` and `CaughtPokemon` components. What do you think the files should be called? |

### Making an argument for Props <a href="#making-an-argument-for-props" id="making-an-argument-for-props"></a>

What's the problem with our `HelloMentor` component above?

The component `HelloMentor` is very static. What if we want to say *hello* to a different mentor? Currently, we would have to change the code too! This is easy in our tiny application but for "real" applications this might be more difficult.

Instead wouldn't it be good if we could change which mentor we are saying hello to every time we render the component? So we could reuse the `HelloMentor` component for different mentor names. This is what *props* are for.

### What are Props? <a href="#what-are-props" id="what-are-props"></a>

Props are what we use in React to pass "arguments" to components. They are very similar to arguments in functions - you can "pass" props to components, and you can use those props within a component.

First let's look at passing props to your components ([interactive example](https://codesandbox.io/s/intro-to-props-vmjy0o91m7?file=/src/HelloMentor.js)):

```jsx
<Mentor name="Mozafar" />
```

As you can see props are key-value pairs, in this example the key is `name` and the value is the string `'Mozafar'`. We can pass as many props as we like to a component.

We don't have to use strings, we can use any valid JavaScript data like numbers, arrays and objects. Remember that in JSX you can use curly braces `{}` to inject data that is not a string:

```jsx
<Mentor age={30}>
```

Now let's take a look at using props that we have passed to a component ([interactive example](https://codesandbox.io/s/intro-to-props-vmjy0o91m7?file=/src/Mentor.js)):

```jsx
function Mentor(props) {
  console.log(props);
  return <span>{props.name}</span>;
}
```

React gives you access to props in the **first argument** to the component function. We can then inject props into our component using curly braces.

The `props` variable is just a normal object with key-value pairs that match what was passed to the component. Because it is just a variable, it can be used like any other variable. That includes injecting props into attributes:

```html
<div id={"mentor-id-" + props.id}>{props.name}</div>
```

Or calculating new values:

```html
<div>{props.age + 1}</div>
```

| Exercise I (estimate: 10 min)                                                                                                                                                 |
| ----------------------------------------------------------------------------------------------------------------------------------------------------------------------------- |
| 1. Using the `pokedex` React app that you created earlier, open the `App.js` file.                                                                                            |
| 2. Pass a prop `appName="Pokedex"` to the `Logo` component.                                                                                                                   |
| 3. Now open the `Logo.js` file.                                                                                                                                               |
| 4. Delete the `appName` variable. What do you see in your web browser? Why?                                                                                                   |
| 5. Change the `Logo` function to access the first argument and call it `props`. Use `console.log` to inspect the `props` variable.                                            |
| 6. Change the usage of `appName` in the `<h1>` to be `props.appName` instead. Does this fix the problem? Why?                                                                 |
| 7. Now open the `BestPokemon.js` file.                                                                                                                                        |
| 8. Copy the `abilities` variable and then delete it from `BestPokemon.js`.                                                                                                    |
| 9. Paste the `abilities` variable into `App.js`.                                                                                                                              |
| 10. Pass the `abilities` variable as a prop to `BestPokemon` from `App.js`.                                                                                                   |
| 11. In the `BestPokemon.js` file replace the existing usage of `abilities` with the `abilities` **prop**. You should still see the Pokémon ability names in your web browser. |
| 12. **(STRETCH GOAL)** Repeat the process with the `date` variable in the `CaughtPokemon.js` file.                                                                            |


# 2 - Reacting to changes

## Recap

Last week we looked at how to write a `HelloMentor` React component ([interactive example](https://codesandbox.io/s/react-2-recap-7zvk9n1950?file=/src/HelloMentor.js)):

```
function Greeting() {
  return <span>Hello</span>;
}
```

```
function Mentor(props) {
  return <span>{props.name}</span>;
}
```

```
import Greeting from "./Greeting";
import Mentor from "./Mentor";

function HelloMentor() {
  return (
    <div>
      <Greeting />
      <Mentor name="Ali" />
    </div>
  );
}
```

## Handling events

So far we have only looked at React apps that are "static": they don't respond to user input. This week we will look at making our apps *dynamic*.

### Recap: First-class functions in JavaScript

Before we look more at React we need to recap a concept in JavaScript. You may remember that functions in JavaScript are "first class" - that means we can pass a *reference* to a function (as a variable) and then call it elsewhere. Let's look at an example ([interactive example](https://jsbin.com/xudukezaje/edit?js,console)):

```
function hello() {
  return "Hello!";
}

console.log(hello); // Logs: "ƒ hello() {}"
console.log(hello()); // Logs: "Hello!"
```

In the example above `hello` is a **reference** to a function. In the first `console.log` we log out the whole function. The function is **not called** until we use parentheses `()`, so we only log the string `"Hello!"` in the second `console.log`.

This is a really important and useful in React, as we can make a function and pass it to React so that it can call it when a user interacts with our app.

### Event handlers in components

In previous lessons we learned how to attach event listeners with `addEventListener`:

```
// Create an event handler
function logWhenClicked() {
  console.log("buttonElement was clicked!");
}

// Listen for events and call the event handler when triggered
buttonElement.addEventListener("click", logWhenClicked);
```

We still need to listen to events in React, but event handlers are set up in a slightly different way ([interactive example](https://codesandbox.io/s/event-handlers-cc3h7?file=/src/ClickLogger.js)):

```
function ClickLogger() {
  function logWhenClicked() {
    console.log("Button was clicked!");
  }

  return <button onClick={logWhenClicked}>Click me!</button>;
}
```

Every element in React has some special props that start with `on` that can be assigned to a function which will be called when the event is triggered.

Here's a few examples (a full list is available [here](https://react.dev/reference/react-dom/components/common#reference)):

* `onClick` - the element was clicked
* `onCopy` - the clipboard is used to copy some text
* `onKeyDown` - a key is pressed down
* `onBlur` - the element loses "focus"
* `onChange` - only available for `<input>` & `<select>` (and a few others), triggered when changed
* `onDoubleClick` - the element was double-clicked!
* `onPlay` - a video starts playing
* `onSubmit` - a form element is submitted

Notice that just like with `addEventListener` above, we pass the function **reference** to `onClick` instead of **calling** the function. If we call the function, it will run the function when we render, not when the user clicks on the button. (Remember that *rendering* is the term in React for inserting into the DOM).

:::tip Think of it like this: we give the event handler to React, so that React can call our function when the element is clicked. :::

| Exercise A (estimate: 10 min)                                                                                                             |
| ----------------------------------------------------------------------------------------------------------------------------------------- |
| 1. Open the `pokedex` React application from last week and open the `Logo.js` file.                                                       |
| 2. Add a function named `logWhenClicked` within the `Logo` component. (Hint: look at the example above).                                  |
| 3. In the `logWhenClicked` function, `console.log` a message (it doesn't matter what the message is).                                     |
| 4. Add an `onClick` handler to the `<img>` that will call `logWhenClicked`. (Hint: look at the `ClickLogger` component above).            |
| 5. In your web browser, try clicking on the logo image. What do you see in the JavaScript console?                                        |
| 6. In a group of 2 - 3 students, discuss what would happen if you changed your code to `onClick={logWhenClicked()}`. Can you explain why? |
| 7. Report your discussion back to the rest of the class.                                                                                  |

### Passing Functions as Props

Sometimes we need to pass a function to another component as a prop, so that it can handle the event.

A common example for this is a Button component. This component adds some styling to a normal `<button>`, but still needs to be able to pass an event handler function to `onClick`. Let's look at an example ([interactive example](https://codesandbox.io/s/passing-functions-as-props-zqlnmo16y3?file=/src/ClickLoggerApp.js)):

```
function ClickLoggerApp() {
  function logWhenClicked() {
    console.log("Button was clicked");
  }

  return (
    <div>
      <FancyButton handleClick={logWhenClicked} />
      <p>Then look in the console.</p>
    </div>
  );
}

function FancyButton(props) {
  return (
    <button className="my-fancy-classname" onClick={props.handleClick}>
      Click Me!
    </button>
  );
}
```

Notice how this is very similar to the example above where we created the handler and used it in the same component? The only difference here is that we are passing the function reference through a prop. We could even pass it through multiple components as props.

| Exercise B (estimate: 10 min)                                                                                                                                 |
| ------------------------------------------------------------------------------------------------------------------------------------------------------------- |
| 1. Open the `pokedex` React application and open the `Logo.js` file.                                                                                          |
| 2. Copy and paste the `logWhenClicked` function from the `Logo` component to the `App` component.                                                             |
| 3. Pass the `logWhenClicked` function **reference** as a prop to the `Logo` component. (Hint: look at the `ClickLoggerApp` component above for an example).   |
| 4. In the `Logo` component change the `onClick` prop so that it passes `props.handleClick`. (Hint: look at the `FancyButton` component above for an example). |
| 5. In a group of 2 - 3 students, discuss what you think will happen when you click the logo image now. Can you explain why?                                   |
| 6. Report back to the rest of the class what you thought was going to happen and why.                                                                         |

### Re-rendering components <a href="#re-rendering-components" id="re-rendering-components"></a>

So far we've seen that when the page loads, React calls our function components. The JSX elements that are returned from the component functions are turned into the DOM for you by React.

To be able to react to changes, we need to *re-render* our function components to get different JSX elements. React can then update the DOM based on the new JSX elements.

Let's look at how a component is re-rendered ([interactive version](https://codesandbox.io/s/force-component-re-rendering-llow115pll?file=/src/Counter.js)):

```
function Counter(props) {
  console.log(`Rendering. props.likeCount is ${props.likeCount}`);

  return <button id="like-button">Likes: {props.likeCount}</button>;
}
```

If you look in the console, you'll see that the component is rendered once when the page loads. `props.likeCount` starts at 0, so React inserts "Count: 0" into the DOM.

We won't look at how this works at the moment, but behind the scenes there is some code that will listen for clicks on the button and force React to update. That means when you click the button, the function component is called again (or *re-rendered*).

Now `props.likeCount` is **1**. React now **updates** the DOM to make sure it shows the correct number. Every time we click the button, the function component is called and React updates the DOM for us.

We don't need to worry about changing the DOM ourselves! This is what makes React so powerful. Even better, React will figure out exactly the right bits of the DOM that need to be changed, a concept called the ["virtual DOM"](https://reactjs.org/docs/faq-internals.html). This makes it extremely efficient and fast.

### State <a href="#state" id="state"></a>

*State* is a general concept in software engineering. It is used when a part of your app needs to "remember" something that changes when people interact with it.

![](https://4042228299-files.gitbook.io/~/files/v0/b/gitbook-legacy-files/o/assets%2F-MRebciU3NcuLgsX3ijf%2F-Mhi01LVVr6b-Fz0GDhx%2F-Mhi2nitzbpjq0lTlLxQ%2Fimage.png?alt=media\&token=f92e474c-9dec-4cf4-98c9-d63b0af39960)

This is a simple example, but if we had lots of bits of state, then we can make very complex apps.

### React Hooks

React has built-in functionality for initializing and updating state in our components. We will access state via a React *Hook* called `useState`.

Hooks are a newish feature in React. You may find older tutorials that don't use Hooks, but don't panic. The concepts we learn here are the same whether or not you use Hooks. We are looking at Hooks first because they are simpler to learn for beginners.

#### Importing `useState` <a href="#importing-usestate" id="importing-usestate"></a>

To be able to access the `useState` Hook, we first need to import it from the React package. Let's look at an example ([interactive example](https://codesandbox.io/s/importing-usestate-hook-8jr9f?file=/src/App.js)):

```
import React, { useState } from "react";

console.log(useState);
```

If we look at the console, `useState` is just a function. It lives inside the React code that you installed when you created the app.

To reference the `useState` function in our component, we need to import it from the React code. The curly braces around `useState` are a bit like writing:

```
import React from "react";
let useState = React.useState;
```

In fact we can just write `React.useState` in our component if we want! But to type a bit less code, we import it (using the curly braces) once and then can just use `useState`.

#### Using `useState` <a href="#using-usestate" id="using-usestate"></a>

Now let's look at how we can use the `useState` Hook ([interactive example](https://codesandbox.io/s/initialising-and-rendering-usestate-variables-zgszi?file=/src/Counter.js)):

```
function Counter() {
  const [count, setCount] = useState(0);

  return <p>You clicked {count} times</p>;
}
```

Let's break this down into small pieces. First, let's look at calling the `useState` function:

```
useState(0);
```

This initializes the state variable to 0. Any parameter passed to `useState` will be used as the initial value.

Next, let's look at how we render the state variable in our component:

```
return <p>You clicked {count} times</p>;
```

`count` is just a variable, so to insert it into our JSX we treat it like any other variable: we use curly braces.

Finally, let's look at how we get hold of the `count` variable:

```
const [count, setCount] = useState(0);
```

To fully understand this bit of code, we first have to understand *destructuring*. Let's look at [this blog post by Wes Bos about array destructuring](https://github.com/wesbos/es6-articles/blob/master/19%20-%20Destructing%20Arrays.md).

Now we can understand that `useState` is returning an array, with two items. The first item in the array is the current value of the `count` state. In our example it will be 0 on the first render. The second item in the array is a function that we will use to update our state.

**Tip:** Follow the `useState` naming convention.

When we destructure an array, we can name the variables whatever we want, but there is a naming convention when destructuring the `useState` array. The first variable should be named whatever your state is called, and the second variable should be the same name but prefixed with `set`. Let's look at some examples:

```
const [userIsLoggedIn, setUserIsLoggedIn] = useState(false);

const [username, setUsername] = useState("chris");

const [unreadMessages, setUnreadMessages] = useState(5);
```

| Exercise C (estimate: 5 min)                                                                                                           |
| -------------------------------------------------------------------------------------------------------------------------------------- |
| 1. Open [this CodeSandbox](https://codesandbox.io/s/using-usestate-exercise-3kwei?file=/src/Weather.js).                               |
| 2. Take a few minutes to read the code. Why do you think the app is broken?                                                            |
| 3. Initialize a new state variable with `useState` that will fix the app. Think carefully about how you should name the variables.     |
| 4. Discuss with another student how you would create another state variable that represents the weather conditions (e.g. sunny, rain). |

### Updating State

Our Counter isn't very useful right now! Let's make it more useful by getting `count` to actually count up ([interactive example](https://codesandbox.io/s/usestate-counter-lorv5?file=/src/Counter.js)):

```
function Counter() {
  const [count, setCount] = useState(0);

  function incrementCount() {
    setCount(count + 1);
  }

  return (
    <div>
      <button onClick={incrementCount}>Click me</button>
      <p>You clicked {count} times</p>
    </div>
  );
}
```

Our component now has a `<button>`, which will call the `incrementCount` function when clicked:

```
<button onClick={incrementCount}>Click me</button>
```

The `incrementCount` function then calculates the **new** state by adding 1 onto the current `count`. And then calls `setCount` to set the new state:

```
function incrementCount() {
  setCount(count + 1);
}
```

`setCount` does two things. First, it updates the state that our component is "remembering". Whatever you pass as the argument to `setCount` will be remembered as the new state.

It also tells React that the old state that is **still shown in the DOM** is outdated and so the DOM needs to change. Because of this, React will re-render all of our components to figure out what to change in the DOM.

When re-rendering, React will call our `Counter` component again, but this time when we call `useState` it will give us the updated state of 1, instead of the initial state of 0:

```
function Counter() {
  const [count, setCount] = useState(0);

  ...
}
```

On the second render, `count` is now set to 1. Every time we click the button, the whole cycle starts again.

| Exercise D (estimate: 15 min)                                                                                                                                                                                                                                                                                                              |
| ------------------------------------------------------------------------------------------------------------------------------------------------------------------------------------------------------------------------------------------------------------------------------------------------------------------------------------------ |
| 1. Open the `pokedex` React application and open the `CaughtPokemon.js` file.                                                                                                                                                                                                                                                              |
| 2. Create a new state variable with `useState`. It should be named `caught` and be initialized to `0`                                                                                                                                                                                                                                      |
| 3. Within the JSX, there should be a "hard-coded" number 0. Replace it with your new `caught` state.                                                                                                                                                                                                                                       |
| 4. Add a button to the component with an `onClick` handler that calls a function called `catchPokemon`.                                                                                                                                                                                                                                    |
| 5. Create the `catchPokemon` function and have it update the `caught` state so that it is increased by 1 on each click. **HINT** You will need to call the set state function (the 2nd item in the `useState` array) with `caught + 1`.                                                                                                    |
| 6. Write down the things that will happen when you click the button. Compare your list with another student and discuss. **HINT** The state will be updated to be the current state + 1. React is notified that our state has changed, so it re-renders. When rendering, the current state will be different and so React updates the DOM. |

### **Don't mutate State**

As we just learned, `setCount` updates the state for us, but it also notifies React of changes. If you try to just change the `count` variable without using `setState`, nothing will happen, because React wouldn't be notified of the change. You can **only** modify (or *mutate*) state using the setter function ([interactive example](https://codesandbox.io/s/dont-mutate-state-hex49?file=/src/Counter.js)):

```
function Counter() {
  let [count, setCount] = useState(0);

  function handleClick() {
    count = count + 1;
  }

  return (
    <div>
      Count: {count}
      <button onClick={handleClick}>Click</button>
    </div>
  );
}
```

#### Where does State live? <a href="#where-does-state-live" id="where-does-state-live"></a>

We have talked about how a component "remembers" state. In fact, each component *instance* remembers **separate** state from other components. This means we can have multiple different Counters, each with a different state ([interactive example](https://codesandbox.io/s/multiple-counters-xm1x4?file=/src/App.js)):

```
function App() {
  return (
    <div>
      <Counter />
      <Counter />
      <Counter />
    </div>
  );
}
```

#### More complex states <a href="#more-complex-states" id="more-complex-states"></a>

The examples we've looked at so far have used numbers, strings and Booleans. You can also use arrays and objects in state too. Let's take a look at an example ([interactive example](https://codesandbox.io/s/more-complex-state-with-usestate-b34wf?file=/src/ShoppingList.js)).

```
function ShoppingList() {
  const [list, setList] = useState([]);

  function addToList() {
    setList(list.concat("Bread"));
  }

  return (
    <p>
      <button onClick={addToList}>Add item to list</button>
      {list.map((item, index) => {
        return <li key={index}>{item}</li>;
      })}
    </p>
  );
}
```

In this shopping list example, we're initializing the `list` state to be an empty array. To display our list we loop through the array (like we learned last week) and render an `<li>` for each item in the list.

When we want to add something to the list, we can use the `list.concat` method to make a new array with the new item. This new array is then set as the new state. Right now, our example is not very useful as it can only add Bread to the list! Next week, we'll look at how we can allow users to write their own items to the list.

**Tip :** Don't use the array `push` method with state. Instead use the array `concat` method.

The `list.push` method won't work here, as this method *mutates* the existing array. React requires a completely new array to be set as the new state, otherwise it doesn't realize that the value has changed. The `concat` method works because it copies the whole existing array to a brand new array before it adds the new item.

| Exercise E (estimate: 10 min)                                                                                                                                                                                                     |
| --------------------------------------------------------------------------------------------------------------------------------------------------------------------------------------------------------------------------------- |
| 1. Open the `pokedex` React application and open the `CaughtPokemon.js` file.                                                                                                                                                     |
| 2. Change the `useState` to be initialized to an empty array (`[]`)                                                                                                                                                               |
| 3. There will now be a bug in your app! We don't see how many Pokémon we have caught. Discuss with another student what you think the problem is.                                                                                 |
| 4. Change the JSX to instead render `caught.length`. Does this fix the bug?                                                                                                                                                       |
| 5. Let's now show the names of the Pokémon we have caught. Render a `<ul>` element within the component. Then use the `map` method to loop through each item in the `caught` array and render it in an `<li>` element.            |
| 6. Change the `catchPokemon` function to add a new Pokémon (it doesn't matter which one) onto the `caught` array. (Hint: use the `concat` method.)                                                                                |
| 7. **(STRETCH GOAL)** Generate a random Pokémon each time you click the button. Check this post if you're stuck [StackOverflow post](https://stackoverflow.com/questions/4550505/getting-a-random-value-from-a-javascript-array). |

### Setting multiple States

So far we've only seen an example with one state variable. But you can create multiple state variables if you want! Let's see an example ([interactive example](https://codesandbox.io/s/multiple-state-variables-b3g9d?file=/src/Weather.js)):

```
function Weather() {
  const [temperature, setTemperature] = useState(15);
  const [conditions, setConditions] = useState("sunny");

  function makeItHotter() {
    setTemperature(temperature + 1);
  }
  function makeItColder() {
    setTemperature(temperature - 1);
  }

  function makeItSunny() {
    setConditions("sunny");
  }
  function makeItRainy() {
    setConditions("rainy");
  }

  return (
    <div>
      <h1>Today's Weather</h1>
      <ul>
        <li>Temperature will be {temperature}°C</li>
        <li>The conditions will be {conditions}</li>
      </ul>

      <hr />
      <button onClick={makeItHotter}>+</button>
      <button onClick={makeItColder}>-</button>
      <button onClick={makeItSunny}>Make it sunny</button>
      <button onClick={makeItRainy}>Make it rainy</button>
    </div>
  );
}
```

#### When do you use Props or State? <a href="#when-do-you-use-props-or-state" id="when-do-you-use-props-or-state"></a>

We've looked at the 2 main ways of managing data in our React components. But when should we use props and when should we use state?

Remember that props are like "arguments" to a component. It's good practice to make sure that you don't modify arguments after you receive them. Just like state, React prevents you from mutating them. Let's have a look at an example ([interactive example](https://codesandbox.io/s/when-to-use-props-or-state-9wl90npk4?file=/src/Greeting.js)):

```
function Greeting(props) {
  function handleThing() {
    props.name = "Mozart";
  }

  return (
    <div>
      <p>Hello {props.name}</p>
      <button onClick={handleThing}>Click me</button>
    </div>
  );
}
```

When you click the button, you might expect the `name` prop to change to "Mozart". But it doesn't! React has made props *read-only*, which is a reminder that we shouldn't change props.

If we were allowed to change props, React doesn't have a way of telling that we've changed the data. Our UI is now *stale* - not up-to-date with the latest data - and has no way of knowing that it has to re-render.

From this we can get a clue about when to use state. If data *changes over time*, then we need to use state. My rule of thumb is that I always use props until I know that it needs to change over time, then I convert it to state.

| Exercise F (estimate: 5 min)                                                                                                            |
| --------------------------------------------------------------------------------------------------------------------------------------- |
| 1. Open [this CodeSandbox](https://codesandbox.io/s/props-vs-state-exercise-mjmor?file=/src/Highlighter.js).                            |
| 2. Take a few minutes to read the code. Discuss with another student what you think will happen when you click on the highlighted word. |
| 3. Now click on the highlighted word. Can you explain why this happened?                                                                |
| 4. Fix the app so that clicking on the highlighted word will change the highlight color to purple.                                      |


# 3 - Fetching Data

### Recap <a href="#recap" id="recap"></a>

Last week we looked at using props and state to create React components that change with user input ([interactive example](https://codesandbox.io/s/react-3-state-recap-38x3b?file=/src/Counter.js)):

```
import React, { useState } from "react";

function Counter() {
  const [count, setCount] = useState(0);

  function increment() {
    setCount(count + 1);
  }

  return (
    <div>
      <p>You clicked {count} times</p>
      <button onClick={increment}>Click me</button>
    </div>
  );
}

export default Counter;
```

### Fetching Data in React <a href="#fetching-data-in-react" id="fetching-data-in-react"></a>

Often when you create a React app, you will want to fetch data from an API and display it inside your components. How do we do this in React?

You might think that we could just fetch the data in the component like this, but unfortunately it **won't work** ([interactive example](https://codesandbox.io/s/async-data-fetching-in-react-not-working-fnfyu?file=/src/MartianPhotoFetcher.js)):

**Danger** This code won't work!

```
function MartianPhotoFetcher() {
  let imgSrc = null;

  fetch(
    `https://api.nasa.gov/mars-photos/api/v1/rovers/curiosity/photos?earth_date=2015-6-3&api_key=DEMO_KEY`
  )
    .then((res) => res.json())
    .then((data) => {
      imgSrc = data.photos[0].img_src;
    });

  console.log(`The image src is ${imgSrc}`);
  return <img src={imgSrc} />;
}
```

This is because React is synchronous, while `fetch` is asynchronous. If we look in the console, we'll see that the `imgSrc` will always be `null` when we try to render it. React will try to render before `fetch` has had time to get the data from the API.

![](https://4042228299-files.gitbook.io/~/files/v0/b/gitbook-legacy-files/o/assets%2F-MRebciU3NcuLgsX3ijf%2F-Mhi6YC5OngxlijzR8i7%2F-Mhi6rIx8Rw4anwggDQ8%2Fimage.png?alt=media\&token=176655c1-3169-4ca7-b4c2-2f8a38e672df)

We need a way of running the `fetch` call **after** we have rendered for the first time, so that it is not *racing* against React updating the DOM. Then once we have got the data back we can use state to tell React to re-render with the new data.

![](https://4042228299-files.gitbook.io/~/files/v0/b/gitbook-legacy-files/o/assets%2F-MRebciU3NcuLgsX3ijf%2F-Mhi6YC5OngxlijzR8i7%2F-Mhi6uFe2q7YQkTmHAKZ%2Fimage.png?alt=media\&token=2168f71f-346b-4eb3-af58-d5d6301e432d)

The way we do this is with another Hook, provided by React. This one is called `useEffect`.

### Importing `useEffect`

Just like `useState`, we will import `useEffect` into our file like this ([interactive example](https://codesandbox.io/s/importing-useeffect-hook-mij5v?file=/src/App.js)):

```
import React, { useEffect } from "react";

console.log(useEffect);
```

If we look in the console, we'll see that `useEffect` is also a function like `useState`.

Often, we will need to use `useState` and `useEffect` together. They are imported together like this:

```
import React, { useState, useEffect } from "react";
```

### Using `useEffect`

Now let's look at how to use the `useEffect` Hook ([interactive example](https://codesandbox.io/s/basic-useeffect-example-jf6id?file=/src/HelloUseEffect.js)):

```
function MartianPhotoFetcher() {
  useEffect(() => {
    fetch(
      `https://api.nasa.gov/mars-photos/api/v1/rovers/curiosity/photos?earth_date=2015-6-3&api_key=DEMO_KEY`
    )
      .then((res) => res.json())
      .then((data) => {
        console.log(data);
      });
  }, []); // Always remember to put an empty array here!

  return <div>Hello useEffect!</div>;
}
```

The `useEffect` Hook takes two arguments:

1. A callback function, where we can put our `fetch` call. In this example, we're fetching some data from the NASA API!
2. An array, which we'll look at later but is very important that you don't forget it!

**Tip :** When writing your `useEffect`, write the "skeleton" first, then fill in the callback function later.

```
// Write this bit first!
useEffect(() => {
  // Write this bit later!
}, []);
```

You might have noticed that we still haven't rendered the data from the API. We now need to tell React to re-render once we get the data. This sounds like a job for state!

Let's look an example of how we can use state and `useEffect` to do this ([interactive example](https://codesandbox.io/s/using-the-useeffect-hook-jtz5u?file=/src/MartianPhotoFetcher.js)):

```
function MartianPhotoFetcher() {
  const [marsPhotoData, setMarsPhotoData] = useState(null);

  useEffect(() => {
    console.log("Fetching data from NASA");

    fetch(
      `https://api.nasa.gov/mars-photos/api/v1/rovers/curiosity/photos?earth_date=2015-6-3&api_key=DEMO_KEY`
    )
      .then((res) => res.json())
      .then((data) => {
        setMarsPhotoData(data);
      });
  }, []);

  if (marsPhotoData) {
    return <img src={marsPhotoData.photos[0].img_src} alt="Martian surface" />;
  } else {
    return null;
  }
}
```

The timeline of this component is now what we wanted at the start:

1. The component renders for the first time. Notice that we are returning `null` here: if a component returns `null`, then React will render nothing on-screen
2. After rendering, the `useEffect` callback is run, so it fetches data from the NASA API
3. When the response is received, we update the state
4. This causes a re-render so that we can show the data on-screen

You might notice that even though we re-rendered, we did **not** run the `useEffect` a second time. The way we've set it up, `useEffect` will only run after the **first** time a component renders. We'll look at controlling this in more detail later.

| Exercise A (estimate: 15 min)                                                                                                                                                                                                                              |
| ---------------------------------------------------------------------------------------------------------------------------------------------------------------------------------------------------------------------------------------------------------- |
| 1. Open the `pokedex` React application again.                                                                                                                                                                                                             |
| 2. Create a new file `src/PokemonMoves.js`, and copy/paste the code from [this CodeSandbox](https://codesandbox.io/s/pokemonmoves-useeffect-exercise-starting-point-f1mwm?file=/src/PokemonMoves.js).                                                      |
| 3. Render the `PokemonMoves` component inside the `App` component (underneath `CaughtPokemon`).                                                                                                                                                            |
| 4. Take a few minutes to read the code in the new `PokemonMoves` component. Discuss with another student why you think it doesn't work.                                                                                                                    |
| 5. Create a new state variable called `pokemonData` and initialize it to `null`.Click here if you are stuck.                                                                                                                                               |
| 6. Now add a `useEffect` call, but leave the callback function empty for now. **Make sure you remember to add the empty array after the callback function**.                                                                                               |
| 7. Inside the `useEffect` callback, call the `fetch` function with this URL: `https://pokeapi.co/api/v2/pokemon/1/`.                                                                                                                                       |
| 8. Add a `.then` handler into the `fetch` function (remember this needs to come immediately after the `fetch` call) which converts the response from JSON (hint: `.then(res => res.json())`).                                                              |
| 9. Add a second `.then` handler after the one we just added, where the callback function will receive an argument called `data`.                                                                                                                           |
| 11. Within the second `.then` callback function, log out the data that we just received (hint: `console.log(data)`). Inspect the data in the dev tools console. Is there any interesting data? (Hint: think about what the component is trying to render). |
| 12. Still within the second `.then` callback, set the `pokemonData` state to be the `data` object we received from the API.                                                                                                                                |
| 13. What happens in your browser? Do you understand why? If not, discuss it with another student. If you are both stuck, ask a Teaching Assistant.                                                                                                         |

### Conditional rendering

In the `MartianPhotoFetcher` component above, we wrapped our JSX inside an `if` / `else` statement. This is common practice in React, as it allows us to show something different depending on the situation (for example if there is no data to display, show the user something else instead).

You may also see this done in 2 other ways:

**The ternary operator ? :**

The *ternary operator* follows this structure `condition ? outputIfTrue : outputIfFalse` ([interactive example](https://codesandbox.io/s/conditional-rendering-with-ternary-operator-tjro6?file=/src/MartianPhotoFetcher.js)):

```
return (
  <div>
    {marsPhotoData ? (
      <img src={marsPhotoData.photos[0].img_src} alt="Martian surface" />
    ) : (
      <span>Loading...</span>
    )}
  </div>
);
```

**The double ampersand &&**

The double ampersand `&&` is used when you don't have an `else`. The implication is that when the condition is not fulfilled, nothing will render ([interactive example](https://codesandbox.io/s/conditional-rendering-with-double-ampersand-1b5t9?file=/src/MartianPhotoFetcher.js)):

```
return (
  <div>
    {marsPhotoData && (
      <img src={marsPhotoData.photos[0].img_src} alt="Martian surface" />
    )}
  </div>
);
```

You'll notice in the `&&` example above, we do not render a 'Loading...' message, because there is no alternative output (no `else` case).

| Exercise B (estimate: 5 min)                                                                                                        |
| ----------------------------------------------------------------------------------------------------------------------------------- |
| 1. Open the `pokedex` application and the `src/PokemonMoves.js` file.                                                               |
| 2. Change the `if` / `else` statement in your JSX to use the ternary operator (`condition ? outputIfTrue : outputIfFalse`) instead. |

#### The Circle of Life <a href="#the-circle-of-life" id="the-circle-of-life"></a>

We now know how to fetch data and render it in our React applications. However, there was a problem with the method that just learned. To understand this problem we first have to understand the *lifecycle* of a component.

Let's take a look at an example:

| Exercise C (estimate: 10 min)                                                                                                             |
| ----------------------------------------------------------------------------------------------------------------------------------------- |
| 1. Open [this CodeSandbox](https://codesandbox.io/s/fetch-with-prop-updates-not-working-x1dox?file=/src/App.js).                          |
| 2. Take 5 minutes to read the code.                                                                                                       |
| 3. Click the "Fetch image for 2019" button. **If you're feeling confident**: predict what is going to happen before you click the button. |
| 4. Now click the "Fetch image for 2020" button. What did you expect to happen? What actually happened? Can you explain why?               |

Together let's "play computer" to break down exactly what is happening with these components:

1. When the page loads, the `App` function component is called
2. It doesn't have any `date` state already, so we initialize it to an empty string (`""`) with `useState`
3. It renders the 2 buttons, but because `date` is an empty string, it does **not** render the `MartianImageFetcher` component. Instead `null` is returned, which means that nothing is rendered

```
  function App() {
    const [date, setDate] = useState("");

    ...

    return (
      <div>
        <button onClick={handle2019Click}>Fetch image for 2019</button>
        <button onClick={handle2020Click}>Fetch image for 2020</button>

        {date ? <MartianImageFetcher photoDate={date} /> : null}
      </div>
    );
  }
```

1. When we click the "Fetch image for 2019" button, the `handle2019Click` click handler is called
2. The state is set by `setDate` to be `"2019-01-01"`, and a re-render is triggered
3. The `App` function component is called again
4. This time, `useState` remembers that we have `date` state and it is set to `"2019-01-01"`

```
  function App() {
    ...

    function handle2019Click() {
      setDate("2019-01-01");
    }

    ...

    return (
      ...
      <button onClick={handle2019Click}>Fetch image for 2019</button>
      ...
    );
  }
```

1. Now `App` **does** render `MartianImageFetcher` and passes the `date` state as a prop named `photoDate`
2. The `MartianImageFetcher` function component is called for the first time
3. `useState` knows that we haven't got any `imgSrc` state so initializes it to `null`
4. We queue an effect, which will run after we render for the first time
5. Because the `imgSrc` state is set to `null`, we return `null`. This means that nothing is rendered

```
  function MartianImageFetcher(props) {
    const [imgSrc, setImgSrc] = useState(null);

    useEffect(() => {
      ...
    }, []);

    if (!imgSrc) {
      return null;
    } else {
      return <img src={imgSrc} />;
    }
  }
```

1. Now that the component has rendered for the first time, the effect is run
2. A `fetch` request is made to the NASA API
3. When the request data comes back, we set the `imgSrc` state to a piece of the data, which triggers a re-render

```
  function MartianImageFetcher(props) {
    ...

    useEffect(() => {
      fetch(
        `https://api.nasa.gov/mars-photos/api/v1/rovers/curiosity/photos?earth_date=${
          props.date
        }&api_key=gnesiqnKCJMm8UTYZYi86ZA5RAnrO4TAR9gDstVb`
      )
        .then(res => res.json())
        .then(data => {
          setImgSrc(data.photos[0].img_src);
        });
    }, []);

    ...
  }
```

1. The `MartianImageFetcher` function component is called again
2. `useState` remembers that the `imgSrc` state is set to the data from the API
3. This time, we do **not** queue an effect. We set up `useEffect` with an empty array (`[]`), which means that we only run after the **first** render
4. We do have `imgSrc` state set, so we render the image using the data from the API

```
  function MartianImageFetcher(props) {
    const [imgSrc, setImgSrc] = useState(null);

    ...

    if (!imgSrc) {
      return null;
    } else {
      return <img src={imgSrc} />;
    }
  }
```

Phew! That was a lot of work just to render an image! But we're not quite done yet, we still need to find out what happens when we click the "Fetch image for 2020" button:

1. In the `App` component, the `handle2020Click` click handler is called
2. The `date` state is set to `"2020-01-01"` and a re-render is triggered
3. The `App` function component is called again and the `date` state is set to `"2020-01-01"`
4. The `date` prop that is passed to `MartianImageFetcher` is **different** which means that it has to re-render

```
  function App() {
    ...

    function handle2020Click() {
      setDate("2020-01-01");
    }

    ...

    return (
      ...
      <div>
        ...
        <button onClick={handle2020Click}>Fetch image for 2020</button>
        ...
        {date ? <MartianImageFetcher photoDate={date} /> : null}
        ...
      </div>
      ...
    );
  }
```

1. In the `MartianImageFetcher` component `useState` remembers that we already had `imgSrc` state. It is set to the image from 2019
2. Again, we do **not** queue the effect because this is a re-render and `useEffect` has been passed an empty array `[]`
3. Because `imgSrc` state has been set previously we render the image from 2019

```
  function MartianImageFetcher(props) {
    const [imgSrc, setImgSrc] = useState(null);

    useEffect(() => {
      ...
    }, []);

    return <img src={imgSrc} />;
  }
```

| Exercise D (estimate: 5 min)                                                                          |
| ----------------------------------------------------------------------------------------------------- |
| 1. Did you spot where the bug was? Discuss with a group of 2 - 3 students where you think the bug is. |
| 2. Report back to the rest of the class where you think the bug happened.                             |

**HINT :** The key that the `useEffect` in `MartianImageFetcher` is **only run once**. This is because we told React that the queue should be queued on the first render only. However, as we saw, sometimes you need the effect to run again when some data changes. In this case the `date` prop, changed from `"2019-01-01"` to `"2020-01-01"`, meaning that we have to fetch data different data. We call this a *dependency* of the effect. Any variables which are used inside the `useEffect` callback function are dependencies.

### `useEffect` dependencies array

To solve this problem, we can tell React to queue the effect on the first render **and** when a dependency changes. We do this by adding the dependency variable to the array ([interactive example](https://codesandbox.io/s/fetch-with-prop-updates-working-64vw3?file=/src/App.js)):

```
function MartianImageFetcher(props) {
  const [imgSrc, setImgSrc] = useState(null);

  useEffect(() => {
    ...
  }, [props.photoDate]);

  ...
}
```

Now when the `photoDate` prop changes, React knows that the effect must be run again, this time with the 2020 date. Because of this behavior, the second argument to `useEffect` is called the *dependencies argument*. We use it whenever we have something in our effect function that *depends* on a variable outside of the effect function.

Here's a diagram showing when the `useEffect` callback will be run:

![](https://4042228299-files.gitbook.io/~/files/v0/b/gitbook-legacy-files/o/assets%2F-MRebciU3NcuLgsX3ijf%2F-Mhi6YC5OngxlijzR8i7%2F-Mhi7c2KUgfajNFzoZkR%2Fimage.png?alt=media\&token=e4f28ec8-021c-49ac-be06-b143f491f905)

To help you understand this better, try "playing computer" again, but this time think about what happens when we use `[props.photoDate]` for the dependencies argument. Think carefully about what changes with step 6 after we click the 2020 button.

| Exercise E (estimate: 10 min)                                                                                                                                                                                                                                                                                         |
| --------------------------------------------------------------------------------------------------------------------------------------------------------------------------------------------------------------------------------------------------------------------------------------------------------------------- |
| 1. Open the `pokedex` React application.                                                                                                                                                                                                                                                                              |
| 2. Create a new file `src/PokemonMovesSelector.js`. Copy/paste the code from [this CodeSandbox](https://codesandbox.io/s/pokemonmovesselector-exercise-starting-point-wt5d0) into the new file.                                                                                                                       |
| 3. Open `src/App.js` and replace the `PokemonMoves` component with the `PokemonMovesSelector` component (remember to update the `import` too!)                                                                                                                                                                        |
| 4. Take a few minutes to read what the `PokemonMovesSelector` component does. If you have questions, ask a Teaching Assistant to help. We **won't** need to make any more changes to this component.                                                                                                                  |
| 5. Open the `PokemonMoves` component again. Change the URL to use backticks (`` `...` `` ) instead of double-quotes (`"..."`). Then replace the hard-coded number 1 with `${props.pokemonId}`. What will this do? **HINT :** The URL will contain the `pokemonId` instead of always fetching the Pokémon with id of 1 |
| 6. Open your browser and find where the `PokemonMovesSelector` component is rendered. **Before you click the buttons**, think about what you expect will happen. Then click the "Fetch Bulbasaur" button to find out what actually happens.                                                                           |
| 7. Refresh the page. What happens now if you click the "Fetch Bulbasaur" button, then click the "Fetch Charmander" button? Is this what you expected? Discuss with another student why this happens.                                                                                                                  |
| 8. Fix the bug by adding `props.pokemonId` to the `useEffect` dependencies array in `PokemonMoves`. Remember that you can test if the bug still happens by refreshing the page, clicking one of the buttons, then the other button.                                                                                   |

### ESLint rules for React Hooks

As you may have noticed, VSCode highlighted the empty dependencies array when you changed the URL passed to `fetch` in `PokemonMoves`.

This is because your React application is using the rules from [`eslint-plugin-react-hooks`](https://www.npmjs.com/package/eslint-plugin-react-hooks), a package created by the developers who make React. It helps you to find bugs in React Hooks code by highlighting places where you might be missing dependencies.

If you see a red squiggly line underneath your `useEffect` dependencies array, you can hover your mouse over and it will tell you which variable is missing so you can add it to the dependencies array. Here's an example:

![](https://4042228299-files.gitbook.io/~/files/v0/b/gitbook-legacy-files/o/assets%2F-MRebciU3NcuLgsX3ijf%2F-Mhi6YC5OngxlijzR8i7%2F-Mhi8Ke9LhISakrdpX-F%2Fimage.png?alt=media\&token=4ee23c2b-594e-4636-b603-b816e4376859)

### Working with forms in React <a href="#working-with-forms-in-react" id="working-with-forms-in-react"></a>

Modern web applications often involve interacting with forms such as creating an account, adding a blog post or posting a comment. This would involve using inputs, buttons and various form elements and being able to get the values entered by users to do something with it (like display them on a page or send them in a POST request). So, how do we do this in React?

#### Controlled component pattern <a href="#controlled-component-pattern" id="controlled-component-pattern"></a>

A popular pattern for building forms and collect user data is the *controlled component* pattern. A *pattern* is a repeated solution to a problem that is useful in multiple similar cases. Let's have a look at an example ([interactive example](https://codesandbox.io/s/controlled-component-4jq1yqy8kx?file=/src/SimpleReminder.js)):

```
function SimpleReminder() {
  const [reminder, setReminder] = useState("");

  function handleChange(event) {
    setReminder(event.target.value);
  }

  return (
    <form>
      <input
        type="text"
        placeholder="Some reminder"
        value={reminder}
        onChange={handleChange}
      />
      <p>Today I need to remember to... {reminder}</p>
    </form>
  );
}
```

We're controlling the `value` of the input by using the value from the `reminder` state. This means that we can only change the value by updating the state.

It is done using the `onChange` attribute and the `handleChange` function which is called every time the input value changes (typically when a new character is added or removed).

If we didn't call `setReminder` in the `handleChange` function, then the input's value would never change and it would appear as if you couldn't type in the input! Finally, the value we keep in the `reminder` state is displayed on the screen as today's reminder.

In addition, instead of just saving the value of the input in the state, we could have also transformed the string before we set it with `setReminder`, for example by calling `toUpperCase()` on the string.

| Exercise F (estimate: 10 min)                                                                                                                                                                           |
| ------------------------------------------------------------------------------------------------------------------------------------------------------------------------------------------------------- |
| 1. Open the `pokedex` React application.                                                                                                                                                                |
| 2. Create a new file `src/PokemonCity.js`. Copy/paste the code from [this CodeSandbox](https://codesandbox.io/s/pokemon-city-exercise-starting-point-6wivm?file=/src/PokemonCity.js) into the new file. |
| 3. Open the `src/App.js` file and render the new `PokemonCity` component (underneath `PokemonMovesSelector`).                                                                                           |
| 4. Take a few minutes to understand what the `PokemonCity` component does.                                                                                                                              |
| 5. Add an `<input type="text" />` element above the `<p>` element.                                                                                                                                      |
| 6. Set the `value` attribute of the `<input>` to the `city` state.                                                                                                                                      |
| 7. Create a function within the component called `updateCity`. Pass this function to the `onChange` event handler.                                                                                      |
| 8. Change the `updateCity` component so that it has a parameter named `event`.                                                                                                                          |
| 9. Add a `console.log` to inspect the value of `event.target.value`. What happens when you type in the input?                                                                                           |
| 10. Using `setCity`, update the city state to what was typed in the input box.                                                                                                                          |

#### Form with Multiple Fields <a href="#form-with-multiple-fields" id="form-with-multiple-fields"></a>

Let's have a look at a more complex example where we want to build a form to let users enter information to create a personal account ([interactive example](https://codesandbox.io/s/controlled-component-with-multiple-fields-qy3cd?file=/src/CreateAccountForm.js)):

```
function CreateAccountForm() {
  const [username, setUsername] = useState("");
  const [email, setEmail] = useState("");
  const [password, setPassword] = useState("");

  function handleUsernameChange(event) {
    setUsername(event.target.value);
  }
  function handleEmailChange(event) {
    setEmail(event.target.value);
  }
  function handlePasswordChange(event) {
    setPassword(event.target.value);
  }

  return (
    <form>
      <div>
        <input
          type="text"
          name="username"
          placeholder="Username"
          value={username}
          onChange={handleUsernameChange}
        />
      </div>
      <div>
        <input
          type="text"
          name="email"
          placeholder="Email"
          value={email}
          onChange={handleEmailChange}
        />
      </div>
      <div>
        <input
          type="password"
          name="password"
          placeholder="Password"
          value={password}
          onChange={handlePasswordChange}
        />
      </div>
    </form>
  );
}
```

We now have three different inputs named `username`, `email` and `password`. There is a corresponding state variable and change handler function for each value.

| Exercise G (estimate: 10 min)                                                                                                                                                                              |
| ---------------------------------------------------------------------------------------------------------------------------------------------------------------------------------------------------------- |
| 1. Open the `pokedex` React application again and open the `src/CaughtPokemon.js` file.                                                                                                                    |
| 2. Render an `<input>` before the `<button>` (hint: `<input type="text" />`).                                                                                                                              |
| 3. Create a new state variable called `pokemonNameInput` and initialize to an empty string (`""`).                                                                                                         |
| 4. Add a `value` attribute to the `<input>` which is set to the `pokemonNameInput` state variable. (Hint: `value={pokemonNameInput}`)                                                                      |
| 5. Create a new `handleInputChange` function within the component.                                                                                                                                         |
| 6. Add a `onChange` handler to the `<input>` that will call `handleInputChange`.                                                                                                                           |
| 7. Add a parameter called `event` to the `handleInputChange` function. Set the `pokemonNameInput` state variable to `event.target.value`. Try typing in the `<input>` again. What happens now?             |
| 8. Change the `catchPokemon` function to add the `pokemonNameInput` state to the `caught` array (hint: change the value that we are passing to the `concat` method)                                        |
| 9. Open your browser, type a Pokémon name into the `<input>` and click on the "Catch Pokémon" button. Do you see your new Pokémon being added to the list?                                                 |
| 10. Empty the `<input>` after clicking on the button. To do this, set the state of `pokemonNameInput` to an empty string `""` after we have added it to the `caught` array in the `catchPokemon` function. |
| 11: **(STRETCH GOAL)** Make sure the user cannot add a Pokémon to the `caught` state if the value of `pokemonNameInput` state is empty.                                                                    |

### **Inlining event handlers**

We could make our code a bit shorter if we *inlined* our event handlers ([interactive example](https://codesandbox.io/s/controlled-component-with-inlined-event-handlers-wfq8o?file=/src/CreateAccountForm.js)):

```
<input
  type="text"
  name="username"
  placeholder="Username"
  value={username}
  onChange={(event) => setUsername(event.target.value)}
/>
```

### **Centralizing event handlers**

Sometimes we need to put all of our update logic in one function, maybe because we need to validate the user's input before we set it in state.

We can use a single `handleChange` function, that is reused to keep track of changes for **all** of the form fields. To be able to tell which `<input>` is being updated, we check the `event.target.name` field. This corresponds to the `name` attribute on the `<input>` (e.g. `<input name="username">`).

Based on this value, we then decide which state to update ([interactive example](https://codesandbox.io/s/controlled-component-with-centralised-handlers-1z90l?file=/src/CreateAccountForm.js)):

```
function handleChange(event) {
  if (event.target.name === "username") {
    setUsername(event.target.value);
  } else if (event.target.name === "email") {
    setEmail(event.target.value);
  } else if (event.target.name === "password") {
    setPassword(event.target.value);
  }
}
```

### Form submission

So far, our form examples don't have a way of sending the user data back to the server, so that we can store it in the database.

We will be using a special `submit` event triggered on the `<form>` element. This event is triggered when the user clicks a submit button or if they hit the Enter key. Let's take a look at an example ([interactive example](https://codesandbox.io/s/controlled-component-with-submit-handler-5uhih?file=/src/CreateAccountForm.js)):

```
function CreateAccountForm() {

  ...

  function handleSubmit(event) {
    event.preventDefault();

    console.log("Sending data to server");

    fetch("https://httpstat.us/200", {
      method: "POST",
      body: JSON.stringify({
        username: username,
        email: email,
        password: password
      }),
      headers: {
        "Content-Type": "application/json"
      }
    });
  }

  return (
    <form onSubmit={handleSubmit}>
      ...
      <button>Submit</button>
    </form>
  );
}
```

We set up our `<form>` to handle the event by passing the `handleSubmit` function to the `onSubmit` prop. If we click on the Submit button or hit Enter while focused on the form, the event is triggered and the `handleSubmit` function is called.

The first thing we do inside the handler function is call `event.preventDefault()`. This is necessary because the browser has a *default* action when the submit event is triggered on the form to send a GET request to the server. We prevent the default action because we will handle the event ourselves.

We can then do whatever we want with our user data! In this example, we're sending a POST request using the `fetch` method.

### Further Reading <a href="#further-reading" id="further-reading"></a>

#### Container components <a href="#container-components" id="container-components"></a>

There is a common pattern when loading data in React applications, called *container components*.

[Read more about it here.](https://medium.com/@learnreact/container-components-c0e67432e005#.2kd1wuyp4)

#### Multiple fields as state pattern <a href="#multiple-fields-as-state-pattern" id="multiple-fields-as-state-pattern"></a>

There is another common pattern for handling multiple fields in a form, but it requires some JavaScript functionality that you may not have seen before.

[Read more about it here.](https://www.dotnetcurry.com/reactjs/forms-using-react-functional-components-hooks)

## Homework <a href="#homework" id="homework"></a>

1. If you haven't already, complete the in-class exercises on your `pokedex` app
2. Complete all of the lesson 3 exercises in the [cyf-hotel-react](https://github.com/Migracode-Barcelona/cyf-hotel-react) project.
3. Try to complete the [Stretch Goal exercises](https://github.com/Migracode-Barcelona/cyf-hotel-react) in the cyf-hotel-react homework


# Extra Materials


# Class components

### Class Components <a href="#class-components" id="class-components"></a>

So far we have looked at components which are just functions (which are called *function components*), but there is another way of creating React components using the `class` keyword. Let's look at an example ([interactive example](https://codesandbox.io/s/class-components-1zmoz1817j?file=/src/Greeting.js)):

```
import React, { Component } from "react";

// Class component
class Greeting extends Component {
  render() {
    return <div>Hello</div>;
  }
}

// Function component
const Greeting = () => {
  return <div>Hello</div>;
};
```

Instead of getting props through the first argument of the component function, the class component gets props from `this.props` ([interactive example](https://codesandbox.io/s/class-components-1zmoz1817j?file=/src/Mentor.js)):

```
class Mentor extends Component {
  render() {
    return <div>{this.props.name}</div>;
  }
}
```

Here are the steps to follow to convert from a function component into a class component:

1. Import the `Component` variable by changing the React import to: `import React, { Component } from 'react';`
2. Create a new `class` that extends the component: `class MyComponentName extends Component {}`
3. Inside the class, create a render method: `render() {}`
4. Copy and paste the contents of the function component into the `render` method
5. Replace any references to `props` with `this.props`
6. Delete the old function component

| **Exercise**                                                                      |
| --------------------------------------------------------------------------------- |
| 1. Open the `pokedex` React application that you created last week.               |
| 2. Convert the `Logo` component from a function component into a class component. |
| 3. Convert the `CaughtPokemon` component into a class component.                  |
| 4. Convert the `BestPokemon` component into a class component.                    |

#### When you should use function components or class components? <a href="#when-you-should-use-function-components-or-class-components" id="when-you-should-use-function-components-or-class-components"></a>

Classes are an older method for creating components in React. Even though they are older, they will still continue to work for a long time. Because of this, there are **many** React components written using classes. You will likely still encounter them when developing with React.

Before Hooks were released classes were the only way to access state and lifecycle (similar to effects). The rule of thumb now is that new components should be written using function components with Hooks, but class components don't need to be updated.

### Class Methods

Class *methods* are similar to nested "handler" functions inside function components. Let's take a look at an example ([interactive example](https://codesandbox.io/s/class-methods-in-react-13omkro30j?file=/src/Hello.js)):

```
import React, { Component } from "react";

class Hello extends Component {
  sayHello = () => {
    console.log("Hello from Hello component!");
  };

  render() {
    return <button onClick={this.sayHello}>Say hello</button>;
  }
}
```

Unlike nested functions, we can't use just the name of the function in the `onClick` prop. We have to use `this` first, because the method is attached to the class.

Notice how we use a slightly different syntax for the `sayHello` method than the `render` method? There is a reason for this, but it is quite complicated and mostly irrelevant. The rule of thumb is to always use this syntax:

```
methodName = () => {
  // ...
};
```

**Except** for the `render` method (and a handful of others which we'll talk about later).

| **Exercise B**                                                                                                              |
| --------------------------------------------------------------------------------------------------------------------------- |
| 1. Open the `pokedex` React application and open the `Logo.js` file.                                                        |
| 2. Add a method named `logWhenClicked` to the `Logo` component (hint: remember to use the correct syntax).                  |
| 3. Within the `logWhenClicked` method, `console.log` a message (it doesn't matter what the message is).                     |
| 4. Add a `onClick` handler to the `<img>` that will call `this.logWhenClicked` (hint: look at the `Hello` component above). |
| 5. In your web browser, try clicking on the image. What do you see in the JavaScript console?                               |

### State in Class Components <a href="#state-in-class-components" id="state-in-class-components"></a>

Accessing state in class components is a bit different than with function components. We're going to use the `Counter` component we looked at previously:

```
import React, { useState } from "react";

function Counter() {
  const [count, setCount] = useState(0);

  function increment() {
    setCount(count + 1);
  }

  return (
    <div>
      Count: {count}
      <button onClick={increment}>Click me!</button>
    </div>
  );
}
```

Now let's look at the equivalent version in a class ([interactive example](https://codesandbox.io/s/class-component-with-state-wtzte?file=/src/App.js)):

```
class Counter extends Component {
  state = {
    count: 0,
  };

  increment = () => {
    this.setState({
      count: 1,
    });
  };

  render() {
    return (
      <div>
        Count: {this.state.count}
        <button onClick={this.increment}>Click me!</button>
      </div>
    );
  }
}
```

There's a lot going on here! Let's break it down into pieces.

### State initialization

Unfortunately, React prevents us from using `useState` inside class components and we have to use alternatives. To initialize state we have to assign a class property called `state`:

```
class Counter extends Component {
  state = {
    count: 0,
  };
}
```

This creates a new state variable called `count`. Any value you assign will be the initial value of the state variable, so here we initialize to `0`.

Unlike `useState`, you can initialize multiple state variables at once, like this:

```
class Counter extends Component {
  state = {
    count: 0,
    isCountingDown: false
  }

  ...
}
```

#### Defining the `increment` handler function <a href="#defining-the-increment-handler-function" id="defining-the-increment-handler-function"></a>

Another difference in the class is that we don't define a "normal" function as the `increment` handler function. We also don't define it inside the `render` method, as you might expect.

Instead we define `increment` as a class method (see above for a reminder):

```
class Counter extends Component {
  ...

  increment = () => {
    ...
  }

  ...
}
```

This also means that we have to change how we use the handler function in our JSX:

```
class Counter extends Component {
  ...

  render() {
    return (
      <div>
        ...
        <button onClick={this.increment}>Click me!</button>
      </div>
    );
  }
}
```

### Accessing state variables

Since we can't use `useState`, it also means that we don't have access to the `count` variable. Instead our `count` state lives inside `this.state`:

```
class Counter extends Component {
  ...

  render() {
    return (
      <div>
        Count: {this.state.count}
        ...
      </div>
    );
  }
}
```

We have just swapped `count` with `this.state.count`. Otherwise it works exactly the same.

### Updating state with `this.setState`

The final piece is how we update state variables. Again, because we can't use `useState`, we don't have access to `setCount`. Instead we use a special function called `this.setState`:

```
class Counter extends Component {
  ...

  increment = () => {
    this.setState({
      state: 1
    })
  }

  ...
}
```

This function is similar to `setCount` because it does two things:

1. Updates the state variable
2. Triggers a re-render

One difference is that `this.setState` can update multiple state variables at once:

```
this.setState({
  state: 1,
  isCountingDown: true,
});
```

### Updating state based on previous state

You may have noticed that our `Counter` app isn't very useful. It can only count to 1! This is because `this.setState` has one more difference: if you need to update some state based on the previous state, then we need to pass a callback instead of an object ([interactive example](https://codesandbox.io/s/class-component-updating-state-based-on-previous-state-08itp?file=/src/App.js)):

```
class Counter extends Component {
  state = {
    count: 0,
  };

  increment = () => {
    this.setState((previousState) => {
      return {
        count: previousState.count + 1,
      };
    });
  };

  render() {
    return (
      <div>
        Count: {this.state.count}
        <button onClick={this.increment}>Click me!</button>
      </div>
    );
  }
}
```

Now we can count up as much as we like!

This is because React can "delay" `this.setState` executing for performance reasons. By using a callback function, we ensure that we are computing the new state with the correct version of the old state and not an outdated one. This problem is one of the reasons why `useState` was created.

#### Recap <a href="#recap" id="recap"></a>

Let's recap what we've learnt about React state:

* We initialize state by assigning a `state` class property to an object with whatever initial state we want (e.g. `{ something: 'hello' }`)
* We can read or render state by using the `this.state` variable (e.g. `this.state.something`)
* We can change state using the `this.setState()` method and by passing the piece of state we want to update (e.g. `this.setState({ something: 'hi' })`)
* If we need to read the previous state to be able to calculate the new state, then we must use a callback function with `this.setState()` (e.g. `this.setState((previousState) => { return { something: previousState.something + 1 } })`)

| **Exercise**                                                                                                                                                                              |
| ----------------------------------------------------------------------------------------------------------------------------------------------------------------------------------------- |
| 1. Open the `pokedex` React application and open the `CaughtPokemon.js` file.                                                                                                             |
| 2. Set the initial state by assigning the `state` class property to an object. Then make the initial state have 0 `caughtPokemon`.                                                        |
| 3. Change the `CaughtPokemon` component to render `this.state.caughtPokemon` instead of hard-coding 0. Do you expect anything to have changed in your web browser?                        |
| 4. Add a `<button>` with the text "Catch Pokémon" to the `CaughtPokemon` component.                                                                                                       |
| 5. Create an `catchPokemon` method within the `CaughtPokemon` class.                                                                                                                      |
| 6. Add a `onClick` handler to the `<button>` we just created that will call the `catchPokemon` method.                                                                                    |
| 7. Within the `catchPokemon` method, use `this.setState()` to change `caughtPokemon` to 1.                                                                                                |
| 8. Update the `catchPokemon` method to increase the number of `caughtPokemon` by 1 every time the button is clicked (hint: we need to use the previous state to calculate the new state). |

### Unmounting <a href="#unmounting" id="unmounting"></a>

So far we've looked at components that are always rendered in the browser. However (and this is often the case in large applications), we might want to control whether components are shown or not. Let's look at a Toggle component ([interactive example](https://codesandbox.io/s/unmounting-with-class-components-xmo8oo514?file=/src/Toggle.js)):

```
const Message = () => <p>I'm shown when this.state.isShown is true âœ…</p>;

class Toggle extends Component {
  state = {
    isShown: false,
  };

  toggle = () => {
    this.setState((previousState) => {
      return { isShown: !previousState.isShown };
    });
  };

  render() {
    return (
      <div>
        {this.state.isShown ? <Message /> : null}
        <button onClick={this.toggle}>Toggle</button>
      </div>
    );
  }
}
```

If you open up dev tools, you will see that the element changes based on the `isShown` state. The hidden element is not hidden with CSS, it is actually removed from the DOM. This is because `this.state.isShown` is `false` which means the Toggle component returns `null` for that part of the JSX. If you return `null` in JSX then React will render nothing at all.

### Class Component Lifecycle <a href="#class-component-lifecycle" id="class-component-lifecycle"></a>

When a class component is within the DOM, we call it *mounted*. When a component is removed from the DOM, we call it *unmounted*. When we change state like in the unmounting example above, we can switch between these statuses. This gives us a clue that components go through a *lifecycle* of different statuses. We have seen 2 of the statuses: mounting and unmounting, there is also a third called *updating*.

We can hook into this lifecycle through special component methods that are added by React's `Component` class. They are run at different points of the lifecycle, often before and after they change to a different status. The method names contain `will` or `did` based on whether they run before or after a status change.

This diagram shows the React component lifecycle:

![](https://4042228299-files.gitbook.io/~/files/v0/b/gitbook-legacy-files/o/assets%2F-MRebciU3NcuLgsX3ijf%2F-Mhi8xlWHVcF7daz-klM%2F-Mhi9jnfRZ37LRPP71IN%2Fimage.png?alt=media\&token=04c4bc02-9760-4eb6-9445-5bf6dab644ae)

Let's look at how we can use one of the lifecycle methods ([interactive example](https://codesandbox.io/s/simple-class-component-lifecycle-m5z2v36x1y?file=/src/Lifecycle.js)):

```
class Lifecycle extends Component {
  componentDidMount() {
    console.log("componentDidMount");
  }

  render() {
    return <div>Hello World</div>;
  }
}
```

| **Exercise**                                                                                                                                                                           |
| -------------------------------------------------------------------------------------------------------------------------------------------------------------------------------------- |
| 1. Open the `pokedex` application that we have been working on for the last 2 weeks and open the `CaughtPokemon.js` file.                                                              |
| 2. Add a `componentDidMount` method to the `CaughtPokemon` component. Within this method add a `console.log('componentDidMount')`. You don't need to return anything from this method. |
| 3. Repeat the same step above with the `componentDidUpdate` and `componentWillUnmount` methods.                                                                                        |
| 4. Try interacting with the `CaughtPokemon` component in your web browser (clicking the button) while looking at the JavaScript console. What order do the logs appear?                |
| 5. The `componentWillUnmount` method will never be called. Can you explain why?                                                                                                        |

We'll now focus on a few of the lifecycle hooks and see how they are used.

### `componentDidMount` and `componentWillUnmount`

The `componentDidMount` method runs after a component has finished rendering to the DOM. The component is now waiting for a props change or input from the user. It is called only once. We use this lifecycle hook to make changes outside of the component (sometimes these are called *side effects*).

The `componentWillUnmount` method runs when a component has been unmounted from the DOM. It is used to "clean up" the component as it is no longer being shown. Often we need to close down or cancel the changes we made in `componentDidMount`.

To look at these in more detail, we'll create a Clock component in an exercise.

| **Exercise**                                                                                                                                       |
| -------------------------------------------------------------------------------------------------------------------------------------------------- |
| 1. Open [this CodeSandbox](https://codesandbox.io/s/toggleable-clock-with-class-components-p9q2wq069j?file=/src/Clock.js).                         |
| 2. Now change the `Time` component (notice that there are 2 components defined in this file) add a `componentDidMount` method.                     |
| 3. Within the `componentDidMount` method use `setInterval` to call `this.tick` every 1000 milliseconds (hint: `setInterval(this.tick, 1000)`).     |
| 4. Now open the JavaScript console your web browser. What is happening? Can you explain why?                                                       |
| 5. Keep looking at the JavaScript console and try clicking the "Toggle time" button. What do you think the problem is here? How can we fix it?     |
| 6. Change the `componentDidMount` method to assign `this.timer` to the output of `setInterval` (hint: `this.timer = setInterval(this.tick, 1000)`) |
| 7. Add a `componentWillUnmount` method to the `Time` component                                                                                     |
| 8. In the `componentWillUnmount` method, remove the timer by calling `clearInterval(this.timer)`                                                   |
| 9. Try clicking the "Toggle time" button again, like in step 5. How have we solved the problem?                                                    |

### Fetching Data with Class Components <a href="#fetching-data-with-class-components" id="fetching-data-with-class-components"></a>

Data fetching with class components is also a bit different than with Hooks. The problem is similar to accessing state, because we can't use `useEffect` inside our class components. Instead we can use the class component lifecycle.

The component lifecycle is very important - we don't want to be calling our API at the wrong time, or multiple times with the same data! If we tried to fetch data in our `render` method, it would make a request every time props or state changed. This would create lots of unnecessary requests. A similar problem is solved when using `useEffect` by the dependencies array.

As we saw above, `componentDidMount` is called only once when the component is first rendered and so it is an ideal place for making requests. Let's look at an example ([interactive example](https://codesandbox.io/s/data-fetching-problem-with-class-components-4rkovwq0kw?file=/src/MartianPhotoFetcher.js)):

```
class MartianPhotoFetcher extends Component {
  componentDidMount() {
    fetch(
      `https://api.nasa.gov/mars-photos/api/v1/rovers/curiosity/photos?earth_date=${this.props.date}`
    );
  }

  render() {
    // We don't don't what the img src is when we render :(
    return <img src={src} />;
  }
}
```

This example isn't very useful! We can't use the data returned from the server in `render` because the request is asynchronous :( We need React to re-render once the request is resolved - a perfect use for state! Let's look at an example ([interactive example](https://codesandbox.io/s/data-fetching-with-setstate-in-class-components-5kk53yx6ll?file=/src/MartianPhotoFetcher.js))

```
class MartianPhotoFetcher extends Component {
  state = {
    imgSrc: null,
  };

  componentDidMount() {
    fetch(
      `https://api.nasa.gov/mars-photos/api/v1/rovers/curiosity/photos?earth_date=${this.props.date}`
    )
      .then((res) => res.json())
      .then((data) => {
        this.setState({
          imgSrc: data.photos[0].img_src,
        });
      });
  }

  render() {
    return <img src={this.state.imgSrc} />;
  }
}
```

Now we can see the Martian photo that we fetched from the server!

However we have a bit of a problem - when we first render the component, we don't have the photo `src` yet. We first have to initialize it to `null`. This shows us that we're missing something from our UI - a *loading status*.

Let's look at showing a different UI when the request is loading ([interactive example](https://codesandbox.io/s/data-fetching-with-loading-state-in-class-components-93zr0xz32r?file=/src/MartianPhotoFetcher.js)):

```
class MartianPhotoFetcher extends Component {
  state = {
    isLoading: true,
    imgSrc: null,
  };

  componentDidMount() {
    fetch(
      `https://api.nasa.gov/mars-photos/api/v1/rovers/curiosity/photos?earth_date=${this.props.date}&api_key=gnesiqnKCJMm8UTYZYi86ZA5RAnrO4TAR9gDstVb`
    )
      .then((res) => res.json())
      .then((data) => {
        this.setState({
          isLoading: false,
          imgSrc: data.photos[0].img_src,
        });
      });
  }

  render() {
    if (this.state.isLoading) {
      return <span>Loading... ðŸ‘½</span>;
    } else {
      return <img src={this.state.imgSrc} />;
    }
  }
}
```

Here are the steps that the component takes:

* Initialize `isLoading` to `true`
* In `render`, show a loading message because `isLoading` is true
* Once rendered, `componentDidMount` will trigger the API request
* When the request resolves, we set the `isLoading` state to false and set the data that we want
* Changing state triggers a re-render, and because `isLoading` is false we render the Martian photo

We can still improve our component! What happens if we make a request that fails? Our request will error, but we won't show the error in the browser. Let's see how we can fix it ([interactive example](https://codesandbox.io/s/data-fetching-with-error-state-in-class-components-6v9qo90r2r?file=/src/MartianPhotoFetcher.js)).

First we have to deal with annoying quirk of `fetch`. You may remember that it doesn't reject the promise on HTTP errors. The fix is to add another `.then` before we convert to JSON:

```
.then((res) => {
  if (res.ok) {
    return res;
  } else {
    throw new Error('HTTP error');
  }
})
```

Now we can add our solution - a `.catch` on the `fetch` call. Here we reset the loading state and add the error to state.

```
.catch((err) => {
  this.setState({
    isLoading: false,
    err: err
  });
})
```

Now we can check if there's an error in state and render out an error message:

```
render() {
  if (this.state.isLoading) {
    return <span>Loading... ðŸ‘½</span>;
  } else if (this.state.error) {
    return <span>Something went wrong ðŸ˜­</span>;
  } else {
    return <img src={this.state.imgSrc} />;
  }
}
```

| **Exercise**                                                                                                                                                                                                                                                                 |
| ---------------------------------------------------------------------------------------------------------------------------------------------------------------------------------------------------------------------------------------------------------------------------- |
| 1. Open the `pokedex` React application again and open the `src/BestPokemon.js` file.                                                                                                                                                                                        |
| 1. If you haven't already, convert the `BestPokemon` component to a class component.                                                                                                                                                                                         |
| 2. Set the initial state to have a key named `pokemonNames` that is assigned to an empty array `[]`.                                                                                                                                                                         |
| 3. Add a `componentDidMount` method to the component.                                                                                                                                                                                                                        |
| 4. Within the `componentDidMount` method call the `fetch()` function with this URL: `https://pokeapi.co/api/v2/pokedex/1/`. What will this do?                                                                                                                               |
| 5. Add a `.then()` handler into the `fetch` function (hint: remember this needs to come immediately after the `fetch()` call) which converts the response from JSON (hint: `.then(res => res.json())`)                                                                       |
| 6. Add a second `.then()` handler after the one we just added, where the callback function will receive an argument called `data`.                                                                                                                                           |
| 7. Within the second `.then()` callback function, log out the data that we just received (hint: `console.log(data.pokemon_entries[0].pokemon_species.name)`).                                                                                                                |
| 8. Now change the `console.log()` to log out an array instead, with the first, fourth and seventh Pokémon (hint: `console.log([data.pokemon_entries[0].pokemon_species.name, data.pokemon_entries[3].pokemon_species.name, data.pokemon_entries[6].pokemon_species.name])`). |
| 9. Now again within the `.then()` callback function, call `this.setState()` to set the `pokemonNames` key and assign it to the array that we just logged out (you can copy/paste it).                                                                                        |
| 10. Inside the `render` method, remove the old `pokemonNames` variable and replace it with `this.state.pokemonNames`. What do you see in your web browser?.                                                                                                                  |
| 11. Add an `isLoading` piece of state, which is initialized to `true`.                                                                                                                                                                                                       |
| 12. When calling `this.setState()` inside the `.then()` handler, also set `isLoading` to `false`.                                                                                                                                                                            |
| 13. In the `render` method check if `this.state.isLoading` is `true` and return a loading message (e.g. `<span>Loading...</span>`). Otherwise if `this.state.isLoading` is `false` then render the loop as we did before.                                                    |
| 14. **(STRETCH GOAL)** Add some error handling which renders an error message.                                                                                                                                                                                               |
| 15. **(STRETCH GOAL)** Explore the data returned from the API. See if you can show some more interesting Pokémon information in your app (hint: try `console.log`ging different data returned from the API).                                                                 |

### Further Reading <a href="#further-reading" id="further-reading"></a>

* [Converting a class component to a function component with Hooks](https://dev.to/subdeveloper/migrating-from-class-components-to-react-hooks-4lp3)


# Routing

### Introduction to React-Router <a href="#introduction-to-react-router" id="introduction-to-react-router"></a>

In the past few weeks, you've learned how to build applications with React and the different applications and examples were all built on a single page. However, what if you wanted to have different pages with each page having its own URL (so you can bookmark it for example)? You will need to introduce a router in your application. In JavaScript, a router is the piece of code which is in charge of switching between views of your application and keep each view in sync with a specific URL. For example, you could imagine having a homepage reachable from the root path `/` and a users page with the path `/users`. In React, a popular library to help you achieve this is React-Router.

Let's look at a first example ([interactive example](https://codesandbox.io/s/react-router-1-lk44e)):

```
const Index = () => {
  return <h2>Home</h2>;
};

const About = () => {
  return <h2>About</h2>;
};

const Users = ({ names }) => {
  return (
    <div>
      <h2>Users</h2>
      <ul>
        {names.map((name) => (
          <li>{name}</li>
        ))}
      </ul>
    </div>
  );
};

const AppRouter = () => {
  return (
    <BrowserRouter>
      <div>
        <nav>
          <ul>
            <li>
              <Link to="/">Home</Link>
            </li>
            <li>
              <Link to="/about/">About</Link>
            </li>
            <li>
              <Link to="/users/">Users</Link>
            </li>
          </ul>
        </nav>

        <Route path="/" exact component={Index} />
        <Route path="/about/" component={About} />
        <Route
          path="/users/"
          render={() => <Users names={["Raresh", "Nate"]} />}
        />
      </div>
    </BrowserRouter>
  );
};
```

React-Router provides some default React components that you can use to enable routing in your application. First, notice the top level `<BrowserRouter>` component which wraps everything else. Each route is defined with the `<Route>` component which maps a path (defined with the `path` props) with a React component. In the simplest case, you can specify the React component to map to the path with the `component` props. However, it is assuming you don't need to pass any props to it. If you face a more complex scenarios or if you need to pass props to your React component, you can use the `render` props which takes a function and return exactly what you want to render on this path. Then, the `Link` component can be used to create links to navigate to different routes.

> **Exercise A** Open the `pokedex` React application. In this exercise, React-Router will be introduced. Instead of displaying all your components in the same page, we will use React-Router to define different pages in the `pokedex` application.
>
> 1. In the terminal, install React-Router with `npm install --save react-router-dom`.
> 2. Open `src/App.js` and import BrowserRouter, Route and Link components from React-Router (hint: `import { BrowserRouter, Route, Link } from "react-router-dom";`)
> 3. Wrap all the components in the `render` method in the `<BrowserRouter>` component.
> 4. In the following, we will have `CaughtPokemon` and `BestPokemon` displayed with different route. But first, let's create some links to navigate to different pages. Still in the `render` method of `src/App.js`, use the `Link` component to create 2 links: one to navigate to the URL `/best-pokemon` and another one to navigate to `/caught-pokemon` (hint: `<Link to="/best-pokemon">Best Pokemon</Link>`).
> 5. Open the `pokedex` in your browser and verify that you can see 2 links on the page. When clicking on each of these links, the URL in your browser address bar should change (but nothing will change on the screen yet!).
> 6. Now let's define the routes to map a path to a React component. First, create a route to map `/best-pokemon` to the `BestPokemon` component. Then, use another route to map `/caught-pokemon` to the `CaughtPokemon` component (Hint: depending on if you pass some props to `BestPokemon` or `CaughtPokemon` you will need to use either the `component` or the `render` props in the `<Route>` component).
> 7. Open the `pokedex` in your browser and verify that when clicking on each link, `BestPokemon` and `CaughtPokemon` are rendered accordingly.

### URL parameters <a href="#url-parameters" id="url-parameters"></a>

Sometimes, parameters can be passed from the URL to a React component directly via its props. In this case, different URLs can be mapped to one single React component. For example, in an online shopping application, a React component `Product` may be responsible to display a specific product on the page. By using URL parameters, the name or ID of the requested product can be specific in the URL and React-Router will pass it a props of the `Product` component ([interactive example](https://codesandbox.io/s/compassionate-https-jsf59)):

```
const Product = ({ match }) => {
  return <h2>Product: {match.params.name}</h2>;
};

const AppRouter = () => {
  return (
    <BrowserRouter>
      <div>
        <nav>
          <h2>Product List</h2>
          <ul>
            <li>
              <Link to="/products/laptop">Laptop</Link>
            </li>
            <li>
              <Link to="/products/tv">TV</Link>
            </li>
            <li>
              <Link to="/products/teddy-bear">Teddy Bear</Link>
            </li>
          </ul>
        </nav>

        <Route path="/products/:name" component={Product} />
      </div>
    </BrowserRouter>
  );
};
```

In the route definition above, a specific syntax is used to define the URL parameter: `:name`. Then in the `Product` component, the value of `name` can be accessed through the component props `match.params.name`.

> **Exercise B** In the following, we will create a new component to display a Pokemon information. The Pokemon name will be passed through the URL and displayed on the screen.
>
> 1. Create a new component `PokemonInfo`.
> 2. In `src/App.js`, create a new route which maps the path `/pokemon/:name` to the previously created component `PokemonInfo` (hint: `<Route path="/pokemon/:name" component={PokemonInfo} />`).
> 3. In the `render` method of `PokemonInfo` component, display the name of the Pokemon which is passed in the URL parameter (hint: use the props `match.params.name`).
> 4. Open the `pokedex` in your browser and try several URLs (such as `http://localhost:3000/pokemon/Pikachu` and see if the Pokemon name is displayed accordingly on your screen.
> 5. **(STRETCH GOAL)** Instead of passing the name of the Pokemon in the URL parameter, now pass an ID. The ID passed correspond to the ID of the Pokemon in the Poke API. For example, the ID 1 corresponds to the Pokemon Bulbasaur (<https://pokeapi.co/api/v2/pokemon-species/1/>). In the `PokemonInfo` component, use the Pokemon ID from the URL to load the corresponding Pokemon data from the Poke API and display the following Pokemon information on the screen: name, color.name, shape.name, base\_happiness and capture\_rate.

### Further Reading <a href="#further-reading" id="further-reading"></a>

A lot of examples are available on the [official React-Router website](https://reacttraining.com/react-router/web/guides/quick-start).


# Node.js

**Node.js is an open-source, back-end (or server-side) environment for developing apps. It works across platforms and Node.js applications are written in JavaScript. Node.js provides a runtime environment that executes JavaScript code outside a web browser. In this module, we teach you how to use Node.js most effectively.**

Below an overview of the week-by-week topics - click on the title to find more details.

{% content-ref url="/pages/-MS3so4TupfiZfuIYO1C" %}
[1 - Node and Express 101](/courses/introduction-3/course-content/nodejs/week-1)
{% endcontent-ref %}

{% content-ref url="/pages/-MS3t34JktanSSA-Ffsr" %}
[2 - APIs in Node](/courses/introduction-3/course-content/nodejs/week-2)
{% endcontent-ref %}

{% content-ref url="/pages/-MS3u6CAZ5FrSTKrR1Bn" %}
[3 - Workshop](/courses/introduction-3/course-content/nodejs/week-3)
{% endcontent-ref %}

![](https://4042228299-files.gitbook.io/~/files/v0/b/gitbook-legacy-files/o/assets%2F-MRebciU3NcuLgsX3ijf%2F-MSXGtKUhAK1wnjgonVJ%2F-MSXHFTPlFGTiDQE_NYZ%2FP9010126migracode-bcn.jpg?alt=media\&token=29341bd7-f520-4745-be53-78a1da774730)


# 1 - Node and Express 101

### Learning Objectives <a href="#learning-objectives" id="learning-objectives"></a>

By the end of this lesson students should be able to:

* Explain what Node.js is.
* Explain what Express is.
* Create a simple REST API using Express.
* Explain what Postman is and how it works.
* Working with GET Requests using Postman.
* Working with POST Requests using Postman.
* Communicating with the server.
* Implement routing to return different resources depending on the URL.
* Implement query parameters to return different content.

### What is Node.js?

Node.js is an open-source\* and cross-platform JavaScript runtime environment. The *runtime environment* is the *environment* in which a program or application is executed. It's the hardware and software infrastructure that supports the running of a particular codebase in real time.

Node.js runs the V8 JavaScript engine (the core of Google Chrome) outside of the browser. This allows Node.js to be very performant. A Node.js app runs in a single process, without creating a new thread for every request. **Threads** are a way for a **program** to divide (termed "split") itself into two or more simultaneously (or pseudo-simultaneously) running tasks.

Node.js has a unique advantage because millions of front-end developers that write JavaScript for the browser can write the server-side code in addition to the client-side code without the need to learn a completely different language.

***\*Open source*** is a term that originally referred to *open source* software (OSS). *Open source* software is code that is designed to be publicly accessible—anyone can see, modify, and distribute the code as they see fit.

### What is Express? <a href="#a-vast-number-of-libraries" id="a-vast-number-of-libraries"></a>

Express.js or simply Express is a minimal, open source and flexible Node.js web framework designed to make developing websites, web apps, and APIs much easier. It lets you structure a web application to handle multiple different `http` requests at a specific URL (Uniform Resource Locator).

Express helps you respond to requests with **route** support so that you may write responses to specific URLs. The nice thing about it is that it’s very simple and it’s open-source.

A **route** is a section of **Express** code that links an HTTP action ( GET, POST, PUT, DELETE, etc.) to a URL path/pattern, and a function that is called to handle that pattern.

### Creating a simple Rest API

The **REST** abbreviation stands for representational state transfer. The definition can be conveyed with simpler words: data presentation for a client in the format that is convenient for it. One of the main points that you need to understand and remember is that REST is not a standard or protocol: it is an approach to, or architectural style for, writing APIs.

**API** stands for Application Programming Interface. It is a way to provide information for other applications. Basically, it enables communication between applications.

![](https://4042228299-files.gitbook.io/~/files/v0/b/gitbook-legacy-files/o/assets%2F-MRebciU3NcuLgsX3ijf%2F-MZmMwVJ_pDFejLeBJG7%2F-MZmcDrUaBm7oCl0-hT4%2Fimage.png?alt=media\&token=191dfff9-9278-4769-9193-b1da607a5844)

REST is an architectural style, and RESTful is the interpretation of it. This means that if your back-end server has a REST API and you make client-side requests (from a website/application) to this API, then your client is RESTful.

RESTful API best practices come down to four essential operations:

* receiving data in a convenient format
* creating new data
* updating data
* deleting data

### Get started

### **Step 1**: Go to the terminal and create a folder called node-web-server

```
mkdir node-web-server
```

### **Step 2**: Go inside the project and generate the `package.json` file using **`npm init`**

```
cd node-web-server
npm init
```

You can keep pressing 'enter' through all of the options that you will see in your terminal. After this, you will see that a file called `package.json` has been created automatically.

The terminal will look something like this once you execute `npm init`

```
npm init
This utility will walk you through creating a package.json file.
It only covers the most common items, and tries to guess sensible defaults.

See `npm help init` for definitive documentation on these fields
and exactly what they do.

Use `npm install <pkg>` afterwards to install a package and
save it as a dependency in the package.json file.

Press ^C at any time to quit.
package name: (new)
version: (1.0.0)
description:
entry point: (index.js)
test command:
git repository:
keywords:
author:
license: (ISC)
About to write to /home/yogi/new/package.json:

{
  "name": "new",
  "version": "1.0.0",
  "description": "",
  "main": "index.js",
  "scripts": {
    "test": "echo \"Error: no test specified\" && exit 1"
  },
  "author": "",
  "license": "ISC"
}


Is this OK? (yes)
```

### **Step 3**: Install Express

```
npm install express
```

### **Step 4:** Create a file called `server.js` in the root/main project folder ( e.g. node-web-server )

```
touch server.js
```

This is the file where we will configure all our routes.

### **Step 5**: Paste the following code in your `server.js` file:

```
const express = require('express');
const app = express();

app.get('/', (req, res) => {
    res.send('Hello Express')
});

app.listen(3000, () => console.log("Server is up and running"))
```

***Line 1:** We already installed Express in Step 3, but we need to make sure it is included in this file specifically so we can use its methods. In Node.js, when you want to use a package in another file, you must require it. You can think of require as a need to import something. You can instantiate the package at the top of your file. Instantiate means creating an example or single occurrence of something and we assign that example or instance to a variable, for example "express"*\
***Line 2**: To initialise/create our server, we need to call the `express()`function. This will perform a set of operations behind the scene and create an Express application for us and we can assign it to the app variable.*\
***Line 4: `app.get`**&#x69;s saying that when it gets that route, it should give the response that is specified in the function. It takes in two arguments: (1) the URL (2) the function that tells Express what to send back to the person making the request.*\
***Line 8:** One more step left: we need to set a port for our server to listen to. Think of a port as a door number; any requests that comes to the server will come via that door. Setting a port will allow us to find out where our server is running. We use the **`app.listen`**&#x6D;ethod to do this. This method takes two arguments: a **port** and a **callback** function telling it what to do once the server is running.*

***Note :*** If the port `3000` is in use (e.g. you already have a project running on port `3000`), then your system will throw an error. In this case you will have to manually change port in ***Line 8** `app.listen(3001)`* **or** *`app.listen(3002)`* **or** *`app.listen(3003)`* till you find the next available port and run the server with that.&#x20;

When you run `npm install package_name` in the terminal, the package you want gets added as one of the dependencies into the `package.json` file:

```
{
  “name”: “node-web-server”,
  "version": "1.0.0",
  "description": "",
  "main": "index.js",
  "scripts": {
    "test": "echo \"Error: no test specified\" && exit 1"
  },
  "author": "",
  "dependencies": {
     "express": "4.15.3",
     "jade": "*",
     "underscore": "^1.7.0"
  }
}
```

* The syntax it uses is semantic versioning **(SEMVER)**, which means you can specify which version of the dependency you would like.
* A star symbol (**\***) means it can be any version, whichever is the latest one.
* A carrot symbol (**^**) prior to the version means I want that version or anything newer.

**SEMVER :** Given a version number (e.g `"express": "4.15.3"` ) MAJOR.MINOR.PATCH, increment the:

1. ( `"express": "4.x.x"` ) MAJOR version when you make incompatible API changes,
2. ( `"express": "x.15.x"` ) MINOR version when you add functionality in a backwards compatible manner, and
3. ( `"express": "x.x.3"` ) PATCH version when you make backwards compatible bug fixes.

**Note :** We never installed "jade" and "underscore". These are mentioned for explaining SEMVER and you can ignore these packages here.

### **Step 6**: To run the application, change into the root directory of the project and type the following in the terminal:

```
node server.js
```

Go to your browser and type the following URL (use port 3000 or whichever port you used in the previous step)

```
http://localhost:3000/
```

You should see “Hello Express” on your screen.

**Note:** Whenever you make any changes in your project, you will have to **manually restart the server**. You can do this by pressin&#x67;**`ctrl c`** on your keyboard to stop the current server and then repeat the step to start the server:`node server.js`

####

### **Step 7**: Setting up a server to listen to changes automatically

Install the package ***nodemon*** globally on your machine by using following command:&#x20;

```
npm install -g nodemon
```

When you install an npm package using the **-g** flag, that package gets installed in your system instead of in your program, and you do not need to install it ever again. Now you can use`nodemon` instead of`node` when running your app locally. Nodemon monitors your app for any changes and automatically restarts your application when you change anything. With the`node` command, you have to restart manually after you make changes.

```
nodemon server.js
```

Go to your browser and go to port 3000 (or whichever port you used in step 5)

```
http://localhost:3000/
```

You should see “Hello Express”.

### **Step 8:** Npm Scripts

`package.json` has various sections. `scripts` is one of them, and it allows you to write an npm script that you can run using `npm run <script-name>.`

```
"scripts": {
  "test": "echo \"Error: no test specified\" && exit 1"
}
```

Typically we can have a scripts section. The scripts are defined as JSON with the key-value script. Key is the command name that we will use to run and value is the command we want to run.

To exit the running the server, type `crtl c`. Instead of running the server with `nodemon server.js` every time, we can create an alias (a shortcut) for it in `package.json`.

Under the `scripts` property, add `"start: nodemon server.js"`.&#x20;

```
"scripts": {
  "test": "echo \"Error: no test specified\" && exit 1",
  "start": "nodemon server.js"
}
```

We can now run our server using `npm start` which will be an alias for `nodemon server.js`.Go to the terminal and type `npm start` and make sure that the server still runs.

### What is Postman

**Postman** is a scalable API testing tool which started in 2012 to simplify the API workflow in testing and development.

#### Why Use Postman?

Developers use Postman for the following reasons:

1. Accessibility - To use the Postman tool, a developer can log into their own account, making it easy to access files anytime, anywhere, as long as a Postman application is installed on the computer.
2. Use of Collections - Postman lets users create collections for their Postman API calls. Each collection can have sub-folders and multiple requests. This helps in organizing your test suites.
3. Collaboration - Collections and environments can be imported or exported, making it easy to share files. A direct link can also be used to share collections.
4. Debugging - Postman console helps to check what data has been retrieved, making it easy to debug tests.
5. Continuous Integration - With its ability to support continuous integration, development practices are maintained.

#### How to download and install Postman

Postman is an Open Source tool and can be easily downloaded. Here are the steps to install:

**Step 1)** Go to <https://www.postman.com/downloads/> and choose your desired platform  (Mac, Windows or Linux). Click *Download*

![](https://4042228299-files.gitbook.io/~/files/v0/b/gitbook-legacy-files/o/assets%2F-MRebciU3NcuLgsX3ijf%2F-MZWfLymYLDcNddqFNdI%2F-MZWjauliZK4PQEw7sm4%2Fimage.png?alt=media\&token=63ba7fb1-56df-4637-8d36-b2f9a476cdf1)

**Step 2)** The message *Your download is in progress'*&#x73;hould now display on the Apps page. Once the Postman download is completed, click on *Run*

![](https://4042228299-files.gitbook.io/~/files/v0/b/gitbook-legacy-files/o/assets%2F-MRebciU3NcuLgsX3ijf%2F-MZWfLymYLDcNddqFNdI%2F-MZWjixqKALVltUGpGF1%2Fimage.png?alt=media\&token=4674d664-0cef-4713-b1c1-0d211fb2565b)

**Step 3)** Installation Starts

![](https://4042228299-files.gitbook.io/~/files/v0/b/gitbook-legacy-files/o/assets%2F-MRebciU3NcuLgsX3ijf%2F-MZWfLymYLDcNddqFNdI%2F-MZWk-Ui-HeJcgLpxmpq%2Fimage.png?alt=media\&token=95d2998e-5fa8-423e-9cbb-01742b263934)

**Step 4)** In the next window, signup for a Postman Account

![](https://4042228299-files.gitbook.io/~/files/v0/b/gitbook-legacy-files/o/assets%2F-MRebciU3NcuLgsX3ijf%2F-MZWfLymYLDcNddqFNdI%2F-MZWkIdpSTGQ5A1eOZb0%2Fimage.png?alt=media\&token=2c2759b3-cbfe-458d-aa36-107b30f4e104)

NOTE: There are two ways to sign up for a Postman account. One is to create a new Postman account, and the other is to use a Google account. Though Postman allows users to use the tool without logging in, signing up ensures that your collection is saved and can be accessed for later use.

**Step 5)** Select the workspace tools you need and click *Save My Preferences*

![](https://4042228299-files.gitbook.io/~/files/v0/b/gitbook-legacy-files/o/assets%2F-MRebciU3NcuLgsX3ijf%2F-MZWfLymYLDcNddqFNdI%2F-MZWl6sXgyvABIYZMtcW%2Fimage.png?alt=media\&token=439b5ee9-ddc0-40ff-a762-bdb2616fc4cf)

**Step 6)** You will see the Startup Screen

![](https://4042228299-files.gitbook.io/~/files/v0/b/gitbook-legacy-files/o/assets%2F-MRebciU3NcuLgsX3ijf%2F-MZWfLymYLDcNddqFNdI%2F-MZWlCYZU0JZC-QaokVk%2Fimage.png?alt=media\&token=ff9d8ad1-b491-4128-836b-fbc941f93db0)

#### How to use Postman to execute APIs

Below is the Postman Workspace. Let's explore the step by step process on **How to use Postman** and different features of the Postman tool!

**Note: Don't worry about all the features mentioned below, right now you just need a few.**

![](https://4042228299-files.gitbook.io/~/files/v0/b/gitbook-legacy-files/o/assets%2F-MRebciU3NcuLgsX3ijf%2F-MZWfLymYLDcNddqFNdI%2F-MZWlR_L7XitvJMAt3K9%2Fimage.png?alt=media\&token=49d9a238-088a-40f7-8114-abd783962a0c)

1. New - This is where you will create a new request, collection or environment.
2. Import - This is used to import a collection or environment. There are options such as import from file, folder, link or paste raw text.
3. Runner - Automation tests can be executed through the Collection Runner. This will be discussed further in the next lesson.
4. Open New - Open a new tab, Postman Window or Runner Window by clicking this button.
5. My Workspace - You can create a new workspace individually or as a team.
6. Invite - Collaborate in a workspace by inviting team members.
7. History - Past requests that you have sent will be displayed in History. This makes it easy to track actions that you have done.
8. Collections - Organize your test suite by creating collections. Each collection may have sub-folders and multiple requests. A request or folder can be duplicated as well.
9. Request tab - This displays the title of the request you are working on. By default, "Untitled Request" would be displayed for requests without titles.
10. HTTP Request - Clicking this will display a drop-down list of different requests such as GET, POST, COPY, DELETE, etc. In Postman API testing, the most commonly used requests are GET and POST.
11. Request URL - Also known as an endpoint, this is where you will identify the link to where the API will communicate with.
12. Save - If there are changes to a request, clicking save is a must so that new changes will not be lost or overwritten.
13. Params - This is where you will write parameters needed for a request such as key values.
14. Authorization - In order to access APIs, proper authorization is needed. It may be in the form of a username and password, bearer token, etc.
15. Headers - You can set headers such as content type JSON, depending on the needs of the organization.
16. Body - This is where you can customize details in a request commonly used in POST request.
17. Pre-request Script - This is a script that will be executed before the request. Usually, pre-request scripts for the setting environment are used to ensure that tests will be run in the correct environment.
18. Tests - These are scripts executed during the request. It is important to have tests as it sets up checkpoints to verify if response status is OK, retrieved data is as expected and other tests.

### Working with GET requests using Postman

GET requests are used to retrieve information from the given URL. There will be no changes done to the endpoint.

We will use the following URL for all examples in this Postman tutorial. It is a website for testing HTTP requests.

```
https://jsonplaceholder.typicode.com/users
```

In the workspace

1. Set your HTTP request to GET.
2. Copy the link above in the request URL field, &#x20;
3. Click Send
4. You will see a *200 OK* message
5. There should be 10 user results in the body. This means that your test has run successfully.

![](https://4042228299-files.gitbook.io/~/files/v0/b/gitbook-legacy-files/o/assets%2F-MRebciU3NcuLgsX3ijf%2F-MZWfLymYLDcNddqFNdI%2F-MZWlwzDzDuTMV8fQF-W%2Fimage.png?alt=media\&token=64de11b9-79a2-45b4-be3e-b7c57628a4dc)

**Note:** There may be cases that a Postman GET request is unsuccessful. It can be due to an invalid request URL, or that authentication is needed.

### Working with POST Requests using Postman

POST requests are different from GET request because there is data manipulation: the user adds data to the endpoint. Using the same data from the previous tutorial on the GET request, let's now add our own user.

**Step 1)** Click a new tab to create a new request.

![](https://4042228299-files.gitbook.io/~/files/v0/b/gitbook-legacy-files/o/assets%2F-MRebciU3NcuLgsX3ijf%2F-MZWfLymYLDcNddqFNdI%2F-MZWm1NMEX-k8T0H6WkZ%2Fimage.png?alt=media\&token=9f7368bc-deab-4cba-b312-a85a099fdfe9)

**Step 2)** In the new tab

1. Set your HTTP request to POST.
2. Input the same link in the request URL: <https://jsonplaceholder.typicode.com/users>
3. Switch to the Body tab

![](https://4042228299-files.gitbook.io/~/files/v0/b/gitbook-legacy-files/o/assets%2F-MRebciU3NcuLgsX3ijf%2F-MZWfLymYLDcNddqFNdI%2F-MZWm5JnxnS2RJCZmhrN%2Fimage.png?alt=media\&token=d6544876-a81c-48c4-9a83-572bcdfcf954)

**Step 3)** In Body,

1. Click raw
2. Select JSON

![](https://4042228299-files.gitbook.io/~/files/v0/b/gitbook-legacy-files/o/assets%2F-MRebciU3NcuLgsX3ijf%2F-MZWfLymYLDcNddqFNdI%2F-MZWmD5OdKJXX7IFzE5e%2Fimage.png?alt=media\&token=aec0a25e-2b3b-4d1e-a37f-ec7815d20942)

**Step 4)** Copy and paste one user result from the previous GET request (see example below). Ensure that the code has been copied correctly with paired curly braces and brackets. Change`id` to 11 and`name` to any desired name. You can also change other details like the address.

```
[
    {
        "id": 11,
        "name": "Krishna Rungta",
        "username": "Bret",
        "email": "Sincere@april.biz",
        "address": {
            "street": "Kulas Light",
            "suite": "Apt. 556",
            "city": "Gwenborough",
            "zipcode": "92998-3874",
            "geo": {
                "lat": "-37.3159",
                "lng": "81.1496"
            }
        },
        "phone": "1-770-736-8031 x56442",
        "website": "hildegard.org",
        "company": {
            "name": "Romaguera-Crona",
            "catchPhrase": "Multi-layered client-server neural-net",
            "bs": "harness real-time e-markets"
        }
    }
]
```

![](https://4042228299-files.gitbook.io/~/files/v0/b/gitbook-legacy-files/o/assets%2F-MRebciU3NcuLgsX3ijf%2F-MZWfLymYLDcNddqFNdI%2F-MZWmY8NIbX8SfFsy-NJ%2Fimage.png?alt=media\&token=5c8a9a59-ca88-4c1d-912e-fe9ff4e08820)

**Note:** An online POST request should have the correct format to ensure that the requested data will be created. It is a good practice to use GET first to check the JSON format of the request. You can use tools like <https://jsonformatter.curiousconcept.com/>

![](https://4042228299-files.gitbook.io/~/files/v0/b/gitbook-legacy-files/o/assets%2F-MRebciU3NcuLgsX3ijf%2F-MZWfLymYLDcNddqFNdI%2F-MZWmfvBZfEo_5cO3GRG%2Fimage.png?alt=media\&token=1f8c8bf7-a896-4918-8cc1-89ce2ba390fb)

**Step 5)** Next,

1. Click *Send*.
2. *Status: 201 Created* should be displayed
3. The posted data are showing up in the body.

![](https://4042228299-files.gitbook.io/~/files/v0/b/gitbook-legacy-files/o/assets%2F-MRebciU3NcuLgsX3ijf%2F-MZWfLymYLDcNddqFNdI%2F-MZWmlWm7oyAGC1P6Tjz%2Fimage.png?alt=media\&token=d31fb8ff-60d7-4d0c-9b87-e022c8aff1a7)

### &#x20;<a href="#step-3---communicating-with-the-server" id="step-3---communicating-with-the-server"></a>

### Communicating with the server <a href="#step-3---communicating-with-the-server" id="step-3---communicating-with-the-server"></a>

Now that we've built the server, we need to communicate with it. We are going to control the server with **handler functions**.

#### What is a handler function? <a href="#what-is-a-handler-function" id="what-is-a-handler-function"></a>

When a request reaches the server, we need a way of responding to it. In comes the handler function. The handler function is a function that receives requests and handles them, hence the name.

The handler function is always called with a `req` and `res` (= request and response) object. The response object is what gets sent back to the client. It contains the information that gets displayed in the web page. You can decide what to send back in your response.

**What does a handler function look like in Express?**

The `get()` [method](http://expressjs.com/en/api.html#app.get.method) is one of the methods used to define a handler function in Express. It takes two parameters: the **endpoint** at which to trigger an action (we'll explain more about this in the next step), and the handler function that specifies exactly what to do. Here's a simple "Hello World!" example:

```
// req is the Request object, res is the Response object
// (these are just variable names, they can be anything but it's a convention to call them req and res)
app.get("/", (req, res) => {
  res.send("Hello World!");
});
```

Here, we are telling our server to respond with "Hello World!" when someone tries to access the webpage.

#### 1. Create your own handler function <a href="#id-1-create-your-own-handler-function" id="id-1-create-your-own-handler-function"></a>

Let us add a handler function to send back a message to the client. To do that, we're going to use the Express `send()` [method](http://expressjs.com/en/api.html#res.send). This will update the response object with the message.

Update your handler function like so:

```
const express = require("express");
const app = express();

app.get("/", function (req, res) {
  res.send("Yay Node!");
});

app.listen(3000, () => console.log("Server is up and running"))
```

> Exercise: Try to `console.log` the `request` object inside the handler function. Send the request again with Postman, then go to your terminal to see what it looks like. You should see a lot of data coming through.

#### 2. Check it out in Postman <a href="#id-2-check-it-out-in-postman" id="id-2-check-it-out-in-postman"></a>

Now, open Postman, and send a `GET` request to `http://localhost:3000`. If you see your message in Postman, congratulations! You have just sent your first response from the server.

### Routing <a href="#step-4---routing" id="step-4---routing"></a>

At the moment our server only does one thing. When it receives a request from the `/` endpoint, it sends back the same response: "Yay Node!".

> Try typing <http://localhost:3000/node> and see what happens.

By making use of endpoints, we can make the server send different responses for different requests. This concept is called **routing**.

#### What is an endpoint? <a href="#what-is-an-endpoint" id="what-is-an-endpoint"></a>

An endpoint is the part of the URL which comes after `/`. For example: In this URL `https://jsonplaceholder.typicode.com/users` everything before `/users` is the base URL and  `/users` is the endpoint. It's the URL which we used in Postman example to send a request.

#### What are the elements of a URL? <a href="#what-is-url" id="what-is-url"></a>

![](https://4042228299-files.gitbook.io/~/files/v0/b/gitbook-legacy-files/o/assets%2F-MRebciU3NcuLgsX3ijf%2F-MhiAjr8XpR2wL_pdo31%2F-MhiCgkvgggtc0mLn98E%2Fimage.png?alt=media\&token=5a3f9537-5468-4261-a0c5-bef4359afb66)

#### Create your own endpoints and send different responses <a href="#create-your-own-endpoints-and-send-different-responses" id="create-your-own-endpoints-and-send-different-responses"></a>

We're going to try sending different responses at different endpoints. Remember the `app.get()` method? To set up routing in your server, we just need to repeat this method with different endpoints.

For example:

```
app.get("/", function (req, res) {
  res.send("Hello World!");
});

app.get("/chocolate", function (req, res) {
  res.send("Mm chocolate :O");
});
```

> **Exercise:** Add some code so that your server sends one message when the endpoint is `/node` and another one when it's `/migracode`.

### Query Parameters <a href="#step-5---query-parameters" id="step-5---query-parameters"></a>

So what is a query parameter?

In simple terms, a query string is the part of a URL after the question mark (?). It is meant to send small amounts of information to the server via the URL. This information is used as parameters to query a database or to filter results.

Here is an example of a URL with query strings attached:

> <https://stackabuse.com/?page=2&limit=3>

#### 1. Detect Query Parameters <a href="#id-1-detect-query-parameters" id="id-1-detect-query-parameters"></a>

We're going to try sending different responses at different endpoints. Remember the `app.get()` method? To set up routing in your server, we just need to repeat this method with different endpoints.

For example:

```
app.get("/", function (req, res) {
  let searchQuery = req.query.search;
  res.send("Hello World! You searched for " + searchQuery);
});
```

#### **Exercise:** Follow the instructions of [node-challenge-calculator](https://github.com/Migracode-Barcelona/node-challenge-calculator)


# 2 - APIs in Node

### Learning Objectives <a href="#learning-objectives" id="learning-objectives"></a>

By the end of this lesson students should be able to:

* Define what each part of CRUD is and what it does
* Process a GET request using Express and Node to retrieve data from memory
* Process a POST request using Express and Node and store data in memory
* Process a PUT request using Express and Node and update existing data in memory
* Process a DELETE request using Express and Node to remove data from memory
* Install a third party library using `npm`
* What is a middleware

### CRUD Continued <a href="#crud-continued" id="crud-continued"></a>

We will now build a **CRUD** API. CRUD stands for Create, Retrieve, Update, Delete. If you think about it, this is what most applications do:

* Create some "resources"
* Retrieve them (GET them)This step will require you to use POSTMAN because our project does not have client interface (front-end part) with a HTML form for creating new quotes.
* Update them
* Delete them

Below are three in-class exercises that can be used to demonstrate parts of the API workshop below.

#### (1) Get Exercise <a href="#id-1-get-exercise" id="id-1-get-exercise"></a>

This is an instructor-led exercise that can be used to show how we can retrieve an element by ID using a GET request.

**Objective**

Change a quote API server to allow GETting a quote according to the given ID.

The id should be given in the URL structure like this:

> /quotes/2

You should use the starting project: [node-quotes-api](https://github.com/Migracode-Barcelona/node-quotes-api). This is because this project has quotes with IDs.

When you fork and clone the starting project, run `npm install` to install required dependencies.

#### (2) Post Exercise <a href="#id-2-post-exercise" id="id-2-post-exercise"></a>

This is an instructor-led exercise that can be used to show how we can add an element to an array

**Objective**

Change a quote API server to allow POSTs of new quotes.

The new quotes should be added to your quotes list, which is just an array in memory.

You can assume the POSTed quotes are all in the correct JSON format.

The route should use the HTTP method POST and should use the URL:

> /quotes

#### (3) Put Exercise <a href="#id-1-get-exercise" id="id-1-get-exercise"></a>

This is an instructor-led exercise that can be used to show how we can update existing data in memory using a PUT request.

**Objective**

Change the quote API server to allow updating a quote according to the given ID.

The route should use the HTTP method PUT and ID should be given in the URL structure like this:

> /quotes/2

This step will require you to use POSTMAN because our project does not have client interface (front-end part) with a HTML form for updating quotes.

#### (4) Delete Exercise <a href="#id-3-delete-exercise" id="id-3-delete-exercise"></a>

This is an instructor-led exercise that can be used to show how we can remove an element to an array

**Objective**

Change a quote API server to allow updating a quote according to the given ID.

The id should be given in the URL structure like this:

/quotes/2

You should use the `delete` HTTP method.

### Workshop <a href="#workshop" id="workshop"></a>

You can use this [Express Cheatsheet](https://github.com/nbogie/express-notes/blob/master/express-cheatsheet.md) to help you.

**API** stands for Application Programming Interface.

Read this description of what an API does from [How To Geek](https://www.howtogeek.com/343877/what-is-an-api/).

> Think of an API like a menu in a restaurant. The menu provides a list of dishes you can order, along with a description of each dish. When you specify what menu items you want, the restaurant’s kitchen does the work and provides you with some finished dishes. You don’t know exactly how the restaurant prepares that food, and you don’t really need to. Similarly, an API lists a bunch of operations that developers can use, along with a description of what they do. The developer doesn’t necessarily need to know how, for example, an operating system builds and presents a “Save As” dialog box. They just need to know that it’s available for use in their app.

An API does not have to be web-based. But in our work, since we are doing web development, we will work only with web-based APIs (also referred to as **Web Services**), and we will communicate with those services using the protocol for the Web: **HTTP**.

> **Checkpoint:** Let us recap what we know about HTTP before continuing.

#### Objective <a href="#objective" id="objective"></a>

Our **API** will manage Beyoncé albums:

* Create a new album,
* Retrieve a list of albums or a single album,
* Update an existing album's information
* Delete an album

We will build these endpoints:

`GET /albums` should return all the albums `GET /albums/:albumId` should return a single album (that matches the passed albumId) `POST /albums` should save a new album `PUT /albums/:albumId` should update the album (that matches the passed albumId) `DELETE /albums/:albumId` should delete the album (that matches the passed albumId).

#### GET /Albums <a href="#get-albums" id="get-albums"></a>

1. In `server.js` Add the endpoint for `GET /albums`.

```
const albumsData = [
  {
    albumId: "10",
    artistName: "Beyoncé",
    collectionName: "Lemonade",
    artworkUrl100:
      "http://is1.mzstatic.com/image/thumb/Music20/v4/23/c1/9e/23c19e53-783f-ae47-7212-03cc9998bd84/source/100x100bb.jpg",
    releaseDate: "2016-04-25T07:00:00Z",
    primaryGenreName: "Pop",
    url:
      "https://www.youtube.com/embed/PeonBmeFR8o?rel=0&amp;controls=0&amp;showinfo=0",
  },
  {
    albumId: "11",
    artistName: "Beyoncé",
    collectionName: "Dangerously In Love",
    artworkUrl100:
      "http://is1.mzstatic.com/image/thumb/Music/v4/18/93/6d/18936d85-8f6b-7597-87ef-62c4c5211298/source/100x100bb.jpg",
    releaseDate: "2003-06-24T07:00:00Z",
    primaryGenreName: "Pop",
    url:
      "https://www.youtube.com/embed/ViwtNLUqkMY?rel=0&amp;controls=0&amp;showinfo=0",
  },
];

app.get("/albums", function (req, res) {
  res.send(albumsData);
});
```

1. Test the endpoint with Postman. `GET /albums` should return a JSON reply with the array we specified.
2. Add another item to the array and test that the `GET /albums` returns three items.

#### Step 1: GET /albums/:albumId <a href="#step-1-get-albumsalbumid" id="step-1-get-albumsalbumid"></a>

**Complete in-class (1) GET Exercise at this point**

Sometimes, we do not want to *list* all the information in one request, maybe we only want to get the information related to a single album. Imagine if we have a page to display the details of one album, we could call the server and get all albums then filter the one we need *client-side.* Would it not be more effective to tell the server to just return the one album we are interested in?

Let us add a new endpoint to return only a single album `GET /albums/:albumId`. In this case, *albumId* will tell us what album we can return so the call will be something like `GET /albums/10` and that will return the album with that has *albumId* 10.

This endpoint has something different. The endpoint `/albums/:albumId` has a *dynamic* part, because the *albumId* will vary depending on what the client sends. If we call `/albums/12` then albumId is 12, and if we call `/albums/10` then we will return the album with albumId 10, and so on.

**How can we achieve that using** `express` - `req.params`&#x20;

These are properties attached to the URL named route parameters. You prefix the parameter name with a colon (**:**) when writing your routes.

For instance,

```
  app.get("/albums/:albumId", (req, res) => {
   console.log(req.params.albumId)
  })
```

To send the parameter from the client, just replace its name with the value

```
  GET  http://localhost:3000/albums/123456
```

```
app.get("/albums/:albumId", function (req, res) {
  // req.params.albumId will match the value in the url after /albums/
  console.log(req.params.albumId);
  // now we can use the value for req.params.albumId to find the album requested
  // how do we "find" something in an array

  // finish the code yourself - it should end with res.send(album) where album is the single album you found  based on the id
});
```

**Tip** :- Install nodemon following previous week's [guide](https://syllabus.migracode.org/course-content/nodejs/week-1#step-7-setting-up-server-to-listen-to-changes-automatically)

#### Step 2: Add a new album <a href="#step-2-add-a-new-album" id="step-2-add-a-new-album"></a>

**Complete in-class (2) Post Exercise at this point**

> Our analogy with the Restaurant menu is somewhat incomplete. In a restaurant, we only GET items from the menu. In the world of APIs, we also have the possibility to create items, we can provide *ingredients* to create a new dish. In this case, we provide some data (a payload) and we use a different verb **POST** (Create) as opposed to GET.

`POST /albums` should save a new album and return `200` with JSON `{ success: true }` to the user.

```
// notice .post (not .get)
app.post("/albums", function (req, res) {
  console.log("POST /albums route");
});
```

Let's start by testing using Postman. Do a `POST` request to the endpoint and make sure it prints the console.log message we have added.

> In Postman, change the request `method` to `POST` instead of `GET` and test our endpoint. It should log the message to the terminal but the request will hang because we did not end it, i.e. we did not say `res.send(something)`

So what format does the client send the data with? It is up to us, but since we already are familiar with `json`, let us use it.

In order for our *server-side* to receive and use the data sent by the client. We will need to use a **middleware**. Lets take a pause to learn about middleware and then we will come back to this exercise.

#### What is a Middleware

Middleware is just a function which gives you access to `req` and `res` in the apps request-> response cycle.

#### **What does a middleware function look like?**

![](https://4042228299-files.gitbook.io/~/files/v0/b/gitbook-legacy-files/o/assets%2F-MRebciU3NcuLgsX3ijf%2F-M_eoJqHTMM1k9O-eGQ3%2F-M_fqVmV3P4ZC5csHvLQ%2Fimage.png?alt=media\&token=9500d399-315e-4170-b524-57c346eb28de)

There are several important things to point out here:

1. Middleware functions usually have 3 standard params `req`, `res`, and `next`. The first two are objects, the last is a function that will call the next middleware function, if there is one.
2. Usually there is a *middleware chain*, meaning a chain of functions that are called one after the other, with the last function sending the response back to the browser. So we get the request from the browser, make any modifications and data additions, and then send a response back.
3. You must call `next()` (unless it’s the last function in the chain) or the request will just hang and eventually timeout. In the browser this will manifest as a really long spinner before a message of “connection timed out” or similar.
4. Any changes you make to `req` or `res` will be available in the next middleware function.
5. `req` and `res` are unique for each request. Meaning that the changes you make to `req` or `res` in one request will not be reflected in a new request.&#x20;

#### How do I write my own middleware for certain routes?

This is where middleware is the most useful.

![](https://4042228299-files.gitbook.io/~/files/v0/b/gitbook-legacy-files/o/assets%2F-MRebciU3NcuLgsX3ijf%2F-M_eoJqHTMM1k9O-eGQ3%2F-M_frnQoWLC4BBIJfaxU%2Fimage.png?alt=media\&token=9ef8491a-e4fe-4f31-8979-d85a76d927ef)

When we run the above code, and request the `/user/someName` route, the server will check to see if the user is already logged in. If they are not, the server tells the browser to redirect to the `/login` route.

Now that we know what is a **middleware** function, lets continue with the exercise.

The **express.json()** function is a built-in middleware function in Express. It parses incoming requests with JSON payloads and is based on **body-parser.** It makes it easier for our endpoints to receive and understand different formats of data.

```
app.use(express.json()); // before our routes definition
```

Now we will receive the data as `req.body`.

```
app.post("/albums", function (req, res) {
  console.log("POST /albums route");
  console.log(req.body);
});
```

> Exercise: Use Postman to `POST` this data to `/albums` endpoint.

```
{
  "albumId": "13",
  "artistName": "Beyoncé",
  "collectionName": "B'Day (Deluxe Edition)",
  "artworkUrl100": "http://is5.mzstatic.com/image/thumb/Music/v4/6c/fc/6a/6cfc6a13-0633-f96b-9d72-cf56774beb4b/source/100x100bb.jpg",
  "releaseDate": "2007-05-29T07:00:00Z",
  "primaryGenreName": "Pop",
  "url": "https://www.youtube.com/embed/RQ9BWndKEgs?rel=0&amp;controls=0&amp;showinfo=0"
}
```

> Finish the code for the route `POST /albums` to add the album data to the albums list (how to amend an array?).

#### Step 3: Delete an album <a href="#step-3-delete-an-album" id="step-3-delete-an-album"></a>

**Complete in-class (3) DELETE Exercise at this point**

Lets look back at our original objectives.

> `DELETE /albums/:albumId` should delete the album that matches the passed albumId.

This means that `DELETE /albums/2` should delete an album with the id `2` and return `200` with JSON `{ success: true }` to the user.

The code will look like this:

```
// notice .delete
app.delete("/albums/:albumID", function (req, res) {
  console.log("DELETE /albums route");
});
```

Can you work out how to remove an album using this code?


# 3 - Workshop

Today we’re going to build a Node.js Express Rest API example that supports Token Based Authentication with JWT ([JSONWebToken](https://www.npmjs.com/package/jsonwebtoken)). You’ll know:

* What is CORS
* What is Authentication
* What is JSONWebToken
* What are environment variables
* What is password hashing
* Appropriate Flow for User Sign-up & User Login with JWT Authentication
* Node.js Express Architecture with CORS, Authentication & Authorization middlewares
* How to configure Express routes to work with JWT

### What is CORS

CORS stands for **C***ross*-**O***rigin* **R***esource* **S***haring*. It allows you to make requests from one website to another website in the browser, which is normally prohibited by another browser policy called the Same-Origin Policy (SOP).

CORS and SOP are both browser policies that have developed in response to issues of browser security and vulnerabilities.

The specific browser vulnerability that Same Origin Policy is meant to address is called “cross-site request forgery” (CSRF, or alternatively XSRF, don’t you love all these acronyms? XD ).

CORS allows servers to specify certain trusted ‘origins’ they are willing to permit requests from. Origins are defined as the combination of protocol (http or https), host (a domain like [www.example.com](http://www.example.com/) or an IP address) and port. Browsers which implement the CORS policy will include a HTTP header called ‘Origin’ in requests made with AJAX (or newer web APIs like Fetch).

![](https://4042228299-files.gitbook.io/~/files/v0/b/gitbook-legacy-files/o/assets%2F-MRebciU3NcuLgsX3ijf%2F-M_fudhy4USUCWLna3Z3%2F-M_fxsPDwWATBpSIA8FQ%2Fimage.png?alt=media\&token=ca33591e-3a63-49d1-b7cf-baac467cf43e)

### What is Authentication

Authentication is the process of verifying identity. A unique identifier is associated with a user which is the username or user id. Traditionally, we use a combination of username and password to authenticate a user.&#x20;

User authentication plays a central role in almost everything we do online. From apps to hardware and websites, user accounts and logins are everywhere. Authentication is critical for verifying a user's identity online and for confirming permissions so individuals can perform privileged actions.

Let’s take a quick look at how we used to do authentication:

![](https://4042228299-files.gitbook.io/~/files/v0/b/gitbook-legacy-files/o/assets%2F-MRebciU3NcuLgsX3ijf%2F-M_eoJqHTMM1k9O-eGQ3%2F-M_fu4InDYq7uE4hEpKV%2Fimage.png?alt=media\&token=41a2a96c-2eb7-46b3-888a-74c8a2a374ad)

HTTP is a *stateless* protocol. That means it doesn’t remember anything from request to request. If you login for one request, you’ll be forgotten, and will need to login again to make another request. As you can imagine, this can get very annoying fast.

The old-school solution has been to create what’s called a “session”. A session is implemented in two parts:

1. An object stored on the server that remembers if a user is still logged in, a reference to their profile, etc.
2. A cookie on the client-side that stores some kind of ID that can be referenced on the server against the session object’s ID.

**Cookie-based Auth:**

![](https://4042228299-files.gitbook.io/~/files/v0/b/gitbook-legacy-files/o/assets%2F-MRebciU3NcuLgsX3ijf%2F-M_eoJqHTMM1k9O-eGQ3%2F-M_fuAzfAWqEyza9WRP0%2Fimage.png?alt=media\&token=4d2c4603-77be-4021-b5b1-893c0d5bbe97)

If a user visits a web page (makes a request) and the server detects a session cookie, it will check if it currently has a session stored with the ID from the cookie, and if that object is still valid (whatever that means: not expired, not revoked, not blacklisted, etc). A ***cookie*** is a small file of letters and numbers downloaded on to your computer when you access certain websites.

If the session is still valid, it will respond with the requested web page (or data. If it finds a session object, that object can contain data and with that, the server can “remember” who you are and what you were doing (e.g. if this is an e-commerce store, what products you’ve added to our shopping cart).

If the session is not valid (or no session cookie was detected) it will respond with some sort of error message saying that the request is “unauthorized”.

This type of setup has worked pretty well for us since the web came out and since we’ve been visiting websites that do most of their “thinking” on the server side. Typically, this has been a conversation between the user’s front-end browser and a corresponding back-end server in a one-to-one relationship.

![](https://4042228299-files.gitbook.io/~/files/v0/b/gitbook-legacy-files/o/assets%2F-MRebciU3NcuLgsX3ijf%2F-M_fudhy4USUCWLna3Z3%2F-M_fv7GbK7XCezHQEGce%2Fimage.png?alt=media\&token=97713e36-40ba-4cea-acda-2f030677d469)

This setup still works, but these days we have many different situations that require different setups (e.g. multiple mobile native apps alongside large single-page web apps contacting multiple back-end services, that may be nothing more than json data without a webpage at all). In these types of scenarios, the cookie you get from one server, won’t correspond — or even be sent — to another server (let alone the problems that get created with CORS).

#### Drawbacks With Cookie-based Auth

![](https://4042228299-files.gitbook.io/~/files/v0/b/gitbook-legacy-files/o/assets%2F-MRebciU3NcuLgsX3ijf%2F-M_fudhy4USUCWLna3Z3%2F-M_fw4rtl5JHDp8DR8if%2Fimage.png?alt=media\&token=76606f4c-62eb-423a-b9e1-7cde38617aa9)

* **Sessions**: need to be stored somewhere, either in memory, in a database and they need to be managed so that they are removed when they expire or are otherwise invalidated.
* **Poor Scalability**: The session store needs to be scaled when scaling the server. The store uses up resources, and adds complexity.
* **Performance Issues**: When the session needs to be stored on the server, a lot of database/store lookups need to happen on every request which can bog down the server.
* **Native Apps (or non-browser apps)**: Browsers handle cookies, but custom apps don’t (at least not easily), so a different kind of session mechanism is needed.
* **CSRF**: If cookies are being used, extra security is needed to prevent cross-site request forgery attacks since the cookie will be automatically sent to the server with any request made from that site.
* **CORS**: Cookies + CORS doesn’t work well across different domains (actually, real cross-domain doesn’t work at all).

### What is JSONWebToken

**What Is JSON?**

JSON stands for JavaScript Object Notation. It is a text-based format for transmitting data across web applications. It stores information in an easy-to-access manner, both for developers and computers. It can be used as a data format by any programming language and is quickly becoming the preferred syntax for APIs.

**What Are Tokens?**

Now that you understand JSON as a data text format, you may be wondering what tokens are. To put it simply, a token is a string of data that represents something else, such as an identity. In the case of authentication, a non-JWT based token is a string of characters that allows the receiver to validate the sender’s identity. The important distinction here is lack of meaning within the characters themselves.&#x20;

**What Do JWTs Look Like?**

JWTs differ from other web tokens in that they contain a set of claims. Claims are used to transmit information between two parties. What these claims are depends on the use case at hand. For example, a claim may assert who issued the token, how long it is valid for, or what permissions the client has been granted.

A JWT is a string made up of three parts, separated by dots (.), and serialized using base64. In the most common serialization format, compact serialization, the JWT looks something like this

![](https://4042228299-files.gitbook.io/~/files/v0/b/gitbook-legacy-files/o/assets%2F-MRebciU3NcuLgsX3ijf%2F-M_fudhy4USUCWLna3Z3%2F-M_g-mMlpZHfF-NpqqCx%2Fimage.png?alt=media\&token=e7fec002-5b3c-42c4-86d1-e85374698488)

The first section of the JWT is the header, which is a Base64-encoded string. If you decoded the header it would look something similar to this:

```
{
  "alg": "HS256",
  "typ": "JWT"
}
```

The header section contains the hashing algorithm, which was used to generate the sign and the type of the token.

The second section is the payload that contains the JSON object that was sent back to the user. Since this is only Base64-encoded, it can easily be decoded by anyone.

It is recommended not to include any sensitive data in JWTs, such as passwords or personally identifiable information.

Usually, the JWT body will look something like this, though it's not necessarily enforced:

```
{
  "sub": "1234567890",
  "name": "John Doe",
  "iat": 1516239022
}
```

Most of the time, the `sub` property will contain the ID of the user, the property `iat`, which is shorthand for *issued at*, is the timestamp of when the token is issued.

You may also see some common properties such as `eat` or `exp`, which is the expiration time of the token.

The final section is the signature of the token. This is generated by hashing the string `base64UrlEncode(header) + "." + base64UrlEncode(payload) + secret` using the algorithm that is mentioned in the header section.

The `secret` is a random string which only the server should know. No hash can be converted back to the original text and even a small change of the original string will result in a different hash. So the `secret` cannot be reverse-engineered.

When this signature sends back to the server it can verify that the client has not changed any details in the object.

According to the standards, the client should send this token to the server via the HTTP request in a header called `Authorization` with the form `Bearer [JWT_TOKEN]`. So the value of the `Authorization` header will look something like:

```
Bearer eyJhbGciOiJIUzI1NiIsInR5cCI6IkpXVCJ9.eyJzdWIiOiIxMjM0NTY3ODkwIiwibmFtZSI6IkpvaG4gRG9lIiwiaWF0IjoxNTE2MjM5MDIyfQ.XbPfbIHMI6arZ3Y922BhjWgQzWXcXNrz0ogtVhfEd2o
```

#### JSON Web Tokens Are Better

JWTs don’t use sessions, have no problem with native apps, and actually don’t even need special CSRF protections, and they work very well with CORS.

![](https://4042228299-files.gitbook.io/~/files/v0/b/gitbook-legacy-files/o/assets%2F-MRebciU3NcuLgsX3ijf%2F-M_fudhy4USUCWLna3Z3%2F-M_fzPUSLWGbzh4on2EB%2Fimage.png?alt=media\&token=ff18ec75-67a7-4152-82f2-32fbde34cd4d)

With JWT you register yourself with an app, much the same way you would with an old-school app, and you login with your credentials (e.g. username/password). But instead of making a session and setting a cookie, the server will send you a JSON Web Token instead. Now you can use that token to do whatever you want to do with the server (that you have authorization to do).

Think of it like a hotel key: you register at the front desk and they give you one of those plastic electronic keys that you can use to access your room, the pool, and the garage. But you can’t open other people’s rooms or go into the manager’s office. And, like a hotel key, when your stay has ended, you’re simply left with a useless piece of plastic (i.e. the token doesn’t do anything any more after it’s expired).

### What are environment variables

Environment variables are predetermined values that are typically used to make it possible to configure a value in your code from outside of your application.

![](https://4042228299-files.gitbook.io/~/files/v0/b/gitbook-legacy-files/o/assets%2F-MRebciU3NcuLgsX3ijf%2F-M_g24W2T7XvsKUM15T7%2F-M_g3DUzn5Qm4wdV0T36%2Fimage.png?alt=media\&token=e33ccbb4-85b1-4c43-bec3-960273984711)

You'll often find these variables stored in a file named with some kind of variation of  `.env`.

**How can I keep these** `.env` **files secure?**

This is probably one of the more important points here – you need to ensure you're handling these files with care and not checking them into a git repository. If you expose these keys by uploading them to a public location by mistake, the internet could easily find these keys and people could abuse them for their own gains.

So how can we keep these secure? The easiest way is to add the environment file where you keep these keys to your `.gitignore` file.

To do this, simply open your existing `.gitignore` file or create a new one at the root of your repository and add the filename as a new line:

```
# Inside .gitignore
.env
```

### What is password hashing?

A hash is just a way to represent any data as a unique string of characters. You can hash anything: music, movies, your name, or this article. Metaphorically speaking, hashing is a way of assigning a “name” to your data. It allows you to take an input of any length and turn it into a string of characters that is always the same length. Obviously, there are many methods (algorithms) to do this.

A few of the most popular hashing algorithms:

* MD5 – Given any data will return a unique 32 character hash.
* SHA1 – Given any data will return a unique 40 character hash.
* SHA256 – Given any data will return a unique 64 character hash; designed by the National Security Agency.

The reason hashing is secure is simple: hashing is a one way operation. It cannot be reversed.

**bcrypt** is an npm library that helps you hash passwords. You can read about [bcrypt in Wikipedia](https://en.wikipedia.org/wiki/Bcrypt) as well as through this [link](https://www.npmjs.com/package/bcrypt).

### Workshop JWT Authentication Flow for User Sign-up & User Login

First, we create a folder for our project:

```
mkdir node-auth-project-migracode
cd node-auth-project-migracode
```

Then we initialize the application with a *package.json* file:

```
npm init

name: (auth-project-migracode) 
version: (1.0.0) 
description: Authentication using JWT in REST API
entry point: (index.js) server.js
test command: 
git repository: 
author: yogi
license: ISC
Is this ok? (yes) yes
```

We need to install necessary modules: `express`, `cors`, `dotenv`, `jsonwebtoken` and `bcrypt`.\
Run the command:

```
npm install express dotenv cors jsonwebtoken bcrypt
```

**Important:** You have to install nodemon globally in your system if you haven't done so already. Using this command `npm i -g nodemon`

Once all these packages are installed, add a script in *package.json* `"start": "nodemon server.js"`

The package.json file now looks like this:

```
{
  "name": "auth-project-migracode",
  "version": "1.0.0",
  "description": "Authentication using JWT in REST API",
  "main": "server.js",
  "scripts": {
    "test": "echo \"Error: no test specified\" && exit 1",
    "start": "nodemon server.js"
  },
  "author": "yogi",
  "license": "ISC",
  "dependencies": {
    "bcrypt": "^5.0.1",
    "cors": "^2.8.5",
    "dotenv": "^8.2.0",
    "express": "^4.17.1",
    "jsonwebtoken": "^8.5.1"
  }
}
```

###

### Setup Express web server

In the project's root folder which is `node-auth-project-migracode`, let’s create a new *server.js* file:

```
const express = require("express");
const cors = require("cors");


// initializing express application
const app = express();


// parse requests of content-type - application/json
app.use(express.json());

const corsOptions = {
  origin: "http://localhost:3000"
};
app.use(cors(corsOptions));  // enable CORS


// simple route
app.get("/", (req, res) => {
  res.json({ message: "Welcome to MigraCode Auth application." });
});


// set port, listen for requests
const PORT = process.env.PORT || 4000;
app.listen(PORT, () => {
  console.log(`Server is running on port ${PORT}.`);
});

```

Let me explain what we’ve just done:

1\) **import** `express` **and** `cors` **modules**:

* Express is for building the Rest APIs
* `express.json()` helps to parse the request and create the `req.body` object
* [cors](https://www.npmjs.com/package/cors) provides Express middleware to enable CORS

2\) **create an Express app**, then add `express.json()` and `cors` middleware using `app.use()`method. Notice that we set origin `http://localhost:3000`.\
3\) **define a GET route** which is simple for test.

4\)  **listen on port 4000** for incoming requests.

**Note:** we assign PORT variable equal to `process.env.PORT || 4000` which means if PORT is defined already as an environment variable then it will be selected otherwise `4000` will be selected.  We will create the `.env` file in a later step.

Now let’s run the app with command: `nodemon server.js`.\
Open your browser with URL <http://localhost:4000/>, you will see:

![](https://4042228299-files.gitbook.io/~/files/v0/b/gitbook-legacy-files/o/assets%2F-MRebciU3NcuLgsX3ijf%2F-M_iZfkdXjl-zGYZdq-J%2F-M_ienOv0XLWWaR1Lu9H%2Fimage.png?alt=media\&token=0663eff6-bb85-4f1a-a8d3-124fca067f99)

### Database / Data store

Since we have not learned how databases works, we will continue working with JSON files.

Lets create a JSON file with an empty array inside it where we will save the user data after user registration.

In the project's root folder which is `node-auth-project-migracode`, let’s create a new directory `database` with a file *db.json* using following command:

```
mkdir database
cd database
touch db.json
```

Now open this db.json file and create an empty array inside it like this:

```
[]
```

###

### Define Routes

When a client sends a request for an endpoint using an HTTP request (GET, POST, PUT, DELETE), we need to determine how the server will respond by setting up the routes.

We can separate our routes depending on the resources we want to access.

**User Authentication:**

* POST `/user/sign-up`
* POST `/user/sign-in`
* POST `/user/auth`

In the project's root folder `node-auth-project-migracode`, let’s create a new directory `routes` with a file *user.js* using following command:

```
mkdir routes
cd routes
touch user.js
```

### Registration endpoint

Let's create a user authentication endpoint in the *user.js* file we just created

**node-auth-project-migracode/routes**/*user.js*

```
const express = require("express");
const bcrypt = require("bcrypt");   // bcrypt is used to hash password before saving it to database
const fs = require("fs");   // fs is node's inbuilt file system module used to manage files

const usersDb = require("../database/db.json");   // import existing data from db.json file


const router = express.Router();   // we create a new router using express's inbuilt Router method


// user registration / sign-up
router.post("/sign-up", async (req, res) => {
  const {  name, email, password } = req.body;

  try {
    const user = await usersDb.filter(user => user.email === email);

    if (user.length > 0) {
      return res.status(400).json({error: "User already exist!"});
    }

    const salt = await bcrypt.genSalt(10);
    const bcryptPassword = await bcrypt.hash(password, salt);

    let newUser = {
      id: usersDb.length,
      name: name,
      email: email,
      password: bcryptPassword
    }

    usersDb.push(newUser);  // we add newUser to usersDb array


    // we save the updated array to db.json file by using fs module of node
    
    await fs.writeFileSync('./database/db.json', JSON.stringify(usersDb));

    
    /* Once the user registration is done successfully, we will generate a
      jsonwebtoken and send it back to user. This token will be used for
      accessing other resources to verify identity of the user.
      
      The following generateJWT function does not exist till now but we
      will create it in the next step. */
    
    const jwtToken = generateJWT(newUser.id);

    return res.status(201).send({ jwtToken: jwtToken, isAuthenticated: true});

  } catch (error) {
    console.error(error.message);
    res.status(500).send({error: error.message});
  }
});


module.exports = router;   // we need to export this router to implement it inside our server.js file

```

**Line 22:** We create a salt using bcrypt. Salting is simply **the addition of a unique, random string of characters known only to the site to each password before it is hashed.** Typically, this “salt” is placed in front of each password.&#x20;

**Line 23:** We hash the password provided by user using bcrypt and the salt we generated in the previous line.

### JWT Secret

First we need to create a secret which we will use for generating JWT token. Secret is just a long string which can contain anything.&#x20;

In the project's root folder which is `node-auth-project-migracode`, let’s create a new file `.env` with a secret inside it using following command:

```
touch .env
```

Now inside this file create a secret like this:

```
jwtSecret = "migracodeAuthJan2021"
```

This is your secret to sign the JWT token. You should never share this secret, otherwise someone else could use it to forge JWT tokens to gain unauthorized access to your service. The more complex this access token is, the more secure your application will be.

###

### JWT Generator

In the project's root folder `node-auth-project-migracode`, let’s create a new directory `utils` with a file *generateJWT.js* using following command:

```
mkdir utils
cd utils
touch generateJWT.js
```

Now open this *generateJWT.js* file and create a function like this:

```
const jwt = require("jsonwebtoken");
require("dotenv").config();   // here we use dotenv module which we installed in the begining to access environment variables from .env file

function generateJWT(user_id) {
  // payload is just an object which usually contains some information about user but not confidential information such as password.
  const payload = {
    user: {
      id: user_id
    }
  };

  return jwt.sign(payload, process.env.jwtSecret, { expiresIn: "1h" });
}

module.exports = generateJWT;  // we export this function to use it inside routes/user.js
```

Lets import this function inside **routes/**&#x75;ser.js

Put the following code on line 7 in *user.js* file right before we create a router on line 8

```
const generateJWT = require("../utils/generateJWT");
```

At this point our user router is ready with one endpoint for user registration/sign-up. We will connect this user router to our server.js in the next step.

### Implement User Router in server.js

All we need now is to import the router right before we initialize our application using `const app = express();`  by using following code inside your *server.js* file

**Hint:** put this code in line 4

```
const user = require("./routes/user");
```

Once the router is imported we need to use this router in our application by writing following code before `app.listen(...)`

**Hint:** put this code in line 22 or 23

```
app.use("/user", user);
```

### &#x20;<a href="#homework" id="homework"></a>

### Test User Registration in Postman <a href="#homework" id="homework"></a>

We will create a new POST request to `localhost:4000/user/sign-up` URL with a body in JSON format with three key-value pairs which we need for your registration. It will look like the following

![](https://4042228299-files.gitbook.io/~/files/v0/b/gitbook-legacy-files/o/assets%2F-MRebciU3NcuLgsX3ijf%2F-M_izuZD0GIYdC3WO30G%2F-M_j0KEPfxKyuUn1AFea%2Fimage.png?alt=media\&token=f48f5e9f-b76b-457d-a9d8-1fdd43b010c9)

Once you hit the send button, it will send a request to our server and make sure that the server is running and you are able to see this in your terminal

![](https://4042228299-files.gitbook.io/~/files/v0/b/gitbook-legacy-files/o/assets%2F-MRebciU3NcuLgsX3ijf%2F-M_izuZD0GIYdC3WO30G%2F-M_j1KjkK91tJjRTJuV1%2Fimage.png?alt=media\&token=741cd407-a145-4f19-a9fa-aa2a9bb0e126)

Once the request is sent with a name, email and password, we will receive a response back from our server which will look something like this in Postman

![](https://4042228299-files.gitbook.io/~/files/v0/b/gitbook-legacy-files/o/assets%2F-MRebciU3NcuLgsX3ijf%2F-M_izuZD0GIYdC3WO30G%2F-M_j1sm5JFWs2XxpF6y8%2Fimage.png?alt=media\&token=fdcc5473-82a9-401f-b9dd-0a517209f5f2)

As you can see we have **Status: 201 Created** and we received an object with a token.

If we try to send the same request again we will receive something like this

![](https://4042228299-files.gitbook.io/~/files/v0/b/gitbook-legacy-files/o/assets%2F-MRebciU3NcuLgsX3ijf%2F-M_izuZD0GIYdC3WO30G%2F-M_j2Rqdv0jxUbG3ZqfU%2Fimage.png?alt=media\&token=c10c88de-e6a5-48ad-8f6b-9f75963531b1)

This means that the user already exists and we can not create a new user with same email.

At this point our user registration endpoint is ready and we can move forward to create login/sign-in endpoint.

### Login/Sign-in endpoint

We have already done all the tedious part of setting up a server and creating a router. Now we just need to append a new endpoint in the existing *user.js* file inside **routes** directory.

Lets append the following code inside **routes/**&#x75;ser.js file

**Hint:** add it between sign-up endpoint and export statement which is the last line of code in the file.

```

// user sign-in / login
router.post("/sign-in", async (req, res) => {
  const { email, password } = req.body;

  try {
    const user = await usersDb.filter(user => user.email === email);

    if (user.length === 0) {
      return res.status(401).json({error: "Invalid Credential", isAuthenticated: false});
    }


    // if the user exist then we will compare the password provided by user with the hashed password we stored during user registration
    const isValidPassword = await bcrypt.compare(
      password,
      user[0].password
    );

    if (!isValidPassword) {
      return res.status(401).json({error: "Invalid Credential", isAuthenticated: false});
    }

    
    // if the password matches with hashed password then we generate a new token and send it back to user
    const jwtToken = generateJWT(user[0].id);

    return res.status(200).send({ jwtToken, isAuthenticated: true });

  } catch (error) {
    console.error(error.message);
    res.status(500).send({error: error.message});
  }
});

```

### Test User Login/Sign-in in Postman

We will create a new POST request to `localhost:4000/user/sign-in` URL with a body in JSON format with two key-value pairs that we need for login. It will look like the following:

![](https://4042228299-files.gitbook.io/~/files/v0/b/gitbook-legacy-files/o/assets%2F-MRebciU3NcuLgsX3ijf%2F-M_j3S3YpqScXkmtW4S2%2F-M_j7nLaBGADjKQUGWUu%2Fimage.png?alt=media\&token=fdc6b8ee-34ef-465f-b56d-c134e97a9bc6)

Once you hit the send button, it will send a request to our server and make sure that the server is running and you are able to see this in your terminal

![](https://4042228299-files.gitbook.io/~/files/v0/b/gitbook-legacy-files/o/assets%2F-MRebciU3NcuLgsX3ijf%2F-M_izuZD0GIYdC3WO30G%2F-M_j1KjkK91tJjRTJuV1%2Fimage.png?alt=media\&token=741cd407-a145-4f19-a9fa-aa2a9bb0e126)

Once the request is sent with an email and password, we will receive a response back from our server which will look something like this in Postman

![](https://4042228299-files.gitbook.io/~/files/v0/b/gitbook-legacy-files/o/assets%2F-MRebciU3NcuLgsX3ijf%2F-M_j3S3YpqScXkmtW4S2%2F-M_j7zmNIzh1shHRHL9B%2Fimage.png?alt=media\&token=717991ec-935e-4abc-b5da-98ebc137d43f)

As you can see that the **Status: 200 OK** and we received an object with a token.

If we try to send a request with **different password** we will receive something like this

![](https://4042228299-files.gitbook.io/~/files/v0/b/gitbook-legacy-files/o/assets%2F-MRebciU3NcuLgsX3ijf%2F-M_j3S3YpqScXkmtW4S2%2F-M_j8PnC4DFluvZsCmZx%2Fimage.png?alt=media\&token=9655e1a5-aaf7-4ad8-b5a7-6866f783957c)

This means that the provided login credentials are incorrect and we have **Status: 401 Unauthorized**

At this point our user registration and login/sign-in endpoints are ready and we can move forward to create our last endpoint.

### User Authorization endpoint

This endpoint is created to verify the user identity before sending back any resource to the user. Lets start by adding the following code in **routes/**&#x75;ser.js file

**Hint:** add it between sign-in endpoint and export statement which is the last line of code in the file.

```
// user authorization
router.post("/auth", authenticate, (req, res) => {
  try {
    
    res.status(200).send({isAuthenticated: true});

  } catch (error) {
    console.error(error.message);
    res.status(500).send({error: error.message, isAuthenticated: false});
  }
});
```

As you might have already noticed, we have a new argument between `"/auth"` and `(req, res)` called **authenticate**. It is a custom middleware function which we will create in the next step. We will use this authenticate middleware in all the endpoints which we want to protect to verify user identity before sending back the requested resources.

### Authenticate Middleware

In the project's root folder `node-auth-project-migracode`, let’s create a new directory `middleware` with a file *authenticate.js* using the following command:

```
mkdir middleware
cd middleware
touch authenticate.js
```

Now open this *authenticate.js* file and create a function like this:

```
const jwt = require("jsonwebtoken");
require("dotenv").config();


function authenticate (req, res, next) {
  // Get token from request headers
  let token = req.header("authorization");
  
  // Check if token exists
  if (!token) {
    return res.status(403).send({ message: "authorization denied", isAuthenticated: false });
  }

  token = token.split(" ")[1];
  
  // Verify token using jwt
  try {
    /* this will return the user id (user:{id: user_id}) which we 
    provided as payload while generating JWT token */
    const verify = jwt.verify(token, process.env.jwtSecret);

    req.user = verify.user;

    next();
    
  } catch (err) {
    res.status(401).send({ message: "Token is not valid", isAuthenticated: false });
  }
};

module.exports = authenticate;  // we export it to use it inside user router
```

**Line 7:** We will receive an Authorization header from user with every request to a protected endpoint which requires user authentication. Without this Authorization header, user can not access any information.

**Line 14:** In this middleware, we read the value of the authorization header. Since the `authorization` header has a value in the format of `Bearer [JWT_TOKEN]`, we have split the value by the space and separated the token.

**Line 20:** Then we have verified the token with JWT.&#x20;

**Line 22:** Once verified, we attach the `user` object into the request and continue. Otherwise, we will send an error to the client.

Now lets import this middleware function inside **routes/**&#x75;ser.js

Put the following code on line 6 in *user.js* file right before we create a router on line 8

```
const authenticate = require("../middleware/authenticate");
```

At this point our user router is ready with all three endpoints for user registration/sign-up, login/sign-in and authorization.

### Test User Authorization in Postman

We will create a new POST request to the `localhost:4000/user/auth` URL with a Authorization header which we need for user verification. You will have to select **Bearer Token** from the drop-down under Authorization tab and paste the token (which you received after login or registration) on the right side of Token. It will look like the following

![](https://4042228299-files.gitbook.io/~/files/v0/b/gitbook-legacy-files/o/assets%2F-MRebciU3NcuLgsX3ijf%2F-M_jF0uWRrtjiXJ8rm5Z%2F-M_jJNqFqYd6o_siTaPn%2Fimage.png?alt=media\&token=640bc1f8-04bf-46e7-9aee-4012fa790cb3)

Once you hit the send button, it will send a request to our server and make sure that the server is running and you are able to see this in your terminal

![](https://4042228299-files.gitbook.io/~/files/v0/b/gitbook-legacy-files/o/assets%2F-MRebciU3NcuLgsX3ijf%2F-M_izuZD0GIYdC3WO30G%2F-M_j1KjkK91tJjRTJuV1%2Fimage.png?alt=media\&token=741cd407-a145-4f19-a9fa-aa2a9bb0e126)

Once the request is sent with a Authorization header containing **Bearer Token**, we will receive a response back from our server that will look something like this in Postman

![](https://4042228299-files.gitbook.io/~/files/v0/b/gitbook-legacy-files/o/assets%2F-MRebciU3NcuLgsX3ijf%2F-M_jF0uWRrtjiXJ8rm5Z%2F-M_jK3tS4dFESVIwu4Jp%2Fimage.png?alt=media\&token=7eda301a-03ef-473b-9fde-4f9eb67ff759)

As you can see that the **Status: 200 OK** and we received an object with a property `isAuthenticated: true`

If we try to send a request without **Bearer Token** we will receive something like this

![](https://4042228299-files.gitbook.io/~/files/v0/b/gitbook-legacy-files/o/assets%2F-MRebciU3NcuLgsX3ijf%2F-M_jF0uWRrtjiXJ8rm5Z%2F-M_jKPv1L3muCVUQLZRx%2Fimage.png?alt=media\&token=1b263973-cebd-4d1a-86ff-38e7ef916726)

This means that we cannot access protected endpoints that use the authenticate middleware without a **Bearer Token** and we have **Status: 403 Forbidden**

Now we can add this authenticate middleware to any endpoint which we want to protect and users will have to provide a token to access the resources of these endpoints.


# Databases

**Databases are essential for any modern web application and are used in many languages. In this module we teach the theory behind databases while also showing the implementation of a database.**

Below an overview of the week-by-week topics - click on the title to find more details.

{% content-ref url="/pages/-MS3tICBJCeGqi23EEBy" %}
[1 - Introduction to SQL](/courses/introduction-3/course-content/databases/week-1)
{% endcontent-ref %}

{% content-ref url="/pages/-MS3tcDYBZ80XioS1UJE" %}
[2 - SQL with Node](/courses/introduction-3/course-content/databases/week-2)
{% endcontent-ref %}

{% content-ref url="/pages/-MS3tm7Qa3goGS5Xzr0z" %}
[3 - CRUD with SQL and Node](/courses/introduction-3/course-content/databases/week-3)
{% endcontent-ref %}

![](https://4042228299-files.gitbook.io/~/files/v0/b/gitbook-legacy-files/o/assets%2F-MRebciU3NcuLgsX3ijf%2F-MYfTOsy9ryhYjQ6mcOZ%2F-MYfTxKEryUkkyHUHFPH%2FP9010153migracode-bcn.jpg?alt=media\&token=bdb30e85-db1d-4e29-a505-66c773ff9791)


# 1 - Introduction to SQL

### Learning Objectives <a href="#learning-objectives" id="learning-objectives"></a>

By the end of this lesson students should be able to

* Explain why databases are needed in Web Development
* Define what SQL is and what it is used for
* Describe what `table`, `rows` and `columns` are used for in a relational database
* Install and create a database using PostgreSQL
* Create a table in a database using PostgreSQL
* Insert data into a table using PostgreSQL
* Retrieve data from a table using PostgreSQL
* Retrieve data from a table using conditionals in PostgreSQL
* List the different kinds of data that can be held in a PostgreSQL database

### Introduction to databases <a href="#introduction-to-databases" id="introduction-to-databases"></a>

A database is a structured set of data held in a computer. It provides ways to store, retrieve and organize information.

#### Why do we need them? <a href="#why-do-we-need-them" id="why-do-we-need-them"></a>

In the past few weeks, you stored and retrieved data using files. This is fine for simple data but it can quickly become an issue as your application becomes more complex and needs to store and manipulate more complicated data. For example, imagine you want to develop the next biggest hotel booking application. You will need to store the list of hotels available for booking somewhere, and as you add more features, you will need to save users information, the reviews they post for each hotel, but also the bookings each user makes. You can see that the data you need to handle can become very complicated, especially when you need to consider that data are not static, as they can be updated or deleted. To work more effectively with data, we can then use a database, which present the following benefits:

* A database defines a structure for your data and the relationships between entities
* A database provides convenient and performant ways to safely store and retrieve data
* A database provides a mechanism to check the validity of your data

#### Different types of database <a href="#different-types-of-database" id="different-types-of-database"></a>

There are many different kinds of database and different implementations. Sometimes, a database type is a better fit to certain use case or certain problems. The most well-known database types include relational database, key/value database, graph database and document database (also known as NoSQL). For this class, we will focus specifically on relational database as they are the most widely used and supported. You can consult [DB-Engines](https://db-engines.com/en/ranking) to see a ranking of the most used database, as you can see, there is a lot of them!

### Introduction to PostgreSQL <a href="#introduction-to-postgresql" id="introduction-to-postgresql"></a>

*"PostgreSQL is a powerful, open source object-relational database system that uses and extends the SQL language combined with many features that safely store and scale the most complicated data workloads. The origins of PostgreSQL date back to 1986 as part of the POSTGRES project at the University of California at Berkeley and has more than 30 years of active development on the core platform."* (source: [postgresql.org](https://www.postgresql.org/about/))

#### What is SQL? <a href="#what-is-sql" id="what-is-sql"></a>

* Pronounced S-Q-L or sequel
* Stands for Structured Query Language
* SQL is the standard language used to communicate with relational database
* SQL statements are used to query, create, update, delete records in a database
* SQL statements are executed by a RDBMS.

#### What is a RDBMS? <a href="#what-is-a-rdbms" id="what-is-a-rdbms"></a>

* Stands for Relational Database Management System
* It is a program that processes SQL statements to manage a relational database
* PostgreSQL is a RDBMS.

#### What characterizes a relational database? <a href="#what-characterizes-a-relational-database" id="what-characterizes-a-relational-database"></a>

As mentioned previously, a relational database is a specific type of database. Data is stored in *tables* of *rows* and *columns* as per the example below:

![](https://4042228299-files.gitbook.io/~/files/v0/b/gitbook-legacy-files/o/assets%2F-MRebciU3NcuLgsX3ijf%2F-MhiFXjNay4AnWB3ya32%2F-MhiFz5yKBfisWo0_p0v%2Fimage.png?alt=media\&token=c9c3bbf9-1ca1-46ba-a197-5eaec06829e5)

**How about storing everything in one big table as shown below? Why isn't it a good idea?**

A customer could have several bookings. If the customer changes their telephone number, you would have to update every single rows for this customer with their new number, which is more prone to errors. As a general rule, try to avoid duplication of data, and instead design your system in a way that you have a single source of truth for each piece of data. The example below is **NOT** a good solution.

![](https://4042228299-files.gitbook.io/~/files/v0/b/gitbook-legacy-files/o/assets%2F-MRebciU3NcuLgsX3ijf%2F-MhiFXjNay4AnWB3ya32%2F-MhiG152-Ti509EsZ8uW%2Fimage.png?alt=media\&token=1aa216c0-0bcf-4086-ad42-5f41621c48a8)

#### Database modeling exercise <a href="#database-modeling-exercise" id="database-modeling-exercise"></a>

**Scenario:** You've been hired to create a database for a new company which wants to revolutionize the hotel booking market. The first task you've been given is to model how the company would store its data in a database. Here are your requirements:

* The company wants to store in the database all the hotels available on their website
* For each hotel, the company wants to record the name and the number of rooms. Also each hotel can have several room types and each room type has a specific price.
* The company also needs to store the information of customers who registered on their website with a name, an email and an address.
* Customers need to be able to record their bank details which consist of an account number and a sort code. Each customer can register several bank accounts if they want.
* Finally, as customers can book a room in an hotel starting on a specific date for a specific number of nights, the company wants to store the bookings.

With mentors help, model the database for this company. In particular, show the different entities, fields and relationships between each entity.

#### Check your PostgreSQL installation <a href="#check-your-postgresql-installation" id="check-your-postgresql-installation"></a>

Open a terminal in your laptop and verify the command `psql -V` returns the version of PostgreSQL. In psql, you can type use the command `help` to show the help menu. Within the command prompt, you can enter SQL statements and run them against PostgreSQL. To quit psql, enter the command `\q`.

### Communicating with the database using SQL <a href="#communicating-with-the-database-using-sql" id="communicating-with-the-database-using-sql"></a>

All commands in the following need to be entered in a psql command prompt. However, sometimes it's easier to write the code in a file and then load the file with psql. For example, if you write your SQL code in a file called `test.sql`, you can then execute it with `psql -d DATABASE_NAME -f test.sql`.

#### Creating a new database <a href="#creating-a-new-database" id="creating-a-new-database"></a>

In a terminal, create a new database named `cyf_hotels` with the following command:

```
createdb cyf_hotels
```

Then connect to your database with:

```
psql cyf_hotels
```

#### Creating a table <a href="#creating-a-table" id="creating-a-table"></a>

Data are stored in tables. Let's first create a `customers` table to hold the details of customers.

```
CREATE TABLE customers (
  id        SERIAL PRIMARY KEY,
  name      VARCHAR(30) NOT NULL,
  email     VARCHAR(120) NOT NULL,
  address   VARCHAR(120),
  city      VARCHAR(30),
  postcode  VARCHAR(12),
  country   VARCHAR(20)
);
```

Few things to mention from the SQL statement above:

* `SERIAL PRIMARY KEY` defines the column `id` as a unique identifier for each row. Moreover, this identifier will automatically incremented every time data is inserted. `id` is called the primary key of the table `customers`.
* `VARCHAR(20)` defines the column to hold text data with a maximum length of 20 characters
* `NOT NULL` defines the column as not nullable, which means that you must set a value.
* Other useful types include `INT`, `TEXT`, `BOOLEAN` and `DATE`.
* The database will reject any values which don't match the type.

#### DBeaver, a SQL client software <a href="#dbeaver-a-sql-client-software" id="dbeaver-a-sql-client-software"></a>

[DBeaver](https://dbeaver.com/) is a SQL client software application and a database administration tool. If you think create tables in the command line is a bit confusing to you, this is your solution.

* [Download Community Version](https://dbeaver.io/download/)
* [Overview](https://dbeaver.com/docs/wiki/Application-Window-Overview/)
* [Database Navigator](https://dbeaver.com/docs/wiki/Database-Navigator/)
* [SQL Editor](https://dbeaver.com/docs/wiki/SQL-Editor/)

**Exercise 1**

* Create the `customers` table in the `cyf_hotels` database.
* Verify that the table `customers` is created with the psql command `\dt` which lists the existing tables, or update the list of tables using DBeaver.
* Display the table `customers` definition with the command `\d customers` and verify that it matches what you expect, or use DBeaver
* Create a new table `hotels` in the `cyf_hotels` database with the following columns: an `id`, a `name`, the number of `rooms` and the hotel `postcode`. Use the commands above to verify that the table is correctly created.

Now that we have a table to store `customers` and a table to store `hotels`, we can create a table to hold the bookings of customers for an hotel with the checkin date and the number of nights they intend to stay:

```
CREATE TABLE bookings (
  id               SERIAL PRIMARY KEY,
  customer_id      INT REFERENCES customers(id),
  hotel_id         INT REFERENCES hotels(id),
  checkin_date     DATE NOT NULL,
  nights           INT NOT NULL
);
```

In the above, `customer_id` and `hotel_id` are called **foreign keys** as they reference an id from a different table. This set a very strong constraint as you will not be able to create a booking for a customer id which does not exist in the customers table!

**Exercise 2**

* Create the table `bookings` in your `cyf_hotels` database and verify that it is correctly created.

#### Inserting data <a href="#inserting-data" id="inserting-data"></a>

Once your `customers`, `hotels` and `bookings` table are created, you can insert data with the following SQL statements:

```
INSERT INTO customers (name, email, address, city, postcode, country) VALUES ('John Smith','j.smith@johnsmith.org','11 New Road','Liverpool','L10 2AB','UK');
INSERT INTO hotels (name, rooms, postcode) VALUES ('Triple Point Hotel', 10, 'CM194JS');
INSERT INTO bookings (customer_id, hotel_id, checkin_date, nights) VALUES (1, 1, '2019-10-01', 2);
```

The data you insert should be of the same type with your table definition. For example, the following insert statement will **fail**:

```
INSERT INTO bookings (customer_id, hotel_id, checkin_date, nights) VALUES (1, 1, '2019-14-01', 2);
```

**Exercise 3**

* Run the 3 SQL statements above.
* Insert yourself in the `customers` table.
* Insert the following 3 hotels in the `hotels` table:
  * The `Triple Point Hotel` has 10 rooms, its postcode is `CM194JS`
  * The `Royal Cosmos Hotel` has 5 rooms, its postcode is `TR209AX`
  * The `Pacific Petal Motel` has 15 rooms, its postcode is `BN180TG`
* Try to insert a booking for a customer id which does not exist in the `customers` table (for example ID `100`). What is happening and why?

#### Retrieving data <a href="#retrieving-data" id="retrieving-data"></a>

Previously, you have inserted data in your tables. How do you make sure these data have been inserted correctly? The following SQL statement is used to request data from a specific table:

```
SELECT * FROM customers;
```

**Exercise 4**

* Use the above SQL statement to display all the data inserted in the `customers` table.
* Use the above SQL statement to display all the data inserted in the `hotels` table.
* Use the above SQL statement to display all the data inserted in the `bookings` table.

#### Retrieving data with conditions <a href="#retrieving-data-with-conditions" id="retrieving-data-with-conditions"></a>

Actually, the `SELECT` statement is very powerful and you will see you can request a lot of different things with it. Have you seen the `*` character in the SQL statement above? It means that you want to see the data for all the columns of the table. What if you want to only return specific columns? For example, to retrieve all customers `name` and `address` from the table `customers`:

```
SELECT name,address FROM customers;
```

Sometimes, you want to retrieve only data which verify a specific condition. In this case, you can use a `WHERE` clause. For example, to retrieve all hotels having more than 7 rooms:

```
SELECT * FROM hotels WHERE rooms > 7;
```

To retrieve the customer name and address with id 1:

```
SELECT name,address FROM customers WHERE id = 1;
```

To retrieve all the bookings starting after 2019/10/01:

```
SELECT * FROM bookings WHERE checkin_date > '2019/10/01';
```

To retrieve all the bookings starting after 2019/10/01 for a minimum of 2 nights:

```
SELECT * FROM bookings WHERE checkin_date > '2019/10/01' AND nights >= 2;
```

To retrieve all the hotels with the postcode `CM194JS` or `TR209AX`:

```
SELECT * FROM hotels WHERE postcode = 'CM194JS' OR postcode = 'TR209AX';
```

**Exercise 5**

{% file src="/files/-MctcmUQUsQojl8HShEo" %}
cyf\_hotels\_exercise5.sql
{% endfile %}

* Execute the file [`cyf_hotels_exercise5.sql`](https://firebasestorage.googleapis.com/v0/b/gitbook-28427.appspot.com/o/assets%2F-MRebciU3NcuLgsX3ijf%2F-MctcbHxY10DZkAIDQgV%2F-MctcmUQUsQojl8HShEo%2Fcyf_hotels_exercise5.sql?alt=media\&token=a5ed1123-4d94-41a5-be33-869f9c8ab89d) which will reset your existing tables and insert more data in the `customers`, `hotels` and `bookings` tables. (hint: in the terminal, use `psql -d cyf_hotels -f cyf_hotels_exercise5.sql`).
* Retrieve all information for the customer Laurence Lebihan.
* Retrieve all customers name living in UK.
* Retrieve the address, city and postcode of Melinda Marsh.
* Retrieve all hotels located in the postcode DGQ127.
* Retrieve all hotels with more than 11 rooms.
* Retrieve all hotels with more than 6 rooms but less than 15 rooms.
* Retrieve all hotels with exactly 10 rooms or 20 rooms.
* Retrieve all bookings for customer id 1.
* Retrieve all bookings for more than 4 nights.
* Retrieve all bookings starting in 2020.
* Retrieve all bookings before 2020 for less than 4 nights.

### Reference material <a href="#homework" id="homework"></a>

Learn more about PostgreSQL using these [tutorials](https://www.postgresqltutorial.com).


# 2 - SQL with Node

### Learning Objectives <a href="#learning-objectives" id="learning-objectives"></a>

* Add and remove columns in a pre-existing table using PostgreSQL using `ALTER`
* Rename tables and columns in a pre-existing table using PostgreSQL using `DELETE`
* Update rows in a pre-existing table using PostgreSQL using `UPDATE`
* Combine tables together using PostgreSQL using `INNER JOIN`
* Connect a PostgreSQL database to a NodeJS application
* Retrieve data from a PostgreSQL database in a NodeJS application

### More SQL <a href="#more-sql" id="more-sql"></a>

For the following, use the file [`cyf_hotels_exercise5.sql`](https://firebasestorage.googleapis.com/v0/b/gitbook-28427.appspot.com/o/assets%2F-MRebciU3NcuLgsX3ijf%2F-MctcbHxY10DZkAIDQgV%2F-MctcmUQUsQojl8HShEo%2Fcyf_hotels_exercise5.sql?alt=media\&token=a5ed1123-4d94-41a5-be33-869f9c8ab89d) from the previous class to reinitialise your database with `psql -d cyf_hotels -f cyf_hotels_exercise5.sql`.

#### Changing the definition of a table <a href="#changing-the-definition-of-a-table" id="changing-the-definition-of-a-table"></a>

Sometimes, you may need to change the definition of a table you created before without deleting it. Such changes include renaming a table, adding/removing a column, changing the name of a column, changing the type of a column etc... The general syntax to perform these operations is:

```
ALTER TABLE table_name action;
```

For example, to add a new column to the existing `customers` table:

```
ALTER TABLE customers ADD COLUMN date_of_birth DATE;
```

To delete an existing column from the `customers` table:

```
ALTER TABLE customers DROP COLUMN date_of_birth;
```

To rename the table `customers` into `clients`:

```
ALTER TABLE customers RENAME TO clients;
```

For more examples, you can consult the following tutorial: [Postgres alter table](http://www.postgresqltutorial.com/postgresql-alter-table/).

**Exercise 1**

* Add a column `date_of_birth` of type `DATE` in the `customers` table.
* Rename the column `date_of_birth` to `birthdate` in the `customers` table.
* Delete the column `birthdate` from the `customers` table

#### Dropping a table <a href="#dropping-a-table" id="dropping-a-table"></a>

To delete the table `customers`:

```
DROP TABLE customers;
```

**Exercise 2:**

* Create a new table `test`
* Drop the table `test`

#### Updating a row <a href="#updating-a-row" id="updating-a-row"></a>

The general construction to update a row is:

```
UPDATE table SET column1 = value1, column2 = value2 WHERE condition;
```

For example, to update the name and country of the customers with ID 3:

```
UPDATE customers SET name='Bob Marley', country='Jamaica' WHERE id=3;
```

**Exercise 3**

* Update the postcode of the hotel named `Elder Lake Hotel` to `L10XYZ`
* Update the number of rooms of `Cozy Hotel` to `25`
* For the customer named `Nadia Sethuraman`, update her address to `2 Blue Street`, her city to `Glasgow` and her postcode to `G11ABC` in one query
* Update all the bookings of customer with ID `1` for the hotel with ID `1` to `5` nights in one query

#### Deleting a row <a href="#deleting-a-row" id="deleting-a-row"></a>

The syntax to delete a row is:

```
DELETE FROM table WHERE condition;
```

For example, to delete the booking with ID 4:

```
DELETE FROM bookings WHERE id=4;
```

**NOTE:** If you don't supply a `WHERE` clause with `DELETE` or `UPDATE` the command will be applied to **all** the rows in the table which is rarely what you want.

**Exercise 4**

* Delete the booking of customer ID `8` for the date `2020-01-03`
* Delete all the bookings of customer ID `6`
* Delete the customer with ID `6`

#### Joining tables <a href="#joining-tables" id="joining-tables"></a>

Sometimes, you will need to retrieve data which are spread in different tables in a single response. For this purpose, you will need to join tables together. The general syntax is:

```
SELECT A.column1, B.column2 FROM A INNER JOIN B ON A.b_id=B.id;
```

For example, to load all the bookings along with customer data:

```
SELECT * FROM customers INNER JOIN bookings ON customers.id=bookings.customer_id;
```

To load all the bookings along with customer data and hotel data:

```
SELECT * FROM bookings
INNER JOIN customers ON customers.id=bookings.customer_id
INNER JOIN hotels ON hotels.id=bookings.hotel_id;
```

To load the booking checkin dates for customer ID `1` along with the customer name and the hotel name:

```
SELECT bookings.checkin_date,customers.name,hotels.name FROM bookings
INNER JOIN customers ON customers.id=bookings.customer_id
INNER JOIN hotels ON hotels.id=bookings.hotel_id
WHERE customers.id=1;
```

**Exercise 5**

* Try and understand each of the queries above in your `psql` prompt
* Retrieve all the bookings along with customer data for bookings starting in 2020
* Retrieve the customer names, booking start dates and number of nights for all customers who booked the hotel name `Jade Peaks Hotel`
* Retrieve all the booking start dates with customer names and hotel names for all bookings for more than 5 nights

#### Other useful operations <a href="#other-useful-operations" id="other-useful-operations"></a>

Ordering the result:

```
SELECT * FROM table ORDER BY column;
```

This will sort the returned rows in the ascending order for "column". To sort them in descending order, use:

```
SELECT * FROM table ORDER BY column DESC;
```

Limiting the number of results returned:

```
SELECT * FROM table LIMIT 10;
```

Returning all customers whose ID is 1, 2, 3 or 4:

```
SELECT * FROM customers WHERE id IN (1,2,3,4);
```

Query by pattern matching, for example retrieve all customers whose name starts with Bob:

```
SELECT * FROM customers WHERE name LIKE 'Bob%';
```

You can combine different operations together, for example, if you want to retrieve all the booking start dates with the customer names and hotel names for customer names starting with the letter `M` ordered by hotel name with a limit of 3 results:

```
SELECT bookings.checkin_date,customers.name,hotels.name FROM bookings
INNER JOIN customers ON customers.id=bookings.customer_id
INNER JOIN hotels ON hotels.id=bookings.hotel_id
WHERE customers.name LIKE 'M%'
ORDER BY hotels.name
LIMIT 3;
```

**Exercise 6**

* Retrieve all customers whose name starts with the letter `S`
* Retrieve all hotels which have the word `Hotel` in their name
* Retrieve the booking start date, customer name, hotel name for the top 5 bookings ordered by number of nights in descending order

### Integration with NodeJS <a href="#integration-with-nodejs" id="integration-with-nodejs"></a>

#### Introduction to node-postgres <a href="#introduction-to-node-postgres" id="introduction-to-node-postgres"></a>

*"node-postgres is a collection of node.js modules for interfacing with your PostgreSQL database."* - <https://node-postgres.com/>

In the following, we will use *node-postgres* to...

1. Connect to a database
2. Send SQL query to the database and get results

#### Loading data from a database with a GET endpoint <a href="#loading-data-from-a-database-with-a-get-endpoint" id="loading-data-from-a-database-with-a-get-endpoint"></a>

Let's build a brand new NodeJS application with a single GET endpoint to load the list of hotels that you already have in the `hotels` table of the `cyf_hotels` database.

First, create a new NodeJS application that we will call **cyf-hotels-api** (enter `server.js` when asking about the entry point):

```
mkdir cyf-hotels-api && cd cyf-hotels-api && npm init
```

As before, we will use the Express library to build our API, and the node-postgres library to connect with our database:

```
npm install express
npm install pg
```

Create a `server.js` file, import express, initialise the server and start listening for requests:

```
const express = require("express");
const app = express();

app.listen(3000, function() {
    console.log("Server is listening on port 3000. Ready to accept requests!");
});
```

Import pg library and create a new GET endpoint to load the list of hotels:

```
const { Pool } = require('pg');

const pool = new Pool({
    user: 'postgres',
    host: 'localhost',
    database: 'cyf_hotels',
    password: '',
    port: 5432
});

app.get("/hotels", function(req, res) {
    pool.query('SELECT * FROM hotels', (error, result) => {
        res.json(result.rows);
    });
});
```

In the code above:

* We first import the `Pool` class from the pg library, which is used to connect to a database. [Database connection Pooling](https://node-postgres.com/features/pooling) is a method used to keep database connections open so they can be reused. Pooling keeps the connections active so that, when a connection is later requested, one of the active ones is used in preference to having to create another one.
* We create a new pool where we specify the credentials to connect to the cyf\_hotels database
* We then create a new /hotels endpoint where we use the method `query()` to send a SQL query to load all the hotels from the table `hotels` and return the results with `result.rows`. You can write any valid SQL query that you learned in the `query()` method!

Start your server with `node server.js` and try to reach the `/hotels` endpoint to see the list of hotels currently available in your `hotels` table of your `cyf_hotels` database. You can try to create/update/delete hotels to verify that your API always returns what is stored in your database.


# 3 - CRUD with SQL and Node

### Learning Objectives <a href="#learning-objectives" id="learning-objectives"></a>

By the end of this lesson students should be able to

* Create an API endpoint that can add data to a database
* Write code that effectively validates data before adding it to a database
* Be aware of the dangers of SQL injection attacks, and how to avoid them
* Create an API endpoint that can retrieve data from a database with multiple parameters
* Create an API endpoint that can update data in a database
* Create an API endpoint that can delete data in a database

### Recap integration of cyf\_hotels DB with NodeJS <a href="#recap-integration-of-cyfhotels-db-with-nodejs" id="recap-integration-of-cyfhotels-db-with-nodejs"></a>

For this class, we will use the tables and data from [`cyf_hotels_exercise5.sql`](https://firebasestorage.googleapis.com/v0/b/gitbook-28427.appspot.com/o/assets%2F-MRebciU3NcuLgsX3ijf%2F-MctcbHxY10DZkAIDQgV%2F-MctcmUQUsQojl8HShEo%2Fcyf_hotels_exercise5.sql?alt=media\&token=a5ed1123-4d94-41a5-be33-869f9c8ab89d). To start from a clean state for your `cyf_hotels` database, run `psql -d cyf_hotels -f cyf_hotels_exercise5.sql`.

During the last class, we created a new NodeJS project called `cyf-hotels-api` with a single API endpoint `/hotels` to get the list of all hotels. In this class, we will add other endpoints with more functionalities to interact with the `cyf_hotels` database.

```
const express = require("express");
const app = express();
const { Pool } = require("pg");

const pool = new Pool({
  user: "postgres",
  host: "localhost",
  database: "cyf_hotels",
  password: "",
  port: 5432,
});

app.get("/hotels", function (req, res) {
  pool
    .query("SELECT * FROM hotels")
    .then((result) => res.json(result.rows))
    .catch((e) => console.error(e));
});

app.listen(3000, function () {
  console.log("Server is listening on port 3000. Ready to accept requests!");
});
```

### CRUD operations with NodeJS and PostgreSQL <a href="#crud-operations-with-nodejs-and-postgresql" id="crud-operations-with-nodejs-and-postgresql"></a>

*"The acronym CRUD refers to all of the major functions that are implemented in relational database applications. Each letter in the acronym can map to a standard Structured Query Language (SQL) statement and Hypertext Transfer Protocol (HTTP) method \[...]."* - [Wikipedia](https://en.wikipedia.org/wiki/Create,_read,_update_and_delete)

![](https://4042228299-files.gitbook.io/~/files/v0/b/gitbook-legacy-files/o/assets%2F-MRebciU3NcuLgsX3ijf%2F-MhiG8f_wE3ivUUBVHSW%2F-MhiGM-7b6cl6c77XDPd%2Fimage.png?alt=media\&token=9560f513-9fd7-4ffe-8bdf-e98565570d68)

#### Creating data <a href="#creating-data" id="creating-data"></a>

In the following, we will add a new API endpoint to create a new hotel in the table `hotels` of the `cyf_hotels` database. As a reminder, here is an example of a SQL insert statement to add a new hotel:

```
INSERT INTO hotels (name, rooms, postcode) VALUES ('New Hotel', 5, 'ABC001');
```

As we create a new record in the database, we will add a new POST endpoint in the `cyf-hotels-api` project from last class. Moreover, we need to be able to pass some parameters to this API endpoint such as the hotel name, the number of rooms and the postcode, so we can use this API to create different hotel. These parameters can be sent in the body of the request. To access the parameters in the body of the request with Express.JS, we need to add the module `body-parser` to the `cyf-hotels-api` project:

```
npm install --save body-parser
```

Then include it in the `server.js`:

```
const bodyParser = require("body-parser");
app.use(bodyParser.json());
```

We can finally add our new endpoint to create a new hotel:

```
app.post("/hotels", function (req, res) {
  const newHotelName = req.body.name;
  const newHotelRooms = req.body.rooms;
  const newHotelPostcode = req.body.postcode;

  const query =
    "INSERT INTO hotels (name, rooms, postcode) VALUES ($1, $2, $3)";

  pool
    .query(query, [newHotelName, newHotelRooms, newHotelPostcode])
    .then(() => res.send("Hotel created!"))
    .catch((e) => console.error(e));
});
```

What could go wrong with the code above? There is no validation of any user inputs which could result in errors, duplications or inconsistent data in the database! Here are few examples of things we can verify before creating the hotel in the database:

1. Check that the number of rooms is a positive number
2. Check that no hotel with the same name already exists in the database and so on.

Let's start by validating that the number of rooms is a positive number and if it doesn't, return an error.

```
if (!Number.isInteger(newHotelRooms) || newHotelRooms <= 0) {
  return res
    .status(400)
    .send("The number of rooms should be a positive integer.");
}
```

Then we can validate the new hotel doesn't already exist in the database, thus preventing duplicate data.

```
app.post("/hotels", function (req, res) {
  const newHotelName = req.body.name;
  const newHotelRooms = req.body.rooms;
  const newHotelPostcode = req.body.postcode;

  if (!Number.isInteger(newHotelRooms) || newHotelRooms <= 0) {
    return res
      .status(400)
      .send("The number of rooms should be a positive integer.");
  }

  pool
    .query("SELECT * FROM hotels WHERE name=$1", [newHotelName])
    .then((result) => {
      if (result.rows.length > 0) {
        return res
          .status(400)
          .send("An hotel with the same name already exists!");
      } else {
        const query =
          "INSERT INTO hotels (name, rooms, postcode) VALUES ($1, $2, $3)";
        pool
          .query(query, [newHotelName, newHotelRooms, newHotelPostcode])
          .then(() => res.send("Hotel created!"))
          .catch((e) => console.error(e));
      }
    });
});
```

**Exercise 1**

* Follow the above steps to create a new POST endpoint `/hotels` to create a new hotel. Make sure to add validation for the number of rooms and the hotel name. Test your new API endpoint with Postman and check that the new hotel has been correctly created in your database.
* Add a new POST API endpoint to create a new customer in the `customers` table.
* Add validation to check that there is no other customer with the same name in the customers table before creating a new customer.

#### Reading data <a href="#reading-data" id="reading-data"></a>

We already have one GET endpoint to load all the hotels in the database. However, we can improve this endpoint and add a couple of extra functionalities. First, we may want to order the list of hotels by name:

```
app.get("/hotels", function (req, res) {
  pool
    .query("SELECT * FROM hotels ORDER BY name")
    .then((result) => res.json(result.rows))
    .catch((e) => console.error(e));
});
```

Another functionality which could be useful is to filter the hotel with a keyword to be able to search for a specific hotel name:

```
app.get("/hotels", function (req, res) {
  const hotelNameQuery = req.query.name;
  let query = `SELECT * FROM hotels ORDER BY name`;

  if (hotelNameQuery) {
    query = `SELECT * FROM hotels WHERE name LIKE '%${hotelNameQuery}%' ORDER BY name`;
  }

  pool
    .query(query)
    .then((result) => res.json(result.rows))
    .catch((e) => console.error(e));
});
```

In some case, you would want to load only a specific hotel by id. Let's define a new GET endpoint to load one specific hotel:

```
app.get("/hotels/:hotelId", function (req, res) {
  const hotelId = req.params.hotelId;

  pool
    .query("SELECT * FROM hotels WHERE id=$1", [hotelId])
    .then((result) => res.json(result.rows))
    .catch((e) => console.error(e));
});
```

**Exercise 2**

* Add the GET endpoints `/hotels` and `/hotels/:hotelId` mentioned above and try to use these endpoints with Postman.
* Add a new GET endpoint `/customers` to load all customers ordered by name.
* Add a new GET endpoint `/customers/:customerId` to load one customer by ID.
* Add a new GET endpoint `/customers/:customerId/bookings` to load all the bookings of a specific customer. Returns the following information: check in date, number of nights, hotel name, hotel postcode.

#### Updating data <a href="#updating-data" id="updating-data"></a>

We can now implement an endpoint to update a customer record in the database. For this, we will use a PATCH endpoint.

```
app.patch("/customers/:customerId", function (req, res) {
  const customerId = req.params.customerId;
  const newEmail = req.body.email;

  pool
    .query("UPDATE customers SET email=$1 WHERE id=$2", [newEmail, customerId])
    .then(() => res.send(`Customer ${customerId} updated!`))
    .catch((e) => console.error(e));
});
```

What can go wrong in the code above? Again, there is no validation! We could set an empty email or even a string which is not following the format of an email. **Remember, validating data is very important to make sure you don't end up with inconsistent data in your database!**

**Exercise 3**

* Add the PATCH endpoint `/customers/:customerId` and verify you can update a customer email using Postman.
* Add validation for the email before updating the customer record in the database. If the email is empty, return an error message.
* Add the possibility to also update the address, the city, the postcode and the country of a customer. Be aware that if you want to update the city only for example, the other fields should not be changed!

**Note :-** When a client needs to replace an existing Resource entirely, they can use **PUT**. When they're doing a **partial** update, they can use HTTP **PATCH**.

#### Deleting data <a href="#deleting-data" id="deleting-data"></a>

To delete a record from the database, we will use a DELETE endpoint:

```
app.delete("/customers/:customerId", function (req, res) {
  const customerId = req.params.customerId;

  pool
    .query("DELETE FROM customers WHERE id=$1", [customerId])
    .then(() => res.send(`Customer ${customerId} deleted!`))
    .catch((e) => console.error(e));
});
```

However, if you try to delete a customer which already has some bookings, the previous endpoint will fail. Do you know why? You cannot delete a customer whose ID is used as a foreign key in another table (in this case, in the `bookings` table). Let's delete all the customer bookings first:

```
app.delete("/customers/:customerId", function (req, res) {
  const customerId = req.params.customerId;

  pool
    .query("DELETE FROM bookings WHERE customer_id=$1", [customerId])
    .then(() => {
      pool
        .query("DELETE FROM customers WHERE id=$1", [customerId])
        .then(() => res.send(`Customer ${customerId} deleted!`))
        .catch((e) => console.error(e));
    })
    .catch((e) => console.error(e));
});
```

**Exercise 4**

* Add the DELETE endpoint `/customers/:customerId` above and verify you can delete a customer along their bookings with Postman.
* Add a new DELETE endpoint `/hotels/:hotelId` to delete a specific hotel. **A hotel can only be deleted if it doesn't appear in any of the customers' bookings! Make sure you add the corresponding validation before you try to delete a hotel.**


# Final Projects

Guidelines for students and instructors

{% hint style="success" %}
In the *Final Project*, we will emulate a development project in a real company, working together in teams using an **agile methodology, SCRUM** and the most used tools like **Slack, Trello, Git, Zoom** and more, to build an idea from scratch to finally have a Minimum Viable Product (**MVP**) deployed in a public link.
{% endhint %}

Some details:

* **Team**: group of 3-4 students and an experienced mentor, one of the students will have the role of *Team Leader*. Every team will develop an independent project.
* **MVP**: A Minimum Viable Product is a product with enough features to attract early-adopter customers and validate a product idea early in the product development cycle
* **Software Stack**: In this *Final Project*, we will build a full-stack prototype using the complete stack we learned ->  (HTML+CSS+Javascript+React+Node+Express+Postgre SQL)
* **Duration:** 7 weeks&#x20;

## **Objectives**

During the Project you will work on your technical and communication skills. At the end of this module you'll learn the following:

### **Technical skills**

* [x] How to `build a complete full-stack application`
* [x] Understanding `how each part of an application relates` to each other
* [x] What it means to work on a `feature`
* [x] How to work with `Git` in a team setting
* [x] How to write `readable code`

### **Communication skills**

* [x] How to `communicate effectively` with team members
* [x] `Keeping track` of your project's progress
* [x] Knowing if you `understand what's asked` of you
* [x] How to `communicate with non-developers` about what you're doing
* [x] Learning how to be `solutions-oriented`
* [x] How to work in a `Agile setting`

Finally you will have a nice project to add to your portfolio

## Students Testimonials

Comments of the Final Project from students:

> *"Thanks to the final project and my team, during this process I understood how I can use together all the modules learned. I could realize that just with a nice idea, basic HTML, CSS, node and database is possible to make a really nice project. Imagine what would be possible if you keep learning all of them?"*
>
> by **Thiago Luiz Pereira**

> *"The final project is a great opportunity to put your knowledge in practice and also to find out how it is to work in team. You will understand how all the different parts such as HTML, CSS, React and Node work together. You will also understand how important it is to have a good planning and to assign different tasks to different members of your team. And once you get into the flow of creating and developing you will suddenly understand how much knowledge you collected and what amazing stuff you are able to do!"*
>
> by **Ion Oaie**

> *"I can describe my experience as team leader for the final migracode project as a perfect “first contact” of what it will be like to work in the tech sector when it comes to making a digital product.*&#x20;
>
> *I was lucky enough to have a complete team that made the experience as real as possible, from the design of the user experience to the production process, including the workflows in GIT and the organization of the tasks with SCRUM agile methodologies.*&#x20;
>
> *I was able to see first-hand the challenges faced by development teams, which range from optimising the most human aspects (creating team synergies, motivating members or trying to make them understand the product vision) in order to be more efficient and productive, to choosing all the right technologies (stack) and technical processes in order to produce a quality product while wasting the minimum possible resources.*&#x20;
>
> *In addition to having a great coordinator who has given us feedback to optimize correctly and professionally all our work.*&#x20;
>
> *I consider that I still have a long way to go but in short, this experience has considerably and correctly shortened what could have been something more tedious and disorganised."*
>
> by **Alexei Soliz**
>
> *"It's easy to see how each one of the topics we see throughout the course are useful on their own, and you might even have the right idea about how they will work together in a real project, but implementing them together is a whole different beast, and I'm not only talking about coding here.*&#x20;
>
> *I would say that I learned more about every technology while working on the project for the last 6 weeks of the course, but that's not even the most useful thing I learned with it. Besides really learning how a whole stack interacts together, you get to really see how important organization is in a real life coding project. If you're not organized and don't have good communication, you can easily end up with situations like different code that does the same thing throughout the project, you might have to work with your partner's code and don't understand a thing of what they wrote, or simply be overwhelmed by the amount of tasks there are to do.*&#x20;
>
> *Another great thing about working on what is akin to a real life project is that you will more clearly identify what you like and what you don't, or at least that's what happened to me. You're putting the effort to be a Full Stack Webdev, but in reality you might just like frontend or backend more, and the only way to truly know that is by implementing those things in real apps. I for one learned that I actually like working on the whole stack, but I really don't like CSS and styling, so backend might be the best option for me.*&#x20;
>
> *If you get through the project with a result you like, you're pretty much ready to take onto any challenge that the job market presents to you as a junior, so just keep pushing, because the final project is probably the hardest part of the course but also the most rewarding one."*
>
> by **Ricardo Delgado**

## Succeed projects

Check [List of projects](https://syllabus.migracode.org/course-content/introduction-1/list-of-projects) page to see the complete list of projects.


# Call for project ideas

## Scope

What we can do in the final projects is a simple version of a Web Application, that we can call "Minimum Valuable Product (MVP)" or prototype.

To think about the idea and scope to develop, we need to have in mind the following points:

* [x] We have only 6 weeks to work in the project to develop the project
* [x] The main objective of the final project, is learning and put into practice the Web Development concepts they acquired (front-end, back-end and databases).&#x20;
* [x] The output of the project, could be a tool that improves a process in the organization or a new idea, that can register information through different forms, with different types of users and different functionalities.

What we do not as a final project:

* [ ] Native mobile application for Android or i-Phone. What we can generally do are responsive Web Applications, that could be visited from a Mobile or a Desktop.
* [ ] Web Sites. A Web Site that can be done with wordpress is not the objective of the Web Development course,&#x20;

## Projects for NGO's and third parties

At MigraCode try to find interesting, tech-for-good projects for that stretch the abilities of our students whilst helping an NGO or Charity solve a problem they are facing.

Non-Government Organisations (NGOs) and Third parties focused on improve people lives are not indifferent to digitalization and start to increase their investment to technology. In almost every aspect of life and work, we can see the effects, institutions cannot be independent of this 'digital life', with new habits brought by digitalization. Every time more, digitalization is fundamental for NGOs and third parties to cover their processes and optimize human resources.&#x20;

What MigraCode offers to NGOs, is a tool to improve the performance, covering manual processes done by email, in an Excel Sheet or in a paper. Like:

* Look and register new volunteers and assign them
* Web Page with forms that users can fill, and there is a process to do with the information
* A typical process that now is done in an Excel sheet, and it is not enough

Go to List of Projects to see a complete list of proposals

### Submit your idea

1. Fill this Google Form [Project Idea](https://forms.gle/n9theVRxrbzEEenA8).
2. Complete all the required fields and provide as much information as possible.
3. Send a confirmation email to <yogesh@openculturalcenter.org> or a message on Slack to @yogi

### Your obligations

Once your project has been selected by the students you should:

1. **Prepare product specifications in detail:** prepare a speech to explain to the team your project idea and vision, and all the documents, links, etc, that can be helpful for the team
2. **Join the Kick-off Meeting:** Check the [calendar ](https://migracode.openculturalcenter.org/migracode-class-schedules/)of the assigned course and join the Kick-off meeting
3. **Answer product questions:** the team has a Slack channel (if you don't know it is like a Whatsapp for teams) to talk offline during the week, so they can make you questions about the project or ask for a team meeting if needed

## Student's Project Ideas

Some students may have some ideas about projects that they would like to complete for their Final Project. Before the Final Project starts, ideas should be gathered and fully specified before the start of the first week.

A good project should:

* Show all of the skills the student has learnt at MigraCode so far
* Be large enough that four people can work on it for 6 weeks and still have work to do
* Be something that the student is passionate about
* Be innovative and could have a future use
* Be interesting to employers
* Solve a real world problem that you have faced in the past or at MigraCode

### Submit your idea

1. Fill this Google Form [Student Project Idea](https://forms.gle/72fTk5RcWN216kZo8)&#x20;
2. Complete all the required fields and provide as much information as possible.
3. Send a confirmation email to <yogesh@openculturalcenter.org> or a message on Slack to @yogi

## Selection of project ideas

After gathering the projects description from NGOs and students, Migracode Team, mentors and students will vote the best projects to achieve, giving priority to NGOs and social impact projects.

## Project Proposals List

### 2022-JAN

* **Rutas de ciclismo, by Valeria Ailen:** A website where cyclist can upload a route, and include a description, pictures, useful information, safety info and more, and other cyclist can then view these routes and download the GPX files or save the description etc.
* **Migrant solidarity network, by Burçak Kök:** A website based on Barcelona, that collect all the information migrants need (about legal stuff, health, social events, courses etc.) in one place. The goal of the project is to have the updated informations in one platform and improve it with solidarity and make communities more connected.
* **NeedIt?, by Angel Luis Matos lopez:** Recycling is really important this days, to many things are throw away, PCs, washing machine, a table, baby clothes, toys, dishes or even a small spoon, the idea of my app is to use that and give it to those who need it.
* **HireMigrants, by Arturo Chavez:** A website which specializes in hiring migrants of all profiles but not only tell your work experience but you can also write where you are from, your dreams, your motivations, etc.
* **PetHelp.com, by Isar:** A website where people who found lost pets upload a picture and description (animal, color, contact info, location...) and people who lost their pets can search for their pets using the description. Possibility to add features for pet-sitting and giving away pets.

### 2021-May

* **HostelLife.com, by Diego Vargas:** Website/App focused on young solo travelers helping them meet new people during their trip with whom they can explore their destinations.
* **Miprimercurriculum.com, by Wendy Andrade:** For those people who are entering the world of job search for the first time, and also to help immigrants to have an idea of how to create a CV.
* **24X7,E-Commerce, by Amritpal Kaur:** A website in which products will be deliver round the clock. It will help people to get essential products whenever required and it will be a good platform for 24X7 vendors.
* **tidyup.com, by Bianca Inga:** A housework organizer for people living together. It will help people sharing a house to organize better and improve their living situation.
* [**Homelesslocation.com**](http://homelesslocation.com/)**, by Said ouhmmou:** The idea is if people see someone struggling or in need they will make registration of that person data and the organizations they will locate him/her to give help that needs for example if the person is homeless the Charities that offer dorm to sleep or food they will take care of that case.
* **Proximity Network, by Francisco:** Website that facilitates users to find stores that only sell organic products that were produced locally. Users are also able to know how and where these products were made.
* **LikesMenu, by José Tomás Cardozo Oven:** A website with a super administrator function for multi restaurants and bars, that is, restaurants and bars will be able to register as users and upload their menus. It will be a web application, the registration of users will have the approval of the super administrator by email. The menus will have videos and diners will be able to self-manage their orders.

### 2021-Jan

* **Dulcceange.com, by Antonio Leonardo Pérez Pereira:** ([**Instagram**](https://www.instagram.com/dulcce.ange/?hl=es)**,** [**Youtube**](https://www.youtube.com/channel/UCZhO1FZSO9ucSUQj5niNyRQ)) A website of a pastry startup with a web catalog, where you design your own personalized cake and have a budget based on characteristics and pre-defined ingredients such as sizes, types of cakes, etc.
* **MindfulMeal.com, by Enia Munteanu:** Platform to track food wastage, how much food we buy and in the end - how much remains untouched. The app would allow people/families that are struggling to connect and receive food when needed just by making a profile and logging in the app.
* **KnowUs.com, by Leon Cangini:** A platform to search people who are already registered and want to share knowledge of their own profession for free, through online conversation or  meeting.
* **Our Playlist, by Elialba Rendiles:** An app that works with Spotify API to connect people through their musical taste, where users can chat, talk about songs like lyrics background, comments, song know-how, etc.
* [**Amigo Mio - OCC**](https://openculturalcenter.org/my-friend-2/)**, by Ali Raza Ashraf:** Amigo Mio is a project of Open Cultural Center ( Parent Organization of MigraCode). Amigo Mio is an art book of children from Refugee center. This project is going to give preview of the book and encourage users to make a purchase/donation.
* [**SOS Racisme Catalunya**](http://www.sosracisme.org/)**:** It is a project from an ONG to recreate their old website using modern technologies such as React with an improved **UI**. It is a pilot project and if the ONG like it and approve it then it will be extended after final project and might offer some kind of remuneration (pay).


# List of projects

## 2022-Jan

### Team 1 - Rutas de Ciclismo&#x20;

| Title        |                                                                                                                Rutas de ciclismo                                                                                                                |
| ------------ | :---------------------------------------------------------------------------------------------------------------------------------------------------------------------------------------------------------------------------------------------: |
| Description  | A website where cyclist can upload a route, and include a description, pictures, useful information, safety info and more, and other cyclist can then view these routes and download the GPX files or save the description etc. as a PDF maybe. |
| Students     |                                                                                                    Valeria, Laeken, Diego (TL), Damian, Akram                                                                                                   |
| Instructor   |                                                                                                                Alejandro Sanchez                                                                                                                |
| Deliverables |                                                                                   Project Idea, Product Presentation, Trello Board, Github, Final presentation                                                                                  |
| Language     |                                                                                                                     Spanish                                                                                                                     |

### Team 2 - Migrant solidarity network

| Title        |                                                              Migrant Solidarity Network                                                             |
| ------------ | :-------------------------------------------------------------------------------------------------------------------------------------------------: |
| Description  | A website based on Barcelona, that collect all the information migrants need (about legal stuff, health, social events, courses etc.) in one place. |
| Students     |                                                    Burcak (TL), Juan, Mehtap, Kostiantyn, Rachid                                                    |
| Instructor   |                                                                  Raül Fornell Gómez                                                                 |
| Deliverables |                                     Project Idea, Product Presentation, Trello Board, Github, Final presentation                                    |
| Language     |                                                                       English                                                                       |

### Team 3 - NeedIt?

| Title        |                                                                                                             NeedIt?                                                                                                             |
| ------------ | :-----------------------------------------------------------------------------------------------------------------------------------------------------------------------------------------------------------------------------: |
| Description  | Recycling is really important this days, too many things are thrown away, PCs, washing machine, a table, baby clothes, toys, dishes or even a small spoon, the idea of the app is to use that and give it to those who need it. |
| Students     |                                                                                     Angel (TL), Daniel, Asaad, Matthew, Shaminderjeet, Fatma                                                                                    |
| Instructor   |                                                                                                            Diego Ruiz                                                                                                           |
| Deliverables |                                                                           Project Idea, Product Presentation, Trello Board, Github, Final presentation                                                                          |
| Language     |                                                                                                             English                                                                                                             |

### Team 4 - HireMigrants

| Title        |                                                                                     HireMigrants                                                                                     |
| ------------ | :----------------------------------------------------------------------------------------------------------------------------------------------------------------------------------: |
| Description  | A website which specializes in hiring migrants of all profiles but not only tell your work experience but you can also write where you are from, your dreams, your motivations, etc. |
| Students     |                                                                    Arturo (TL), Yhenifer, Vanessa, Jorgelina, Joao                                                                   |
| Instructor   |                                                                                    Anandamaya Arno                                                                                   |
| Deliverables |                                                     Project Idea, Product Presentation, Trello Board, Github, Final presentation                                                     |
| Language     |                                                                                        Spanish                                                                                       |

### Team 5 - PetHelp.com

| Title        |                                                                                                                                PetHelp.com                                                                                                                               |
| ------------ | :----------------------------------------------------------------------------------------------------------------------------------------------------------------------------------------------------------------------------------------------------------------------: |
| Description  | A website where people who found lost pets upload a picture and description (animal, color, contact info, location...) and people who lost their pets can search for their pets using the description. Possibility to add features for pet-sitting and giving away pets. |
| Students     |                                                                                                            Alissa, Isha, Usman, Yuxuan, Gloria (TL), Gabriela                                                                                                            |
| Instructor   |                                                                                                                                   Isar                                                                                                                                   |
| Deliverables |                                                                                               Project Idea, Product Presentation, Trello Board, Github, Final presentation                                                                                               |
| Language     |                                                                                                                                  English                                                                                                                                 |

## 2021-May

### Team 1 - Miprimercurriculum.com

| Title        |                                                                    Miprimercurriculum.com                                                                   |
| ------------ | :---------------------------------------------------------------------------------------------------------------------------------------------------------: |
| Description  | A platform for those people who are entering the world of job search for the first time, and also to help immigrants to have an idea of how to create a CV. |
| Students     |                                       Juan De Sousa, Wendy Andrade, Maria Victoria Bilbao González, Jesús Cepeda (TL)                                       |
| Instructor   |                                                                  Ricard More, Kevin Castro                                                                  |
| Deliverables |          Project Idea, Product Presentation, Trello Board, Github, [Public Link](http://miprimercurriculum.developeando.tech/), Final presentation          |

### Team 2 - tidyup.com

| Title        |                                                                  tidyup.com                                                                  |
| ------------ | :------------------------------------------------------------------------------------------------------------------------------------------: |
| Description  | A housework organizer for people living together. It will help people sharing a house to organize better and improve their living situation. |
| Students     |                              Amritpal Kaur, Omar Eduardo ascanio arias, Luiza Quaglio, Elmira, Bianca Inga (TL)                              |
| Instructor   |                                                            Fernanda Arroyo, Ananda                                                           |
| Deliverables |        Project Idea, Product Presentation, Trello Board, Github, [Public Link](https://thetidyapp.herokuapp.com/), Final presentation        |

### Team 3 - HostelLife.com

| Title        |                                                               HostelLife.com                                                              |
| ------------ | :---------------------------------------------------------------------------------------------------------------------------------------: |
| Description  | Website/App focused on young solo travelers helping them meet new people during their trip with whom they can explore their destinations. |
| Students     |                              Houssam Zairi, Rana Ahmed, E.M. Inegbenoise, Diego Vargas, Suman Rayamajhi (TL)                              |
| Instructor   |                                                      Vincenzo rusciano, David Naranjo                                                     |
| Deliverables |    Project Idea, Product Presentation, Trello Board, Github, [Public Link](https://hostel-life-app.herokuapp.com/), Final presentation    |

### Team 4 - Proximity Network

| Title        |                                                                               Proximity Network                                                                               |
| ------------ | :---------------------------------------------------------------------------------------------------------------------------------------------------------------------------: |
| Description  | Website that facilitates users to find stores that only sell organic products that were produced locally. Users are also able to know how and where these products were made. |
| Students     |                                   Yusuke Fujita, Gabriela Poves Navarro, Giomar Crespo Solano, Francisco Rodriguez, Matías Andrés Rossi (TL)                                  |
| Instructor   |                                                                  Alejandro Josè Sànchez Gòmez, Steev Anderson                                                                 |
| Deliverables |                         Project Idea, Product Presentation, Trello Board, Github,[ Public Link](https://proximitynetwork.web.app/), Final presentation                        |

## 2021-Jan

### Team 1 - KnowUs.com

| Title        |                                                                         **KnowUs.com**                                                                        |
| ------------ | :-----------------------------------------------------------------------------------------------------------------------------------------------------------: |
| Description  | A platform to search people who are already registered and want to share knowledge of their own profession for free, through online conversation or  meeting. |
| Students     |                                               Ronar Eusebio, Antonio Olivari, Manpreet Singh, Leon Cangini (TL)                                               |
| Instructor   |                                              [Álvaro Pérez Gómez](https://www.linkedin.com/in/alvaroperezgomez/)                                              |
| Deliverables |                                   Project Idea, Product Presentation, Trello Board, Github, Public Link, Final presentation                                   |

### Team 2 - Amigo Mio

| Title        |                                                                                                                     Amigo Mio                                                                                                                    |
| ------------ | :----------------------------------------------------------------------------------------------------------------------------------------------------------------------------------------------------------------------------------------------: |
| Description  | Amigo Mio is a project of Open Cultural Center ( Parent Organization of MigraCode). Amigo Mio is an art book of children from Refugee center. This project is going to give preview of the book and encourage users to make a purchase/donation. |
| Students     |                                                                                            Adrian Corro, Emilio, Artur Nikitsin, Ali Raza Ashraf (TL)                                                                                            |
| Instructor   |                                                                                             [Rahaf Bayazi](https://www.linkedin.com/in/rahafbayazi/)                                                                                             |
| Deliverables |                                                                             Project Idea, Product Presentation, Trello Board, Github, Public Link, Final presentation                                                                            |

### Team 3 - SOS Racisme

| Title        |                                                     **SOS Racisme**                                                    |
| ------------ | :--------------------------------------------------------------------------------------------------------------------: |
| Description  | It is a project from an ONG to recreate their old website using modern technologies such as React with an improved UI. |
| Students     |                          Elialba rendiles, Antonio Leonardo, Adrian Sivira, Jaider Mateo (TL)                          |
| Instructor   |                            [Diana Dashkovska](https://www.linkedin.com/in/dianadashkovska/)                            |
| Deliverables |                Project Idea, Product Presentation, Trello Board, Github, Public Link, Final presentation               |

### Team 4 - MindfulMeal.com

| Title        |                                                                                                                   MindfulMeal.com                                                                                                                  |
| ------------ | :------------------------------------------------------------------------------------------------------------------------------------------------------------------------------------------------------------------------------------------------: |
| Description  | Platform to track food wastage, how much food we buy and in the end - how much remains untouched. The app would allow people/families that are struggling to connect and receive food when needed just by making a profile and logging in the app. |
| Students     |                                                                                             Manuel Alexander, Simon Luque, Enia Munteanu, Kimberly (TL)                                                                                            |
| Instructor   |                                                                                              [Nandan Rao](https://www.linkedin.com/in/nandanmarkrao/)                                                                                              |
| Deliverables |                                                                              Project Idea, Product Presentation, Trello Board, Github, Public Link, Final presentation                                                                             |

## 2020-July

{% embed url="<https://www.youtube.com/watch?v=wj3qZ8EKfuQ>" %}

### Team 1 - Daily App

![](https://4042228299-files.gitbook.io/~/files/v0/b/gitbook-legacy-files/o/assets%2F-MRebciU3NcuLgsX3ijf%2F-MVb5XncnoYEToFic_k6%2F-MVbCSDUXq3C0l57u_Xn%2FfpTeam1.PNG?alt=media\&token=752b4e05-8ee4-4110-9a49-dd200785a26d)

| Title        | [**Programa de control y supervision de personas en residencia de mayores**](https://docs.google.com/document/d/1Liz922J-5cpwSR3Q7Tjzhs4HH8EoQVFtGGBZBDtv4-U) |
| ------------ | :-----------------------------------------------------------------------------------------------------------------------------------------------------------: |
| Description  |    Desarrollar un programa de control y supervision de personas en residencia de mayores tanto para personas ingresadas como personas de residencia de día    |
| Students     |                                             Jorge Ricardo Soliz (TL), Ricardo Soliz, Melina Basales, Adriana Ceron                                            |
| Instructor   |                                                  [Lino Urdiales](https://www.linkedin.com/in/lino-urdiales/)                                                  |
| Deliverables |                                   Project Idea, Product Presentation, Trello Board, Github, Public Link, Final presentation                                   |

### Team 2 - SiHub

![](https://4042228299-files.gitbook.io/~/files/v0/b/gitbook-legacy-files/o/assets%2F-MRebciU3NcuLgsX3ijf%2F-MVb5XncnoYEToFic_k6%2F-MVb8y2pdEHTkek-G3aF%2FfpTeam2.PNG?alt=media\&token=729c4424-b845-4bcc-bbab-c9e3cfd65f19)

| Title        |                                                                   [**SiHub**](https://docs.google.com/document/d/12qKyg36zuIyTbVu2xi3oGPmcT7rZvGOSGCQAKoKNxPA)                                                                   |
| ------------ | :------------------------------------------------------------------------------------------------------------------------------------------------------------------------------------------------------------------------------: |
| Description  |                              SiHub is an online tool for sharing and forking CAD/EDA projects with the approachof developing production-level products that can be sold through the platform aswell                              |
| Students     |                                                                                  Thony Nava (TL), Zaquiel Mayorga, Joanna M. Smerea, Jaime Bravo                                                                                 |
| Instructor   |                                                                                                               Boris                                                                                                              |
| Deliverables | [Project Idea](https://docs.google.com/document/d/12qKyg36zuIyTbVu2xi3oGPmcT7rZvGOSGCQAKoKNxPA),  Github, Public Link, [Final presentation](https://docs.google.com/presentation/d/1tVz90BQ0PII5fINw7fihysHKRvRN6MRPp48Josdpzxs) |

### Team 3 - OCCycling

![](https://4042228299-files.gitbook.io/~/files/v0/b/gitbook-legacy-files/o/assets%2F-MRebciU3NcuLgsX3ijf%2F-MVb5XncnoYEToFic_k6%2F-MVbCGfSvh7L9-UlBmjZ%2FfpTeam3.PNG?alt=media\&token=7c35f842-d59d-45da-a178-c6bbc3b8993f)

| Title        |                                                                          **DropApp for OCC – OCCycling**                                                                          |
| ------------ | :-------------------------------------------------------------------------------------------------------------------------------------------------------------------------------: |
| Client       |                                                                  [**OCC Greece**](https://openculturalcenter.org)                                                                 |
| Description  |                          A platform to manage the free bicycle provision service given by OCC in a refugee camp in Greece to allow them to go to the city                         |
| Students     |                                                          Diana Dashkovska (TL), José Arriaga, Anny Gómez, Gustavo Rossini                                                         |
| Instructor   |                                                              [Nandan Rao](https://www.linkedin.com/in/nandanmarkrao/)                                                             |
| Deliverables | [Project Idea](https://docs.google.com/document/d/1SOLHVUsEQX-OH8T2z_OXfwbBM1-DUXOdQWbSjgCI_WM), [Github](https://github.com/hheiress/OCCycling), Public Link, Final presentation |

### Team 4 - HpUp

{% embed url="<http://hrup.namli.pw/login>" %}
Public Link
{% endembed %}

![Screenshot](https://4042228299-files.gitbook.io/~/files/v0/b/gitbook-legacy-files/o/assets%2F-MRebciU3NcuLgsX3ijf%2F-MVb5XncnoYEToFic_k6%2F-MVb8y2qym73aGpWAyjh%2FfpTeam4.PNG?alt=media\&token=c0b726ef-99e2-49dc-9121-176da71226e1)

| Title        |                                                                                                  [**HpUp - Human resource management system**](http://hrup.namli.pw/login)                                                                                                  |
| ------------ | :-------------------------------------------------------------------------------------------------------------------------------------------------------------------------------------------------------------------------------------------------------------------------: |
| Client       |                                                                                                                     [**Global {M}**](https://globalm.io)                                                                                                                    |
| Description  |                                                              A platform to manage employee’s payroll, holidays, performance management, reviews. As well as have somewhere to store the handbook for the firm.                                                              |
| Students     |                                                                                            Aleksey Andrushchenko (TL), Ali Raza Ashraf, Farhana Tasnin Bipasha, Anudeep Ayulalath                                                                                           |
| Instructor   |                                                                                                                        Nico Hardmeier and Javi Varela                                                                                                                       |
| Deliverables | [Project Idea](https://docs.google.com/document/d/1Jg4vEzvB-P9w6CEOfj3DtKu09jEBPjNYpP-r58n7WYM), Github ([FE ](https://github.com/bipasha39/HpUp-frontend)+ [BE](https://github.com/bipasha39/HpUp-Backend)), [Public Link](http://hrup.namli.pw/login), Final presentation |

## 2020-March

{% embed url="<https://www.youtube.com/watch?v=Fepe8wGi7Lg>" %}

### Team 1 - BeeldBuddy

{% embed url="<https://beeldbuddy.nl/>" %}
Public Link
{% endembed %}

![Screenshot](https://4042228299-files.gitbook.io/~/files/v0/b/gitbook-legacy-files/o/assets%2F-MRebciU3NcuLgsX3ijf%2F-MVb5XncnoYEToFic_k6%2F-MVb8y2lzSsG7lnBWm_u%2FfpMarTeam1b.PNG?alt=media\&token=89be9fc4-01cc-47a1-acbe-2baaff72c634)

| Title        |                                                                                                                      [BeeldBuddy](http://www.beeldbuddy.nl/)                                                                                                                     |
| ------------ | :------------------------------------------------------------------------------------------------------------------------------------------------------------------------------------------------------------------------------------------------------------------------------: |
| Client       |                                                                                [Utrecht University](https://syllabus.migracode.org/courses/introduction-3/course-content/introduction-1/www.uu.nl)                                                                               |
| Description  |                                                                               A website for Social Work students of the Utrecht University of Applied Sciences to connect to vulnerable communities                                                                              |
| Students     |                                                                    Anandamaya Arnó \[TL], Rubén Adarme, [Alejandro José Sánchez Gómez](https://migracode.openculturalcenter.org/portfolio/alejandro-sanchez/)                                                                    |
| Instructor   |                                                                                                                                 Juandiego Calero                                                                                                                                 |
| Deliverables | [Product Document](https://docs.google.com/document/d/18wuFUjI7WZRWMCnJwk7SbX5m6x1ywhGO5487V-7QEUg), Github ([FE](https://github.com/Rubster18/Buddies-app)/[BE](https://github.com/Rubster18/Buddies-app-backend)), [Public Link](http://www.beeldbuddy.nl), Final presentation |

### Team 2 - Hasan's Tailor

{% embed url="<https://hasant-tailor.herokuapp.com/>" %}

![](https://4042228299-files.gitbook.io/~/files/v0/b/gitbook-legacy-files/o/assets%2F-MRebciU3NcuLgsX3ijf%2F-MVb5XncnoYEToFic_k6%2F-MVbFvzfCcVnqWbr2R4h%2FfpMarTeam2.PNG?alt=media\&token=0bdb4c47-a769-46b8-a2d8-722f3eed3bbb)

| Title        |                                                                                        [Hasan's Tailor](https://hasant-tailor.herokuapp.com/)                                                                                       |
| ------------ | :---------------------------------------------------------------------------------------------------------------------------------------------------------------------------------------------------------------------------------: |
| Description  |                                                                                     A website and webshop for a luxury tailor shop in Barcelona.                                                                                    |
| Students     |                                                                                                   Joaquin \[TL], Shaheen, Ricardo                                                                                                   |
| Instructor   |                                                                                                            Lino Urdiales                                                                                                            |
| Deliverables | [Product Document](https://docs.google.com/document/d/14KYMTdRWDJ_CzJAppvTRBwQpMdFBmutvBWHS9m9yVNA/edit), [Github](https://github.com/changodiez/e-commers), [Public Link](https://hasant-tailor.herokuapp.com), Final presentation |

### Team 3 - Dashy

{% embed url="<https://migradashy.herokuapp.com/>" %}

![](https://4042228299-files.gitbook.io/~/files/v0/b/gitbook-legacy-files/o/assets%2F-MRebciU3NcuLgsX3ijf%2F-MVb5XncnoYEToFic_k6%2F-MVbFvzomE0k_5QuGUgo%2FfpMarTeam3.PNG?alt=media\&token=aa737ce3-672b-4465-b6a5-74742be512b5)

| Title        |                                                                                                                     [Dashy](https://migradashy.herokuapp.com/)                                                                                                                    |
| ------------ | :-------------------------------------------------------------------------------------------------------------------------------------------------------------------------------------------------------------------------------------------------------------------------------: |
| Description  |                                                                                 A website made for students of MigraCode to manage their homework and easily find information about their course.                                                                                 |
| Students     |                                                                                                                             Ion \[TL], *Jose, Thiago*                                                                                                                             |
| Instructor   |                                                                                                                                       Kamel                                                                                                                                       |
| Deliverables | [Product Document](https://docs.google.com/document/d/1iZcrGtYV7aoNCpZtKWRUCM2kGvmO2HfBM5btVhSG4yc), Github ([FE](< https://github.com/migraTeam/dashy>)/[BE](https://github.com/calculito/FinalProjectdb)), [Public Link](https://migradashy.herokuapp.com/), Final presentation |

### Team 4 - Asian Food E-shop

![](https://4042228299-files.gitbook.io/~/files/v0/b/gitbook-legacy-files/o/assets%2F-MRebciU3NcuLgsX3ijf%2F-MVb5XncnoYEToFic_k6%2F-MVbFvzpEqZ4Uv181NNK%2FfpMarTeam4.PNG?alt=media\&token=b42b76e6-9342-4c84-b80c-37b380a03a1a)

| Title        |                                                                                                                                                                         Asian Food E-Shop                                                                                                                                                                         |
| ------------ | :---------------------------------------------------------------------------------------------------------------------------------------------------------------------------------------------------------------------------------------------------------------------------------------------------------------------------------------------------------------: |
| Description  |                                                                                                                                     E-commerce that provides traditional food products which are not easily available in Spain                                                                                                                                    |
| Students     |                                                                                                                                                           Jorge Cobo \[TL], Ehsan Waheed, Esteban Medina                                                                                                                                                          |
| Instructor   |                                                                                                                                                                  Henriette Hettinga, Carlos Cobo                                                                                                                                                                  |
| Deliverables | [Product Document](https://docs.google.com/document/d/1m4feimiYuFfSsCzdMTG7RvDaPaeAnmTXCODXhUmu6xU/edit#heading=h.g5g1mn4af5l0), [Github](https://github.com/Kobyjc08/Frontend_Ultimate_Asian_Food), Public Link, [Final presentation](https://prezi.com/d4ypmebgye2z/final-presentation/?token=89cb4043ad04ef890a302022513a2d3ace0e52ab6ba7e70aa59ee284af672ed8) |

### Team 5 - Riderz

![](https://4042228299-files.gitbook.io/~/files/v0/b/gitbook-legacy-files/o/assets%2F-MRebciU3NcuLgsX3ijf%2F-MVb5XncnoYEToFic_k6%2F-MVbFvzqzLaQQZi7vZFH%2FfpMarTeam5.PNG?alt=media\&token=6858f867-eb41-4ce2-8b2f-e826e6ebf43c)

| Title        |                                                                                              [Riderz](https://riderz-app.herokuapp.com/)                                                                                             |
| ------------ | :----------------------------------------------------------------------------------------------------------------------------------------------------------------------------------------------------------------------------------: |
| Description  |                                                                                         Online Tax-Advisor for autonomous drivers/messengers                                                                                         |
| Students     |                                                                                           Alexei Soliz \[TL], Alexei Garban, Josel Carballo                                                                                          |
| Instructor   |                                                                                                              Nandan Rao                                                                                                              |
| Deliverables | [Product Document](https://docs.google.com/document/d/1n05q1q46BIuXnwyvH0QJRi3AN0JN1BnFEbLtwV0mJlI/), Github ([FE](https://github.com/garbanv/riderzfront)/BE), [Public Link](https://riderz-app.herokuapp.com/), Final presentation |

### Team 6 - Booox

![](https://4042228299-files.gitbook.io/~/files/v0/b/gitbook-legacy-files/o/assets%2F-MRebciU3NcuLgsX3ijf%2F-MVb5XncnoYEToFic_k6%2F-MVbFvzrFw4DAfIp5_A4%2FfpMarTeam6.PNG?alt=media\&token=dad31c67-8037-49e6-b5e7-04d06afd0af7)

| Title        |                                                                                                                                                               Booox                                                                                                                                                               |
| ------------ | :-------------------------------------------------------------------------------------------------------------------------------------------------------------------------------------------------------------------------------------------------------------------------------------------------------------------------------: |
| Students     |                    [Umit Selahattin](https://migracode.openculturalcenter.org/portfolio/umit-selahattin-oner/) \[TL], [Lavinia Loredana](https://migracode.openculturalcenter.org/portfolio/lavinia-loredana-sirbulescu/), [Roshan Sapkota](https://migracode.openculturalcenter.org/portfolio/roshan-sapkota/)                   |
| Instructor   |                                                                                                                                                           Eduard Bargues                                                                                                                                                          |
| Deliverables | [Product Document](https://docs.google.com/document/d/1meROU-8ikBAR7yMCeDpg-AgKYyJ-zw0KApm1wQnQaFk/), Github ([FE](https://github.com/lavinialoredana/booox-fe)/[BE](https://github.com/umitao/booox-be)), Public Link, [Final presentation](https://docs.google.com/presentation/d/1rrmiXSeljSwMtVaZAkG6HX_SMh0mTDoJi54cj-NH0lE) |


# Planning and Calendar

In this page is detailed each week work and deliverables

## Calendar

The Final project is done in 7 weeks, including the Demo Day event and the Graduation in the last week, which means that finally the students will have only 6 weeks to work on the project.

Three weeks before the Final project kick-off, teams will be decided and will start "thinking" in their project.

All the classes will be in the assigned Weekday (normally Tuesday or Wednesday), and on Saturday we will not have class. Check the next calendar and see that also we don't have classes the 3rd and 5th week.

No general classes do not mean that the teams are not working, it means that all the teams do not have a common meeting, teams can use the same hours to have team meetings, check Team Weekly Plan for more details.

|  WEEK | Class Content (Weekday)                                                                                                                                | Deliverables (students)                                    |
| :---: | ------------------------------------------------------------------------------------------------------------------------------------------------------ | ---------------------------------------------------------- |
|  *-3* | Ideas brainstorming                                                                                                                                    | <p>Fill the Role Questionnaire</p><p>Project Idea Form</p> |
|  *-2* | Teams, mentors and project assignment                                                                                                                  |                                                            |
|  *-1* |                                                                                                                                                        |                                                            |
| **1** | <p><strong>Kick-off (30' by Head of Education)</strong><br><strong>Product & Team Mgt. Workshop (90' by a Product Manager)</strong></p>                | <p>Project Design Presentation</p><p>Trello Board</p>      |
| **2** | <p><strong>How to start coding Workshop (30' by Head of Education)</strong> </p><p><strong>Project Design Presentation (20' by each Team)</strong></p> | Github                                                     |
| **3** | *\<no class>*                                                                                                                                          |                                                            |
| **4** | Teams development Tracking (15' by each Team)                                                                                                          |                                                            |
| **5** | *\<no class>*                                                                                                                                          |                                                            |
| **6** | Teams development Tracking (15' by each Team)                                                                                                          | <p>Deployed Version</p><p>Testing Plan</p>                 |
| **7** | **Demo Day Event (by Teams)**                                                                                                                          | <p>Project Presentation Link<br></p>                       |

### 2021-May

{% hint style="info" %}
The Final Project starts on the **23rd of November 2021**
{% endhint %}

* **\[23/11/2021]** Tuesday 18:00-22:00 - **Week 1:** *Project Mgt. Workshop by* [*Kamel*](https://www.linkedin.com/in/kamel-aouane-00292b14/)
* **\[27/11/2021]** Saturday 10:30-14:30 - **Week 1:** Professional Skills: Working in projects
* **\[30/11/2021]** Tuesday 18:00-22:00 - **Week 2:** *Project Design Presentation (20min by each Team)*
* **\[14/12/2021]** Tuesday 18:00-22:00 - **Week 4:** *Teams development Tracking*
* **\[28/12/2021]** Tuesday 18:00-22:00 - **Week 6:** *Teams development Tracking*
* **\[04/01/2022]** Tuesday 18:00-22:00 - **Week 7:** *Demo Day Event*
* **\[08/01/2022]** Saturday 10:30-14:30 - ***Graduation**. Location TBD*

## Week by Week

### WEEK 1. Analysis and Design (Sprint-0)

#### Objective

Before starting coding, we should have a clear and common idea of what are we going to build.

This week we should **NOT start coding**, we will think, analyze and design the next weeks project

#### Class Content

* **Product & Team Mgt. Workshop by a Product Manager:** Presentation to explain how to build a product from scratch, analysis and design techniques and the most used tools. The second part of the presentation will be to cover methodologies to succeed in the product development and how to do it with different resources working together as a team.
* [**How to start coding Workshop**](https://docs.google.com/presentation/d/1W7Izd-YNm4ydd9gnJ1QdRi9Pk8Z19x5ClcjgEmz3IV0) **by Head of Education:** Steps and tips to start a project from scratch and with more than 1 developer, use of Git in a Team and how to structure the code.
* **Team Meetings (60'-90')**: each team will have a meeting including next topics:
  * Introduction of each member of the team and the instructor
  * Product vision by the owner of the project idea
  * Talk about the project idea, main personas and main functionalities
  * Define a weekly meeting schedule to check everyone progress, for example
    * A 60' Team meeting after the class and another one on Thursday or Saturday
    * A 60' Team meeting one day every week and a 'Daily scrum' (short meeting) every 2 days
  * Create a Trello Board with the following columns: "Product Backlog", "Sprint-0", "Doing", "Done"
  * Add the tasks to do this week in the **Sprint-0** column, for example:
    * Create a presentation using [Google Slides](https://docs.google.com/presentation/), [Canva ](https://syllabus.migracode.org/courses/introduction-3/course-content/introduction-1/www.canva.com)or similar and add the description and benefits of your product
    * List and describe the Personas
    * List main functionalities
    * List user stories
    * Some Mockups (Tools: [Balsamiq](https://balsamiq.com/), [Wireframes](https://wireframe.cc/))
    * UI Basic Style Guide: primary and secondary colors, font, generic components
    * Sitemap<br>

#### Deliverables (Homework)

For the next week your team should have completed the next deliverables:

* **Project Presentation:** Create an online presentation using [Google Slides](https://docs.google.com/presentation/), [Canva ](https://syllabus.migracode.org/courses/introduction-3/course-content/introduction-1/www.canva.com)or similar,  to explain your product next week to the class, the presentation should include:
  * Title and product description
  * Benefits of the product
  * Tables of personas, functionalities and user stories (what you learned in this week Workshop)
  * UX: Some Mockups
  * UI Basic Style Guide
  * Sitemap
  * Examples (*last time this delivery was a plain document, do it on a presentation so you will have some work done for the final presentation*): [2020-Mar-Team6](https://docs.google.com/document/d/1meROU-8ikBAR7yMCeDpg-AgKYyJ-zw0KApm1wQnQaFk/),&#x20;
* **Link to Trello Board:** including tasks for the **Sprint-0**

### WEEK 2. Planning (Sprint-1)

#### Objective

Once we know what are we going to build and how, it's time to start coding!! It's very hard to be one week without coding right??

But, coding to build a product as a team, requires organization. This week we will learn how to organize a software project, starting with a structured code and a Git repository prepared to add new functionalities in parallel, and how to define a Sprint with the functionalities to develop.

#### Class Content

* **Projects Presentation (20' by each Team):** each team has 20 minutes to show and explain the project presentation that have been working on from last week
* **Team Meetings (60'-90'):** each team will have a meeting including next topics:
  * Define the product Backlog
  * Prioritize the tasks for the **Sprint-1** (2 weeks), dividing them by Front-end and Back-end and assign them to team members
  * Define the structure of the code, what react modules you will use, you will use Bootstrap?, other questions that any team member could have...
  * Important tasks to be included in the **Sprint-1** are:
    * Build the project skeleton: backend, frontend and instructions to start it
    * Design the database: tables, relations, attributes and types
    * Create the Database script with tables and some rows, to have all same database in local
    * Prepare the GitHub repository to work as a team with the skeleton on it
    * In the frontend, start with the generic components: landing, header, footer, common buttons, etc
    * All the features that will be included in **Sprint-1**

#### Deliverables (Homework)

For the next week your team should have completed the next deliverables:

* **GitHub link:** Make the skeleton of the source code, upload it go Github and prepare it to work with your team

### **WEEK 3. Development (Sprint-1)**

**Objective**

Develop the assigned tasks in Sprint 1

#### Class Content

There is no class this week. But the team should meet to check progress, blockers and clarify any doubt.

**Deliverables**

There are not deliverables for this week

### **WEEK 4. Development (Sprint-2)**

**Objective**

Show the progress of a complete Sprint. Analyze the blockers that we had, and learn from other teams. Improve the planning for he second sprint.

#### Class Content

Check the progress of each team, discuss the priorities and blockers together. Each team will make a DEMO and show the Trello board following the next steps:

* What we had planned for today&#x20;
* Are all tasks done? If not, what is blocking our progress?
* What we will do for next week

### **WEEK 5. Development (Sprint-2)**

**Objective**

Develop the assigned tasks in Sprint 2

#### Class Content

There is no class this week. But the team should meet to check progress, blockers and clarify any doubt.

**Deliverables**

There are not deliverables for this week

### **WEEK 6. Deploy and Testing (Sprint-3)**

**Objective**

Show the progress of a complete Sprint. Analyze the blockers that we had, and learn from other teams.

#### Class Content

Check the progress of each team, discuss the priorities and blockers together.&#x20;

Each team will make a DEMO and show the Trello board following the next steps:

* What we had planned for today&#x20;
* Are all tasks done? If not, what is blocking our progress?
* Identify the most important tasks to do before the final presentation.

**Deliverables**

For the next week your team should have completed the next deliverables:

* **Public URL:** Publish the project in the cloud hosting Heroku to have a public URL to access to your project. Follow the steps of this [guide ](/guides/heroku-deployment)to complete your deployment.
* **Final project presentation:** based on the slides that you prepared in the first week delivery "project Design Presentation", but this time focus your presentation for a general public (not just developers)

### **WEEK 7. Final Presentation**

#### **Demo Day Event**

It is an open event, where all MigraCode's community is invited (technical and non-technical volunteers, all courses students...) Also we will invite our list of companies and their recruiters and we will make noise in all social networks (Linked-In, Meetup, Instagram,...)&#x20;

*\[up to 100 persons are expected to join]*

#### Class Content

* **Event Introduction (15' by Vincent and Head of Education)**
* **Projects Presentation (20' by each Team):** each team has 15 minutes to show and explain the project, the idea is to explain the projects using the slides, and then have some time to show a DEMO of the project.

**Graduation Event**

This is the event that students are waiting from the first day!!! Is the "party" when the students receive their diplomas and volunteers and students make a short speech.

More details will be sent in each course.


# How to start coding

## How to start a full-stack coding project from scratch?

1. Prepare the project architecture
   1. Create a repo, this repo will have 2 main folders:
      1. client: here you have to create from scratch
      2. server
   2. **OR** use a template to start coding: <https://github.com/csfilipinyi/cyf-final-project-pgsql-starter-kit>
2. Read the Git manual to build the branches and permissions needed to work in the same repository
3. Work locally on your assigned features, and push your changes at the end of the sprint

## How to manage databases in a Team?

There are 2 options:

1. Create a SQL script that drops and creates all tables and rows in the local database
2. Use the same cloud database deployed in Heroku

## How to manage GIT in a Team?

Read the Guide [Git Management](https://syllabus.migracode.org/git-on-teams)

## How to deploy our code on Internet?

Read the Guide [Heroku Deployment](https://syllabus.migracode.org/heroku-deployment)


# Methodology

## **Introduction**

This is the first time we will build a software product, but how do we start? Do we create a file in Visual Studio and write the first lines of code? Do we draw and write everything like in a building plan before start coding?

Build a software product doesn't require the same specification as a building, but you will have to make some questions before start coding, like:

1. What are the requirements?
2. What budget/time/resources do we have to do it?
3. How could be the product to give an answer to those requirements?

## Software development life cycle

### Waterfall model

{% embed url="<https://en.wikipedia.org/wiki/Systems_development_life_cycle>" %}

### Agile Methodologies

{% embed url="<https://en.wikipedia.org/wiki/Agile_software_development>" %}

### SCRUM

SCRUM is an Agile Methodology

{% embed url="<https://en.wikipedia.org/wiki/Scrum_(software_development)>" %}

![](https://4042228299-files.gitbook.io/~/files/v0/b/gitbook-legacy-files/o/assets%2F-MRebciU3NcuLgsX3ijf%2F-MSX1YFKG1jG5ZchbKy2%2F-MSX27vFk4DcQgMoud7o%2Fimage.png?alt=media\&token=6f0fd2e9-b81d-4b1c-b15f-afd6602bbf45)

Actors:

* Product Owner:&#x20;
* Development Team:&#x20;
* Scrum Master:&#x20;

Items:

* Scrum Task Board:&#x20;
* Product Backlog:
* Sprint Backlog:

Meetings:

* Sprint Planning:
* Sprint Review
* Sprint Retrospective

## **Final Project Phases**

The main work phases are:

1. Requirements Analysis & Design
2. Planning
3. Development
4. Testing
5. Presentation

To these phases we will apply SCRUM

Actors:

* Product Owner: the client or the idea's owner
* Development Team: the developers
* Scrum Master: the instructor

Items:

* Scrum Task Board: we will use Trello
* Product Backlog: column with all functionalities we would like to have in our product
* Sprint Backlog: column with all functionalities we would like to finish during a Sprint

Meetings:

* Sprint Planning:
* Sprint Review


# Team meetings

## Team Kick-off Meeting

know the members

talk about the project

Write user stories

Use of Trello

## Development Kick-off Meeting

Prioritize Trello cards for the first sprint

Assign cards to team members

Create project skeleton->link to first steps

Create branches and check each member can commit changes

React components: start with the generic components, the ones that will be in different pages

Back-end: start with the database and the Node Integration

## Team Weekly Meetings

We’re going to run the final projects in weekly “sprints”, planning out what we’re going to do as teams and as individuals. Each week will therefore look something like:

* **Daily standup**: post a daily message in the team Slack channel to let the rest of the team know what you’re working on, what progress you’ve made (even, and perhaps *especially*, if it’s none so far) and share anything that’s blocking you. Set a time for this and stick to it. Afterwards, post a team summary in the main class channel.
* **Mid-week check-in**: you should have at least one Slack call with the whole team and a mentor during the week to sync on progress, escalate any blockers and make sure that you’re still heading in the right direction.


# Professional Skills

**During your 8-month course, you will receive three weeks of Professional Skills trainings. These trainings include many different topics related to discovering your own work personality, preparing you for the labour market, strengthening your emotional intelligence and getting experience with advanced project management tools.**

Below you can find a week-by-week overview - click on the topic title to see more details.

{% content-ref url="/pages/-MSXAGvSq1qFSR\_uL29t" %}
[Module 1: Soft Skills](/courses/introduction-3/course-content/soft-skills-trainings/soft-skills-overview)
{% endcontent-ref %}

{% content-ref url="/pages/-MSleucJ\_vPV9N5UCm57" %}
[Module 2: Employability](/courses/introduction-3/course-content/soft-skills-trainings/2-employability)
{% endcontent-ref %}

{% content-ref url="/pages/-MSlewz3cqc7Rk\_CzCGh" %}
[Module 3: Working in projects](/courses/introduction-3/course-content/soft-skills-trainings/4-project-management)
{% endcontent-ref %}

![](https://4042228299-files.gitbook.io/~/files/v0/b/gitbook-legacy-files/o/assets%2F-MRebciU3NcuLgsX3ijf%2F-MT7QxE6NAAfkngYlTUp%2F-MT7RThDYTUSNnx3Rmg4%2FDSC_0301migracode-bcn.jpg?alt=media\&token=d039af41-aa82-4a35-b739-af54845ee675)


# Module 1: Soft Skills

## Day 1: Communication

* Communication Styles (Self-awareness, disk model, including a short test)&#x20;
* Non-verbal communication / Body language

## Day 2: Diversity and working in teams

* Working with different cultures/religions/genders/etc.
* Receiving/giving feedback (peer to peer and to managers)

![](https://4042228299-files.gitbook.io/~/files/v0/b/gitbook-x-prod.appspot.com/o/spaces%2F-MRebciU3NcuLgsX3ijf%2Fuploads%2F8tR0TnsWRfbITieVXdHn%2FModule%201%20Communication%2C%20Teamwork%20%26%20Diversity.jpg?alt=media\&token=b179b4cf-fa16-461a-a627-99797fe0e847)


# Module 2: Employability

## Day 1: Self-branding and the job search

* (online) Networking
* Personal Branding
* Market Research
* GitHub & Stack Overflow presentation
* LinkedIn and CV
* Motivation letter writing
* Competence Interview Practice&#x20;

## Day 2: Cracking the tech-interview

* Technical Interview Introduction
* Mock interviews

![](https://4042228299-files.gitbook.io/~/files/v0/b/gitbook-x-prod.appspot.com/o/spaces%2F-MRebciU3NcuLgsX3ijf%2Fuploads%2FFj4W8Gcvg4HRZJYe2BPU%2Fimage.png?alt=media\&token=8065823f-d3a0-4091-ba09-93f7cb0ad2f9)


# Module 3: Working in projects

## Day 1: Facing challenges

* Conflict management
* Working under pressure&#x20;

## Day 2: Project Management

* Project Management&#x20;
* Agile Methodologies&#x20;
* Feature Development
* User Story Development

![](https://4042228299-files.gitbook.io/~/files/v0/b/gitbook-x-prod.appspot.com/o/spaces%2F-MRebciU3NcuLgsX3ijf%2Fuploads%2FBQuO5obNSQqt9M97XAUL%2Fimage.png?alt=media\&token=929f82ed-d45f-4918-a899-261c252f8c5e)


# Advanced JS & ASP.NET course

Under development...


# Admission assignment

## Pre-knowledge

You have to know **HTML and CSS.** You can follow [this video](https://www.youtube.com/watch?v=mU6anWqZJcc\&ab_channel=freeCodeCamp.org) or [this course](https://www.freecodecamp.org/learn/responsive-web-design/) to get the required knowledge.

You have to know **intermediate level JavaScript.** You can follow [this video](https://www.youtube.com/watch?v=jS4aFq5-91M\&ab_channel=freeCodeCamp.org) or [this course](https://www.freecodecamp.org/learn/javascript-algorithms-and-data-structures/) to get the required knowledge.

## Admission project: Pokedex

**In Pokemon lore, the Pokedex is a Pokemon dictionary that the characters carry with them. In this device, they can query the Pokemons and learn details about them, such as, abilities, type of Pokemon, strengths and weaknesses. The different designs of the Pokedex can be found online.** [**Here**](https://pokeapi.co/docs/v2) **is a sample UI of Pokedex.**

#### For the admission of the Advanced JS/ASP.NET course, please create a Pokedex program with the following requirements:

1. Develop a search field where users will search for Pokemon’s name or id.
   * Create a field and button.
   * Add a callback to the button event listener.
2. Make a request by Pokemon ID or name. PokeApi already can handle both.
   * There are some Pokemons that don’t exist but should, 999 doesn’t exist but 1000 does.
   * This is a perfect example of interacting with the response’s status code and adjusting their app to it.
   * The default param of the fetch function is a GET method.
3. Display important information on the Pokemons. All this information is available on the first REST call to the API.
   * Name (Bulbasaur, Charizard, Pikachu)
   * Skills (Lighting-rod, static)
   * Type of Pokemon (Ghost, Poison, Fire)
   * Pokemon Sprites

**WireFrames**

***Home***

[![](https://github.com/Migracode-Barcelona/javascript-module-3-pokedex-workshop/raw/main/images/pokedex%20home.png)](https://github.com/Migracode-Barcelona/javascript-module-3-pokedex-workshop/blob/main/images/pokedex%20home.png)

***Search***

[![](https://github.com/Migracode-Barcelona/javascript-module-3-pokedex-workshop/raw/main/images/pokedex%20search.png)](https://github.com/Migracode-Barcelona/javascript-module-3-pokedex-workshop/blob/main/images/pokedex%20search.png)

***Cards***

[![](https://github.com/Migracode-Barcelona/javascript-module-3-pokedex-workshop/raw/main/images/pokedex%20card.png)](https://github.com/Migracode-Barcelona/javascript-module-3-pokedex-workshop/blob/main/images/pokedex%20card.png)

[![](https://github.com/Migracode-Barcelona/javascript-module-3-pokedex-workshop/raw/main/images/pokedex%20card%202.png)](https://github.com/Migracode-Barcelona/javascript-module-3-pokedex-workshop/blob/main/images/pokedex%20card%202.png)


# Self Study Prerequisites


# Index

## Table of Content

### Dot Net

1. Introduction to the .Net
2. Understanding .NET and the CLR (Common Language Runtime)
3. What kind of applications can be developed with .NET
4. Differences between the .NET Framework and .NET 5
5. What is .NET Standard?
6. Create libraries in .NET Standard and how to use them in different runtimes
7. Evolution of .NET from its appearance to version 1.0
8. Garbage collector in .NET
9. What's New in ASP.Net Core 3.0
10. What's New in .Net 5
11. .Net 5 SDK Installation
12. Create .Net 5 project
13. Introduction to VS
14. Installing Visual Studio 2019 Community
15. Introduction to Visual Studio 2019 Community
16. How to create console application in Visual Studio 2019 Community
17. Compile and run our first application

### C# Language

1. Introducing C#&#x20;
2. Why C#?&#x20;
3. C#’s Defining Features&#x20;
4. Managed Code and the CLR&#x20;
5. Basic Coding in C#&#x20;
   1. Local Variables Scope&#x20;
   2. Statements and Expressions&#x20;
   3. Comments and Whitespace&#x20;
   4. Fundamental Data Types&#x20;
      1. Numeric Types&#x20;
      2. Booleans&#x20;
      3. Strings and Characters&#x20;
      4. Object&#x20;
   5. Operators&#x20;
   6. Flow Control&#x20;
      1. Boolean Decisions with if Statements&#x20;
      2. Multiple Choice with switch Statements&#x20;
      3. Loops: while and do&#x20;
      4. C-Style for Loops&#x20;
      5. Collection Iteration with foreach Loops&#x20;
6. Collections&#x20;
   1. Arrays&#x20;
      1. Array Initialization&#x20;
      2. Searching and Sorting&#x20;
      3. Multidimensional Arrays&#x20;
      4. Copying and Resizing&#x20;
   2. List\<T>
7. Types&#x20;
   1. Classes&#x20;
      1. Static Members&#x20;
      2. Static Classes&#x20;
      3. Reference Types&#x20;
   2. Structs&#x20;
      1. When to Write a Value Type&#x20;
      2. Guaranteeing Immutability&#x20;
   3. Members&#x20;
      1. Fields&#x20;
      2. Constructors&#x20;
      3. Deconstructors&#x20;
      4. Methods&#x20;
      5. Properties&#x20;
   4. Interfaces&#x20;
      1. Default Interface Implementation&#x20;
   5. Enums&#x20;
8. Generics&#x20;
   1. Generic Types&#x20;
   2. Constraints&#x20;
      1. Type Constraints&#x20;
      2. Reference Type Constraints&#x20;
      3. Value Type Constraints&#x20;
      4. Value Types All the Way Down with Unmanaged Constraints&#x20;
      5. Not Null Constraints&#x20;
      6. Other Special Type Constraints&#x20;
      7. Multiple Constraints

### MVC architecture

1. What is MVC?
2. How MVC Design Pattern Works?
3. Understanding Model, View, and Controller.
4. Where the MVC Design Pattern is used in the real-time three-layer application?
5. What is ASP.NET Core MVC?

### Entity Framework

1. Introduction to Entity Framework Core
2. What is Entity Framework Core?&#x20;
3. What is ORM?&#x20;
4. Why do we need to use an ORM?&#x20;
5. EF Core Development Approaches.&#x20;
6. EF Core Code First Approach&#x20;
7. Entity Framework Core Database First Approach&#x20;
8. EF Core Database Providers&#x20;
9. Why need to use Entity Framework Core over EF 6.x?


# Course content


# Index

## Table of content

### Client Programming

1. The location and history objects
2. Document object
3. The form object&#x20;
4. IFE&#x20;
5. Dynamic Scope vs. Lexical Scope&#x20;
6. call(), apply(), bind()&#x20;
7. bind() and currying&#x20;
8. Functions are Objects&#x20;
9. First Class Citizens&#x20;
10. Higher Order Functions&#x20;
11. Closures and Encapsulation&#x20;
12. Promises&#x20;
13. ES8 - Async Await&#x20;
14. Job Queue&#x20;
15. Parallel, Sequence and Race&#x20;
16. ES2020: allSettled()&#x20;
17. ES2021: any()&#x20;
18. Threads, Concurrency and Parallelism&#x20;
19. What Is A Module?&#x20;
20. Module Pattern&#x20;
21. CommonJS, AMD, UMD&#x20;
22. ES6 Modules

### Server programming

1. Collections&#x20;
   1. Arrays&#x20;
      1. Array Initialization&#x20;
      2. Searching and Sorting&#x20;
      3. Multidimensional Arrays&#x20;
      4. Copying and Resizing&#x20;
   2. List\<T>&#x20;
   3. List and Sequence Interfaces&#x20;
   4. Implementing Lists and Sequences&#x20;
      1. Implementing IEnumerable\<T> with Iterators&#x20;
      2. Collection\<T>&#x20;
      3. ReadOnlyCollection\<T>
2. Inheritance&#x20;
   1. Inheritance and Conversions&#x20;
   2. Interface Inheritance&#x20;
   3. Virtual Methods&#x20;
   4. Abstract Methods&#x20;
   5. Sealed Methods and Classes&#x20;
   6. Accessing Base Members&#x20;
   7. Inheritance and Construction&#x20;
   8. Special Base Types
3. LINQ&#x20;
   1. Query Expressions&#x20;
      1. How Query Expressions Expand&#x20;
      2. Supporting Query Expressions&#x20;
   2. Deferred Evaluation&#x20;
   3. LINQ, Generics, and IQueryable\<T>
   4. Standard LINQ Operators&#x20;
      1. Filtering&#x20;
      2. Select&#x20;
      3. SelectMany&#x20;
      4. Ordering&#x20;
      5. Grouping&#x20;
      6. Joins
4. Introduction to .NET
5. Introduction to ASP.NET
6. Internet Information Services
7. What is web API&#x20;
8. Web API project&#x20;
9. Project structure&#x20;
10. Web API controller&#x20;
11. Configure Web API&#x20;
12. Web API routing&#x20;
13. Middleware&#x20;
14. Parameter binding&#x20;
15. Action return type&#x20;
16. Data formats&#x20;
17. Create Web API for CRUD operations&#x20;
    1. Implement GET
    2. Implement POST&#x20;
    3. Implement PUT&#x20;
    4. Implement DELETE&#x20;
18. Consume Web API
    1. Consume all CRUD operations
19. HttpClient&#x20;
20. Dependency Injection&#x20;
21. Exception-handling
22. Access to databases
23. Create the database
24. Authentication and Security
25. Web API hosting


# How to install course tools

## **Needed Tools**

**List of tools:**

* **Slack**
* **Zoom**
* **VS Code**
* **Chrome**
* **GIT**
* **Node**
* **PostgreSQL**
* **Dbeaver**

## Install software in Ubuntu

You can use the **Ubuntu Software Center** to search and install new software packages in the computer, it is like the Play Store used in Android mobiles. You will find this icon in the left bar:<br>

![](https://lh3.googleusercontent.com/wknLkHZfEMeuvEAmyipFT5DL9vw_mnL6DImuQw968FmehaMG6xP-3RmLeKB3ake_VLo3s42l-BFZ0hmL4P0I73tT5OnyXPfcCDU97cSeesMF4ba0-rr2OAN-aGF_jHxJz71C7-mC)

## **Slack**

**Ubuntu**: Go to the Ubuntu Software Center, search and install it.

**Others:** Go to the [Slack Website](https://slack.com/intl/es-es/download) and follow the instructions.

## **Visual Studio Code**

**Ubuntu**: Go to the Ubuntu Software Center, search and install it.

**Others:** Go to the [Visual Studio Code Website](https://code.visualstudio.com/download) and follow the instructions.

## **Node**

Ubuntu: Go to the Ubuntu Software Center, search and install it.

Go to the [NodeJS Website](https://nodejs.org/es/download/) and follow the instructions.<br>

To check installation open a Terminal and execute:

```
node -v
```

## **Git**

**Ubuntu**: Go to the Ubuntu Software Center, search and install it.

**Others**: Go to the Git Website and follow the instructions.

To check installation open a Terminal and execute

```
git
```

## **Chrome**

**Ubuntu**: open the terminal and execute the following commands

```
wget https://dl.google.com/linux/direct/google-chrome-stable_current_amd64.deb
```

```
sudo apt install ./google-chrome-stable_current_amd64.deb
```

**Others**: Go to [Chrome Website](https://www.google.com/chrome/browser/desktop/index.html) and follow the instructions

## **PostgreSQL**

#### **Ubuntu:**&#x20;

open the terminal and execute the following commands

sudo apt-get install postgresql-12

On Linux systems, there is no default password set.

To set the default password:

Run the psql command from the postgres user account:

```
sudo -u postgres psql postgres
```

Set the password, try to use the same password you have in your computer, migracode

```
\password postgres
```

Enter the password.

And finally close psql with the command:

```
\q
```

More info in: <https://docs.boundlessgeo.com/suite/1.1.1/dataadmin/pgGettingStarted/firstconnect.html> <br>

**Others**: <https://www.postgresql.org/download/><br>


# Introduction to GIT

## Github Basics <a href="#github-basics" id="github-basics"></a>

### Create a new project in Github <a href="#create-a-new-project-in-github" id="create-a-new-project-in-github"></a>

See the comlete tutorial on [Github: Create a repo](https://docs.github.com/en/github/getting-started-with-github/create-a-repo)

Instead of cloning the repo that you created in Github, you can also initiallize the repo using the command line/terminal by followint the [Add a project using the command line](https://docs.github.com/en/github/importing-your-projects-to-github/adding-an-existing-project-to-github-using-the-command-line)

### Fork and Clone an existing project from Github <a href="#fork-and-clone-an-existing-project-from-github" id="fork-and-clone-an-existing-project-from-github"></a>

We use fork to copy an existing Github repository into out Github account We use clone to copy an existing Github repository into our laptop If we don't fork first, for sure we can clone any repository from others, but if they don't give privileges we will not be able to push the changes, that's why we always fork the repositories

**To fork a repo:**

Firstly you need to click the "Fork" button:

![](https://4042228299-files.gitbook.io/~/files/v0/b/gitbook-legacy-files/o/assets%2F-MRebciU3NcuLgsX3ijf%2F-MhiI7IlWBxO2NlIMrWK%2F-MhiIfKp4qvfaPxJUHMV%2Fimage.png?alt=media\&token=0044c16a-ba0f-4f13-b885-b7c6a38b9818)

Then you should be brought to your new fork (notice how the repo title changes):

![](https://4042228299-files.gitbook.io/~/files/v0/b/gitbook-legacy-files/o/assets%2F-MRebciU3NcuLgsX3ijf%2F-MhiI7IlWBxO2NlIMrWK%2F-MhiIiURvLNQXYDu7fzG%2Fimage.png?alt=media\&token=a4239e31-bc8c-4e33-a760-72268ba39469)

**To clone a repo:**

Now you can clone from your fork by copying the URL here:

![](https://4042228299-files.gitbook.io/~/files/v0/b/gitbook-legacy-files/o/assets%2F-MRebciU3NcuLgsX3ijf%2F-MhiI7IlWBxO2NlIMrWK%2F-MhiIppXm3Y7nT07mVbx%2Fimage.png?alt=media\&token=ac5570d0-33ad-4c60-8144-433d1dde53d5)

The command to clone is:

```
git clone URL_YOU_JUST_COPIED
```

### Basic Git commands <a href="#basic-git-commands" id="basic-git-commands"></a>

#### Commit and push your changes to Github

Once you have your repository, and you do the first changes in the code, do the following instructions to save and push to Github your work:

* `git add .` // track changes on files (create, remove, modify)
* `git commit -m “message”` // save changes
* `git push` // upload your commits from origin (your laptop) to the remote (Github) in branch master (the default)

If you are working with the terminal, before execute the commands, are you in the right repository folder? We can have different folders, each one for a different repository.

#### Configuration commands

* `git config --global user.name "John Doe"`
* `git config --global user.email johndoe@example.com`
* `git config --list`

#### Commands to create a project

* `git init *project name*` //initialize GIT repository in an empty directory (locally)
* `git add .` //track changes on files (create, remove, modify)
* `git commit -m “message”` //save changes
* `git remote add origin *https://github.com/yourusername/yourrepo*`
* `git push -u origin master` //upload origin (my laptop) to the server in branch
* `git status` //show current status
* `git clone *url*` //download files from URL with a file .git

### Remote <a href="#remote" id="remote"></a>

Git has a concept of a "remote". These are other git repositories that can be connected to over the internet. You can push or pull code changes from them. Remotes have a *name* and a *URL*.

All the remotes that you will use at Migracode are hosted on GitHub, so have a github.com URL.

When you clone a repo from GitHub, the default remote is named `origin` and the URL is set to that of the GitHub repo.

You can view the remotes you have set up with:

```
git remote -v
```

#### Adding a Remote

Follow these instructions if you are getting an permission error when pushing your changes. If you have cloned the original repo *before* forking, you'll need to follow these instructions. You can check this by running `git remote -v`. If the output looks something like:

```
origin git@github.com:CodeYourFuture/css-skin.git (fetch)
origin git@github.com:CodeYourFuture/css-skin.git (push)
```

then you have cloned before forking. The key is that the `origin` remote is pointing to a CodeYourFuture URL. Don't worry, we can fix it!

The first step is to fork the original repo. Follow the first 2 steps from [forking instructions](https://migracode-barcelona.github.io/syllabus/others/git.html#how-to-fork-a-github-repo) above.

Now, instead of cloning the fork (you have already cloned), you need to add it as a remote.

Run:

```
git remote add fork URL_YOU_COPIED_FROM_FORK
```

This will add a new remote called `fork` that points to your new fork. To check this, run `git remote -v` again. You should see both the `origin` and `fork` remotes.

Now that you have your `fork` remote you can push to it (instead of the `origin` remote, which will error) by running:

```
git push fork
```

You'll need to remember to add the `fork` *every time you push*.

## Other Github functionalities

### Publish your website in Github.io with GitHub Pages

1. Now all that remains is to publish your website! In your repository `http://github.com/your-username/your-repository-name`, you can find the settings icon in the top right corner:&#x20;

![](https://4042228299-files.gitbook.io/~/files/v0/b/gitbook-legacy-files/o/assets%2F-MRebciU3NcuLgsX3ijf%2F-MaOQDjxMpL4perl-oXX%2F-MaOQrz8RXH35uJL_MMv%2Fimage.png?alt=media\&token=2d9f4c3e-c3bf-457d-9166-a284e6c2bb95)

**2.** Find the section named Github Pages and select "main branch" under 'Source', then hit "Save".

![](https://4042228299-files.gitbook.io/~/files/v0/b/gitbook-legacy-files/o/assets%2F-MRebciU3NcuLgsX3ijf%2F-MaOQDjxMpL4perl-oXX%2F-MaOQw50qQZkGWspR1xn%2Fimage.png?alt=media\&token=449de886-0405-4369-96d8-03d4e4751b96)

**3.** Wait a few minutes, then refresh the page and come back to the Github Pages section. Now you should see a green bar saying "Your site is published at `http://github.com/your-username/your-repository-name`". Click the link, verify that your website is there, then share it with your class!

### Making a Pull Request (PR)

So you've done your homework, you've committed your changes and are ready to make a PR. Congrats! 🎉🎉🎉

At this point you should have followed the instructions either to [fork the original repo](https://migracode-barcelona.github.io/syllabus/others/git.html#how-to-fork-a-github-repo) or [added a remote to your fork](https://migracode-barcelona.github.io/syllabus/others/git.html#adding-a-remote). If you haven't make sure you read those sections first.

You will need to push to your fork. If you forked and then cloned (as in the [how to fork instructions](https://migracode-barcelona.github.io/syllabus/others/git.html#how-to-fork-a-github-repo)) then you just need to run `git push`. If you [added a remote to your fork](https://migracode-barcelona.github.io/syllabus/others/git.html#adding-a-remote), then you will need to run `git push fork`.

Next you need to go the original repo in your browser (probably starting with <https://github.com/CodeYourFuture>). Next click the Pull Requests tab:

![](https://4042228299-files.gitbook.io/~/files/v0/b/gitbook-legacy-files/o/assets%2F-MRebciU3NcuLgsX3ijf%2F-MhiI7IlWBxO2NlIMrWK%2F-MhiJ-SIGGDs300fjeai%2Fimage.png?alt=media\&token=857ff29e-2914-4bbd-a647-ef7c49b3a86a)

Then click the New pull request button:

![](https://4042228299-files.gitbook.io/~/files/v0/b/gitbook-legacy-files/o/assets%2F-MRebciU3NcuLgsX3ijf%2F-MhiI7IlWBxO2NlIMrWK%2F-MhiJ30_tZ6FO4saAZI4%2Fimage.png?alt=media\&token=188515a0-9581-4136-b44e-de32a94e17f0)

Then click the "compare across forks" link:

![](https://4042228299-files.gitbook.io/~/files/v0/b/gitbook-legacy-files/o/assets%2F-MRebciU3NcuLgsX3ijf%2F-MhiI7IlWBxO2NlIMrWK%2F-MhiJ60eSDzumKqXjz2m%2Fimage.png?alt=media\&token=8280b1b0-ea27-4279-ab7f-528121ff4a80)

Then click the "head fork" dropdown button:

![](https://4042228299-files.gitbook.io/~/files/v0/b/gitbook-legacy-files/o/assets%2F-MRebciU3NcuLgsX3ijf%2F-MhiI7IlWBxO2NlIMrWK%2F-MhiJ8R0t9wwAUEScuJL%2Fimage.png?alt=media\&token=efead2f3-16a2-43fb-9621-998415fab0cc)

Then find your fork in the list and click it:

![](https://4042228299-files.gitbook.io/~/files/v0/b/gitbook-legacy-files/o/assets%2F-MRebciU3NcuLgsX3ijf%2F-MhiI7IlWBxO2NlIMrWK%2F-MhiJApszjW2Upovqw04%2Fimage.png?alt=media\&token=6a39f765-98bc-4935-8cd0-e215a6e85fea)

Then click the Create pull request button:

![](https://4042228299-files.gitbook.io/~/files/v0/b/gitbook-legacy-files/o/assets%2F-MRebciU3NcuLgsX3ijf%2F-MhiI7IlWBxO2NlIMrWK%2F-MhiJGGx94Bk3eHbY0FU%2Fimage.png?alt=media\&token=5bc3b6b7-533d-403b-a947-52467c9b5ead)

Almost there! Now fill out the PR form. Give it a sensible title and an (optional) description:

![](https://4042228299-files.gitbook.io/~/files/v0/b/gitbook-legacy-files/o/assets%2F-MRebciU3NcuLgsX3ijf%2F-MhiI7IlWBxO2NlIMrWK%2F-MhiJJDhNBJAgYz5EHEk%2Fimage.png?alt=media\&token=05143b5f-5af9-4da4-8a3c-b1e0489e3d60)

And finally click the Create pull request button at the bottom of the form:

![](https://4042228299-files.gitbook.io/~/files/v0/b/gitbook-legacy-files/o/assets%2F-MRebciU3NcuLgsX3ijf%2F-MhiI7IlWBxO2NlIMrWK%2F-MhiJLpWurp7osz5W8_M%2Fimage.png?alt=media\&token=a7504ceb-73e5-4827-b047-d8e0a59551e5)

That's it! You created your PR!

![](https://4042228299-files.gitbook.io/~/files/v0/b/gitbook-legacy-files/o/assets%2F-MRebciU3NcuLgsX3ijf%2F-MhiI7IlWBxO2NlIMrWK%2F-MhiJOYXTe_HlgHBcOHR%2Fimage.png?alt=media\&token=9cc16c22-8377-418a-a585-c64c56bb4445)

## Advanced

### Git Branching <a href="#git-branching" id="git-branching"></a>

You have been using git to track the changes you make to your exercises project. Each time you commit, you save a copy of your files.

![](https://4042228299-files.gitbook.io/~/files/v0/b/gitbook-legacy-files/o/assets%2F-MRebciU3NcuLgsX3ijf%2F-MhiI7IlWBxO2NlIMrWK%2F-MhiJckTOgnYvPDnDunh%2Fimage.png?alt=media\&token=c2676999-2657-4d7a-b914-afd2fdb59b9e)

When you create a new branch, you create a separate line of commits.

![](https://4042228299-files.gitbook.io/~/files/v0/b/gitbook-legacy-files/o/assets%2F-MRebciU3NcuLgsX3ijf%2F-MhiI7IlWBxO2NlIMrWK%2F-MhiJeI9kzB_G-_s8nIm%2Fimage.png?alt=media\&token=0da413ac-27ae-4d29-a771-021b7027f864)

With branches, you can work on two copies of your project and switch back and forth.

![](https://4042228299-files.gitbook.io/~/files/v0/b/gitbook-legacy-files/o/assets%2F-MRebciU3NcuLgsX3ijf%2F-MhiI7IlWBxO2NlIMrWK%2F-MhiJfwPbqC_VjiwY0Vb%2Fimage.png?alt=media\&token=8a81ae64-8727-4e08-bffc-54923d0f74d8)

Complete exercise 9 from the [exercise project](https://github.com/Migracode-Barcelona/html-css-git-exercises) to learn how to use git branches.

> If you want to go deeper, read this article on [how git branching works](https://www.atlassian.com/git/tutorials/using-branches).

### Git Merging <a href="#git-merging" id="git-merging"></a>

Last week you used Git to create a branch so that you could work on two different copies of your project at the same time.

![](https://4042228299-files.gitbook.io/~/files/v0/b/gitbook-legacy-files/o/assets%2F-MRebciU3NcuLgsX3ijf%2F-MhiI7IlWBxO2NlIMrWK%2F-MhiJkEl76sQAhkLR5Pr%2Fimage.png?alt=media\&token=cfd4746e-d559-4448-b6e0-41cff2f80d5b)

This week you will learn how to merge your changes in one branch back to your master branch.

![](https://4042228299-files.gitbook.io/~/files/v0/b/gitbook-legacy-files/o/assets%2F-MRebciU3NcuLgsX3ijf%2F-MhiI7IlWBxO2NlIMrWK%2F-MhiJm4CVsxfxkz_OeQs%2Fimage.png?alt=media\&token=1e0ad4e6-12d8-49ba-aabf-02a949330b53)

Complete exercise 18 from the [exercise project](https://github.com/Migracode-Barcelona/html-css-git-exercises).

### Git Merge Conflicts <a href="#git-merge-conflicts" id="git-merge-conflicts"></a>

Last week you used Git to merge your changes from one branch back into your master branch.

![](https://4042228299-files.gitbook.io/~/files/v0/b/gitbook-legacy-files/o/assets%2F-MRebciU3NcuLgsX3ijf%2F-MhiI7IlWBxO2NlIMrWK%2F-MhiJq1zRJfqbOnqe5iD%2Fimage.png?alt=media\&token=77ebf4b3-2c70-4441-85ad-e52dc3d1e860)

Sometimes Git can not automatically merge one branch into another, because each branch has modified the same line of code. Git does not know which version of the line is the correct one. When this happens, we have a "merge conflict".

![](https://4042228299-files.gitbook.io/~/files/v0/b/gitbook-legacy-files/o/assets%2F-MRebciU3NcuLgsX3ijf%2F-MhiI7IlWBxO2NlIMrWK%2F-MhiJsIQejrPDsTif1kH%2Fimage.png?alt=media\&token=4525aa33-7165-4966-970c-85200312e93a)

As a developer, you have to tell Git which version of the line of code is correct.

Complete exercise 28 from week 3 of the [HTML, CSS and Git Exercises](https://github.com/Migracode-Barcelona/html-css-git-exercises) to learn how to resolve a merge conflict.

<https://www.atlassian.com/git/tutorials/using-branches/merge-conflicts>

### Git Conflicts <a href="#git-conflicts" id="git-conflicts"></a>

As a professional, you'll usually need to work alongside other coders to build an app or website. We use version control to coordinate changes and manage any conflicts that arise. [Git](https://git-scm.com/) is a version control system which helps us merge code that we've been working on separately into one common codebase.

To manage conflicts, we will need a common code base in which all changes are coordinated. When working on our own, we'll make our changes in `branches` to keep the code separate. Then we'll learn how to refresh your individual `branch` with the common code base, and prepare your changes to be merged.

> Exercise: Get together in pairs and select a "leader". The leader should fork [this repository](https://github.com/CodeYourFuture/first-git-conflict) to their GitHub account. The other person should then fork the leader's repository. Both students should then clone their own personal forks locally.

Now that you have the project set up on your computer, you need a place to safely make changes without effecting the common code base. To do this, we'll navigate to our project in the Terminal and create a new branch:

```
cd <your-project-directory>
git checkout -b my-first-branch
```

When you commit changes on this branch, your changes will be saved separately from the common code base. This way both team members can make changes at the same time.

> Exercise: Add your name and a sentence about yourself to the `index.html` file. Then `git add` and `git commit` to commit to your personal branch.

Now you have two branches: `master` and `my-first-branch`. These branches have *diverged*, which means you have changes in one that don't appear in the other. You can check this by running `git checkout master`, then looking at your `index.html` file.

When you're done, run `git checkout my-first-branch` to go back to the branch with your changes. Git saves your changes in both branches and lets you switch between them. That's why we call it "version control". It saves different versions so you can switch between them.

Right now, your new branch only exists on your computer. Let's push it up to GitHub so you can see it in your profile.

```
git checkout my-first-branch
git push -u origin my-first-branch
```

Now both students in each pair, the "leader" and the other student, should have branches with changes. Now let's try to merge these changes together into the "leader's" master branch.

> Exercise: Browse to the "leader's" GitHub repository and open a new Pull Request. The Pull Request should ask to merge your `my-first-branch` branch into the "leader's" `master` branch. Ask a mentor for help if you have trouble figuring out how to issue a Pull Request. When both students have issued a Pull Request to the correct place, merge *one* of them but not the other.

Congrats, you've merged one student's changes with the common code base in the `master` branch. If you check the other Pull Request, you'll see you have a problem. It can't be merged automatically because there's a conflict. Why?

Conflicts emerge whenever the same file has been edited, and git can't determine what changes should be kept and what changes should be discarded. A human -- that's you -- needs to step in and sort it out. To help us, git writes into our code so we can see where it is confused. Here's an example of a merge conflict in our code:

```
<<<<<<<  HEAD
+   <h2>Mozafar</h2>
+   <p>I am a mentor at CodeYourFuture.</p>
=======
-   <h2>Daniel</h2>
-   <p>I like to ride bikes</p>
>>>>>>> my-first-branch
```

To resolve a conflict, we decide which lines to keep and which lines to remove. When we're done, we remove the extra lines that git added (`<<<<< HEAD`, `========` and `>>>>>>>`).

Let's see how we can resolve this conflict with your branches. First we need to fetch the latest changes from the leader's `master` branch. If you're the **leader**, just do:

```
git checkout master
git pull
```

If you're the **other student**, you need to set up the remote and pull from that master:

```
git checkout master
git remote add upstream <your-leaders-git-repository-url>
git pull upstream master
```

Now everyone's `master` branch should include the Pull Request that was merged. Whichever student still needs to get their Pull Request merged can bring those changes into their branch like this:

```
git checkout my-first-branch
git merge master
```

You probably received a **merge conflict**.

> Exercise: Follow the steps we discussed before about how to resolve a merge conflict by editing the file. Make sure both students changes are included in the final version. When you're done, use `git add`, `git commit` and `git push` to share your changes with GitHub. If everything has gone correctly, you can now merge the Pull Request.

Now everyone can sync their changes. If you're the **leader**, just do:

```
git checkout master
git pull
```

If you're the **other student**, do this:

```
git checkout master
git pull upstream master
```

> Exercise: As a group, discuss why the `git pull` command is different for the **leader** and the **other student**.
>
> Exercise: Try to do the pull requests again, but this time switch the pull requests so that the other student must manage the merge conflict.

If you're feeling confused, don't worry. Version control is one of the most difficult things you'll learn and we'll be going over it again and again and again.

### Merging and advanced Git commands <a href="#merging-and-advanced-git-commands" id="merging-and-advanced-git-commands"></a>

* `git fetch` //fetch latest changes from origin and all branches (no merge)
* `git pull` //fetch latest changes from origin and all branches (with merge)
* `git merge`

Branches:

* `git branch test` //creates a new local branch
* `git checkout test` //move to branch test
* `git checkout master` //move to branch master
* `git checkout -b test` //create a new local branch and move into it
* `git push origin test` //push the branch and all commits to the server
* `git branch -d test` //remove a local branch
* `git checkout -b test origin/test`
* `git fetch --all` //to get all branches from server


# Trello in Scrum

![](https://4042228299-files.gitbook.io/~/files/v0/b/gitbook-legacy-files/o/assets%2F-MRebciU3NcuLgsX3ijf%2F-MSX871soC3R7u4CrAiQ%2F-MSX8Nh6aEUMgnYsak91%2Fimage.png?alt=media\&token=ce5367fe-8054-4c8e-9bde-84dbad1bd456)


# Heroku Deployment

## What is Heroku?

{% hint style="info" %}
&#x20;**Heroku is a hosting services platform, and offers free services to allow us to publish our final** projects for free!
{% endhint %}

{% embed url="<https://www.youtube.com/watch?v=H2Q4vJrxTwo>" %}

## **Heroku Deployment First steps**

### **Register**

First of all register an account in [Heroku Website](https://id.heroku.com/login)

Then install Heroku Command Line Interface (CLI), it makes it easy to create and manage Heroku apps directly from the terminal. It’s an essential part of using Heroku.

[**https://devcenter.heroku.com/articles/heroku-cli#download-and-install**](https://devcenter.heroku.com/articles/heroku-cli#download-and-install)

### Login

After install it, go to the terminal and write:

```bash
heroku login
```

It will open a browser with a button to login if you are already logged, if not you will have to write your credentials:<br>

![](https://lh4.googleusercontent.com/lHXBLBZhz4kRR5UB1KBTr3FDeSKJ0fmEIrZF25ZF3QJ1tpifoOBjjdimLSbrZNlGn3FTp0o8hsnR63t1lMqjp8xoJOFglsnQVyDtZZyjuTnGQ555nqyVO7kNwKe535_sg0xV94mf)

## **Deploy the project**

In our project we will have to deploy 3 elements:&#x20;

1. Front End Code
2. Back End Code
3. SQL Database

We will divide the Heroku project into 2 applications:&#x20;

1. Front End Application
2. Back End Application

Create the 2 applications!

{% hint style="info" %}
**IMPORTANT: DO NOT USE A CREDIT CARD (IS NOT NEEDED)**\
Create both applications in the “Personal” area, if you create a Team you will have to complete a form with your credit card, and later all the applications will have a monthly cost.
{% endhint %}

### **Front-end Application**

Create an application for the front-end code, click in New button:<br>

![](https://lh3.googleusercontent.com/HMuGY7_kzXdEDSLavp7II7hFyV4XmFrVKWAf00F5yVHdKoesahbVGrBywQ6u7FWTca4cqf4OW4am_PARFS_ry-06ha3J1HZR6w0l3hq62WDhSiwEIMO98wqR8b9any8OqPGpv3wu)

Write an available name, choose a good name because it will publish a unique URL to access to your project like: <https://your-app-name.herokuapp.com>

Choose Europe as the region:

![](https://lh5.googleusercontent.com/b0_CON9U3cTQCZ3mxZvyfMKaNZENrFC5Bf_hVeJwoTl79ZBzgymVMqiwFO4nbf9osAqihFPVxlrIr0RtoGv0dmxkAwzSEGLNWbCFocXnR6Lnx53ZnqH5PvkHiDLfWc_ghGUH4uS6)

Using your terminal go to the project directory and checkout the branch you want to deploy, normally master or main, then write:

```bash
heroku git:remote -a “your_app_name”
```

It will create a new remote repository, it means that from now you will have two, one for GitHub and a new one for heroku. From now when you push changes again you will have to specify where do you want to push:

To push your commits to Github.com:

```bash
git push origin master
```

To push your commits to Heroku and deploy a new version in the public URL

```bash
git push heroku master
```

To check the deployed version in heroku, you can write:

```bash
heroku open
```

or just put the complete URL in the browser: <https://your-app-name.herokuapp.com>

![](https://lh4.googleusercontent.com/l2K2MREOAZJNYtoOCYBdSSr96TRehF_dhZKqCJP9khxvlxBElQO3eVejRqg48844qV9TV3taksNx7dmVJlLckzaPmhVWGA5WgNgxww6Wn02UCkCqgkujnl7DzUOQkJvH-Hkfq43t)

### **Back-end Application**

You have to repeat the same process done in the front-end version.

The only difference is that the public URL that you will choose, you will not have to share it, because normally only you front-end application will access to this URL.

### **Database**

Go to the back-end application in the Heroku platform, and in “Resources” tab, add the Postgres add-on:

![](https://lh5.googleusercontent.com/HzuP6J92oDums1qdRDbQS-eZhKy-9zOYUGSSYCqFfI1pnZH8zm4wDUgVtwv_eYverfh8S_-sHQVnHF4kIvOZgp3UjBslkC5quoKi3G9rTzcvPlrVoxetcyU7-O8cs-FIKXob7sI1)

Click in Provision button, then it will appear in the project:

![](https://lh4.googleusercontent.com/6YZcoi5TMpepCiRhS4ENX-Eub6JLEEr0cI2uW-4nOQBk_HzSWX-en39nKS_XKPlAnWVtMfxQDYMAWgRWbSDRC5JZ1YpR8x0NpWGerZWpktobLjAImHPw29Qpf7_7_8as49ERygrD)

If you click in “heroku Postgres” link you can access to the database information.

![](https://lh5.googleusercontent.com/UAGSncDG_OwQF5fKAWhqVbwtTN-zUHXObETu4jdUoU5o5o7msukNQq3GRXc6MQ3tWJUgMgSC58aMi8QH_W9eqBXnALHffNsASMU-Fqp0WIsNwz7EJHo4A-BFT9bHwOPT1kg5XdRD)

Go to Settings and View Credentials button:

![](https://lh3.googleusercontent.com/BmbyOvReCreUgTwOx08ON6elPOmE8OuvA4pvMtxUP6J0Eb3VgnjGF4uKt5i-V7FyqsfQOkFLEwBoflI2BE7G2SZ6IBH1sfqqCUxHdDE--lKiwqlHBzYkudJ6kYzrrJgBuOv7j0VL)

Then you can see the connection information to access the database from your application and from DBeaver:<br>

![](https://lh4.googleusercontent.com/mr1S9ypXA-LCEl6skaQbtZm1KHEKmyi3x3OoOm0CT4-JBWK5GsFUc_I0WuAbzb_yD3D4hneStwDSgLGbsNKnophHR_Iu-IBLCALGjwN3cDJxrCSrsOOY1tXVUJK1bYRb3jaQc0oU)

![](https://lh3.googleusercontent.com/hqFkh_eFkgm5O8uBppwKVv-Kn3Dt-JuyF7I8XU8SvDgg2Nicgzg4qUeGEhqjyOyof86OwN2z0ARHf18UsxOjFOjHvh3J2ob7ZxCe4iLns6Y6giUTdQqT3udnCO3Ul-oRGk4qkuAU)

So now you can execute your scripts, as if you were working in your computer:

![](https://lh4.googleusercontent.com/8cufF6loPfTEjuRESl8FvsXoZzJE1AfMitepjo5NwFpH1b6oUvSkEB2Fus0FS4Z_15zTmkNe_cDz2DlJzUIfsYd59N-GswfXeFeVI7mJwOBgRreyk3Iv69xeY0A1DbcquQ2genoP)

## **Environment variables**

To Link the applications between them (the front-end send a request to the back-end) you will have to configure the new URLs and new ports (the URL will not be localhost and the port will not be 3000)

Also check that the deployed backend to connecting to the deployed Database using a public URL

Use secrets.js or ENV files to configure new addresses.

## **Heroku Extra features**

### **Add a Custom Domain**

Add a custom domain ([www.yourdomain.com](https://syllabus.migracode.org/guides/www.yourdomain.com)) to your application.

Follow the guide: [Adding your custom domain to heroku app](https://medium.com/@imranhsayed/adding-your-custom-domain-to-heroku-app-cdd68d2db67f)

But also you will have to make some changes in your domain provider webpage, if you are using GoDaddy follos this guide: [Adding a GoDaddy domain to your heroku app](https://tekloon.medium.com/a-beginner-friendly-guide-to-configure-godaddy-custom-domain-names-to-heroku-app-2019-edition-3561c721762)

### **Configure SSL**

\<to be completed>

## **Deployment Guides**

### **Buy a Domain**

\<to be completed>

{% embed url="<https://godaddy.com>" %}

### **Buy SSL certificate**

**There are a lot of options:**

Buy the SSL with Heroku, which costs if 20$ per month.

Godaddy when I speak with them, they offer a discount, 55,27€ per one year or 118,27€ per two years.

Free SSL with [Zerossl.com](http://zerossl.com/) . They offer a free plan for three months and then you would have to reinstall it again (also free) every three months.

## &#x20; <br>

<br>

<br>


# Git on Teams

## Git in the final projects

In the final projects you will have to manage a Git repository to work all the Team together, there are many ways to do it, but these are our recommendations:

* **Separate front-end and back-end code:** Create one repository for the back-end code and another one for the front-end code, or in the same repository create a folder for the back-end and a different folder for the front-end, but take into account to manage the folders and package.json properly without breaking others work
* **One Team, One Repo:** Create the repositories in the account of one member of the team, and grant the others students to work there. The other members should clone directly the repository, DO NOT FORK IT! if you fork it every member of the team will work in an independent repository adding difficulties to manage merges of work
  * To give push privileges to other team members, go to your repository in GitHub, and click Settings->Manage access -> Invite a collaborator
* **Use a Git strategy:** once you divide your work in different functionalities and are assigned to team members, to reduce the number of merges and do not involve everybody in the common files, you should have a strategy to work
* **Assign a Git Release Manager:** Assign a member of the team that knows all the code structure and will be the best member to join all functionalities together. The Migracode Team and mentors will help this member to solve conflicts and manage the versions of the project.
* **Use gitignore:** Check this [link](https://www.atlassian.com/git/tutorials/saving-changes/gitignore)

## Small Teams&#x20;

### Git strategy

There are strategies with more branches and more structured, like the common strategy in companies, but taking into account number of people, the criticality of our software and to not spend many hours merging. We recommend you this strategy for the final project!

* 3 type of branches: *master*, *develop* and *developers* branches
* 2 user roles: *Release Manager* and *Developer*

![](https://4042228299-files.gitbook.io/~/files/v0/b/gitbook-legacy-files/o/assets%2F-MRebciU3NcuLgsX3ijf%2F-MhiJvH-q-9mrR9YZbtr%2F-MhiK7a36ak9xs-Md_LB%2Fimage.png?alt=media\&token=86d82589-8bb4-41dd-9f72-c8d3f40a12ff)

**Branches:**

* ***master***: The master branch stores the official release history, the versions that we will show to the client or to the class after each sprint.
* ***develop***: The develop branch serves as an integration branch for features. Once develop has acquired enough features for a release, those will be tested before merge it with master.
* ***developer*****&#x20;branches**: Each new developer has a branch with their name, as *dev-john* or *john*. *developer* branches are created from *develop* and the developer will always work there.

**Roles:**

* **Release Manager**: is the one that manages *master* and *develop*. This user, that at the same time is a Developer, do all merges between developers branches and *develop*. Also is the one that creates versions in *master*.
* **Developer**: all the members on the team are developers, they develop the assigned features in the branch.

### Main actions and commands

**First steps:**

**Create the repositories (Release Manager):**

* Create and add write and push privileges to all developers
* Create a new branch develop from master:
  * `git checkout master` be sure you are on master branch
  * `git checkout -b develop` Create the branch *develop* from *master*
  * `git push -u origin develop` Push the local branch to remote, so it is published on Github and other members can see it
* Create a new branch for each developer from develop:
  * `git checkout -b dev_john`
  * `git push -u origin develop`

**Move to working repositories (all developers):**

* Each developer should get the new branches from remote and move to the assigned branch:
  * `git fetch --all` Get all new branches created
  * `git checkout dev_john` Move yo your name branch

**Daily work:**

* All developers should commit and push all your work
  * `git add .`
  * `git commit -m "new feature"`
  * `git push`

**End of a sprint:**

**Create the sprint version (Release Manager):**

* `git checkout develop`
* `git fetch --all`
* Merge develop branch with the branch of each developer
  * `git merge dev_john`
  * `git add .`
  * `git commit -m "merge with john"`
  * `git push`
* Check that all functionalities are working together, have a meeting to check the version and fix all integration or merge problems
* As a closed version, move the code to *master*:
  * `git checkout master`
  * `git merge develop`
  * `git add .`
  * `git commit -m "merge with john"`
  * `git push`
* Go back to your working branch
  * `git checkout dev_me`

**Update your working branches with last version (all developers)**

* `git fetch --all` to get last version of all branches
* `git merge develop`
* `git add .`
* `git commit -m "merge with develop"`
* `git push`

## Main companies

Here you can find an example on how to manage planned and unplanned (with bugs) versions of a software. [More information](https://nvie.com/posts/a-successful-git-branching-model/)

![](https://4042228299-files.gitbook.io/~/files/v0/b/gitbook-legacy-files/o/assets%2F-MRebciU3NcuLgsX3ijf%2F-MhiJvH-q-9mrR9YZbtr%2F-MhiKDyruD6V_KuKLX1M%2Fimage.png?alt=media\&token=fe45f950-4b6a-4216-8290-5b66ce9eb734)

* ***master***: The master branch stores the official release history, for each published version a tag is assigned with a version number
* ***hotfix***: is the branch we use to fix bugs from the published version as soon as possible, without adding new features. As we can see in v0.1 version the software has a bug, we fix it in the Hotfix branch, and then we merge it directly with master. Also this change is added to develop branch for future versions.
* ***release-xxx***: release branches are created from develop, to have a version that should be tested in detail to become a new version, if during the test some bugs are found are fix directly in this branch. xxx is the name o the release
* ***develop***: The develop branch serves as an integration branch for features. Once develop has acquired enough features for a release, a new release branch is created to test it before go to master.
* ***feature-xxx***: Each new feature with name xxx, should reside in its own branch. But, instead of branching off of master, feature branches use develop as their parent branch. When a feature is complete, it gets merged back into develop. Features should never interact directly with master.


